Security World Remote Administration
Gathering a quorum of card holders to carry out card holder duties in a remote datacenter can be expensive and inconvenient. Remote Administration enables Administrators and Operators to present their cards remotely to authorize HSM operations without being physically present at the HSM.
When presenting a card, a secure channel is formed directly between the Remote Administration smart card and the target HSM before any token shares are read from or written to the smart card.
Remote Administration enables Administrators to use their remote access solution to perform administration operations and extends the operations that can be performed in this way.
Remote Administration enables:
-
Card holders to present smart cards to an HSM without being physically present at the HSM (e.g. the card holder may be in an office, while the HSM is in a datacenter)
-
All Administrator and Operator card operations to be carried out remotely
-
Security World programs and utilities to be run remotely when used in combination with a standard remote access solution
-
Full remote administration of Security Worlds and their HSMs including:
-
Remote mode change
-
Create/load/unload Security World
-
Firmware upgrade
-
Module status (SOS) reporting
-
Connect reboot
-
Connect front panel lock out.
-
Once the software has been installed and the hardware security modules have been configured, Remote Administration enables full remote administration of Security Worlds and their HSMs.
Remote Administration components
Remote Administration consists of a number of components:
Remote Administration software
The following software is needed to allow remote card readers to be associated with an HSM:
-
nShield Remote Administration Client software
Must be installed on the computer that has the card reader attached. See Remote Administration Client for more information. -
nShield Remote Administration Service software
Must be installed where it can access the appropriate HSM to provide communications between the card in the card reader and the HSM. See the Connect Installation Guide for more about where to install Remote Administration Service software.The Remote Administration Service should be installed on a client machine of the HSMs in your Security World that you can make accessible to Remote Administration Clients.
+
See Remote Administration Service for more information.
When a card is inserted in a reader that is associated with an HSM, the nShield Remote Administration Client and the Remote Administration Service convey messages between the card and the HSM, allowing a secure channel of communications to be established.
Security World programs and utilities
The Security World programs and utilities are typically installed on a computer within your datacentre.
In such cases the Remote Administration feature assumes you will use your preferred remote access solution, e.g. SSH or Remote Desktop, to run the Security World programs and utilities remotely.
This means you can run a utility like creatocs from a remote location and present the OCS to be created using a Remote Administration Client.
The Remote Administration feature includes the ability to change the mode of HSMs remotely using the nopclearfail utility.
This means it is possible to create a Security World remotely and perform firmware upgrades.
The nethsmadmin tool provides many of the Remote Administration capabilities for an Connect without accessing the front panel.
For more information, see nethsmadmin.
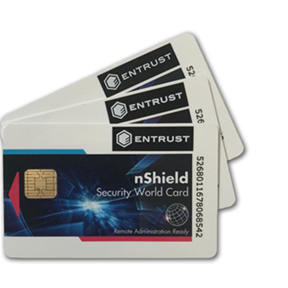
nShield Remote Administration smart cards
You must use nShield Remote Administration Cards with Remote Administration. These are smart cards that are capable of negotiating cryptographically secure connections with an HSM, using warrants as the root of trust. nShield Remote Administration Cards can also be used in the local slot of an HSM if required.
The nShield Remote Administration smart cards provide:
-
Storage and retrieval of logical token fragments, similar to the smart cards used with previous releases
-
Security mechanisms to ensure authentication and confidentiality of data transferred between itself and the HSM
The nShield Remote Administration smart cards are FIPS 140-2 Level 3 certified devices, supporting execution of a custom Java Applet developed by Entrust. The smart cards used with previous versions of Security World software and nShield HSMs are still useable but, as previously, only in an HSM’s local slot. Remote Administration smart cards can be used both remotely and in an HSM’s local slot.
The use of nShield Remote Administration Cards is controlled by an Authorized Card List. If a card does not appear in the list, it cannot be used. See Authorized Card List for more information.
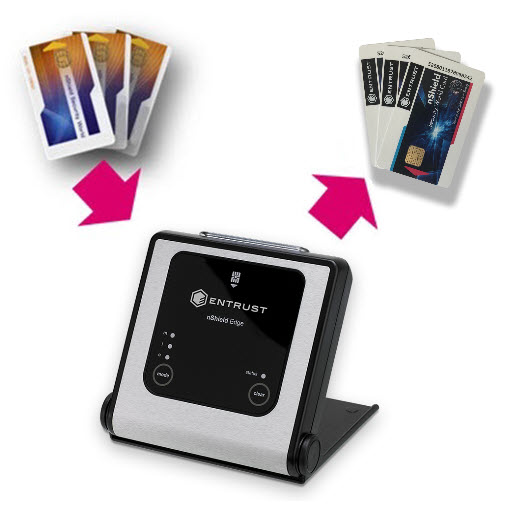
Existing Administrator smart cards can be migrated to new Remote Administration smart cards using the racs (replace administrator card set) utility.
Similarly existing OCS can be migrated using the rocs (replace operator card set) utility, provided the Security World has recovery enabled and the keys protected by that OCS are recovery enabled.
Authorized Card List
The use of nShield Remote Administration smart cards, both remotely and in an HSM’s local slot, is controlled by an Authorized Card List. If the serial number of a card does not appear in the Authorized Card List, it cannot be used by the system. The list only applies to Remote Administration smart cards.
By default, the Authorized Card List is empty following software installation. The serial numbers of Remote Administration smart cards must be added to the list using a text editor before they can be used.
For more information on the Authorized Card List, see Authorized Card List.
| When administrative operations involving Remote Administration smart cards are initiated from an Connect Front Panel, the Connect fetches the Authorized Card List from the RFS. |
| It is necessary to keep the Authorized Card List in sync by copying the file between the RFS and clients manually. |
Remote Administration Client
The Remote Administration Client (RAC) is a utility that enables you to select an HSM located elsewhere from a list provided by the Remote Administration Service (RAS), and associate an nShield Trusted Verification Device attached to your computer with the HSM.
The RAC GUI (usually running on a laptop or workstation) communicates with the RAS (in a datacenter) over a standard TCP/IP connection. If the RAC computer is not on the same local network as the RAS computer, Entrust recommend that the connection is made over a VPN.

In the example screen shown, an HSM will not be Remote Administration (RA) Ready until it has the appropriate firmware, and has one or more dynamic Slots configured.
For users who want to script the card presentation process, there is also a command line utility, raccmd.
See the nShield Remote Administration Client User Guide for more information on deploying and using the Remote Administration GUI or command line utility.
Windows 8.1 + only
If you disconnect the TVD while you are on the Use Card Reader screen the Windows Smart Card service SCardSvr displays an error and terminates.
Remote Administration Service
The Remote Administration Service (RAS) provides a bridge between the RAC and the back end HSMs (via the hardserver). Its functionality is to:
-
Manage connections from multiple RACs
-
Supply a list of available HSMs to the connected RACs
-
Negotiate a connection to an HSM via the hardserver and route messages between the RAC and destination HSM.
The RAS participates as a crypto client of the HSMs. As such, the server used to host this software component must be a licensed client of the Connects being remotely administered. If your Remote File System (RFS) is already a licensed client, the RAS can be collocated on the RFS server without needing to purchase an additional client license.
nShield Trusted Verification Device
Entrust supply and recommend the use of the nShield Trusted Verification Device (TVD). This is an intelligent smart card reader that blocks any malware on the client machine from spoofing the HSM identity passed to the nShield Remote Administration smart card. The TVD allows the card holder to securely confirm the Electronic Serial Number (ESN) of the HSM to which they want to connect, using the Trusted Verification Device display.
For more information, see the Trusted Verification Device (TVD) User Guide.

Software installation
The Remote Administration Service with the Connect or Connect XC

| The Remote Access Server can be on a different client to the one where the Remote Administration Service is installed. |
To use Remote Administration with an Connect or Connect XC, the Remote Administration Service must be installed on a client, which may also be the RFS.
The Remote Administration Service does not require a dedicated server.
A privileged connection is required to carry out privileged operations, such as, for example, changing the mode of the Connect or Connect XC.
Remote Administration Service bundle
The Remote Administration Service (RAS) is provided through the Remote Administration Service bundle and needs to be installed in the default directory.
For information on installing the Remote Administration Service bundle, see the installation guide for your HSM.
Remote Administration Client
The Remote Administration Client is normally deployed on its own using the instructions in the nShield Remote Administration Client user guide but it can be deployed on a client at the same time as rest of nShield software
For more information on the Remote Administration Client, see the nShield Remote Administration Client user guide.
System configuration
Remote Administration Service port
The port used by Remote Administration Clients to access the Remote Administration Service can be changed by setting the port field in the remote_administration_service_slot_server_startup section of the hardserver configuration file, see [remote_administration_service_startup].
For more information on the Remote Administration port, see remote_administration_slot_server_startup.
Stopping and restarting the Remote Administration Service
The Remote Administration Service can be stopped and started using a command window or the Window Control Panel, see Stopping and restarting the hardserver.
Configuring auto push
The auto push feature allows future HSM configuration to be performed remotely (that is, without access to the front panel of the HSM).
| Enabling the auto push feature allows any client computer to change the HSM configuration file and gives the client the power to make configuration changes that are otherwise only available through the HSM secure user interface. |
| The auto push feature must be enabled if you want to use NTP time synchronisation on the HSM, see Configuring NTP in the nShield Connect. |
To enable auto push, on the Connect display, use the right-hand navigation button to select System > System configuration > Config file options > Setup auto push > Auto push mode, set ON or OFF, then select CONFIRM. A confirmation message will be displayed.
Once auto push has been enabled, you must specify the IP address of the client from which to push the configuration from. On the Connect display, use the right-hand navigation button to select System > System configuration > Config file options > Setup auto push > Push address. Enter the IP address and select CONFIRM. A message will be displayed confirming your chosen IP address. Select CONTINUE.
Once auto push is enabled, you can complete the configuration steps by editing the configuration files, rather than by using the front panel of the Connect. See Configuring the Connect with configuration files for more about configuration files.
| If you do not want to enable auto push, you can fetch the updated configuration file manually from the HSM, select System > System configuration > Config file options > Fetch configuration. An SEE machine cannot be installed or configured using the fetch configuration option from the front panel. The auto push feature must be used for this. |
Configuring Dynamic slots
To support Remote Administration, HSMs have to be configured to support between 1 and 16 Dynamic Slots. These Dynamic Slots are virtual card slots that can be associated with a card reader connected to a remote computer. Dynamic Slots are in addition to the local slot of an HSM and any soft token slot that may be available.
| The default number of slots is 0. This disables Remote Administration on the relevant HSM. |
-
Do one of the following:
-
Use the
dynamic_slotssection in the module configuration file to define the number of Dynamic Slots for an HSM and push the updated configuration file to the Connect.
See nShield Connect and client configuration files for more about module configuration files, dynamic_slots for more about thedynamic_slotssection and Configuring the Connect with configuration files for more about editing the module configuration file.or:
-
Use the front panel controls to navigate to Security World mgmt > Set up dynamic slots > Dynamic Slots and follow the instructions on the screen.
-
-
Clear the HSM for the changes to take effect.
For example, run the
nopclearfailcommand:nopclearfail --clear --allYou can check that the HSM has Dynamic Slots by:
-
Running the command:
slotinfo -m 1For example, if four Dynamic Slots have been configured, the output from this command includes the lines:
Slot Type Token IC Flags Details #0 Smartcard - 1 A #1 Software Tkn - 0 #2 smartcard - 0 AD #3 smartcard - 0 AD #4 smartcard - 0 AD #5 smartcard - 0 AD -
The
Din theFlagscolumn indicates that slots2to5are Dynamic Slots.Depending upon your system configuration, it can take up to 30 seconds for the Dynamic Slots to appear. or:
-
Using the front panel controls to navigate to Security World mgmt > Display World.
-
Privileged client
Some Connect administrative tasks can only be carried out from clients that have a privileged connection. There are two aspects to configuring a client with a privileged connection:
-
Configuring the Connect to accept privileged connections from a particular client, see Configuring the Connect to use the client
-
Enrolling the client as privileged, see Configuring the Connect to use the client and Configuring client computers to use the Connect in the Connect Installation Guide.
Using nethsmadmin to reboot an Connect
The Connect can be rebooted using the nethsmadmin command-line utility.
Run the command:
nethsmadmin --module=<MODULE> --rebootIn this command:
--module=<MODULE>
Specifies the HSM to use, by its ModuleID (default = 1).
Enabling and disabling remote reboot
You can enable or disable the ability to remotely reboot an Connect with the nethsmadmin utility using:
-
The module configuration file
-
The front panel of the Connect.
Enabling and disabling remote reboot using the module configuration file
See Configuring the Connect with configuration files for more about editing the module configuration file.
Do the following:
-
To enable remote reboot, locate the
server_settingssection of the module configuration file, and set theenable_remote_rebootfield toyes. -
To disable remote reboot, set the
enable_remote_rebootfield tono. See server_settings for more about theenable_remote_rebootfield.
Enabling and disabling remote reboot using the front panel of the Connect
Do the following:
-
To enable remote reboot, navigate to System > System configuration > Remote config options > Remote Reboot and set to
on. -
To disable remote reboot, set Remote Reboot to
off.
Once you have enabled remote reboot, you can reboot an Connect from a computer using the nethsmadmin command, without accessing the unit itself.
Enabling and disabling remote mode change
You can enable or disable the ability to make remote mode changes with the nopclearfail utility using:
-
The module configuration file
-
The front panel of the Connect
Enabling and disabling remote mode changes using the module configuration file
See Configuring the Connect with configuration files for more about editing the module configuration file.
Do the following:
-
To enable mode change using
nopclearfail, locate theserver_settingssection of the module configuration file, and set theenable_remote_modefield toyes. -
To disable mode change using
nopclearfail1, set theEnable_remote_modefield tono. See server_settings for more about theenable_remote_modefield.
Enabling and disabling remote mode changes using the front panel of the Connect
Do the following:
-
To enable remote mode change, navigate to System > System configuration > Remote config options > Remote mode changes and set to
on. -
To disable remote mode change, set Remote mode changes to
off.
Once you have enabled remote mode change, you can change the mode of an Connect from a computer using the nopclearfail command, without accessing the unit itself.
Enabling and disabling remote upgrade
You can enable or disable the ability to remotely upgrade an Connect with the nethsmadmin utility using:
-
The module configuration file
-
The front panel of the Connect
Enabling and disabling remote upgrade using the module configuration file
See Configuring the Connect with configuration files for more about editing the module configuration file.
Do the following:
-
To enable remote upgrade, locate the
server_settingssection of the module configuration file, and set theenable_remote_upgradefield toyes. -
To disable remote upgrade, set the
enable_remote_upgradefield tono. See server_settings for more about theenable_remote_upgradefield.
Enabling and disabling remote upgrade using the front panel of the Connect
Do the following:
-
To enable remote upgrade, navigate to System > System configuration > Remote config options > Remote Upgrade and set to
on. -
To disable remote upgrade, set Remote Upgrade to
off.
Once you have enabled remote upgrade, you can upgrade an Connect from a computer using the nethsmadmin command, without accessing the unit itself.
Adjusting card removal detection timers to account for network characteristics
Depending upon the characteristics of the network between nShield Remote Administration Clients and HSMs, you may need to adjust the timers that determine how long the system waits for a response, before it regards a card as having been removed. This enables you to balance the assured card removal detection time and network traffic.
Do the following:
-
Use The
dynamic_slot_timeoutssection in the module configuration file to define the round trip (HSM to smartcard and back) time limit (the default is 10 seconds), and the card removal detection timeout (the default is 30 seconds). -
Push the updated configuration file to the Connect. See dynamic_slot_timeouts and Configuring the Connect with configuration files for more information.
Using Remote Administration with applications requiring cards in slot 0
If you want to use Remote Administration, but have an application that expects cards to be presented in slot 0, you must configure a slot mapping for each affected HSM.
-
Do one of the following:
-
Use the
slot_mappingsection in the module configuration file to define a Dynamic Slot to exchange with slot 0 for an HSM and push the updated configuration file to the Connect.
See nShield Connect and client configuration files for more about module configuration file, slot_mapping for more about theslot_mappingsection and About user privileges for more about editing the module configuration file.Or:
-
Use the front panel controls to navigate to Security World mgmt > Set up dynamic slots > Slot mapping and follow the instructions on the screen. You can check the mapping by:
-
Running the command:
slotinfo -m 1For example, if dynamic slot #2 has been mapped to slot #0, the output from this command includes the lines:
Slot Type Token IC Flags Details #0 Smartcard - 1 AD #1 Software Tkn - 0 #2 smartcard - 0 A -
The
Din theFlagscolumn indicates that slot#0is now a Dynamic Slotor:
-
Using the front panel controls to navigate to Security World mgmt > Display World.
-
-
Authorized Card List
The use of nShield Remote Administration smart cards is controlled by an Authorized Card List. If the serial number of a card does not appear in the Authorized Card List, it is not recognized by the system and cannot be used. The list only applies to Remote Administration cards and is used when a card is inserted:
-
In the local slot of an HSM
-
In a card reader that is associated with a dynamic slot of the HSM, through the nShield Remote Administration Client
By default, the Authorized Card List is empty following software installation. The serial numbers of Remote Administration Cards must be added to the list before they can be used.
The Authorized Card List is a text file
/opt/nfast/kmdata/config/cardlist
on the RFS and each client computer.
The file is read from the RFS by associated Connects as and when required for front panel operations.
The list applies to all Connects associated with the RFS, regardless of the Security World to which a Connect may belong, including when creating a Security World from the front panel.
For client initiated card operations the Authorized Card List file on that client computer is used.
The RFS and client copies of the Authorized Card List have to be kept in step manually.
Adding cards to the Authorized Card List
Add the serial numbers (16 digits with no separators) of all Remote Administrator Cards you intend to use to the Authorized Card List, with a standard text editor.
The serial numbers are printed on the smart cards and are reported by using slotinfo -m1 -s0 when the card is in a slot, where 1 is the number of the HSM and 0 is the number of the slot.
| There is an option to allow any Remote Administration Card to be used, by including a wildcard (*) in the Authorized Card List. recommends that you do not use this option, except under controlled circumstances, as it effectively disables the Using Remote Administration control. |
Using Remote Administration
A privileged client can run the Command Line Tools remotely to:
-
Enable and disable remote mode of an Connect using
nopclearfail -O/-I, see Changing the mode -
Reboot an Connect using the
nethsmadminutility,utility nethsmadmin --module= [MODULE] –-reboot, see Using nethsmadmin to reboot an Connect -
Upgrade Connect firmware using the
nethsmadminutility,nethsmadmin --module=MODULE—upgrade-image=image_name, see Upgrading the nShield Connection image file and firmware from a privileged client -
Synchronise an Connect’s Security World data using the
nethsmadminutility,nethsmadmin --module =[ModuleID] --update-world, see Creating a Security World using new-world -
Check if Security World files have been copied to an Connect using the
nethsmadminutility,nethsmadmin –module=[ModuleID] --check-world, see Creating a Security World using new-world
Presenting nShield Remote Administration smart cards using the Remote Administration Client
With Remote Administration, you present a smartcard in a remote work station or laptop rather than locally at the nShield HSM. Remote Administration creates a separate secure connection from the Remote Administration smart card to the nShield HSM enabling remote card presentation.
For information on presenting nShield Remote Administration smart cards, see the nShield® Remote Administration Client user guide.
Configuring the Connect with configuration files
You normally configure the Connect using the front panel controls. However, you can choose to export a configuration file, edit it, and then re-import it. You may prefer this approach, for example, if you are importing a number of clients.
There are two ways to configure the Connect by importing edited configuration files.
If you need to configure the Connect regularly, but do not require physical access to it every time you configure it, follow these steps:
-
Ensure that the Connect is configured to accept a configuration from a remote computer, see Configuring auto push.
-
Create a copy of the configuration file from the remote file system in the
/opt/nfast/kmdata/hsm-ESN/config/directory on the remote computer. -
Change the name of the copied configuration file to
config.new. -
Edit the
config.newfile so that it contains the required configuration. For information about the contents of the Connect configuration file, see nShield Connect and client configuration files. -
Run the
cfg-pushnethsmutility on the updated configuration file, specifying theconfig.newfile and the IP address of the Connect to load the new configuration. To do this, use a command similar to the following:cfg-pushnethsm --address= <module_IP_address> <config_file>In this command,
<module_IP_address>is the Connect on which to load the configuration and<config_file>is the path to, and name of the updated configuration file.If
module_IP_addressis an IPv6 address, then enclose it within square brackets, for example[fc00::1]. -
Check that the configuration file on the RFS has been updated with the required changes.
The Connect checks that it is able to update the configuration file on the RFS before applying changes to its own configuration. If you want the Connect to apply the configuration changes even if it cannot update the configuration file on the RFS, for example, because the RFS is going to be moved to a new IP address, use the --no-rfs-checkcommand line option:cfg-pushnethsm --address= <module_IP_address> <config_file> --no-rfs-checkIf
module_IP_addressis an IPv6 address, then enclose it within square brackets, for example[fc00::1].You will have to copy the configuration file to the RFS manually.
To permit Connect configuration remotely from the RFS computer without enabling the auto push option:
-
Save the file
/opt/nfast/kmdata/hsm-ESN/configasconfig.newin the same directory and edit it to contain the configuration you require. For more information about the contents of the configuration file, see HSM and client configuration files. -
On the Connect, from the main menu select System > System configuration > Config file options > Fetch configuration.
| An SEE machine cannot be installed or configured using the fetch configuration option from the front panel. The auto push feature must be used for this. See Remotely loading and updating SEE machines for more information. |
Whichever method you use, the updated configuration file becomes the new Connect configuration.
It is automatically copied back to the file
/opt/nfast/kmdata/hsm-ESN/config/
on the remote file system.
Remote Administration Configuration file sections
The following sections relevant to Remote Administration are included in the hardserver configuration file:
[server_settings]
# Is remote mode changing enabled on this system? (default=yes)
# enable_remote_mode=ENUM
#
# Is remote reboot enabled on this system? (default=yes)
# enable_remote_reboot=ENUM
#
# Is remote upgrade enabled on this system? (default=yes)
# enable_remote_upgrade=ENUM
[dynamic_slot_timeouts]
# Start of the dynamic_slot_timeouts section
# Timeout values used to specify expected smartcard responsiveness for all
# modules on the network.
# Each entry has the following fields:
#
# Round trip time limit, in seconds, is how long to wait before giving up due
# to network delays. (default=10)
# round_trip_time_limit=INT
#
# Maximum time, in seconds, that can pass without a response from the
# smartcard before considering it removed and unloading all associated secrets
# (default=30)
# card_remove_detect_time_limit=INT| The dynamic_slot_timeout section is in the Module configuration file for Connect HSMs . |
[dynamic_slots]
# Start of the dynamic_slots section
# The dynamic smartcard slots that the modules should provide for the use of
# administrators who do not have physical access to the module hardware
# Each entry has the following fields:
#
# ESN of the module to be configured with dynamic slots.
# esn=ESN
#
# Number of dynamic slots the module will support. (default=0)
# slotcount=INT| The dynamic_slots section is in the Module configuration file for Connect HSMs . |
[slot_mapping]
# Start of the slot_mapping section
# Slot remapping configuration.
# Each entry has the following fields:
#
# ESN of the module on which slot 0 will be remapped with another.
# esn=ESN
#
# Slot to exchange with slot 0. Setting this value to 0 means do
# nothing.(default=0)
# slot=INT| The slot_mapping section is in the Module configuration file for Connect HSMs . |
| Mapping a Dynamic Slot to slot 0 is needed if you want to use Remote Administration with applications that are not aware of slot numbers greater than zero. This applies to KeySafe and CNG Wizard but may also apply to your own applications. |
[remote_administration_service_startup]
# Start of the remote_administration_service_startup section
# Remote Administration Service communication settings, these are only read at
# Remote Administration Service startup time
# Each entry has the following fields:
#
# The port for the Remote Administration Service to listen on for incoming TCP
# connections from remote administration clients (default=9005)
# port=PORT
[ui_lockout]
# Start of the ui_lockout section
# UI lockout settings
# Each entry has the following fields:
#
# Set to "locked" to enable UI lockout without requiring a logical token.
Set
# to "locked_lt" to enable UI lockout with a logical token (requires a valid
# ltui_hash to be set) or "unlocked" for no UI lockout (default=unlocked).
# lockout_mode=ENUM
#
# The hash of the logical token (LTUI) required to authorise access to the
# unit menu structure when the lockout_mode is set to locked_lt; if the
# lockout_mode is locked_lt and a valid hash is provided then the lockout will
# be enabled.
Default is all-zero (disabled).
# ltui_hash=HASH
#
# Set to "no" to disable the front panel power switch in Operational mode.
# (default=yes, power switch causes shutdown)
# panel_poweroff=ENUM| The ui_lockout section is relevant for Connect only. It does not apply to nShield Solo, nShield Solo XC or nShield Edge HSMs. |
To update an existing hardserver configuration file, edit and insert the sections above. Alternatively factory resetting an Connect will generate a new configuration file including the new Remote Administration relevant sections listed above. See the appropriate User Guide for more information on editing and loading configuration files.