Reports
With nShield Monitor, you can create pre-generated reports and send them to a PDF file or export them to a CSV file. These reports can provide valuable information pertaining to a specific HSM or group in near real time. You can also schedule a report to periodically track a group or a specific HSM over time.
With the Reports feature you can track device utilization and loading trends, as well as cross HSM (details per HSM as selected).
Generate Reports
-
Navigate to: Reports > Generate Reports
The Generate Report page opens.
-
Select the Groups and Devices drop down arrow.
The down menu opens.
-
Select a Group. (In the example above, the Group is titled "nShield".)
The Group Report and Device Report options display.
Follow this link to see the Device Report menus/options: Device Report.
Group Report
-
Select Group Report
The Generate Report page opens.
-
Optionally, select Show Top 10 Devices to limit the report to the top 10 devices.
You may need to scroll down the screen to access the expansion arrows. -
Select the Report Configuration expansion arrows.
The Report Configuration window opens.
-
Enter a report name.
-
Expand the drop down arrows and use the radio button to set your report’s specifications.
-
Scroll to the Utilization and Loading Trends Options window.
-
Expand the drop down arrow.
-
Modify the default settings, based on preference.
-
Select Generate Report.
Device Report
-
Select Device Report.
-
Select a device type.
To see the flow for device type Client Hosts, go to: Device report for Client Hosts. The device selection window opens.
-
Select, by single clicking, the devices from the Available Devices window for inclusion in your report.
The click will toggle the device between the Selected Devices window and the Available Devices window. The selected device moves to the Selected Devices window.
You may need to scroll down to access the expansion arrows for additional views. -
Select the expansion arrow to open the Report Configuration window.
-
Enter the report name and select the drop down arrows to display additional selections.
-
Select your preferences.
-
Select the expansion arrow to open the Utilization and Loading Trends Options window.
-
Set your preferences.
-
Select Generate Report.
Device report for client hosts
-
Navigate to: Generate Report > Groups and Devices > Device Report > Client Hosts
The Client Host Cross-HSM device report supports 2,500 nShield keys. That is, the report limits the number of keys to 2,500 even if there are more keys on the client host. -
Select, by single clicking, the devices in the Available Devices window to move the device into the Selected Devices window.
The click will toggle the device between the Selected Devices window and the Available Devices window. You may need to scroll down to access the expansion arrows for additional views. -
Select the expansion arrows to open the Report Configuration window.
-
Enter a report name and select the drop down arrows to display additional selections.
-
Select your preferences.
-
Select the expansion arrow to open the Loading Trends Options window.
-
Set your thresholds.
-
Select Generate Report.
Scheduled Reports
-
Navigate to: Reports > Scheduled Reports
The Scheduled Reports page opens.
-
Select the report name.
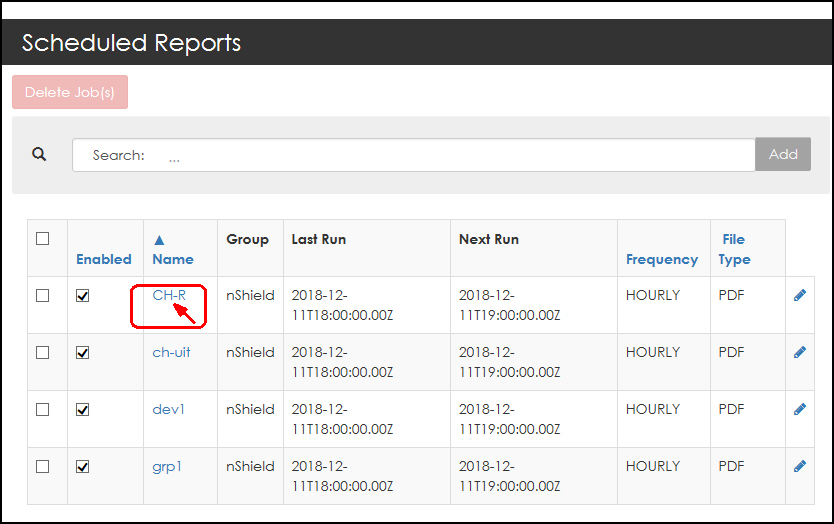
The report page opens.
Downloading individual reports
The report page also provides download links.
-
Select Download Report.
You can open the downloaded report or save the report in a specific folder.
Downloading reports in bulk
Selecting Bulk Download uses a toggle:
-
Select the check box of the first report to download.
The Bulk Download and Delete Report tabs activate as soon as you have selected a report.
To activate the Select All feature, select the box at the header. This check box can also be used to clear you selections. Conversely, you can click specific check boxes to customize the download. The check box selection can be toggled. -
Select Bulk Download to initiate the download.
You can open the zip file containing the selected reports or save the zip file in a specific folder.