Configure the Office 365 host
To enable Microsoft 365 to use a specified TSS appliance for its default time stamp service, you must:
Install the TSA certificate
-
Log into the Office 365 host.
-
Copy the TSE certificate exported in configure-tsop.adoc#fulfill-tsa-csr to a local folder. If you don’t have the certificate, do as follows:
-
Log into the TSS as the security officer (superuser).
-
In the left pane, navigate to TSA Management > Operational Status.
-
Select the TSA Name, then select Cert Info.
-
Select the certificate and Export it to a
.cerfile.
-
-
In the Office 365 host, double-select the certificate. In the certificate dialog window select Install Certificate….
-
In the Certificate Import Wizard dialog window, select Local Machine. Then select Next.
-
In the Certificate Store dialog window, select Automatically select the certificate store… radio button. Then select Next and Finish.
-
On the Import was successful pop-up, select OK.
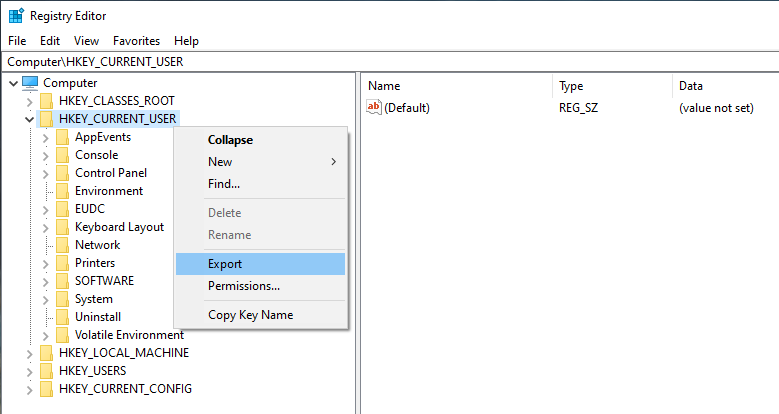
Edit the registry settings
-
Log into the Office 365 host.
-
Enter regedit in the Windows search box and select Registry Editor.
-
In the left pane, navigate to Computer > HKEY_CURRENT_USER.
-
Export the HKEY_CURRENT_USER registry settings as a backup before you continue.
For example:
-
Navigate to the following registry path:
Computer\HKEY_CURRENT_USER\Software\Microsoft\Office\16.0\Common\Signatures.If the registry path does not already exist, create it. -
Add the following entries.
Name Type Data MinXAdESLevel
REG_DWORD (32-bit)
2
TSALocation
String Value
XAdESLevel
REG_DWORD (32-bit)
5
<TSS_IP_address>is the IP address of the TSS appliance. You may use a host name instead of an IP address.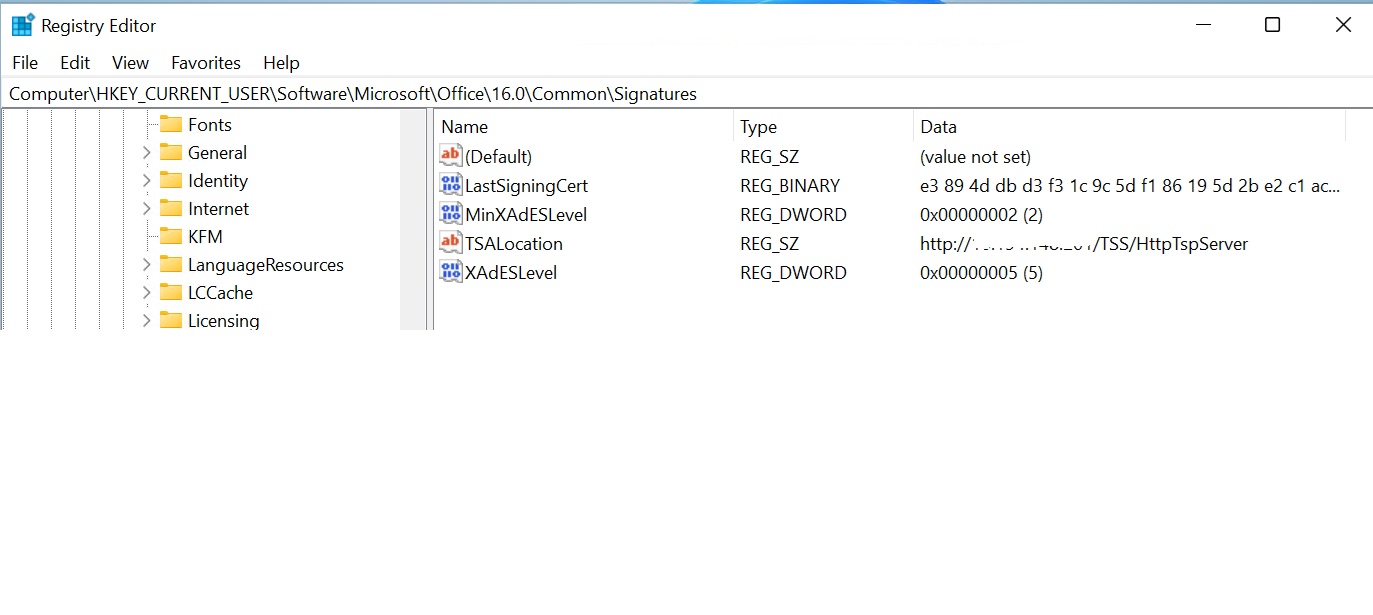
-
Close the registry editor.
Make "Microsoft Office" configuration available in Group Policies
-
Download the administrative template files (ADMX/ADML) for Microsoft Office. Be sure to select your language. For example, the English version is available at Administrative Template files (ADMX/ADML) for Microsoft Office.
-
Double-select the downloaded file to extract the
admxandadmlfolders locally. -
Open the
admxfolder. Copy all the*.admxfiles toC:\Windows\PolicyDefinitions\.. -
In the
admxfolder, select the folder corresponding to your region. For exampleen-us. Copy all the*.admlfiles toC:\Windows\PolicyDefinitions\<your-region>\.. For exampleC:\Windows\PolicyDefinitions\en-US\.. -
Enter group policy in the Windows search box and select Edit group policy.
-
Navigate to User Configuration → Administrative Templates → Microsoft Office 2016 The settings for Microsoft Office should now appear.
For example:
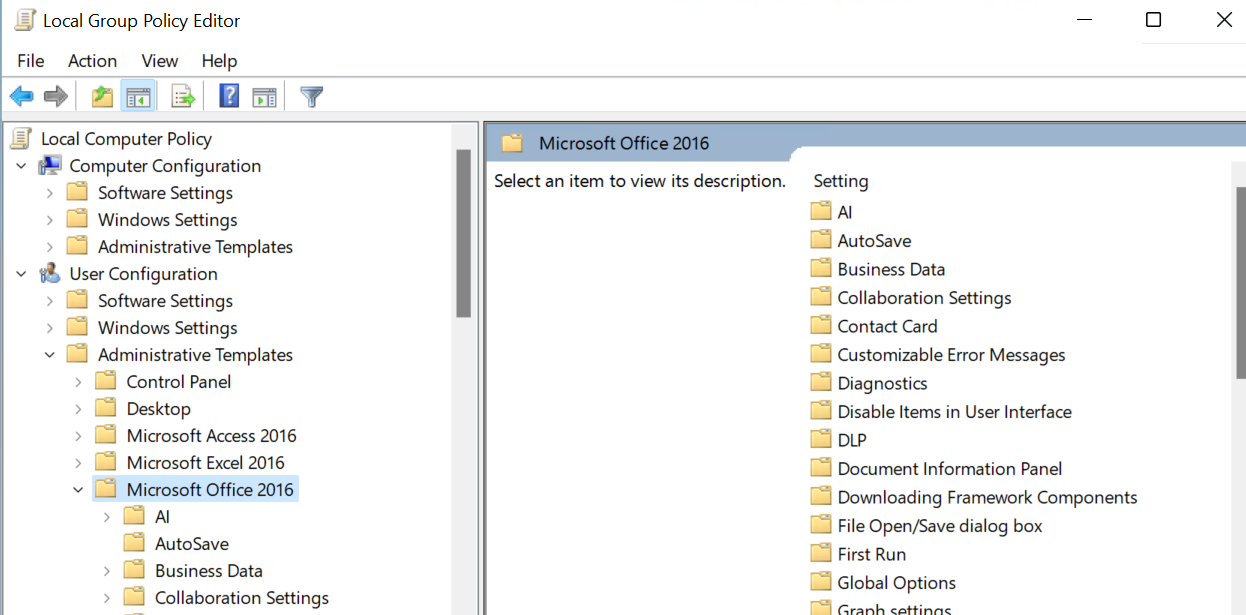
-
Navigate further to Security Settings → Digital Signatures. Edit the following policies as shown below.
Name Value Specify timestamp server name
Requested XAdES level for signature generation
XAdES-X-L
Specify Minimum XAdES level for digital signature generation
XAdES-T
-
Close the group policy editor window.
-
Upgrade the group policy.
>gpupdate /force
Updating policy...

Computer Policy update has completed successfully.
User Policy update has completed successfully.