Install and configure Entrust Cryptographic Security Platform Key Management Vault
A two-node cluster was deployed for this integration. Key Management Vault can be deployed on AHV using the ISO image. The ISO image is available at Software Downloads. Installation instructions are available at ISO Installation.
Upload the Key Management Vault ISO in AHV
For reference, see the following Nutanix online documentation:
-
Log in to the Nutanix Prism Central web UI.
-
Select Prism Center > Infrastructure > Compute > Images.
-
Select Add Image.
-
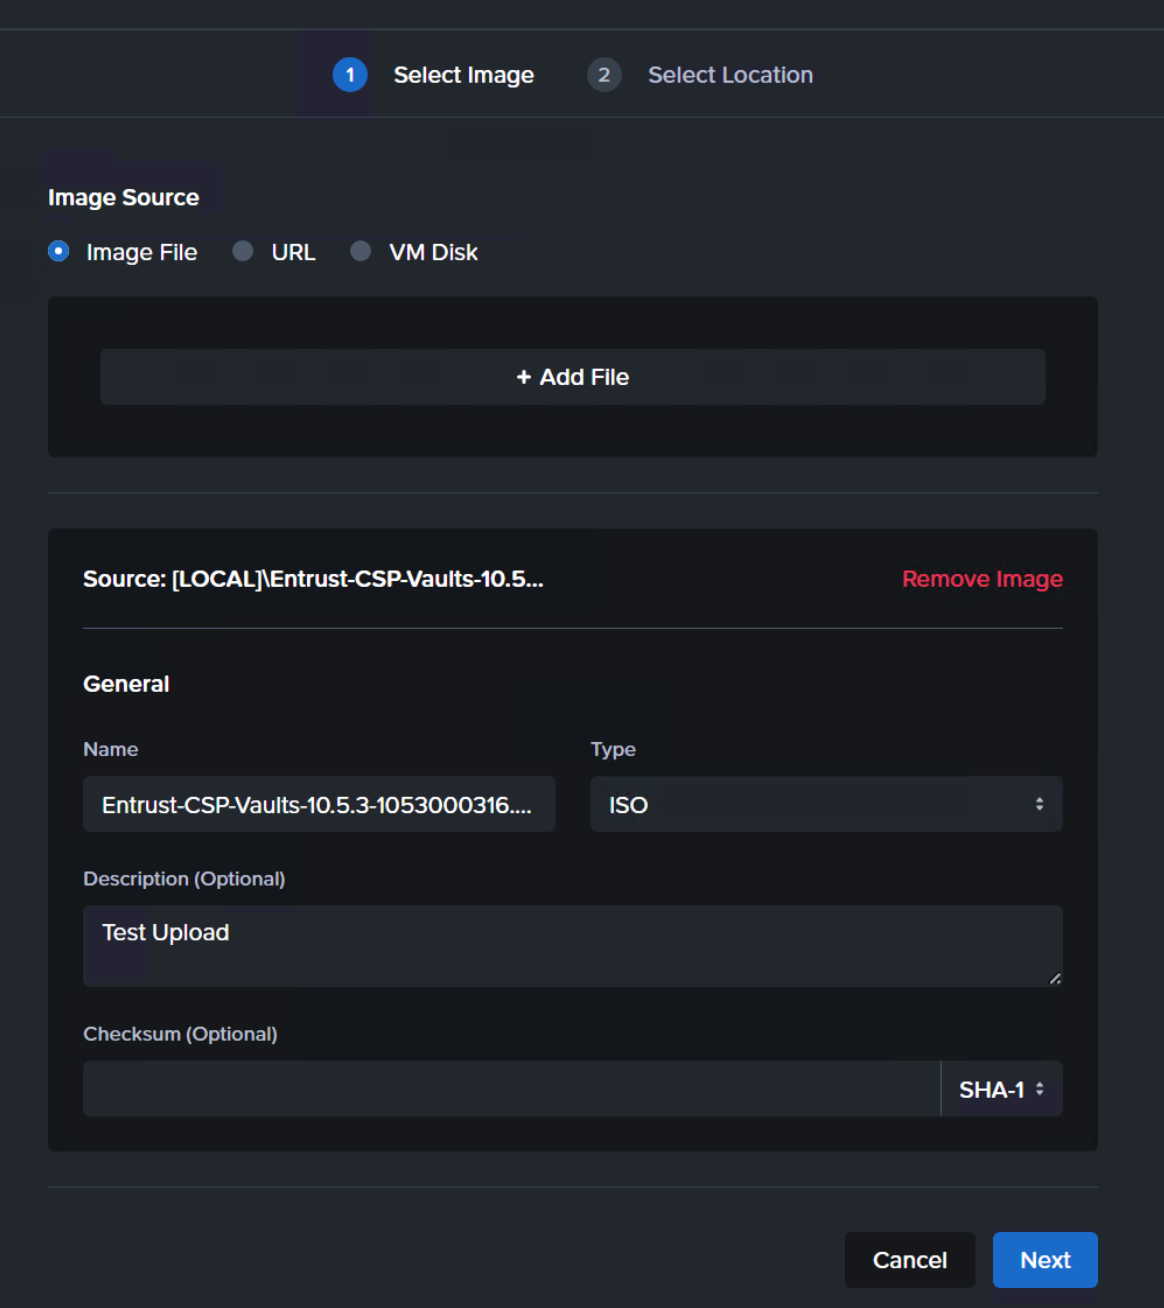
Under Image Source, ensure the Image File radio button is selected and then select Add File.
-
Locate and add the Entrust ISO file.
-
Enter a Name, select the Image Type, and enter a Description, then select Next.
-
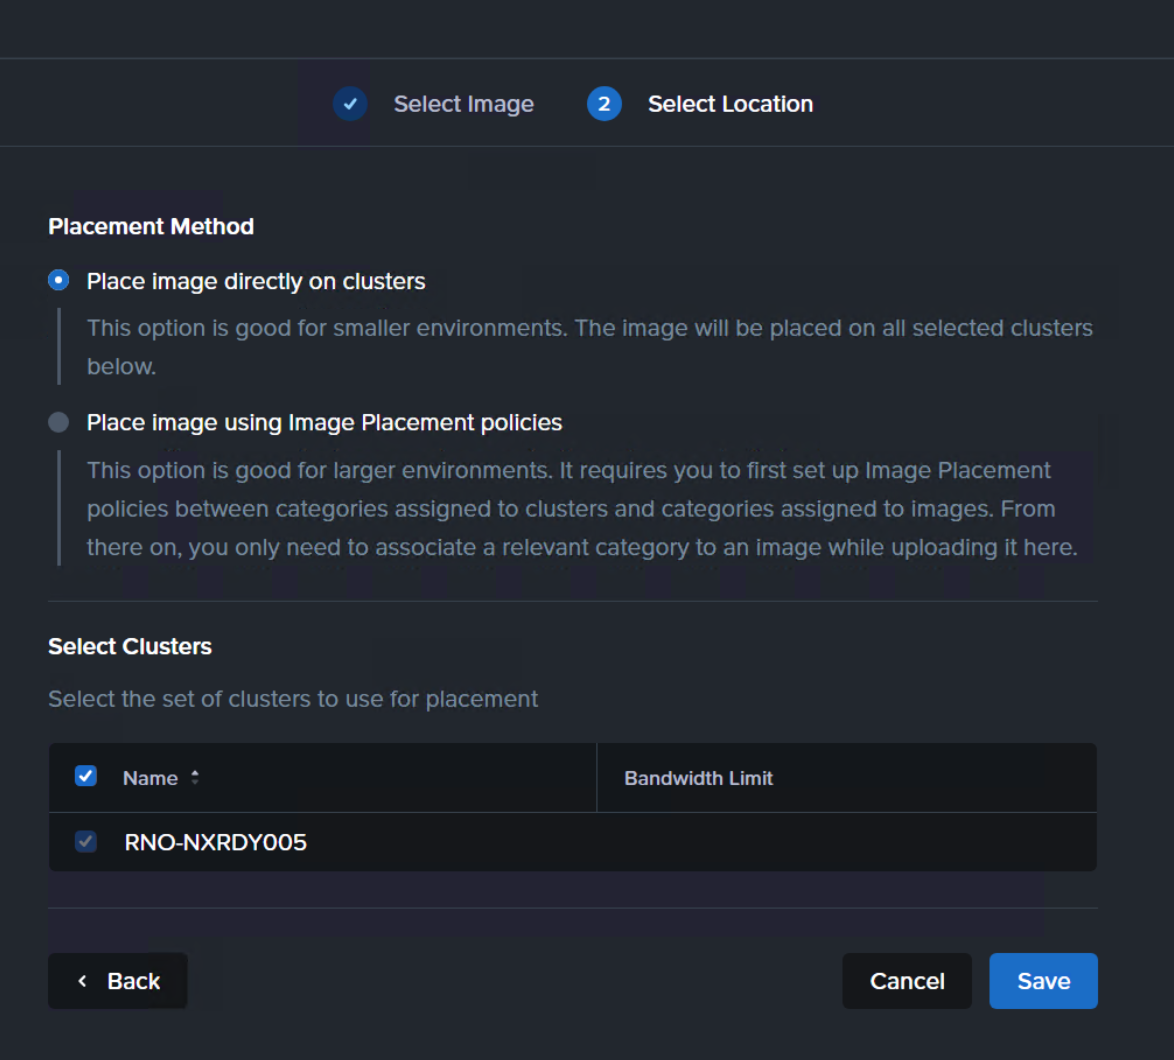
On the next screen, leave the default values selected.
-
Select Save. The operation may take close to a minute to complete.
Deploy a Key Management Vault node on AHV
For more information, refer to VM Management in the Nutanix online documentation.
-
Log in to the Nutanix Prism Central web UI.
-
Select Prism Center > Infrastructure > Compute > VM.
-
Select Create VM.
-
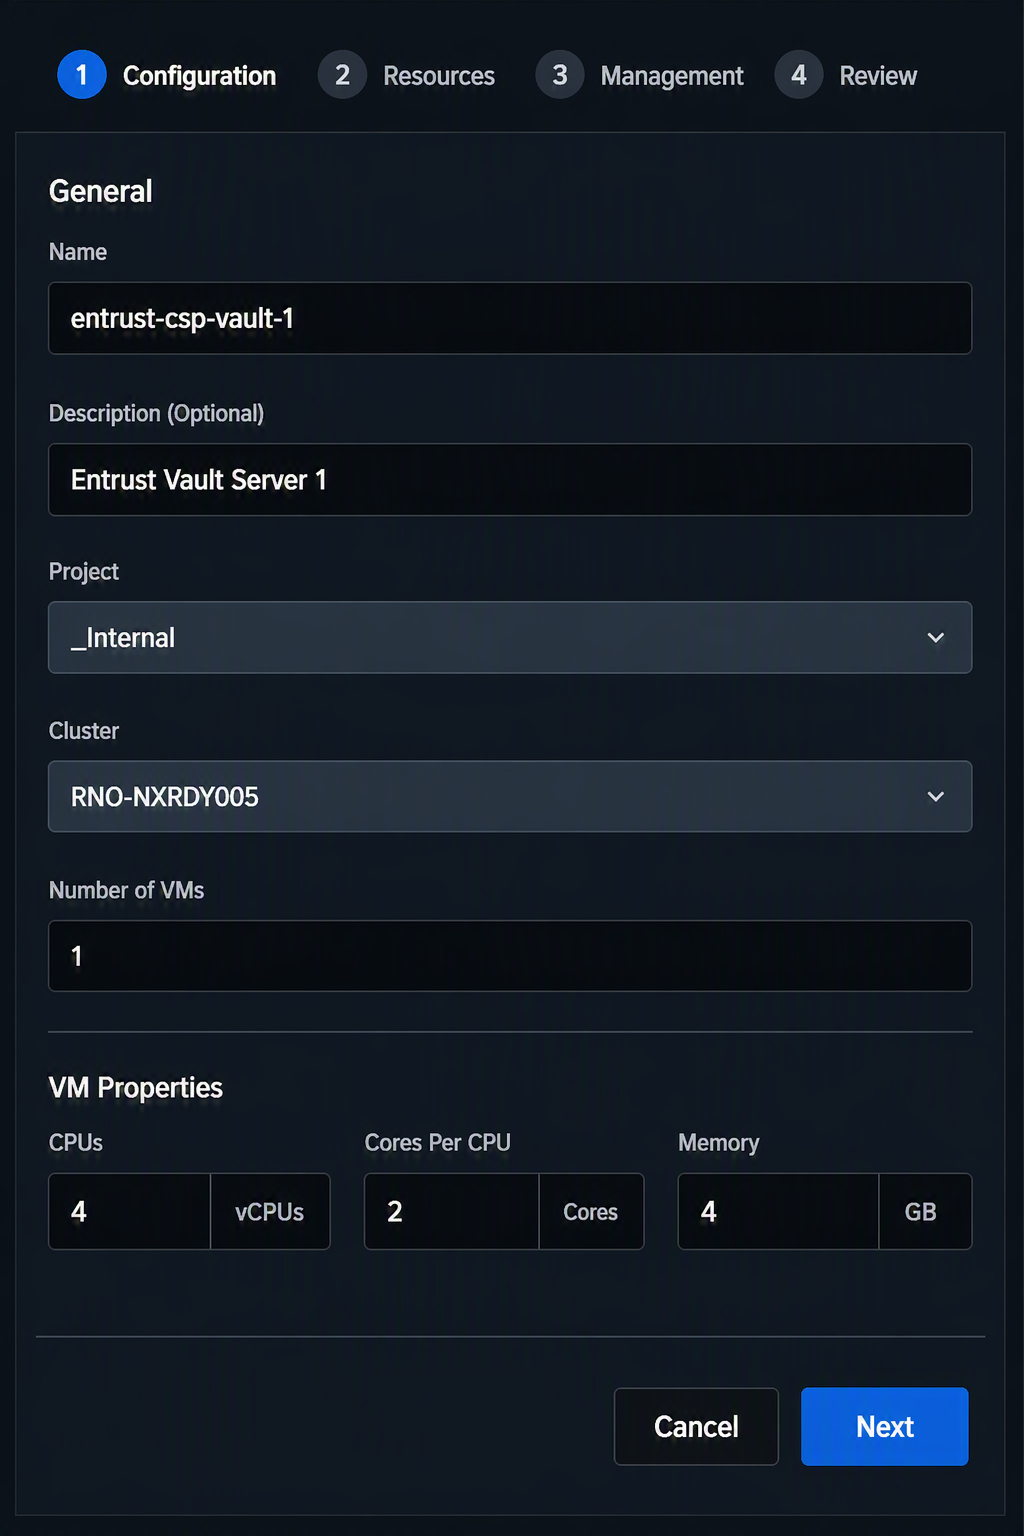
Complete the Create VM dialog as follows, then select Next:
-
Name: Enter a name for the vault, for example, "entrust-csp-vault-1".
-
Description: If required, add a description for the VM. This field is optional.
-
Project: Leave the default value
-
Cluster: Leave the default value
-
Number of VMs: 1
-
VM Properties: 4 CPUs, 2 Cores, 8 GB RAM
-
-
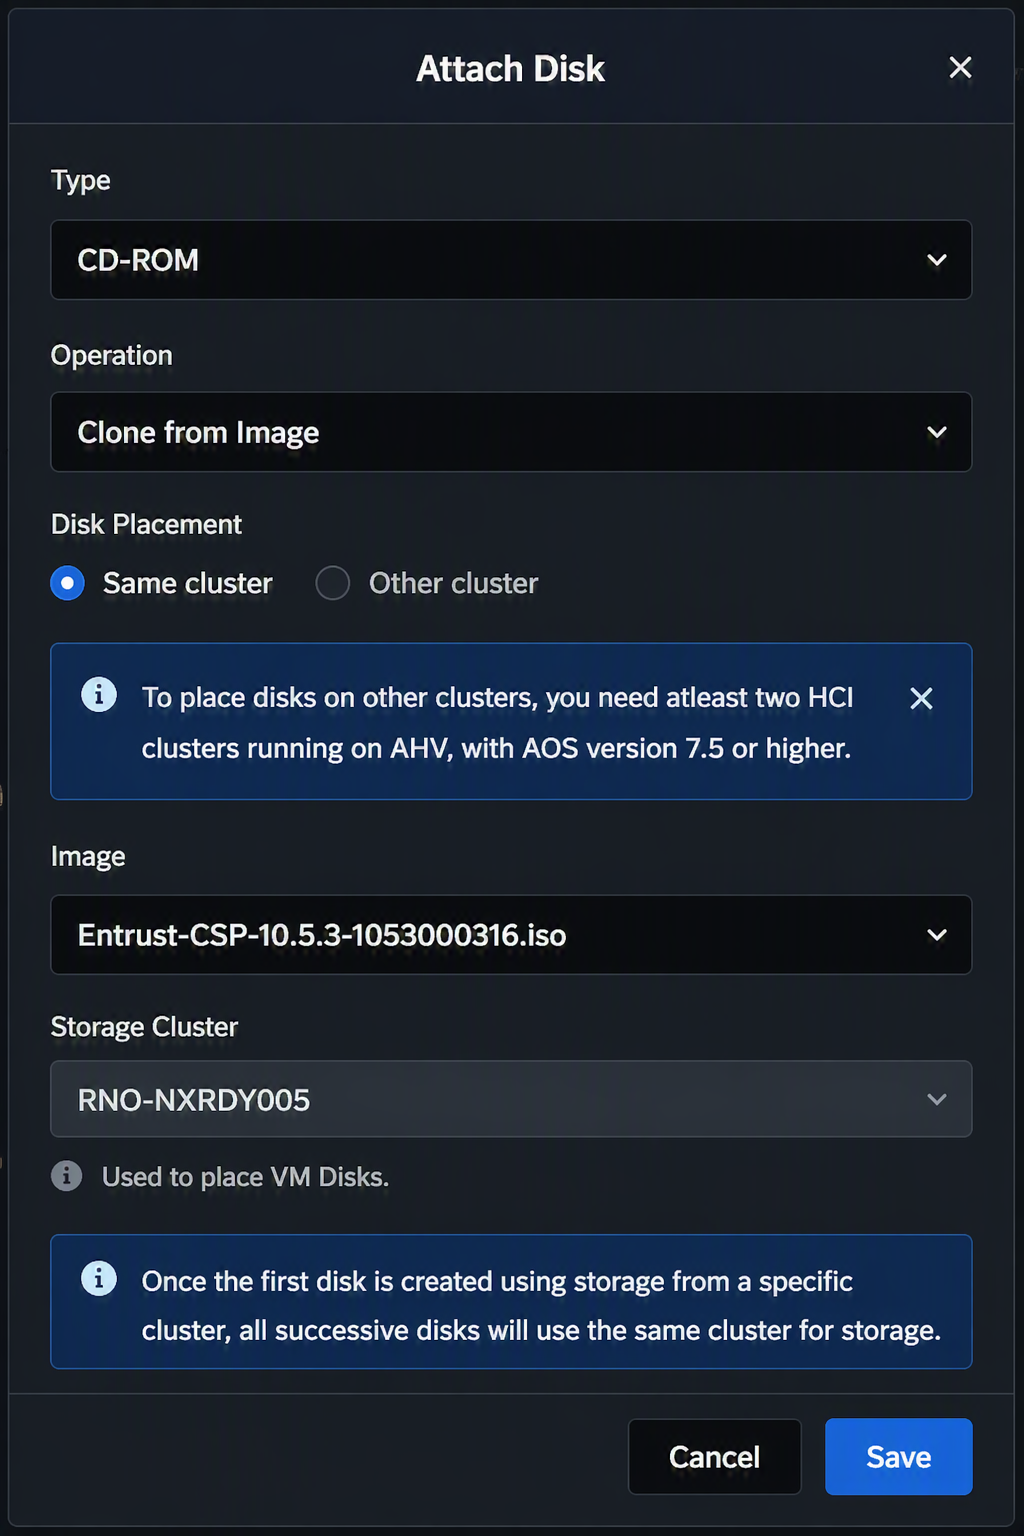
Attach the CD-ROM: Under Disks, select Attach Disk.
-
Complete the Attach Disk window as follows, then select Save:
-
Type: Select CD-ROM.
-
Operation: Select Clone from Image
-
Image: Select the image you created earlier.
-
Bus Type: Select SATA.
-
Leave the other fields set to the default values.
-
-
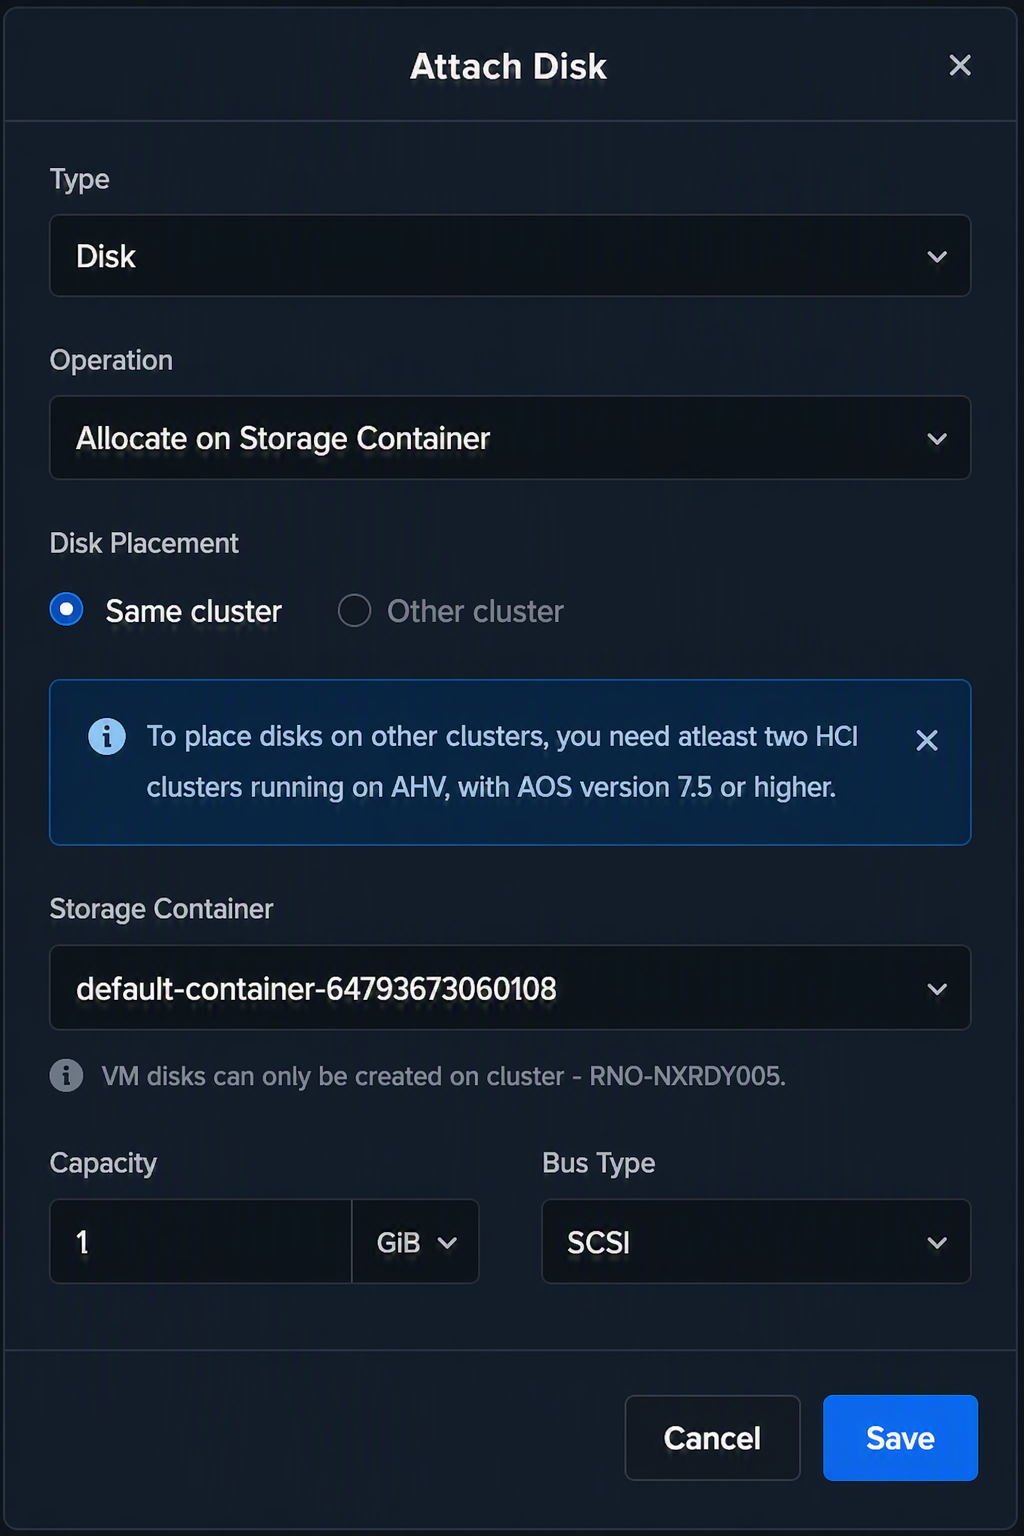
Attach another Disk: Under Disks, select Attach Disk.
-
Complete the Attach Disk window as follows, then select Save.
-
Type: Select Disk.
-
Operation: Select Allocate on Storage Container.
-
Capacity: 80 GB.
For the Compliance Manager VM, the minimum requirement is 250 GB. -
Bus Type: Select SATA.
-
Leave the other fields set to the default values.
-
-
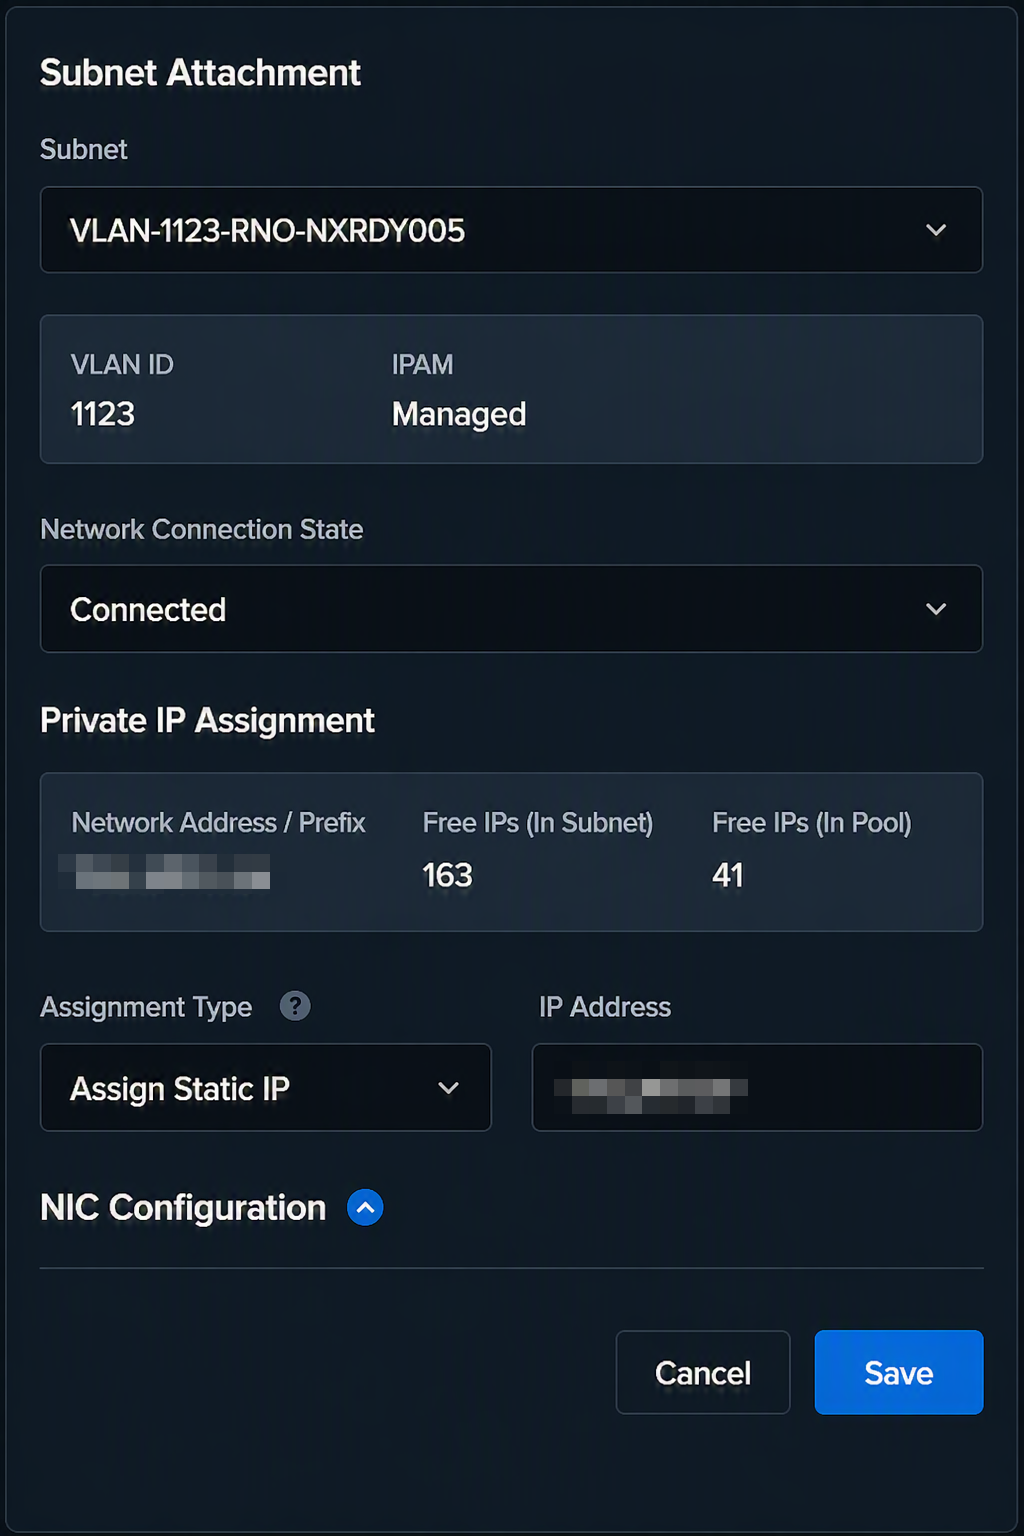
Attach a Subnet: Under Network, select Attach to Subnet.
-
Complete the Attach to subnet window as follows, then select Save:
-
Subnet: Select the Subnet.
-
Assignment Type: Select Assign Static IP.
-
IP Address: Enter the IP address.
-
Leave the other fields set to the default values.
-
-
In the Boot Configuration, select Legacy BIOS, then select Next.
-
Set the Timezone, then select Next.
-
Select Create VM.
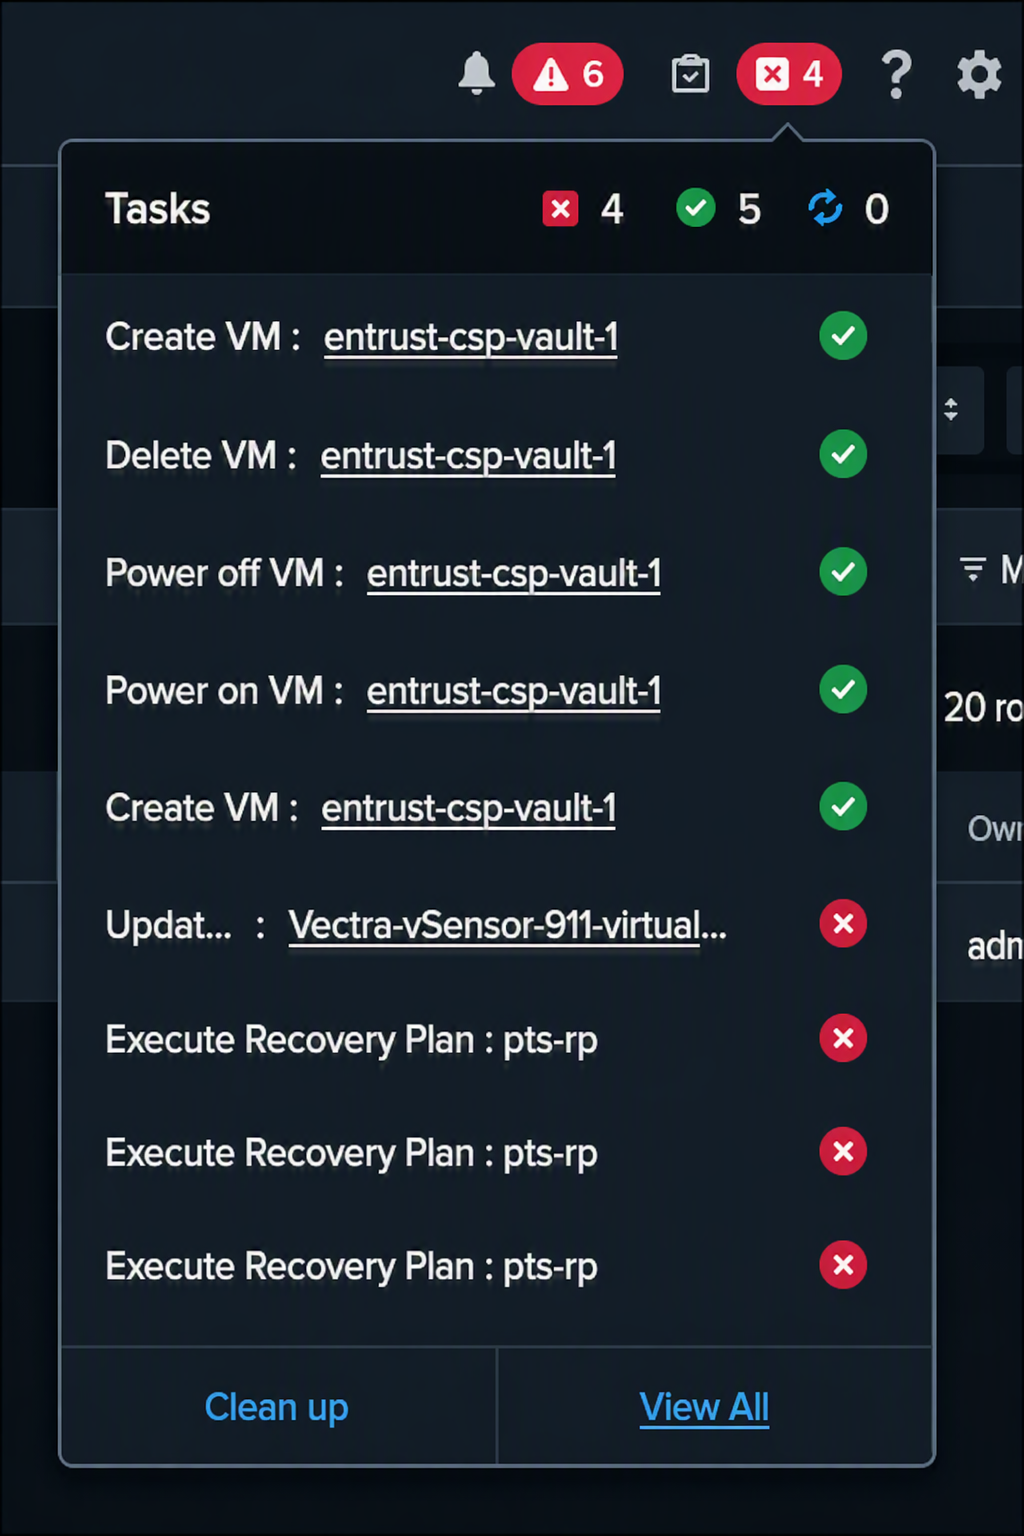
You can track the progress of the VM creation process:
-
Repeat all steps to create a second Entrust Key Management Vault node and a Compliance Manager node.
Initial Configuration of Entrust Key Management Vault and Compliance Manager Nodes
Perform the following steps for each of the VMs you have created:
-
Log in to the Nutanix Prism Central web UI.
-
Select Prism Center > Infrastructure > Compute > VM.
-
Search for and select the required VM.
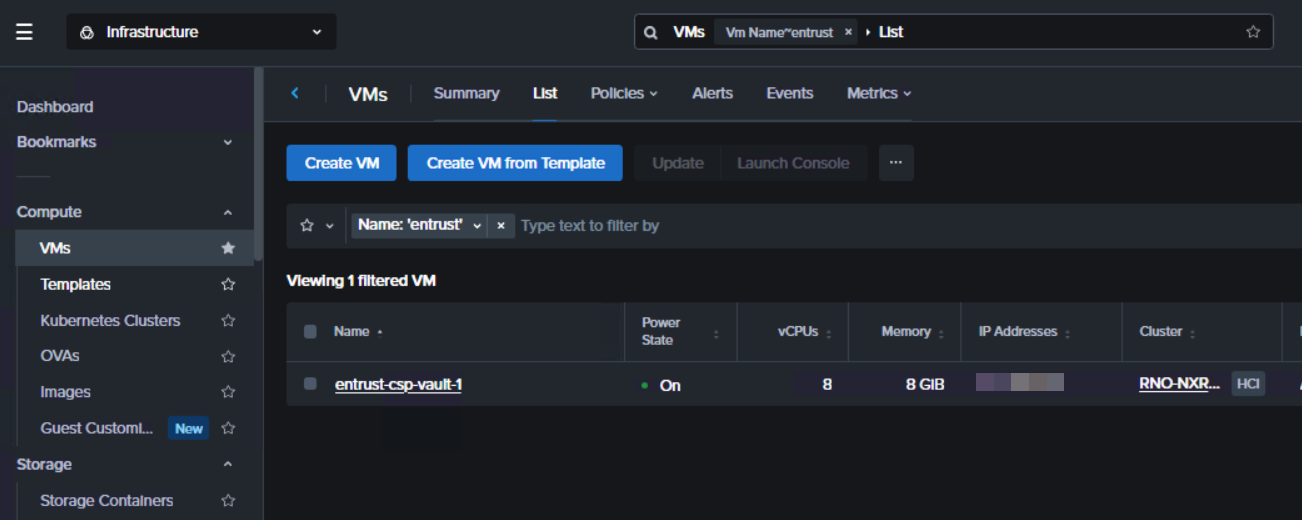
-
Under Power Operations, select Power On.
-
Select Launch Console.
-
After the installer finishes, when prompted for a password for the htadmin account, set the password and select OK.
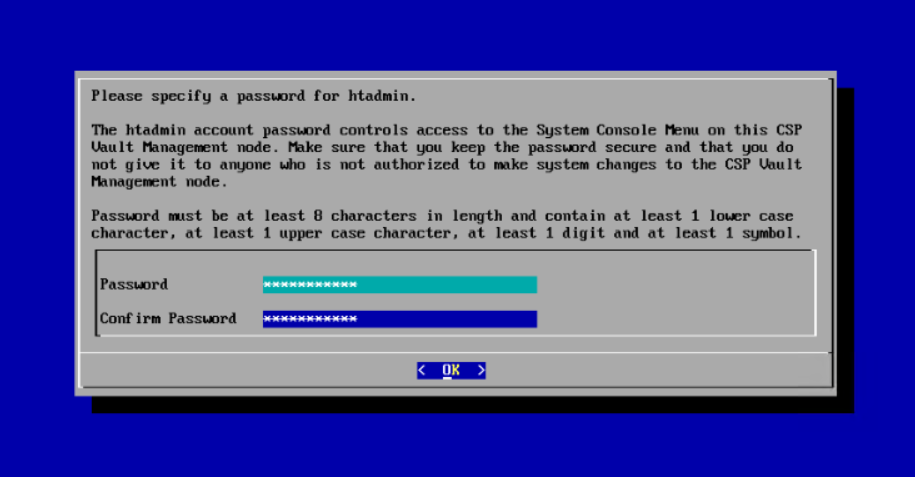
-
Enter the network information.
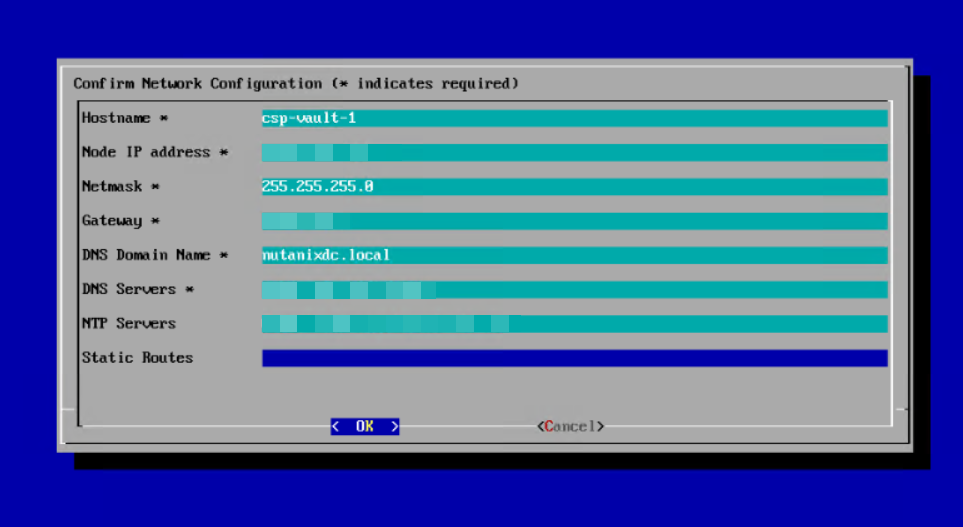
-
Verify the network information and select Yes.
-
Select OK once setup is complete.
-
In a browser, go to the URL (https://Node IP address) and log in with the default secroot credentials.
The default secroot password is secroot.
-
Accept the license agreement.
-
Select Continue as a Standalone Node.
-
Enter a new password for the secroot user and select Update Password.
-
Configure the email settings then select Continue.
-
Select Download and save the admin key.
-
Select Continue.
Configure the Compliance Manager node
Configure the Compliance Manager to establish an initial Appliance Cluster connection with the first Key Management Vault node. For more information, refer to Creating an Appliance Cluster Connection.
Join the two Key Management Vault nodes to form a cluster
Join the two Key Management Vault nodes in a high-availability cluster following the instructions in Installing an Additional CSP Vault Cluster Node on a VM from an ISO Image.
Create a KMIP Key Management Vault
-
Sign in to the KeyControl Appliance Manager.
-
If it loads in the Appliance Management view, select SWITCH TO: Manage Vaults in the toolbar at the top of the window.
-
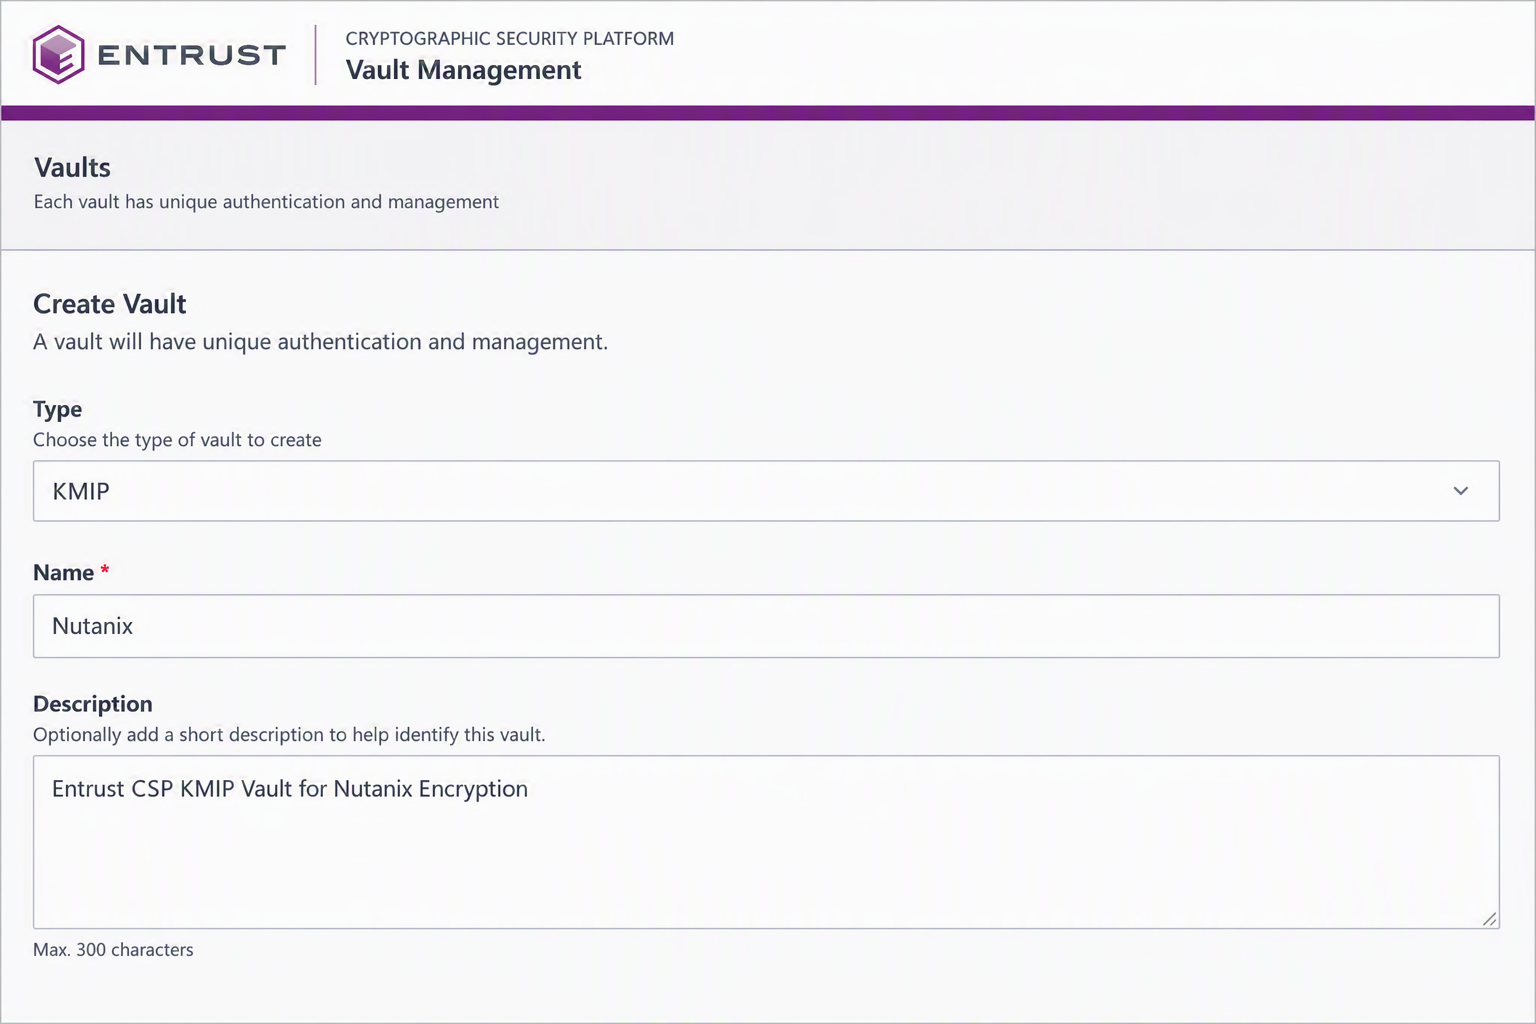
On the Vault Management home page, select Create Vault. The Create Vault dialog appears.
-
Complete the Create Vault dialog as follows, then select Create Vault:
-
Type: Select KMIP.
-
Name: Enter a name for the vault.
-
Description: Enter a description.
-
Email Notifications: Leave it Off unless you configured email when you set up the CSP Vault node.
-
Administrator: Enter Administrator.
-
Admin Email: Enter your company email.
-
-
Bookmark the URL and save the credentials displayed in the confirmation dialog.
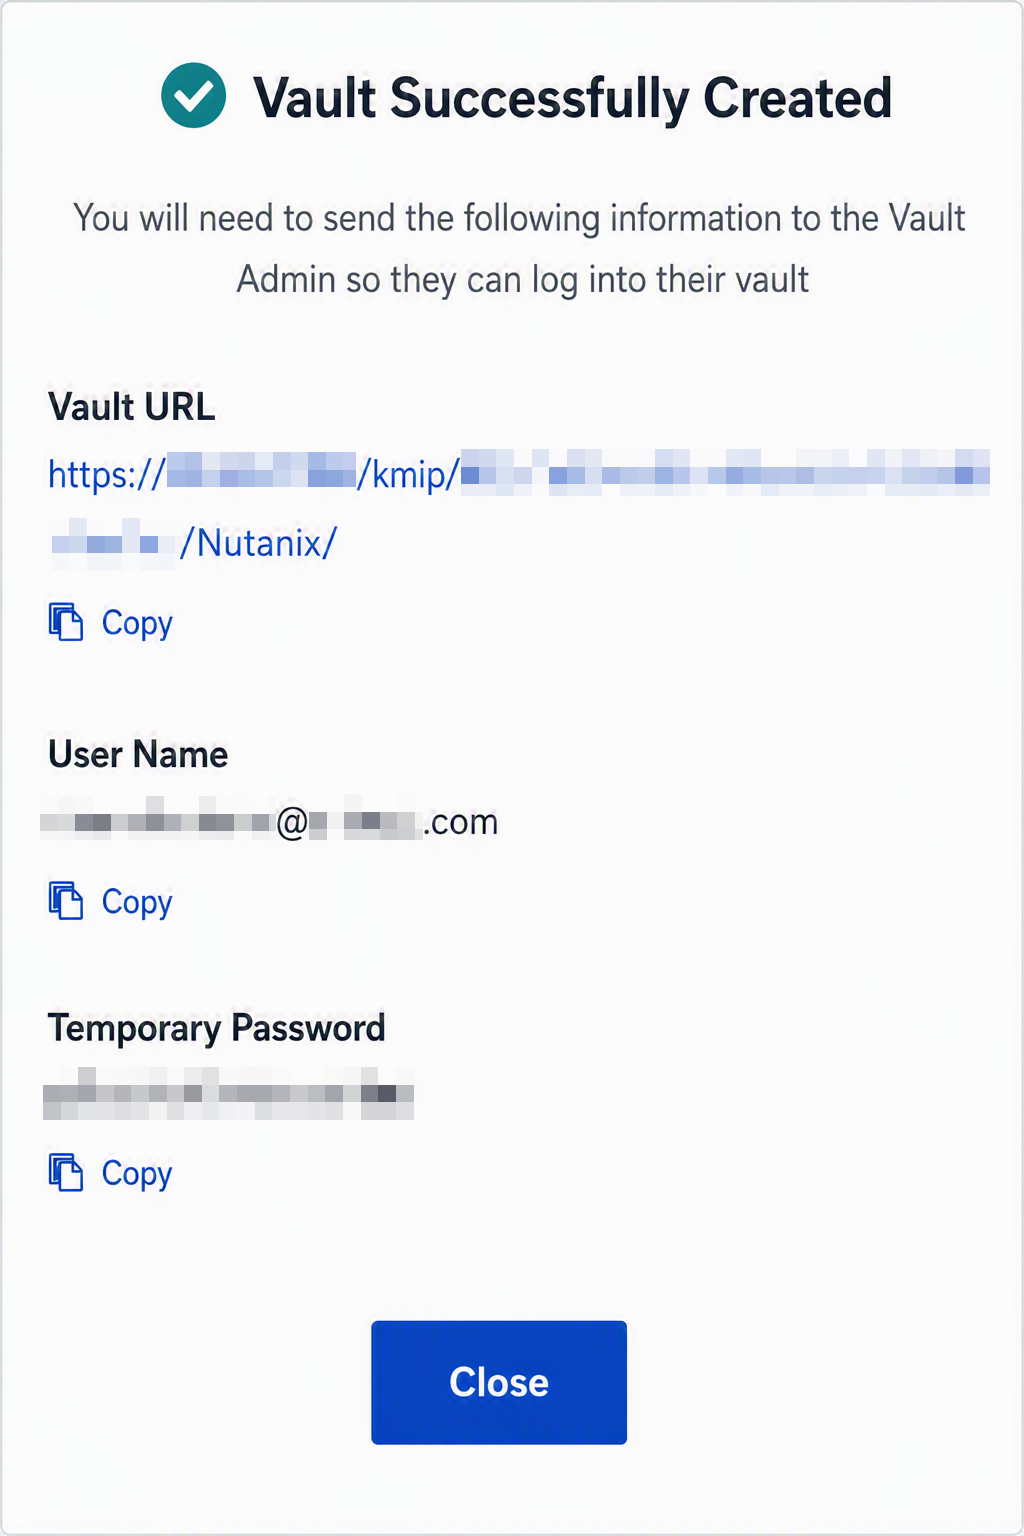
-
In a web browser, navigate to the vault URL.
Sign in to the Vault with the user name and the temporary password that you saved in the previous step.
+ The user name should be the email address that you specified when you created the vault.
-
Change the initial password when prompted.
-
Sign in again to verify the new credentials.