Configure Microsoft Azure
For the purpose on this integration, the Azure Microsoft Entra accounts were provided by Microsoft as a Microsoft 365 development environment. The actual users are part of the quick-start environment Microsoft offers. These have Microsoft 365 Enterprise E5 or above licenses. Alternatively, use your own account with provided it has the license listed above.
The Microsoft 365 account is linked to an Azure Active Directory. Users will be authenticated with it in order to be able to decrypt using the DKE keys. The tenant GUID can be specified in the DKE Cloud Key’s DKE Permissions list to restrict access to a particular tenant, or list of tenants.
Create an app registration in Azure
Authentication to access the DKE decryption is performed by an Azure App registration for the FQDN in the URL specified in the compliance label. This requires the FQDN to be in a verified domain for that Azure tenant.
-
Sign in to the Azure portal https://portal.azure.com/#home with the Microsoft 365 account.
-
Navigate to Microsoft Entra ID (old Azure Active Directory). Type Microsoft Entra ID in the search box and select it from the pull-down menu.
-
Select App registrations in the left pane, then select the + New registration icon in the right pane.
-
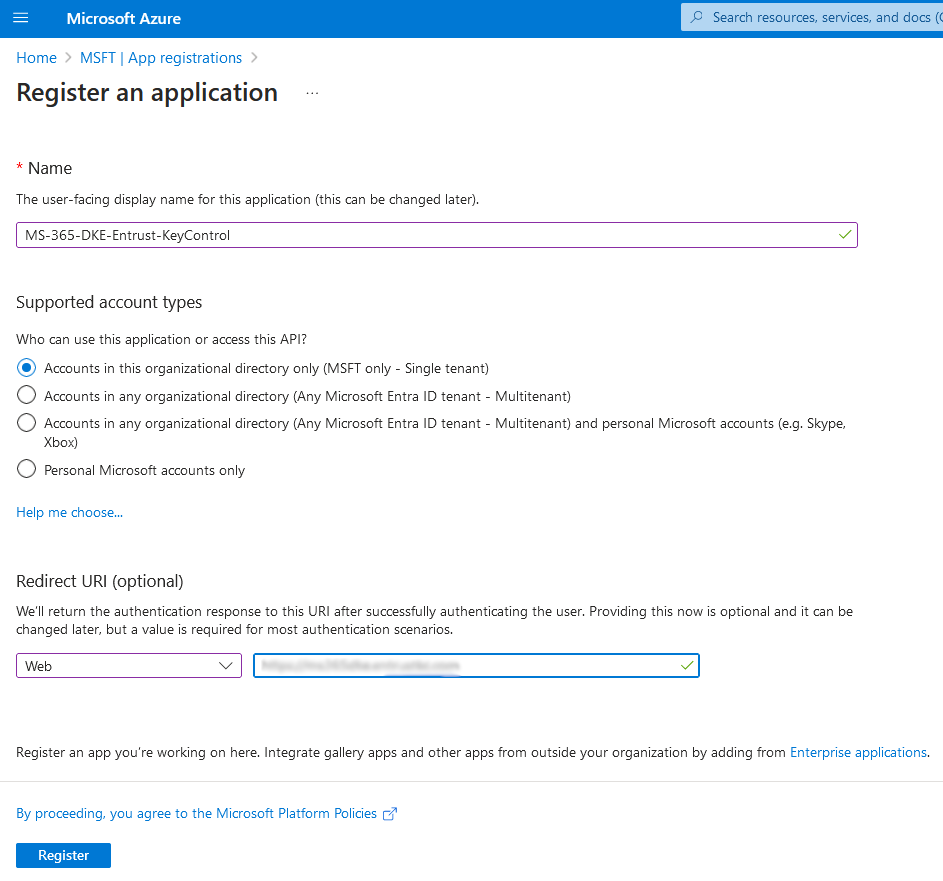
Enter the Name, a user-facing or friendly name. Select the radio button for Who can use this application or access this API?. Select the applicable Supported account types and enter the public URL of the Entrust KeyControl in Redirect URI.
For example:
-
Select Register.
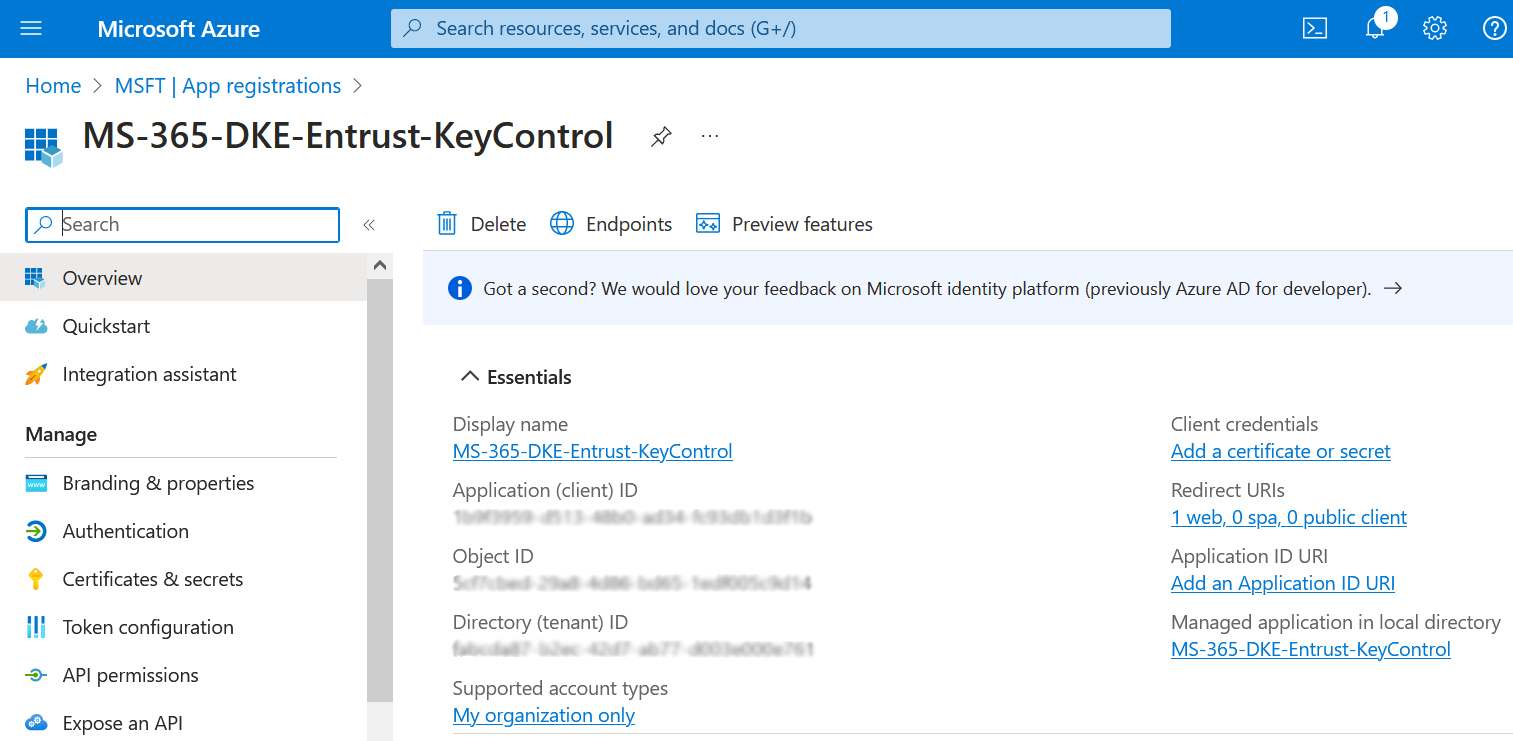
The newly created registration appears.
-
Select Expose an API in the left pane.
-
Select the + icon next to Application ID URI. Enter your information, then select Save and continue.
For example:

-
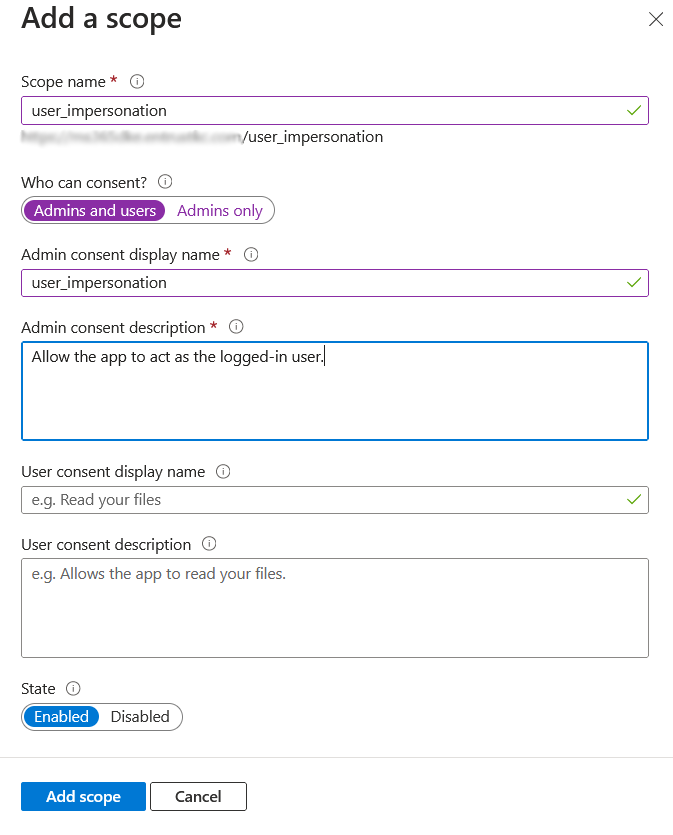
Select the + icon next to Add a scope to add a scope defined by this API. Enter your information, then select Add scope.
For example:
-
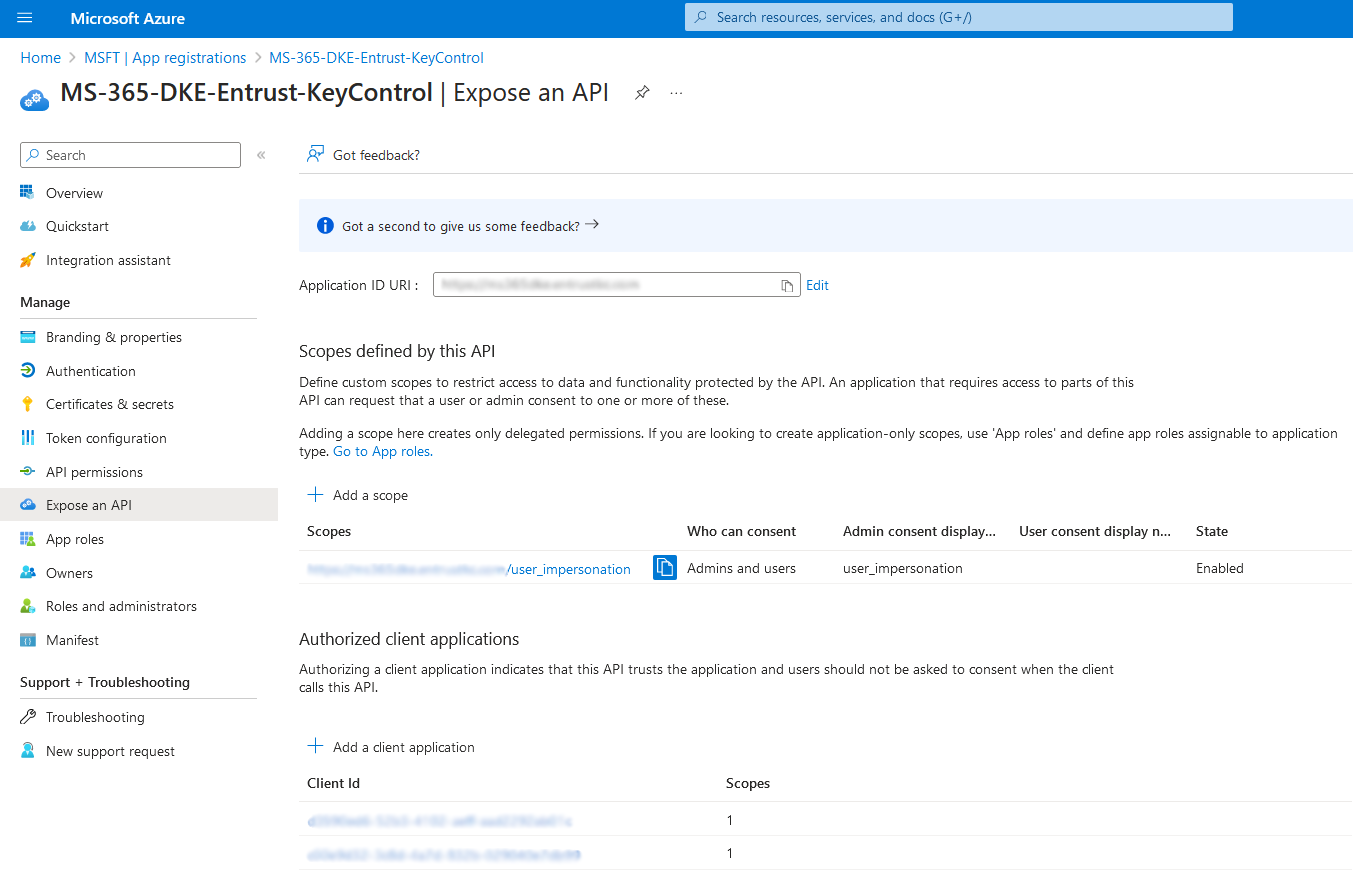
Select the + icon next to Add a client application to add an authorized client application. Add the following Microsoft predefined IDs. These are same for everybody, and can be found at Set up Double Key Encryption. Check Authorized scopes, then select Add application.
ID Value Microsoft Office client ID
d3590ed6-52b3-4102-aeff-aad2292ab01c
Information protection client ID
c00e9d32-3c8d-4a7d-832b-029040e7db99
For example:
Add compliance label
Compliance labels are configured in the Microsoft Compliance portal and distributed to specified users and groups in Active Directory. A DKE label contains a URL which can be used to obtain the public key of the DKE key and a corresponding decryption URL.
-
Sign in to the Microsoft Purview Compliance Portal at https://compliance.microsoft.com/homepage with the Microsoft 365 account.
-
Select Labels under Information protection.
-
Select Information protection in the left pane, then select Labels.
-
Select the + icon next to Create a label.
-
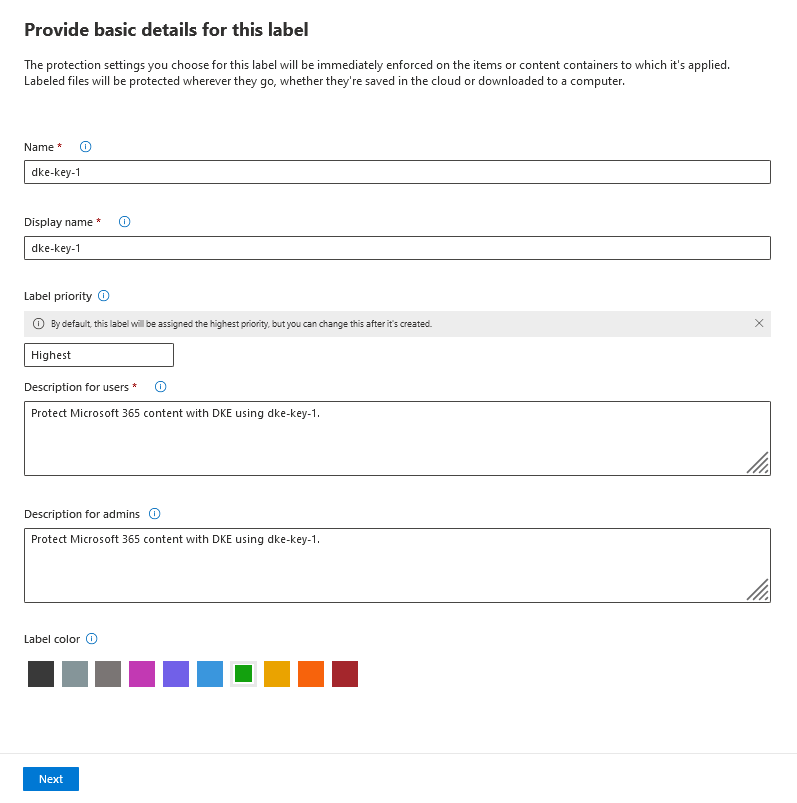
In the Provide basic details for this label window, enter your information, then select Next.
For example:
-
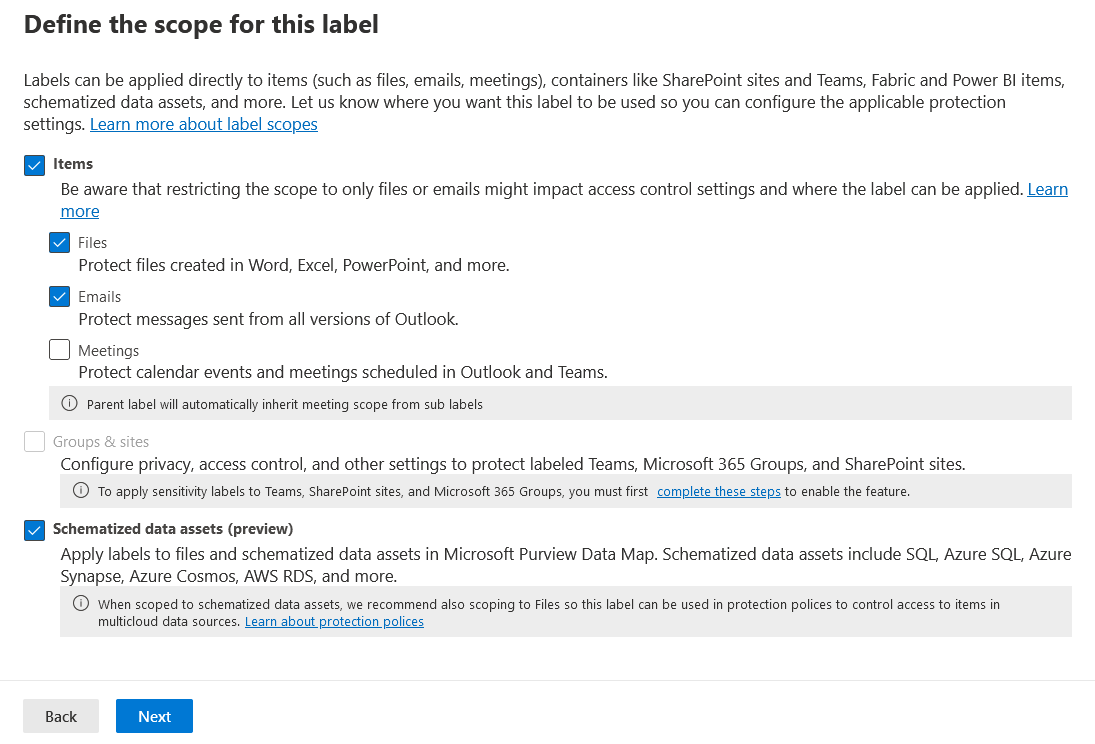
In the Define the scope of this label window, under Items, check Files and Emails. Un-check Meetings, then select Next.
For example:
-
In the Choose protections settings for the types of items you selected window, check Control access, then select Next.
For example:

-
In the Access Control window, select the Configure access control settings radio button.
-
Select Assign permissions and add your users or groups.
-
Check Use Double Key Encryption and enter the URL for the cloud key, then select Next.
For example - Access Control window:
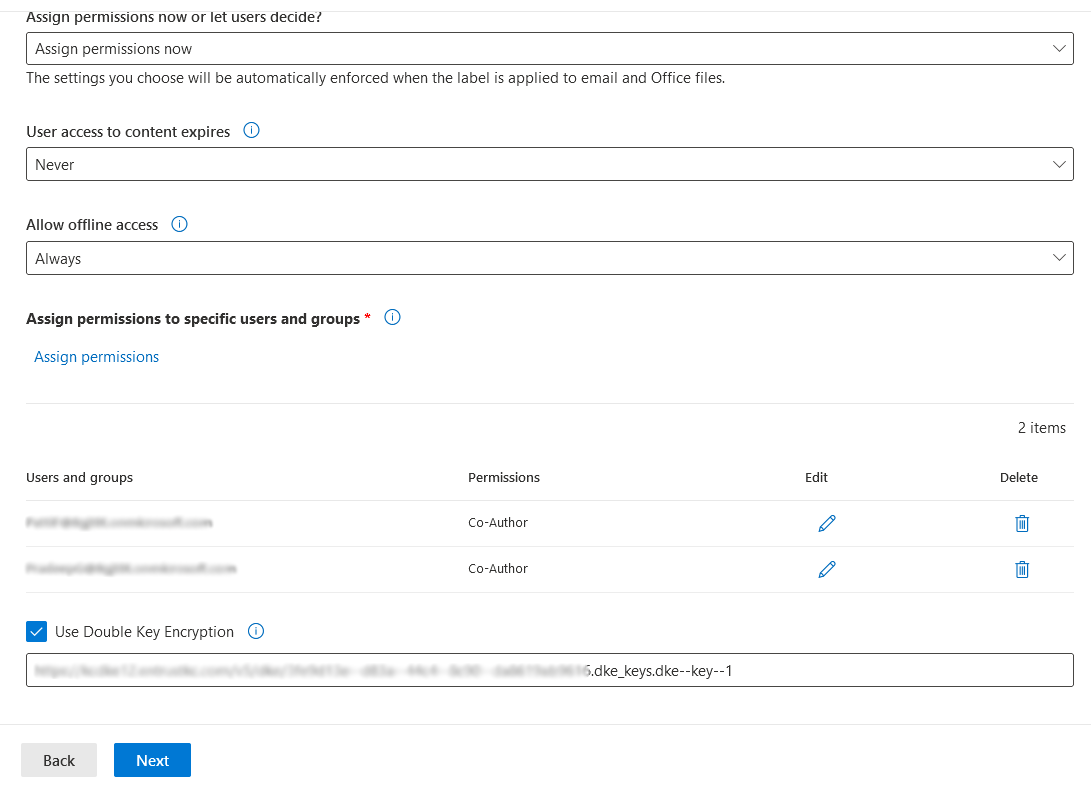
The URL for the cloud key is the DKE uri of the cloud key created in Create a cloud key for Microsoft 365 DKE. For example:

-
In the Auto-labeling for files and emails, select per your organizations policies, then select Next.
-
In the Define protection settings for groups and sites windows, check the settings that apply per your organizations policies, then select Next.
-
In the Auto-labeling for schematized data assets (preview), select per your organizations policies, then select Next.
-
In the Review your settings and finish windows, select and review as needed, then select Create label.
-
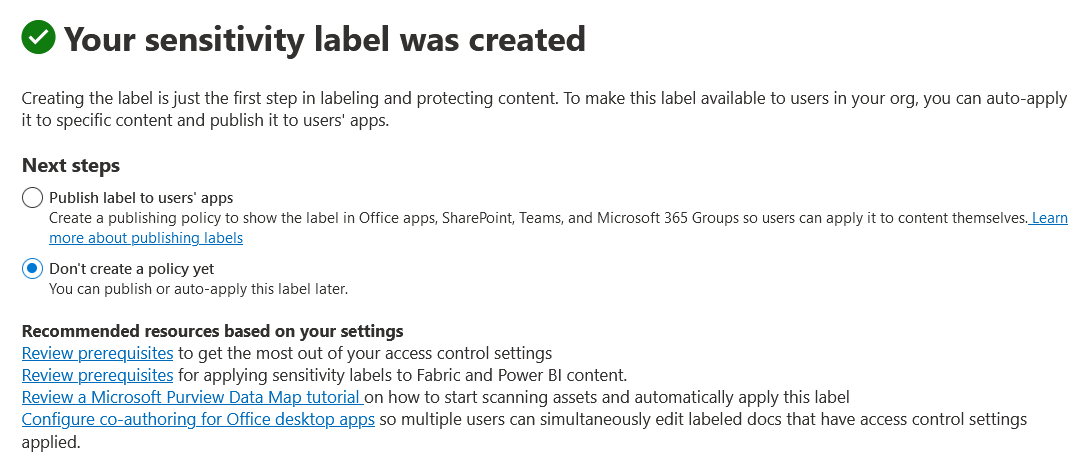
In the Your sensitivity label was created, select the Don’t create a policy yet radio button, then select Done.
For example:
-
Create any other labels you need following the steps above.
Add label policies
The following steps describe the process of adding the new labels to an existing policy.
-
Sign in to the Azure portal https://portal.azure.com/#home with the Microsoft 365 account.
-
Open the Microsoft Purview Compliance Portal at https://compliance.microsoft.com/homepage.
-
Select Labels under Label policies.
-
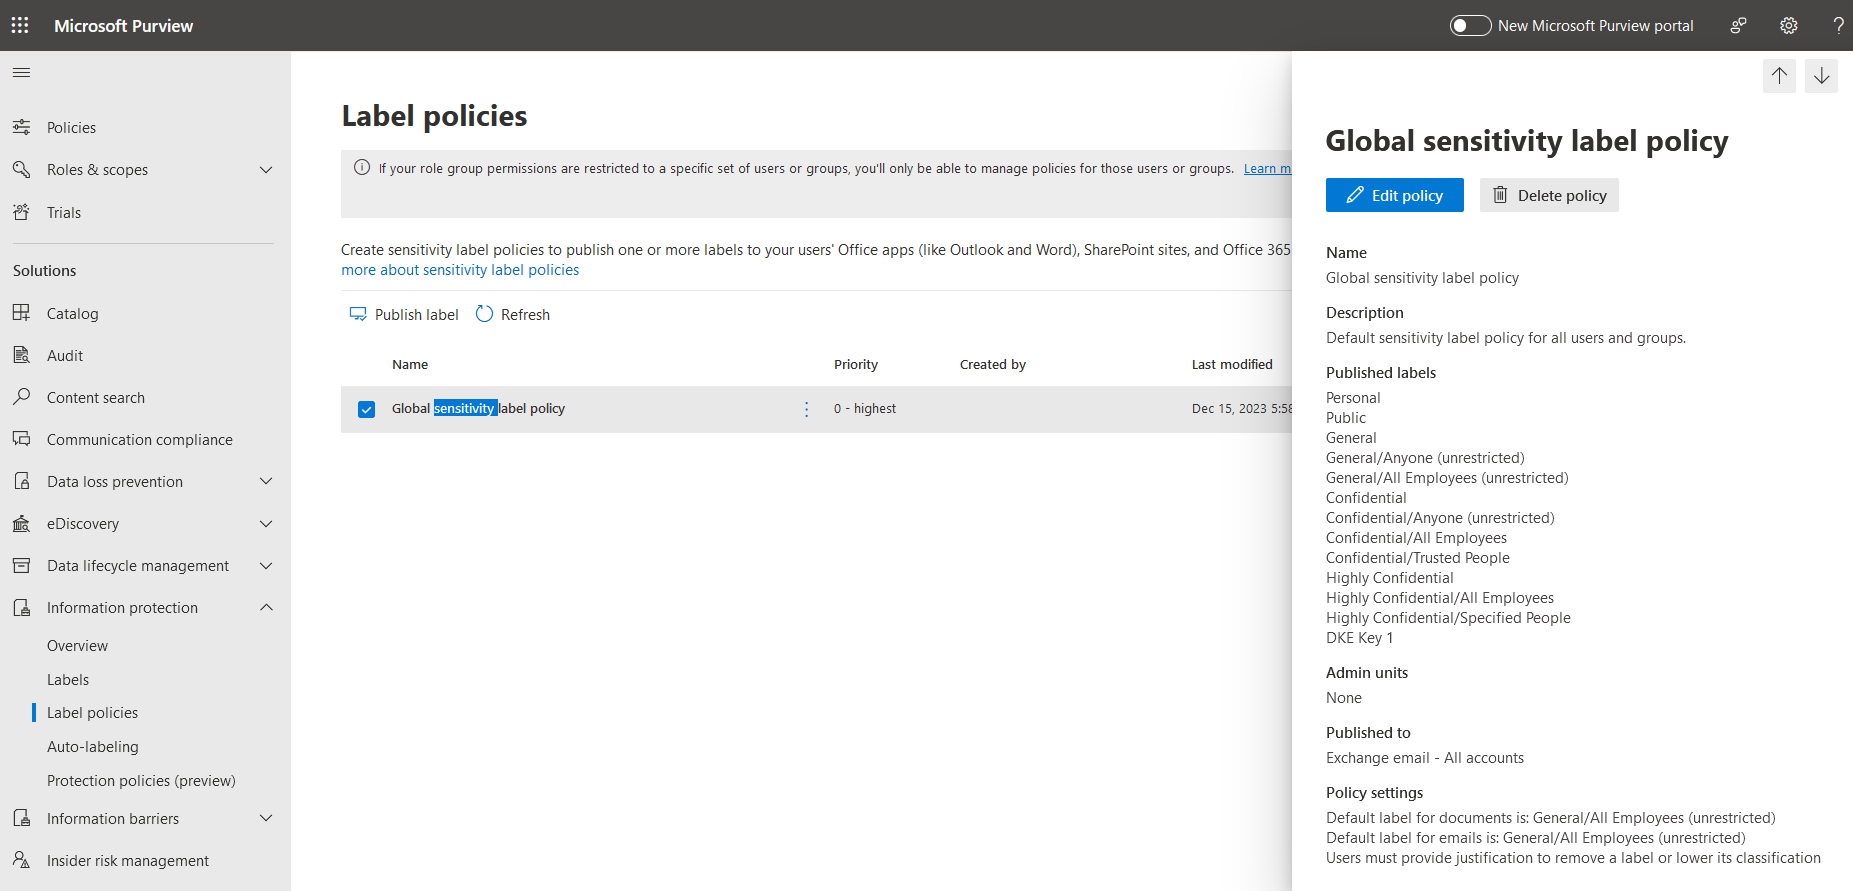
Double-click on the selected label to open the Global selectivity label policy, then select Edit policy.
For example:
-
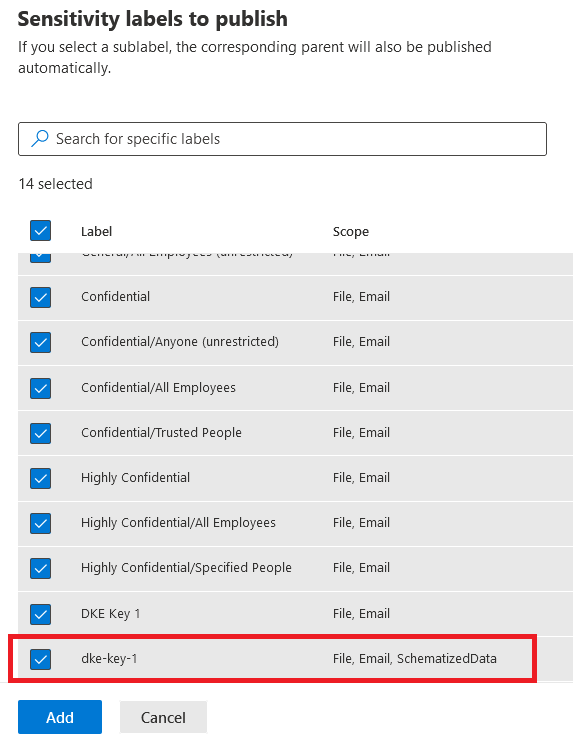
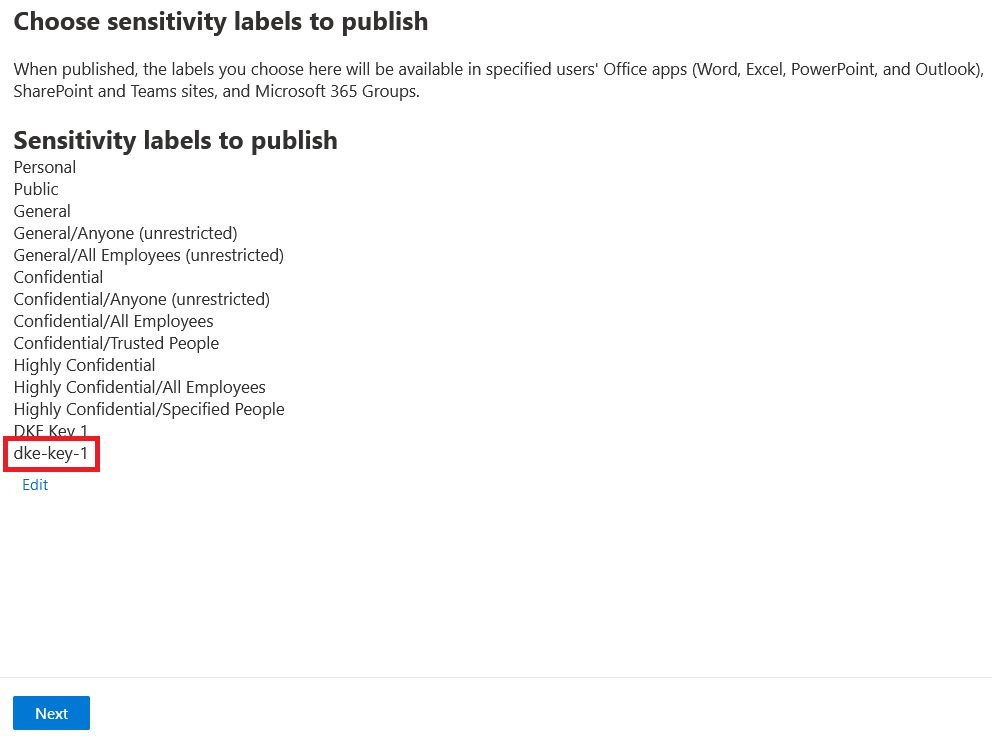
In the Choose sensitivity labels to publish window, select Edit. Check the new labels created in Add compliance label, then select Add.
For example:
-
Select Next.
For example:
-
In the Assign admin units window, add or remove administrative units per your organizations policies, then select Next.
-
In the Publish to users and groups window, add users and groups per your organizations policies, then select Next.
-
In the Policy settings windows, check applicable policies. Then select Next.
-
In the Default settings for documents window, select the Default label per your organizations policies, then select Next.
-
In the Default settings for emails window, select the Default label per your organizations policies. Check Email inherits highest priority label from attachments if applicable, then select Next.
-
In the Default settings for meetings and calendar events window, select the Default label per your organizations policies, then select Next.
-
In the Default settings for Fabric and Power BI content window, select the Default label per your organizations policies, then select Next.
-
In the Name your policy window, select Next.
-
In the Review and finish, make any edits necessary, then select Submit.
For example:
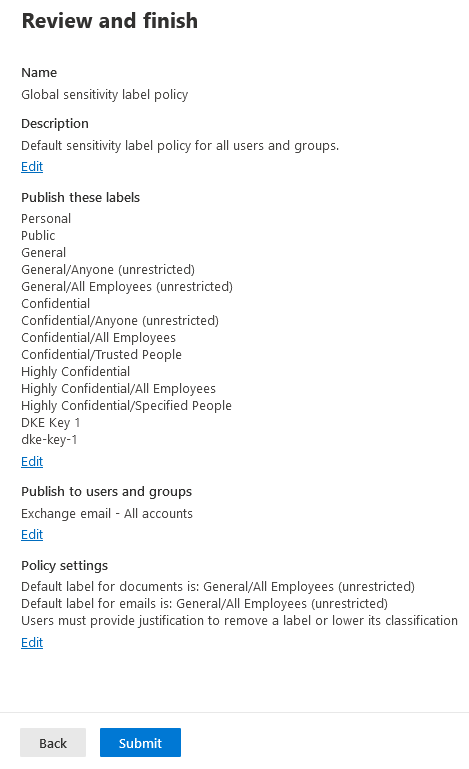
The labels will be propagated according to the policy. It may take some time to appear to the end users.
-
Select Done.
For example:
