Download and configure Entrust CloudControl
Download the Entrust CloudControl software
-
Sign in with your Entrust Trusted Care account.
-
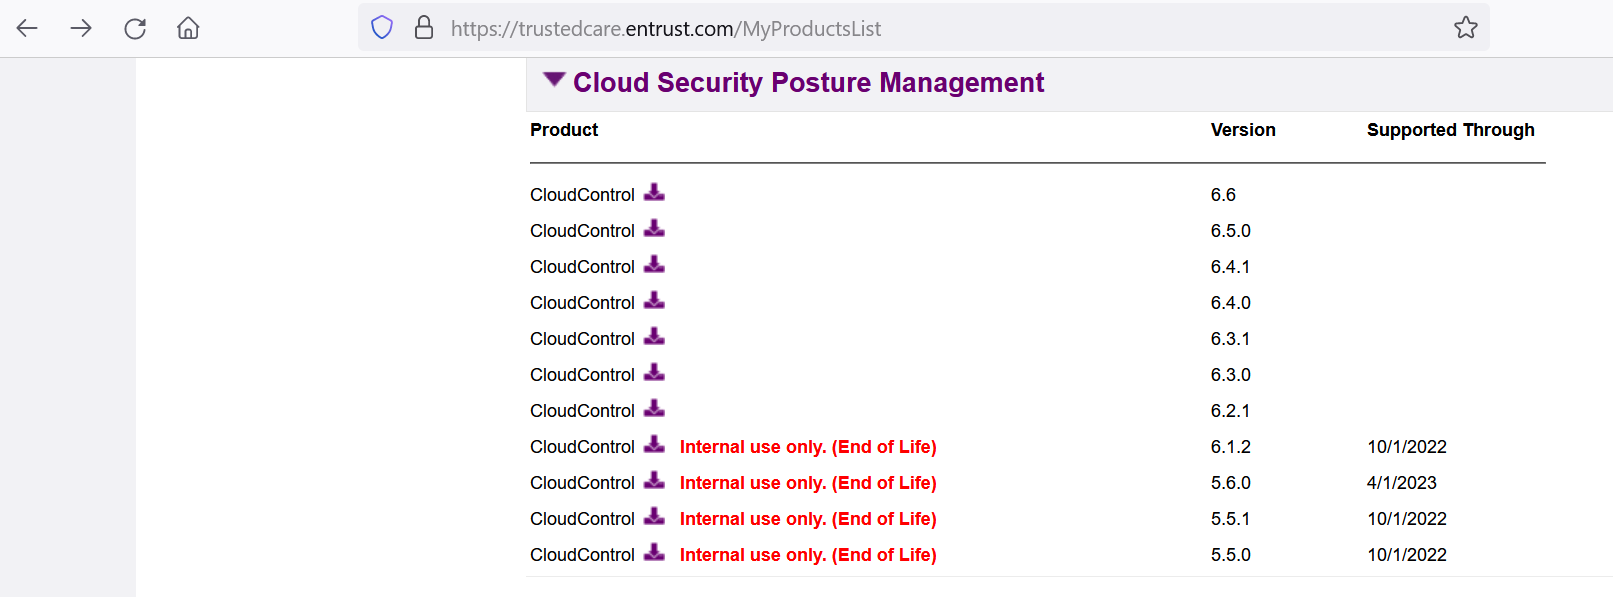
Select Products and then expand Cloud Security Posture Management under CLOUD SECURITY.
-
Select the Entrust CloudControl version and then select and download the OVA.
-
Open the downloaded ZIP file to access to the OVA file.
Deploy an Entrust CloudControl VM from the OVA
-
Log in to vCenter.
-
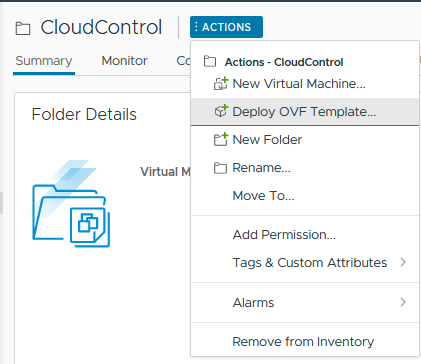
Select the cluster in which to create the Entrust CloudControl VM.
-
From the Actions menu, select Deploy OVF template….
-
Select Local file and upload the Entrust CloudControl OVA file, and then select Next.
-
Follow the instructions during the deployment as needed.
For more information refer to Installing CloudControl from an OVA in the online documentation.
Power the Entrust CloundControl virtual appliance
-
Sign in to the vCenter.
-
Locate the Entrust CloudControl virtual machine in the inventory.
-
Right-click the Entrust CloudControl virtual machine and select Power > Power On.
Configure the Entrust CloudControl virtual appliance
-
Create a standalone Entrust CloudControl node as described in Creating a Standalone Node.
-
Set up the CloudControl GUI as described in Setting Up the CloudControl GUI
-
Open a web browser and navigate to the IP address or hostname of the standalone Entrust CloudControl node created above. Bookmark this URL.
-
Login with the credentials from Entrust CloudControl GUI credentials.
-
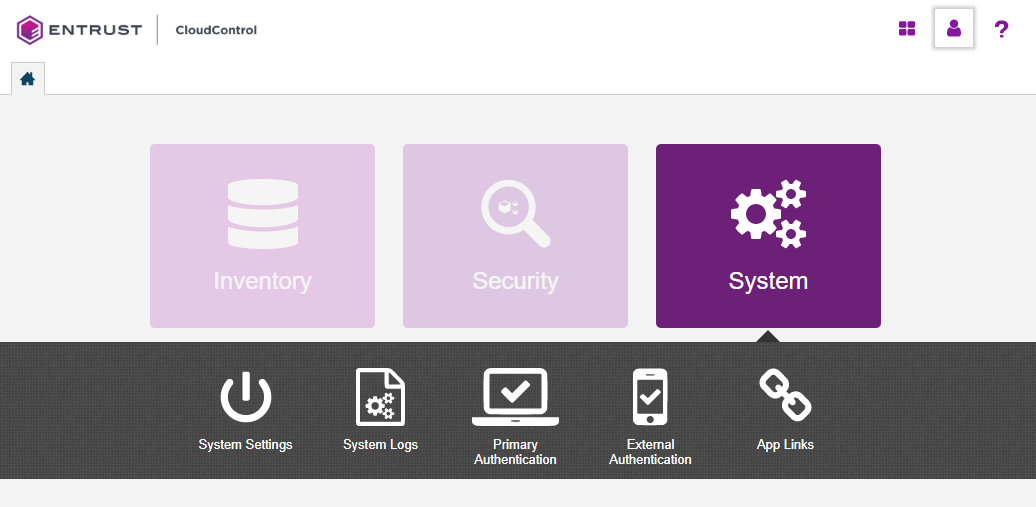
Select Home > System > Primary Authentication.
-
Select Configure Active Directory and Confirm you want to configure Active Directory.
-
In the Details tab of the Configure Active Directory window, enter the following:
Item Value Configuration Method
Manual
Default Domain Name
Domain name
Root Domain Name
Domain name
Security
None
Service Account
Service account, for example, htaServiceAccount
Service Account Password
Password for account above
This guide uses a Manual configuration. However, in a production environment Entrust recommends that this field is set to Automatic Mode. The mode can also be changed later using the Actions > Change to Automatic Mode menu. 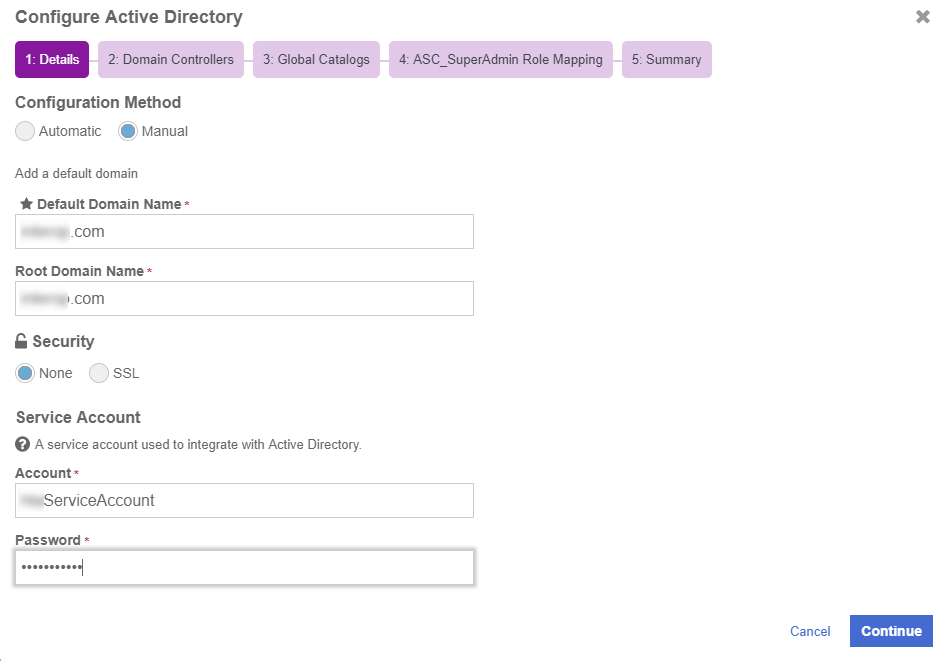
-
In the Domain Controllers tab, select the Add Domain Controller Now link.
-
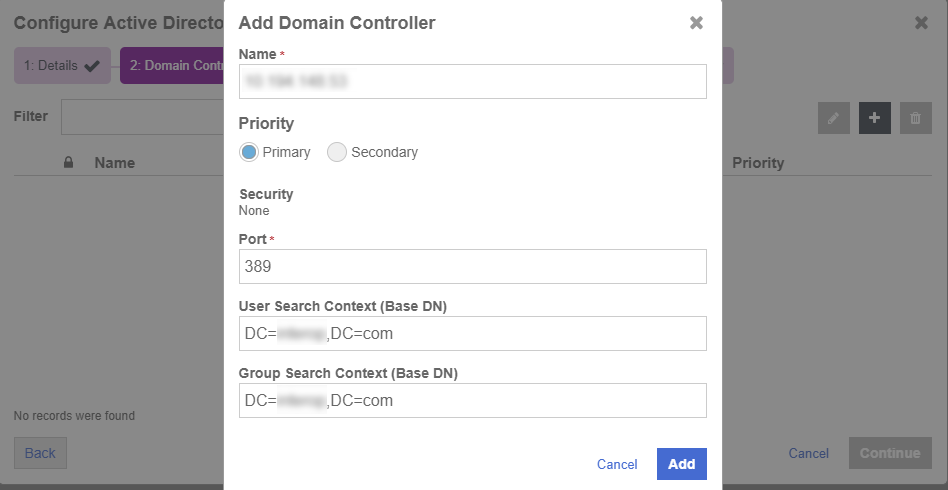
In the Add Domain Controller window, enter the following information:
Item Value Name
IP address/FQDN of the Active Directory server
Priority
Primary
Port
389 (for LDAP)
User Search Context (Base DN)
Your search context, for example, DC=example,DC=com
Group Search Context (Base DN)
Your search context, for example, DC=example,DC=com
-
Select Continue.
-
In the Global Catalogs tab, select the Add a Global Catalog Now link.
-
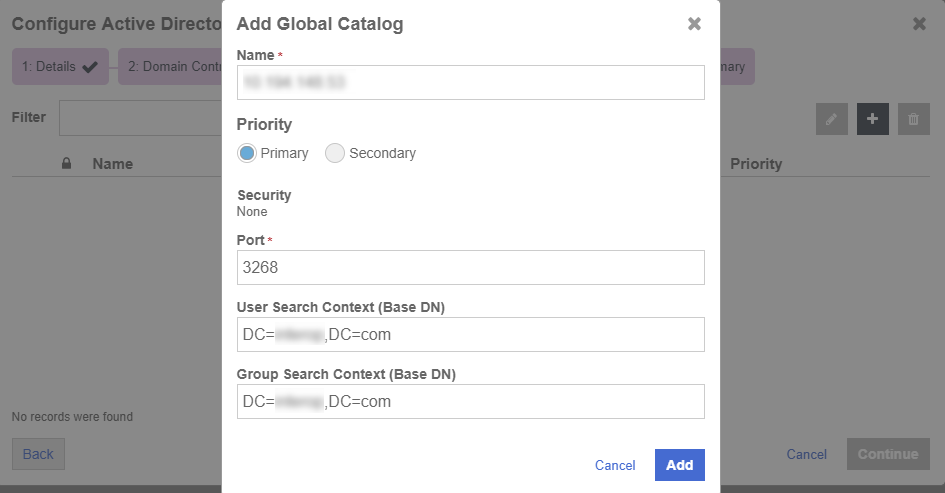
In the Add Global Catalog window, enter the following information:
Item Value Name
IP address/FQDN of the Active Directory server
Priority
Primary
Port
3268
User Search Context (Base DN)
Your search context, for example, DC=example,DC=com
Group Search Context (Base DN)
Your search context, for example, DC=example,DC=com
-
Select Add and then Continue.
-
In the Add Additional Domains window, select Skip.
-
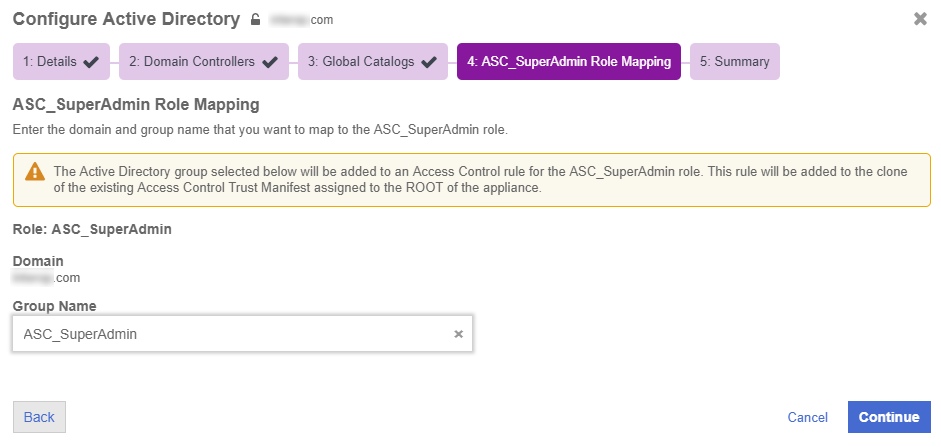
In the ASC_SuperAdmin Role Mapping tab, enter the Active Directory group created in Configure your Active Directory.
-
Select Continue.
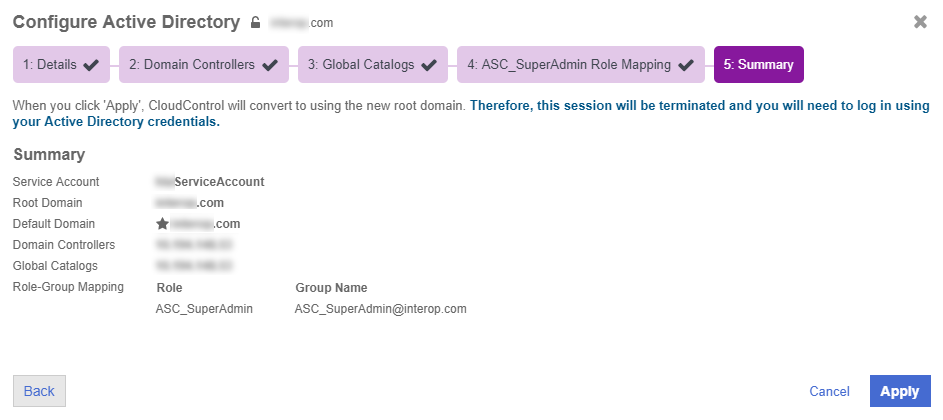
The summary window displays the details.
-
Select Apply to make the changes effective. A confirmation window is shown asking you to confirm the changes to Active Directory.
-
Select Apply AD Settings and Log Out.
-
Sign back in either of the two accounts etccadmin or etccuser in the ASC_SuperAdmin group in Active Directory.