Configure Entrust KeyControl as GCP KMS
Create an Entrust KeyControl CSP account for the GCP service account
The following steps establish the connection between Entrust KeyControl and GCP, making Entrust KeyControl the CSP of the GCP service account.
-
Sign in to the Entrust KeyControl Vault URL bookmark from [create-keycontrol-vault].
-
Select the CLOUDKEYS icon on the toolbar.
-
Select the CSP Accounts tab.
-
Select the Action icon and then Add CSP Account from the drop-down menu that appears.
The Add CSP Account dialog appears.
-
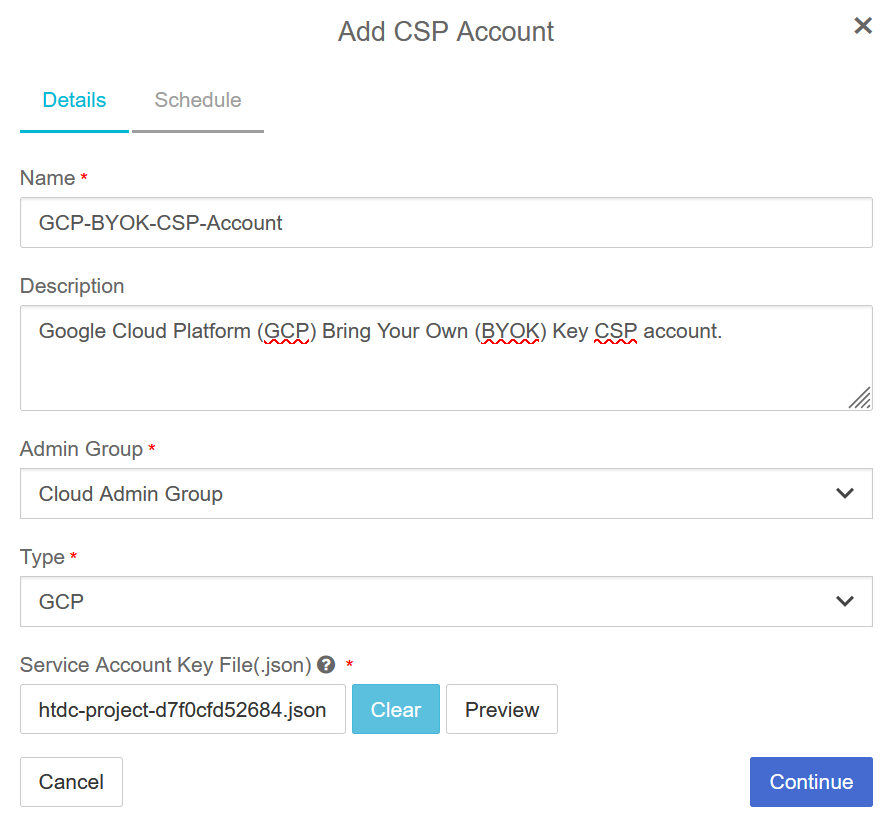
In the Details tab, enter the Name and Description.
-
From the Admin Group drop-down menu box, select Cloud Admin Group.
-
From the Type drop-down menu box, select GCP.
-
In the Service Account Key File (.json) field, select the file download to your computer in [create-key-for-service-account].
For example:

-
Select Continue.
-
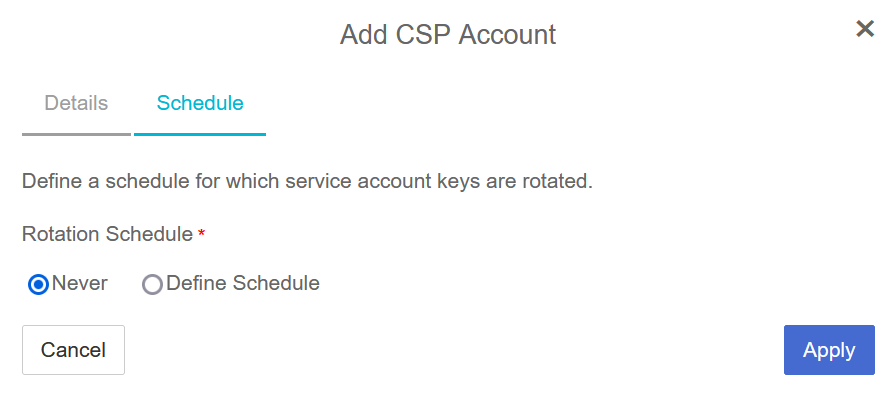
In the Schedule tab, select Never.
For example:

-
Select Apply.
The new CSP account is created.

Verify the connection between Entrust KeyControl and GCP
The key created in [create-key-for-service-account] was rotated automatically after the CSP account was created. The key in the downloaded file is no longer valid. Verify the new key as follows.
-
Select the newly created CSP account in Create an Entrust KeyControl CSP account for the GCP service account.
-
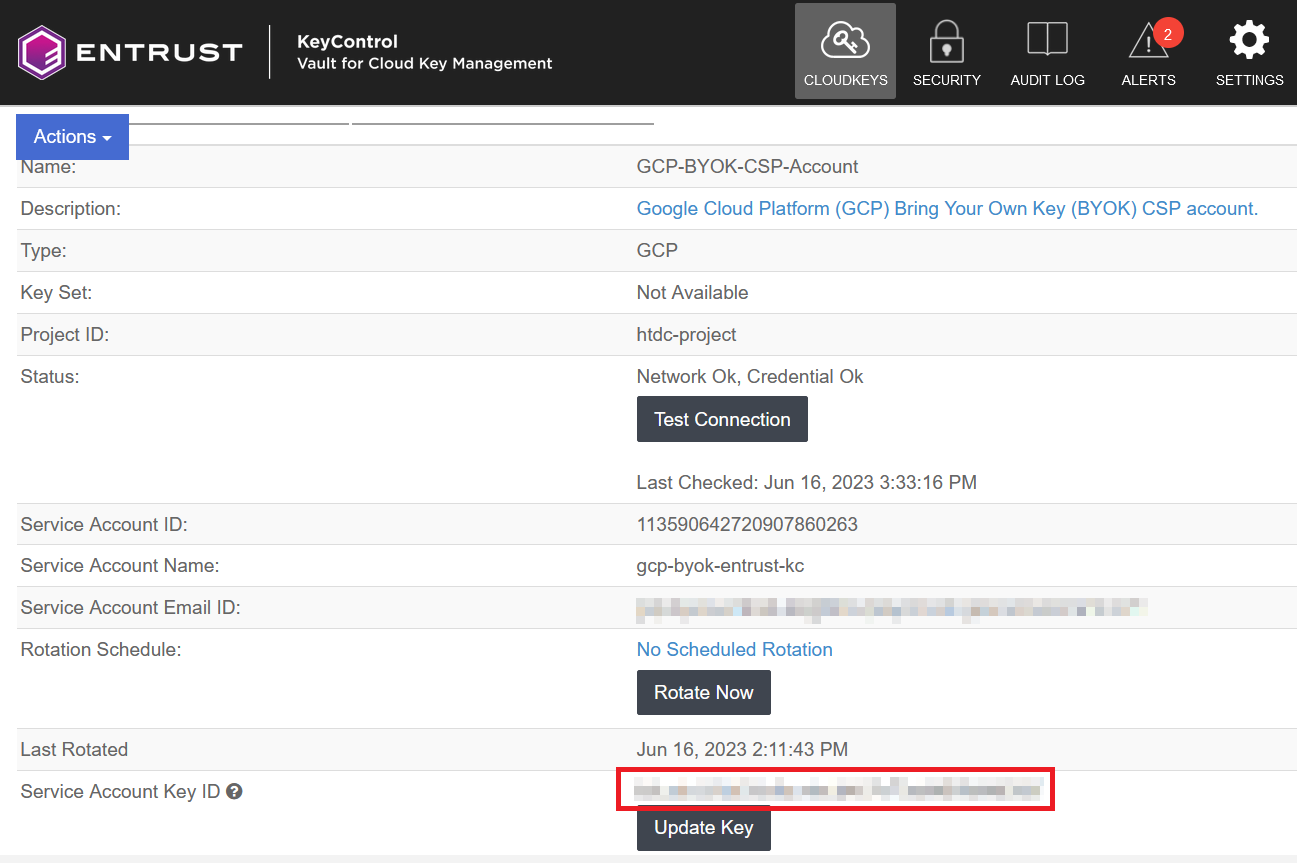
Scroll down until you see Service Account Key ID. Note the value.
For example:

-
Open a browser and sign in to the GCP portal https://console.cloud.google.com.
-
Select IAM & Admin on the Welcome screen.
-
Select Service Accounts in the left-hand pane.
-
Select your service account and then select the KEYS tab.
-
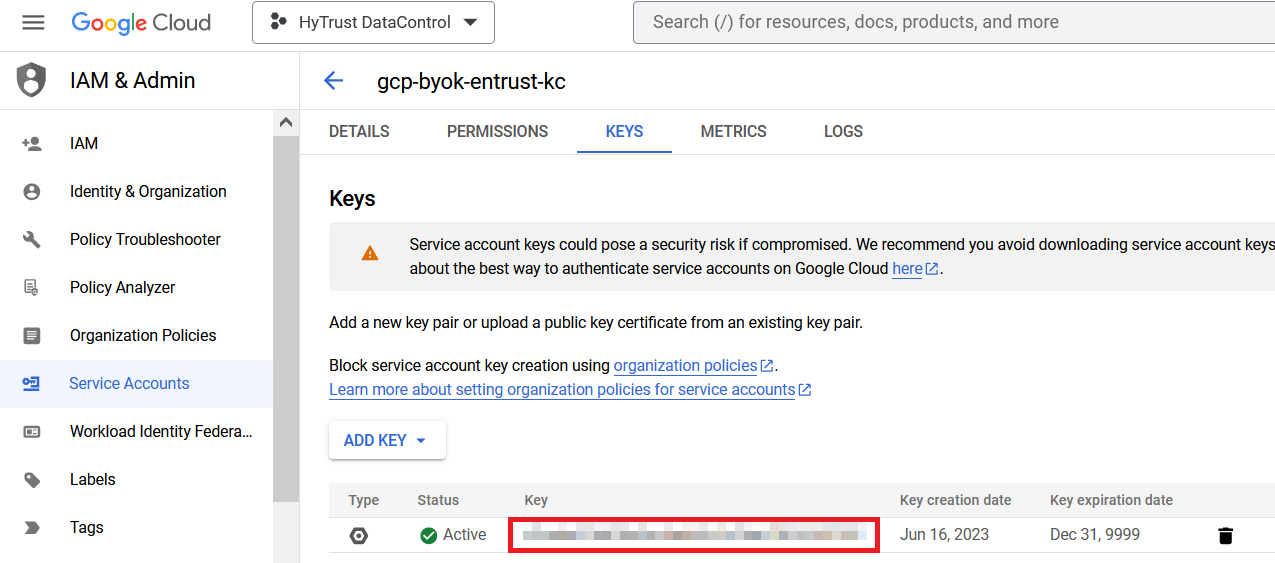
Check that the key is the same as the Service Account Key ID in Entrust KeyControl.
For example:
