Deploy Cryptographic Security Platform Key Management Vault
Deploy a Cryptographic Security Platform Key Management Vault cluster
For this integration, a two-node cluster was deployed.
Follow the installation and setup instructions in the Entrust Cryptographic Security Platform Key Management Vault nShield® HSM Integration Guide. You can access it from the Entrust Document Library and from the nShield Product Documentation website.
Ensure that the KMIP Key Management Vault has been created and that certificates have been generated for NetApp ONTAP. These certificates are used in the configuration of the KMS described below.
Add a record in your DNS server for the Cryptographic Security Platform Key Management Vault cluster. Associate all Cryptographic Security Platform Key Management Vault cluster node IP addresses with the same record.
The following sections describe how to create the KMIP Key Management Vault and certificates.
Create a KMIP Vault in Cryptographic Security Platform Key Management Vault
The Cryptographic Security Platform Key Management Vault appliance supports different types of vaults that can be used by all types of applications. This section describes how to create a KMIP Vault in the Cryptographic Security Platform Key Management Vault Server.
Refer to Cryptographic Security Platform Vault for KMIP for more details.
-
Sign in to the Key Management Vault Server web user interface:
-
Use your browser to access the IP address of the server.
-
Sign in using the secroot credentials.
-
-
If not in the Vault Management interface, in the top menu bar, on the right side, select Switch to: Manage Vaults.
-
In the Key Management Vault interface, select Create Vault.
-
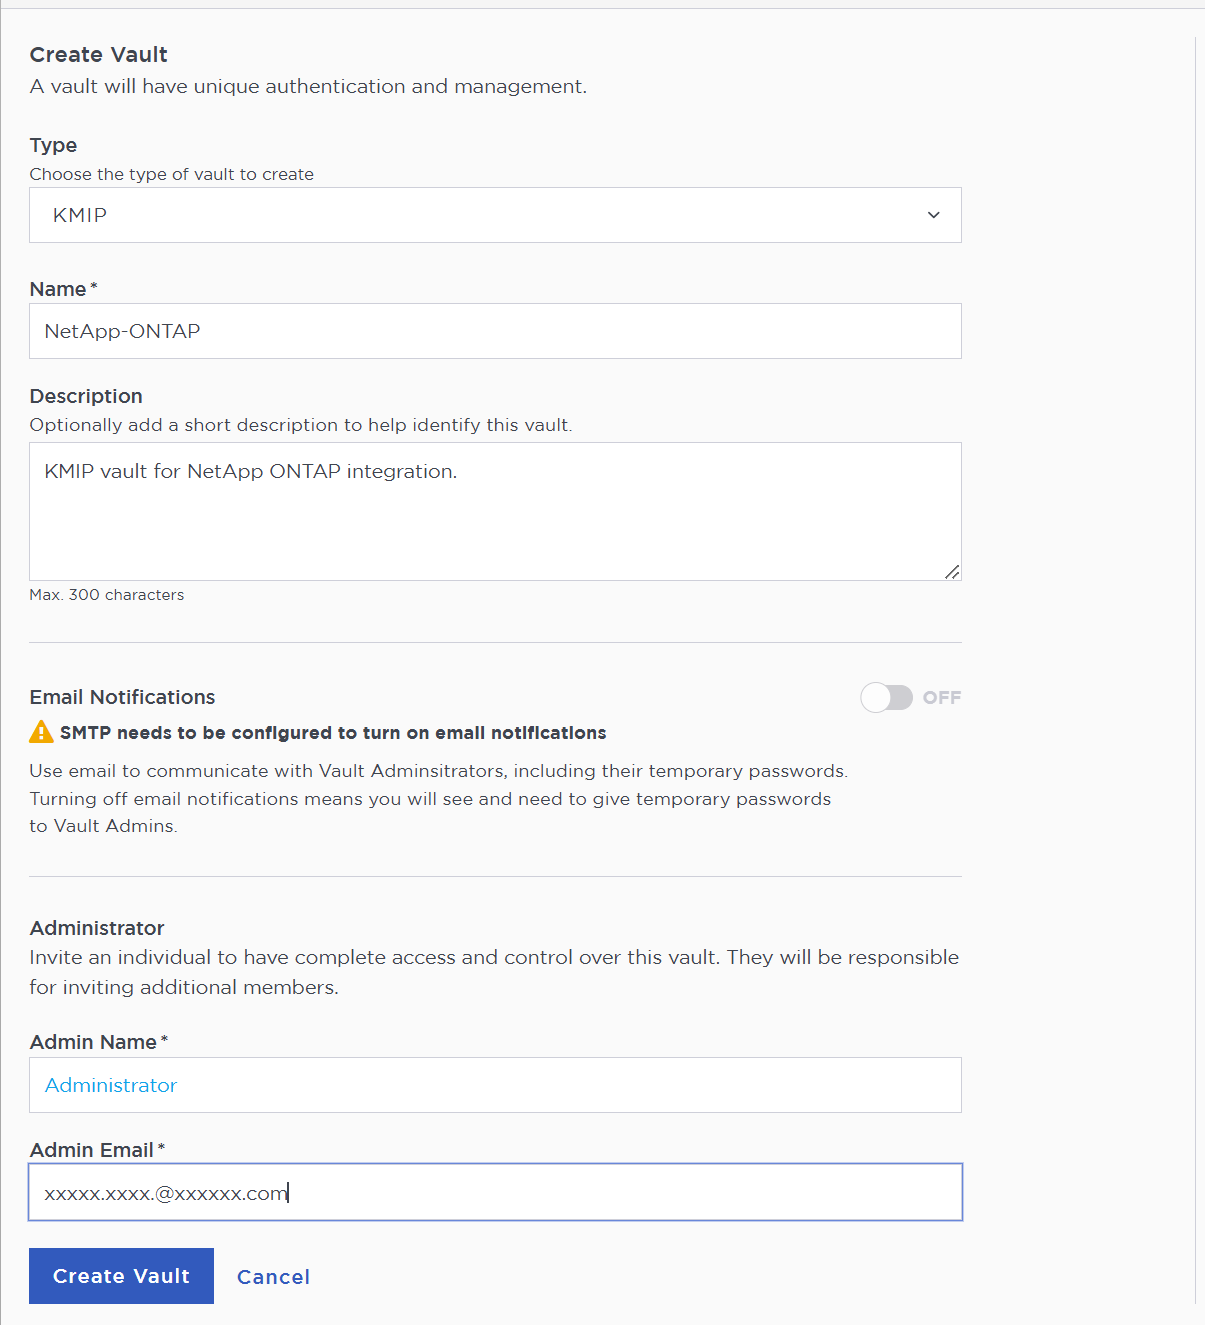
In the Create Vault page, create a KMIP Vault:
-
For the Type, select KMIP.
-
If you are using email to communicate with vault administrators, toggle Email Notifications to On.
You must have SMTP configured to use this feature. -
Complete the other fields as required.
For example:
-
-
Select Create Vault.
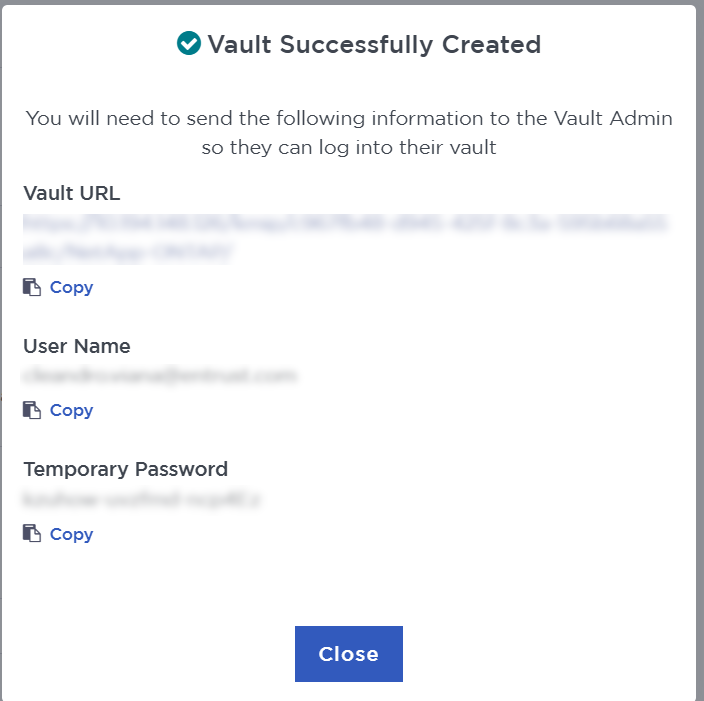
When created, the new vault’s URL and sign-in credentials are emailed to the email address entered in the Admin Email field. This is the temporary password for the first sign-in to the KMIP vault in Cryptographic Security Platform Key Management Vault. In closed gap environments where email is not available, the URL and sign-in credentials are displayed in the Vault Successfully Created dialog. These can be copied and sent to the user.
-
Bookmark the KMIP vault URL and, if required, save the user name and temporary password.
-
Select Close.
-
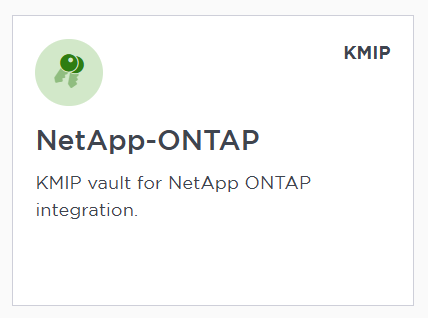
The newly created Vault is added to the Vault Management dashboard and the KMIP server settings on the appliance are enabled.
For example:
-
In a web browser, navigate to the vault URL and sign in using the user name and temporary password. Change the initial password when prompted.
-
Sign in again to verify.
KMIP server settings
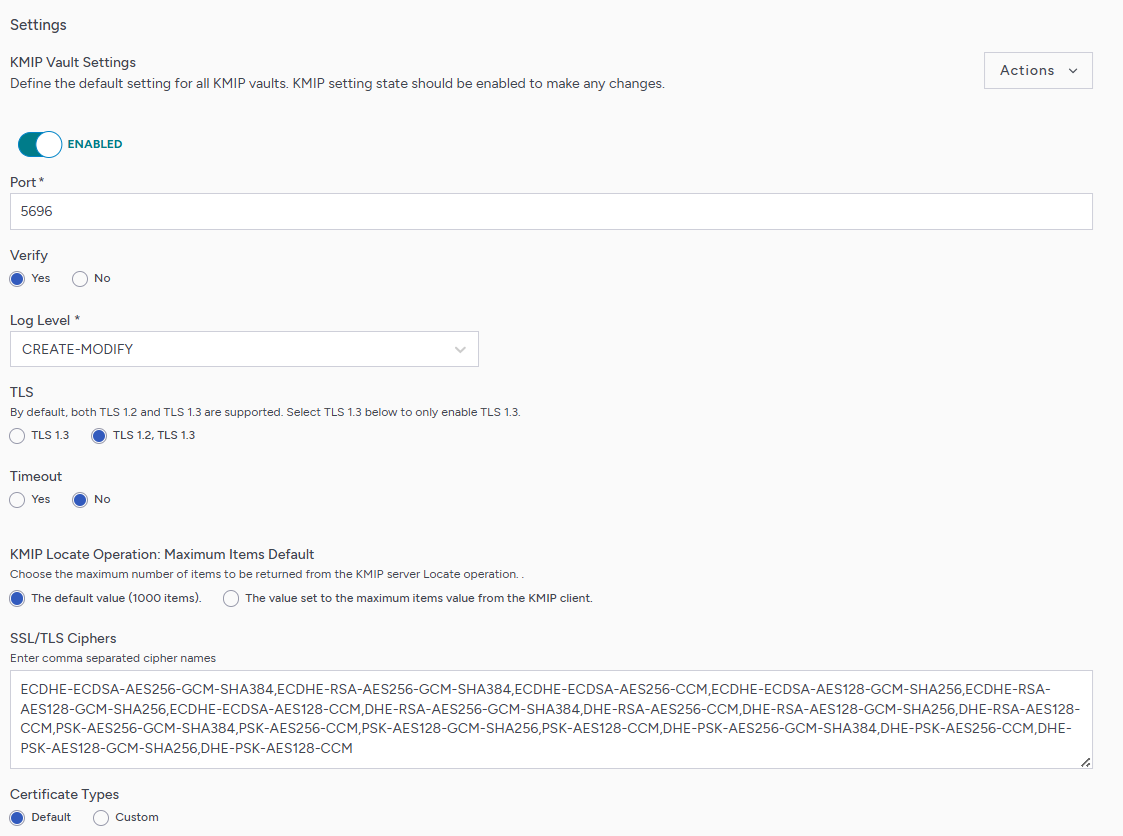
The KMIP server settings are set at the Cryptographic Security Platform Key Management Vault appliance level and apply to all the KMIP vaults in the appliance. After a KMIP vault is created, it is automatically set to ENABLED.
To use external key management and configure the Cryptographic Security Platform Key Management Vault KMIP settings, refer to the Cryptographic Security Platform Key Management Vault for KMIP section of the admin guide.
When using external key management, as required for this integration, the Cryptographic Security Platform Key Management Vault server is the KMIP server and the NetApp server is the KMIP client.
-
Sign in to the Key Management Vault server vault management UI as secroot.
-
Select the Settings icon on the top right to view or change the KMIP settings.
The default settings are appropriate for most applications but you can change settings to suit your environment.
-
If you changed any settings, select Apply.
Install a signed certificate from your local root CA in the Cryptographic Security Platform Key Management Vault cluster
You can use any CA for this integration. This guide describes an integration in which a Microsoft Windows CA was configured as a local root CA.
Create a CSR
-
Sign in to the Key Management Vault server vault management UI as secroot.
-
In the Vault Management dashboard, select the Settings icon on the top right.
-
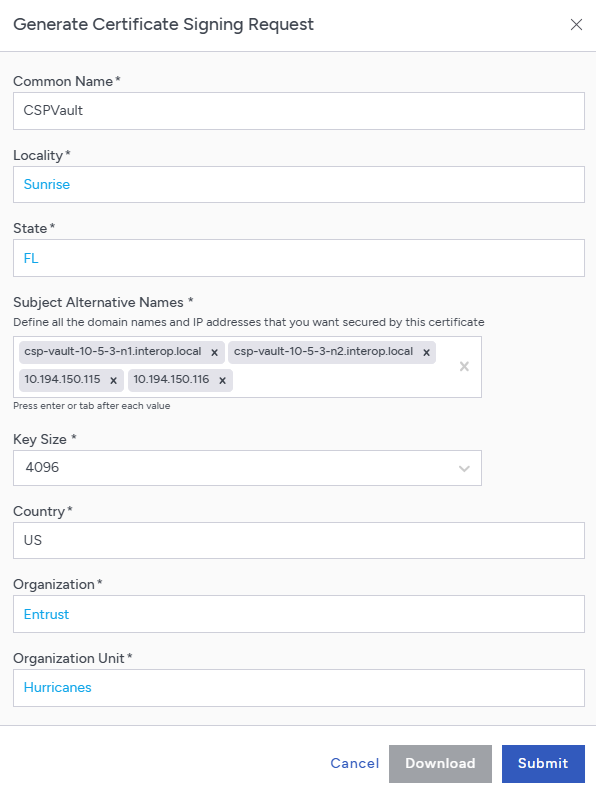
From the Action drop-down menu, select Generate CSR.
-
Enter your information.
Include the FQDN and/or IP of all the Key Management Vault nodes in the Subject Alternative Names.
For example:
-
Select Submit.
-
After submitting the CSR, select Download. The CSR pem file is downloaded to your Downloads folder.
-
Store the file for signing in the next section.
Sign the CSR and issue a certificate
-
Sign in to your local root CA with administrator privileges.
-
Transfer the CSR created above to a local folder on the local root CA server, such as the Downloads folder.
-
Launch the Certificate Authority application.
-
Right-click on the <certification authority name> in the left pane and select All Tasks > Submit new request….
-
Select the copied CSR.
-
Select <certification authority name> > Pending Request in the left pane.
-
Right-click on the request in the right pane and select All Tasks > Issue.
-
Select certification authority name > Issued Certificates in the left pane.
-
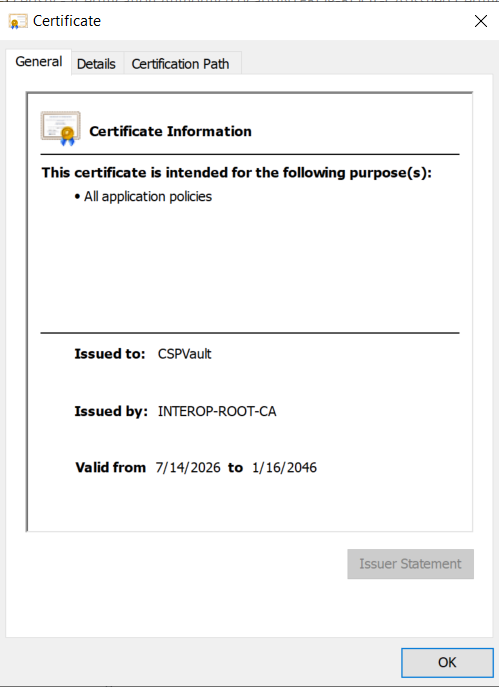
Select the certificate.
For example:
-
On the Details tab, select Copy to File….
-
Follow the instructions, selecting Base-64 encoded X.509 as the Export File Format. Save as
cspvaultin theDownloadsfolder. -
Export the local root CA certificate as a
cerfile:PS C:> certutil -store Root "INTEROP-ROOT-CA" .\rootcacert.cer Root "Trusted Root Certification Authorities" ================ Certificate 9 ================ Serial Number: 289aeb6982de70894c2e8e29402a268a Issuer: CN=INTEROP-ROOT-CA NotBefore: 1/16/2026 3:56 PM NotAfter: 1/16/2046 4:06 PM Subject: CN=INTEROP-ROOT-CA CA Version: V0.0 Signature matches Public Key Root Certificate: Subject matches Issuer Cert Hash(sha1): 2384515ade8d26d8ad04866d2bfe63fc453de58a No key provider information Provider = Microsoft Software Key Storage Provider Simple container name: INTEROP-ROOT-CA Unique container name: 4b8be25ddd1badc35a2f2b7993eb732e_05c8de66-00f6-41ee-b681-f5c65b710b3f Signature test passed CertUtil: -store command completed successfully. -
Encode the certificate as a
pemfile:PS C:> certutil -encode rootcacert.cer rootcacert.pem Input Length = 527 Output Length = 782 CertUtil: -encode command completed successfully. -
Copy the
cspvault.cercertificate and therootcacert.pemto a location accessible by the Key Management Vault server.
Install certificate
-
Sign in to the Key Management Vault server vault management UI as secroot.
-
In the Vault Management dashboard, select the Settings icon on the top right.
-
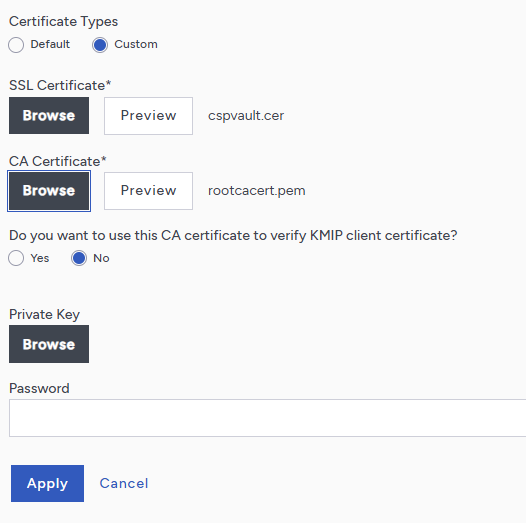
In Certificate Types, select Custom.
-
Browse to and select the certificate as shown.
-
If required, make any other changes, however the other default settings are appropriate for most applications.
-
Select Apply.