Configure SQL EKM
Enable EKM and register the SQLEKM provider
To enable EKM and register the SQLEKM provider:
-
Launch the SQL Server Management Studio GUI.
-
Enable EKM by executing the following query:
sp_configure 'show advanced', 1
GO
RECONFIGURE
GO
sp_configure 'EKM provider enabled', 1
GO
RECONFIGURE
GO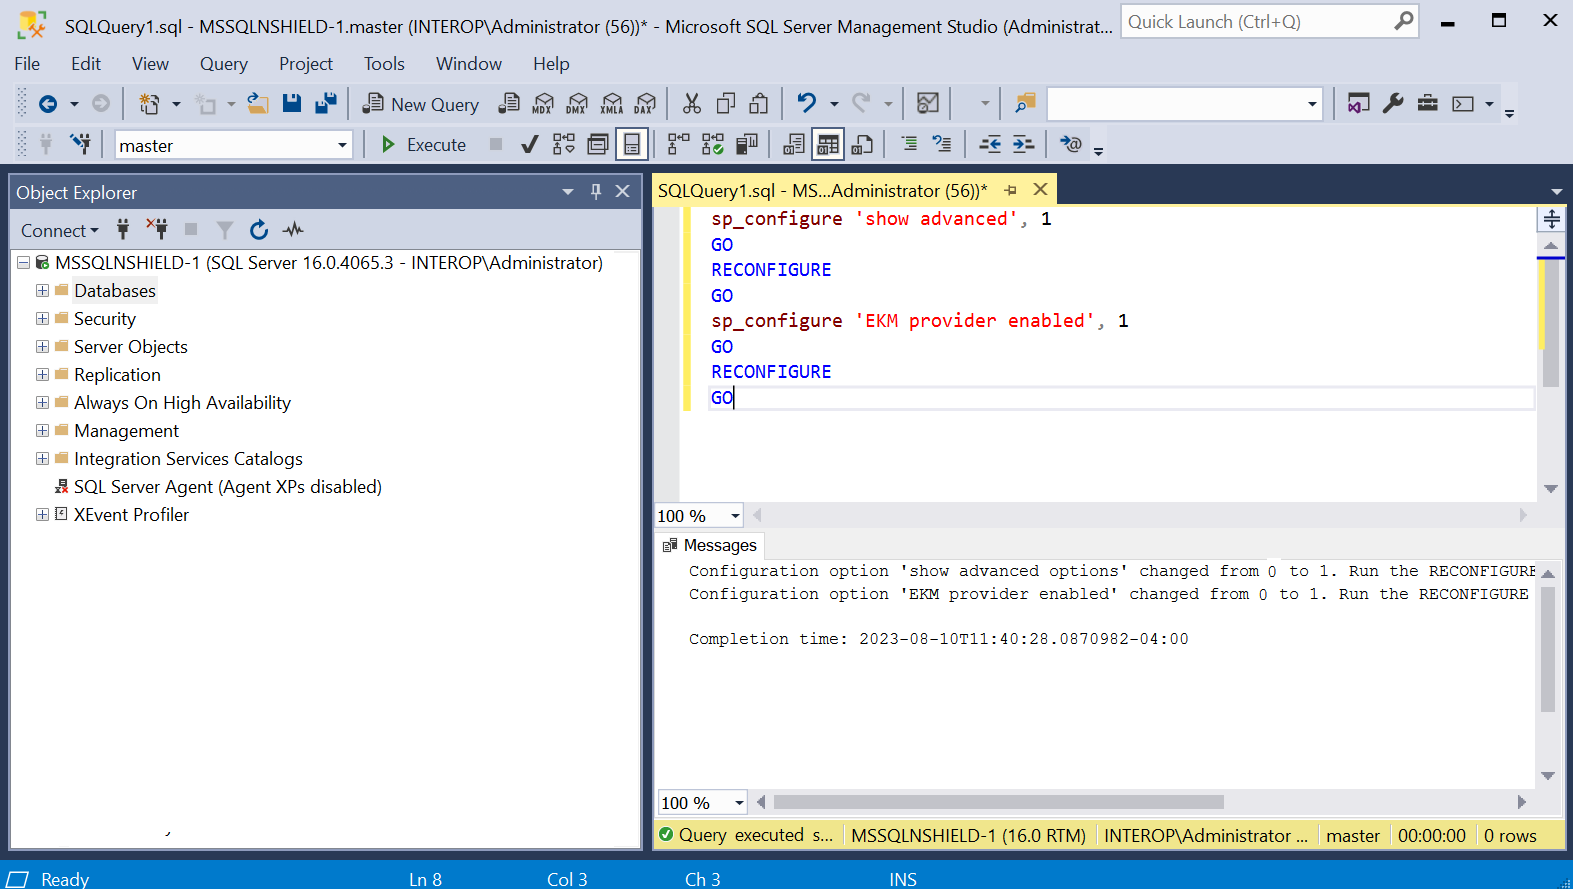
-
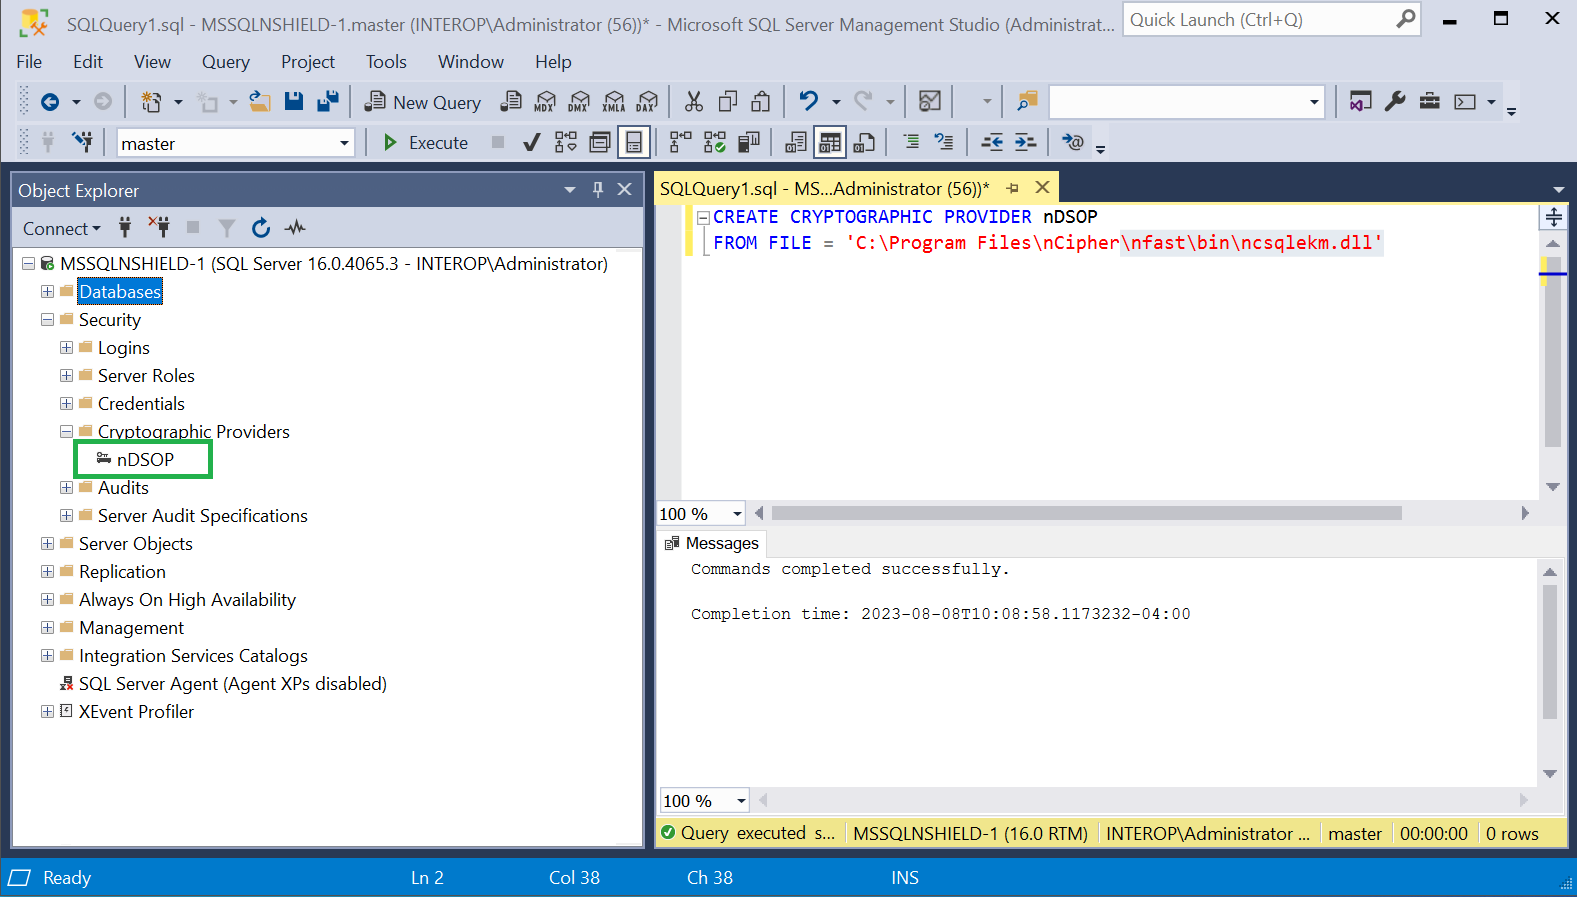
Register the SQLEKM provider with the SQL Server by executing the following query:
CREATE CRYPTOGRAPHIC PROVIDER nDSOP FROM FILE = 'C:\Program Files\nCipher\nfast\bin\ncsqlekm.dll' -
Check the SQLEKM provider is listed in the SQL Server Management Studio GUI. Go to Security > Cryptographic Providers. nDSOP should be visible. Right-click it to verify that it is enabled.
Verify the SQLEKM provider configuration
To verify the SQLEKM provider configuration:
-
Run the following query:
SELECT * FROM sys.cryptographic_providers;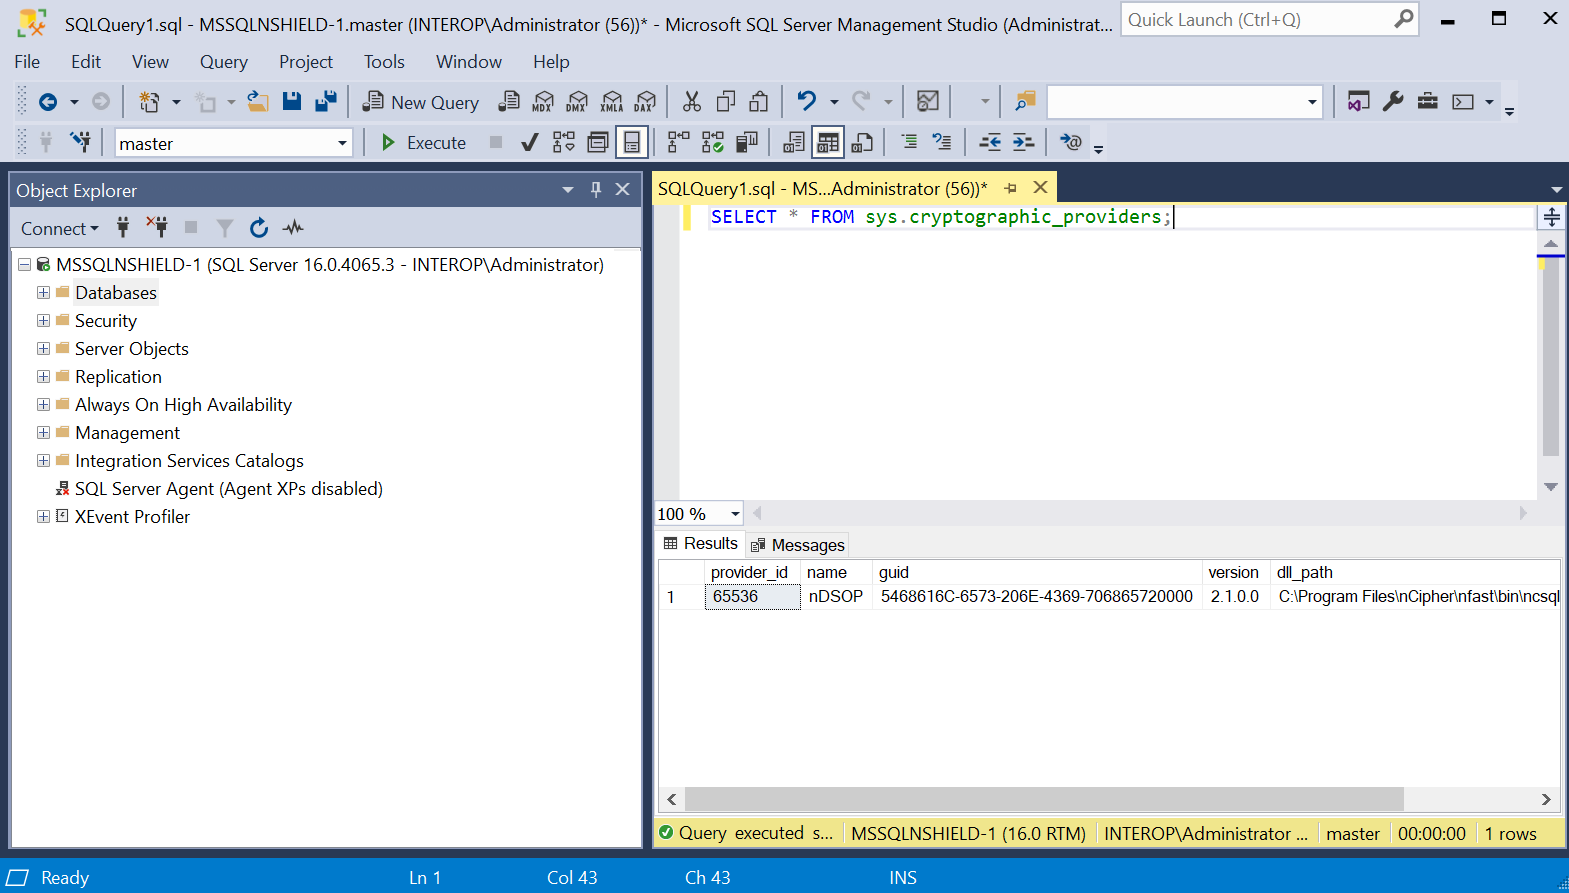
Verify the following:
-
The version matched that of the nDSOP installation
iso. -
Path to
dllis correct. -
is_enabled column set to 1.
-
-
Run the following query:
SELECT * FROM sys.dm_cryptographic_provider_properties;
Verify the following:
Column Value friendly_name
nCipher SQLEKM Provider
authentication_type
BASIC
symmetric_key_support
1
asymmetric_key_support
1
-
Verify the supported cryptographic algorithms can be queried by running the following query:
DECLARE @ProviderId int;
SET @ProviderId = (SELECT TOP(1) provider_id FROM sys.dm_cryptographic_provider_properties
WHERE friendly_name LIKE 'nCipher SQLEKM Provider');
SELECT * FROM sys.dm_cryptographic_provider_algorithms(@ProviderId);
GO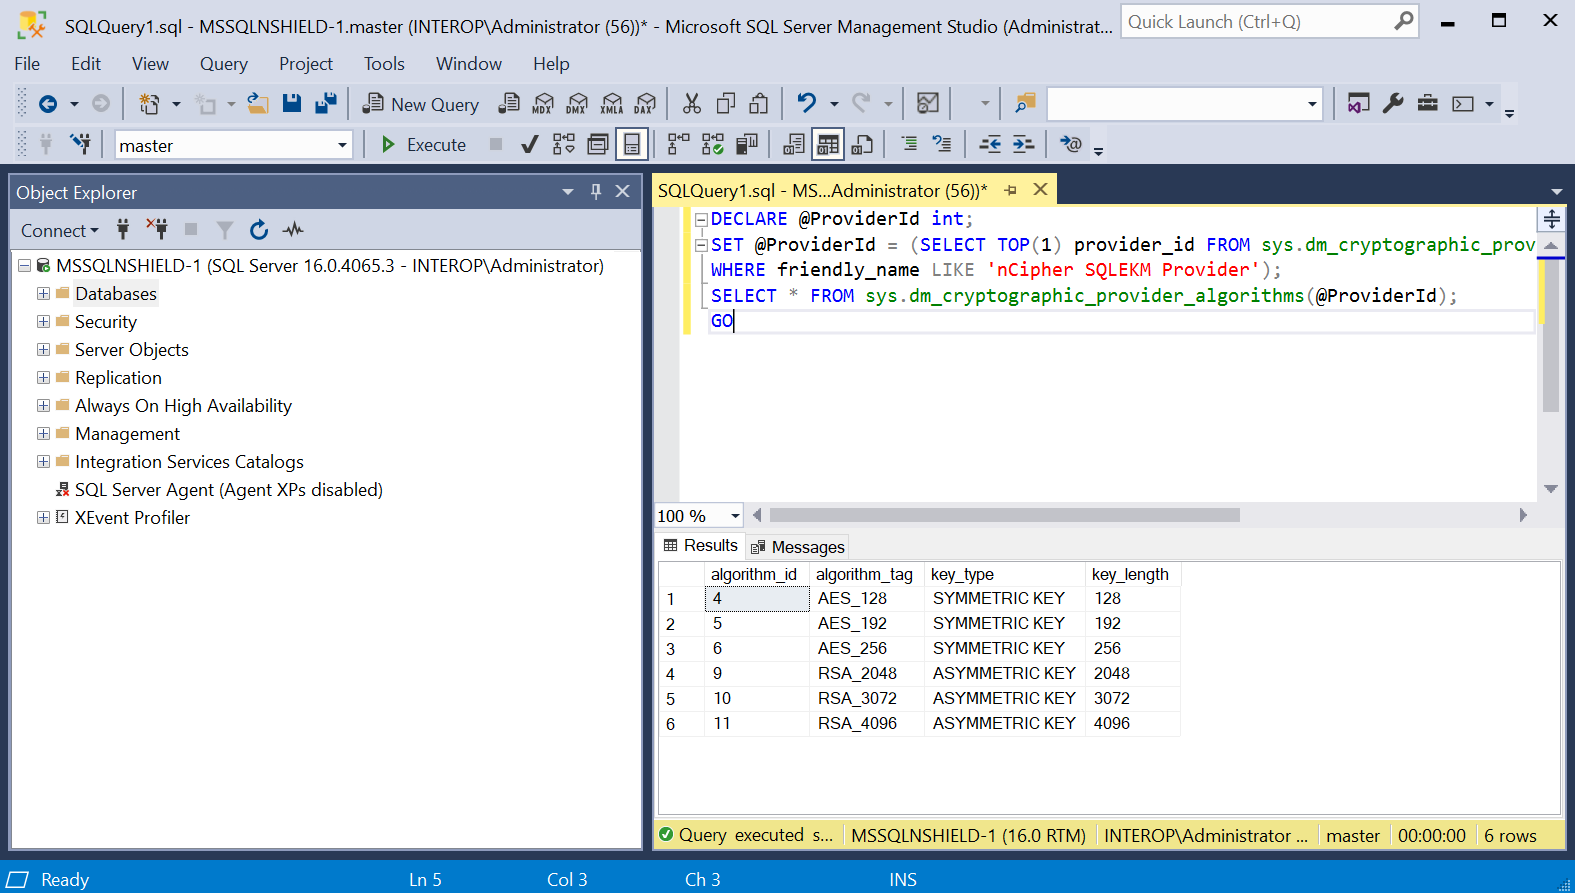
Notice each key type has its set of valid algorithms.
Key Type Algorithm Symmetric
AES_128, AES_192, ASE_256
Asymmetric
RSA_2048, RSA_3072, RSA_4096
Create the user SQL Server credential
To create the user SQL Server credential:
-
Verify the OCS or Softcard created above:
> nfkminfo -c Cardset list - 1 cardsets: (P)ersistent/(N)ot, (R)emoteable/(L)ocal-only Operator logical token hash k/n timeout name edb3d45a28e5a6b22b033684ce589d9e198272c2 1/5 none-NL testOCS > nfkminfo -s SoftCard summary - 1 softcards: Operator logical token hash name 925f67e72ea3c354cae4e6797bde3753d24e7744 testSC -
Insert the OCS in the HSM slot or TVD. If using Softcard protection, no action is needed.
-
Navigate to Security > Credentials in SQL Server Management Studio.
-
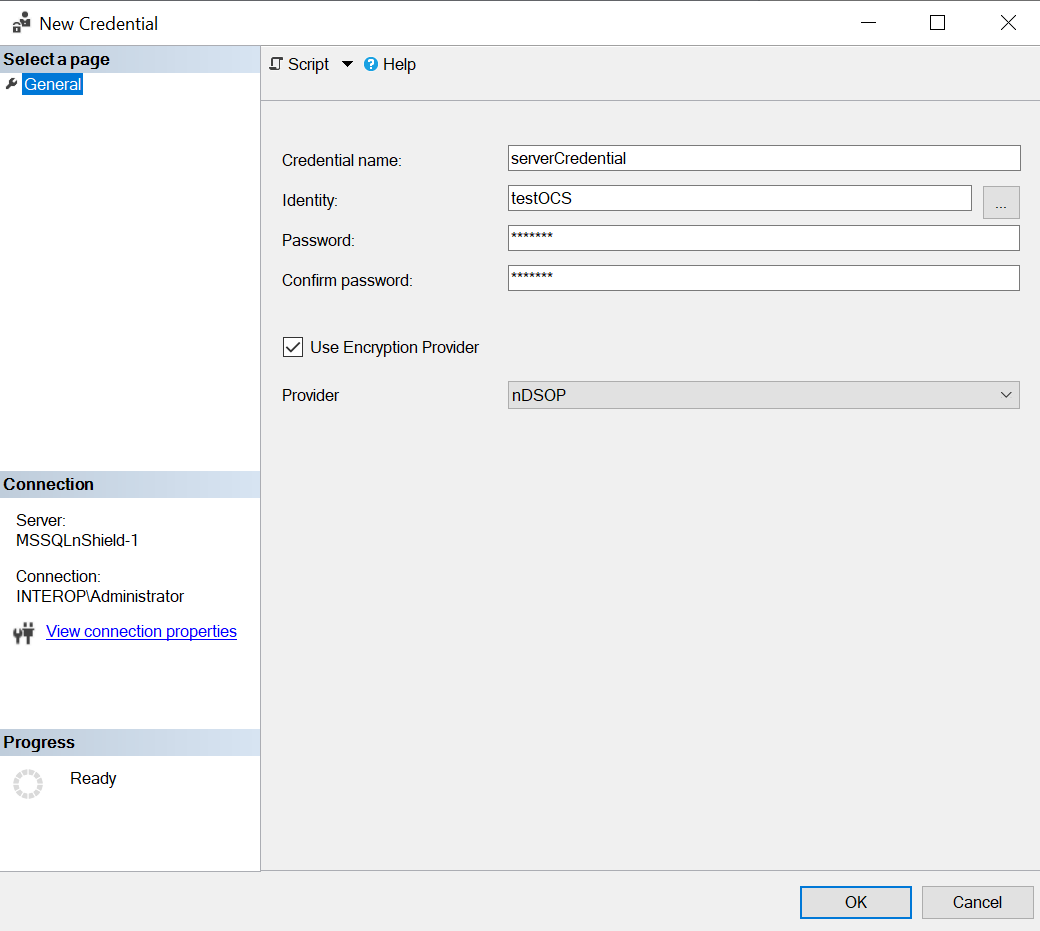
Right-click Credentials, then select New Credential.
-
Under New Credential:
-
Enter the Credential name.
-
For Identity, enter the OCS card or Softcard name.
-
Enter the passphrase of the OCS card or Softcard.
-
Select Use Encryption Provider.
-
For Provider, select nDSOP.
-
Select OK.
-
-
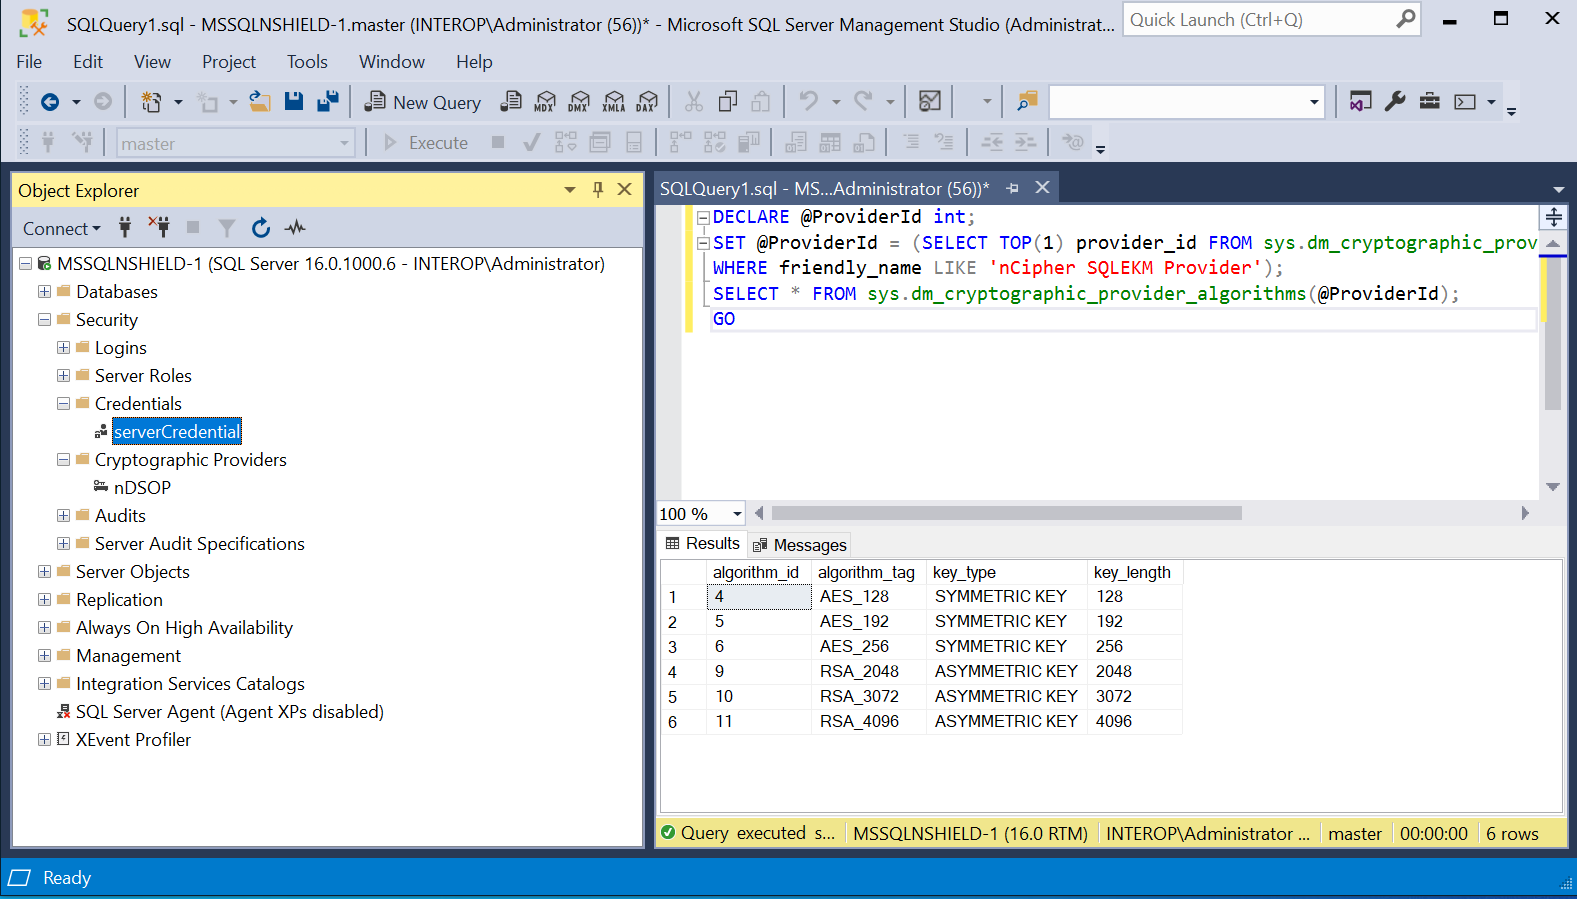
Verify the new credential in Security > Credentials. You may need to right-click and select Refresh.
-
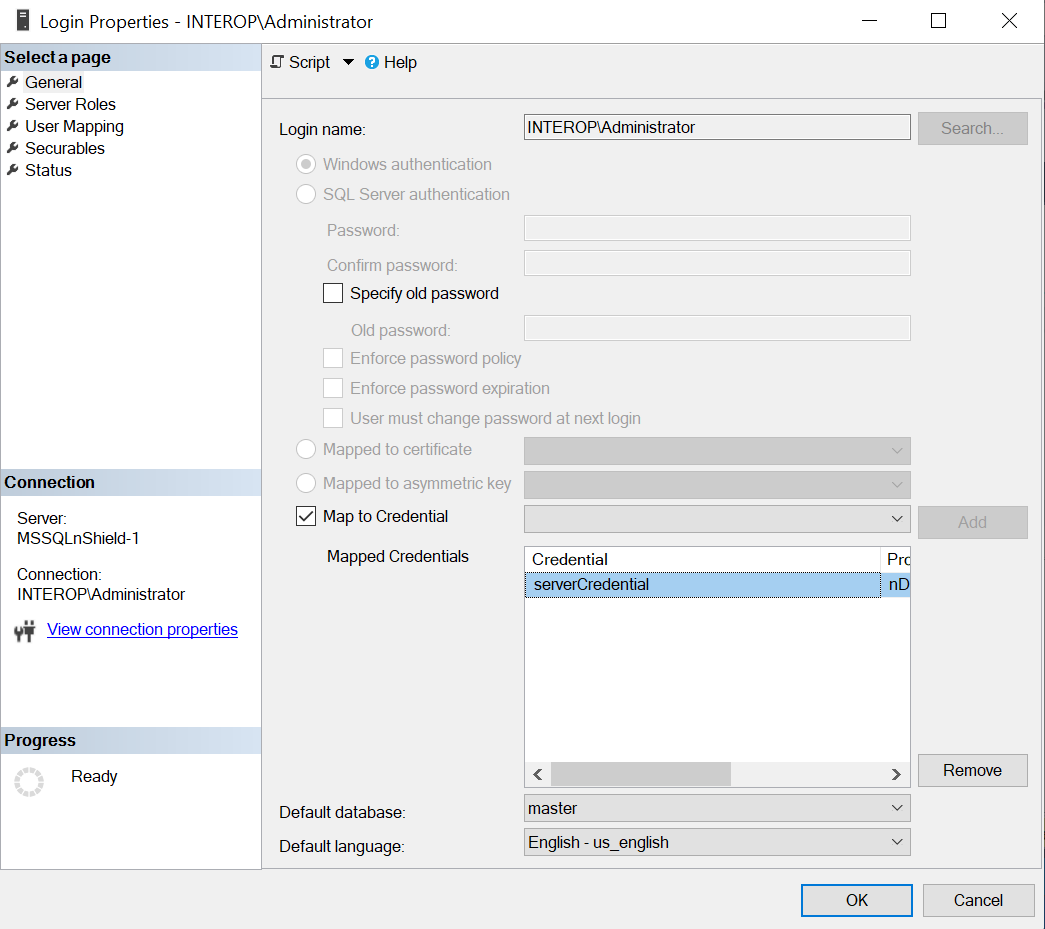
Navigate to Security > Logins. Right-click the login used to access the TestDatabase and select Properties.
-
Check Map to Credentials in the dialog. Select the server credential created above in the drop-down to the right. Then select Add, and select OK.