Install and configure the nShield HSM CNG provider
These steps must be performed on the Windows PC (client) using the <domain_name>\Administrator account.
Install the Entrust nShield HSM
Install the nShield Connect HSM locally, remotely, or remotely via the serial console. Condensed instructions are available in the following Entrust nShield Support articles.
For detailed instructions see the nShield v13.6.12 Hardware Install and Setup Guides.
Install the Security World software and create a Security World
-
Install the Security World software. For detailed instructions see the nShield Security World Software v13.6.12 Installation Guide.
-
Install hotfix-TAC1266 if multiple Windows user accounts need access to the same data. Contact nShield support to download the Hotfix. To perform the installation:
-
Open a command window as Administrator and uninstall the CNG:
C:\Users\Administrator>"C:\Program Files\nCipher\nfast\bin\cnginstall32" --uninstall nckspsw.dll removed. ncpp.dll removed. C:\Users\Administrator>"C:\Program Files\nCipher\nfast\bin\cnginstall" --uninstall nckspsw.dll removed. ncpp.dll removed. -
Reboot the server.
-
Copy files as per the installation instructions in the Hotfix package:
C:\Users\Administrator>copy C:\Users\Administrator\Downloads\hotfix-TAC1266\hotfix-TAC1266\nfast\c\caping\vs2022-64\lib\* "C:\Program Files\nCipher\nfast\c\caping\vs2022-64\lib\." C:\Users\Administrator\Downloads\hotfix-TAC1266\hotfix-TAC1266\nfast\c\caping\vs2022-64\lib\nckspsw.dll Overwrite C:\Program Files\nCipher\nfast\c\caping\vs2022-64\lib\.\nckspsw.dll? (Yes/No/All): All C:\Users\Administrator\Downloads\hotfix-TAC1266\hotfix-TAC1266\nfast\c\caping\vs2022-64\lib\nckspsw.lib C:\Users\Administrator\Downloads\hotfix-TAC1266\hotfix-TAC1266\nfast\c\caping\vs2022-64\lib\nckspsw.map C:\Users\Administrator\Downloads\hotfix-TAC1266\hotfix-TAC1266\nfast\c\caping\vs2022-64\lib\nckspsw.pdb C:\Users\Administrator\Downloads\hotfix-TAC1266\hotfix-TAC1266\nfast\c\caping\vs2022-64\lib\ncpp.dll C:\Users\Administrator\Downloads\hotfix-TAC1266\hotfix-TAC1266\nfast\c\caping\vs2022-64\lib\ncpp.lib C:\Users\Administrator\Downloads\hotfix-TAC1266\hotfix-TAC1266\nfast\c\caping\vs2022-64\lib\ncpp.map C:\Users\Administrator\Downloads\hotfix-TAC1266\hotfix-TAC1266\nfast\c\caping\vs2022-64\lib\ncpp.pdb 8 file(s) copied. C:\Users\Administrator>copy C:\Users\Administrator\Downloads\hotfix-TAC1266\hotfix-TAC1266\nfast\c\caping\vs2022-32\lib\* "C:\Program Files\nCipher\nfast\c\caping\vs2022-32\lib\." C:\Users\Administrator\Downloads\hotfix-TAC1266\hotfix-TAC1266\nfast\c\caping\vs2022-32\lib\nckspsw.dll Overwrite C:\Program Files\nCipher\nfast\c\caping\vs2022-32\lib\.\nckspsw.dll? (Yes/No/All): All C:\Users\Administrator\Downloads\hotfix-TAC1266\hotfix-TAC1266\nfast\c\caping\vs2022-32\lib\nckspsw.lib C:\Users\Administrator\Downloads\hotfix-TAC1266\hotfix-TAC1266\nfast\c\caping\vs2022-32\lib\nckspsw.map C:\Users\Administrator\Downloads\hotfix-TAC1266\hotfix-TAC1266\nfast\c\caping\vs2022-32\lib\nckspsw.pdb C:\Users\Administrator\Downloads\hotfix-TAC1266\hotfix-TAC1266\nfast\c\caping\vs2022-32\lib\ncpp.dll C:\Users\Administrator\Downloads\hotfix-TAC1266\hotfix-TAC1266\nfast\c\caping\vs2022-32\lib\ncpp.lib C:\Users\Administrator\Downloads\hotfix-TAC1266\hotfix-TAC1266\nfast\c\caping\vs2022-32\lib\ncpp.map C:\Users\Administrator\Downloads\hotfix-TAC1266\hotfix-TAC1266\nfast\c\caping\vs2022-32\lib\ncpp.pdb 8 file(s) copied. C:\Users\Administrator>copy C:\Users\Administrator\Downloads\hotfix-TAC1266\hotfix-TAC1266\nfast\lib\versions\caping-atv.txt "C:\Program Files\nCipher\nfast\lib\versions\." Overwrite C:\Program Files\nCipher\nfast\lib\versions\.\caping-atv.txt? (Yes/No/All): All 1 file(s) copied. -
Open a command window as Administrator and install the CNG (64 bit). See
C:\Program Files\nCipher\nfast\binfor 32 bit utilities (e.g. cnginstall32).C:\Users\Administrator>"C:\Program Files\nCipher\nfast\bin\cngregister" -U C:\Users\Administrator>"C:\Program Files\nCipher\nfast\bin\cnginstall" -U C:\Users\Administrator>"C:\Program Files\nCipher\nfast\bin\cnginstall" --install nckspsw.dll installed. ncpp.dll installed. C:\Users\Administrator>"C:\Program Files\nCipher\nfast\bin\cngregister" Provider 'nCipher Primitive Provider' registered successfully Algorithm SHA1 registered successfully Algorithm SHA256 registered successfully Algorithm SHA384 registered successfully Algorithm SHA512 registered successfully Algorithm SHA224 registered successfully Algorithm AES registered successfully Algorithm 3DES registered successfully Algorithm 3DES_112 registered successfully Algorithm RSA registered successfully Algorithm DSA registered successfully Algorithm ECDSA_P256 registered successfully Algorithm ECDSA_P384 registered successfully Algorithm ECDSA_P521 registered successfully Algorithm ECDSA_P224 registered successfully Algorithm DH registered successfully Algorithm ECDH_P256 registered successfully Algorithm ECDH_P384 registered successfully Algorithm ECDH_P521 registered successfully Algorithm ECDH_P224 registered successfully Algorithm RNG registered successfully Provider 'nCipher Security World Key Storage Provider' registered successfully Interface KEY_STORAGE registered successfully Created nShieldServiceAgent Run registry entry -
Reboot the server.
-
-
Add the Security World utilities path to the system path. This path is typically
C:\Program Files\nCipher\nfast\bin. -
Open the firewall port 9004 for the HSM connections.
-
If using remote administration, open firewall port 9005 for the Entrust nShield Trusted Verification Device (TVD).
-
Inform the HSM of the client’s location. In this integration the client is this machine. For instructions, see Configuring the nShield HSM to use the client. If it’s a high-availability setup, repeat the client configuration for each HSM.
-
Enroll this machine as a client of the HSM. For instructions, see Configuring client computers to use the nShield HSM. If it’s a high-availability setup, repeat the enrolment for each HSM.
-
Open a command window and run the following utility to confirm the HSM is operational:
C:\Users\Administrator>enquiry Server: enquiry reply flags none enquiry reply level Six serial number 8FE1-B519-C5AA 6308-03E0-D947 mode operational version 13.6.12 ... Module #1: enquiry reply flags UnprivOnly enquiry reply level Six serial number 8FE1-B519-C5AA mode operational version 13.4.5 ... Module #2: enquiry reply flags UnprivOnly enquiry reply level Six serial number 6308-03E0-D947 mode operational version 12.72.4 ... -
Create your Security World if one does not already exist or copy an existing one. Follow your organization’s security policy for this. For more information see Create a new Security World.
Administrator Card Set (ACS) cards cannot be duplicated after the Security World is created. You may want to create extras in case of a card failure or a lost card. -
Confirm the Security World is Usable:
>nfkminfo
World
 generation  2
 state       0x3737000c Initialised Usable ...
 ...
Module #1
 generation 2
 state      0x2 Usable
 ...
 Module #2
 generation 2
 state      0x2 Usable
 ...
Select the protection method
The following protection methods can be used to authorize access to the keys protected by the HSM. Typically, an organization’s security policies dictate the use of one or the other.
-
Operator Cards Set (OCS) are smartcards that are presented to the physical smartcard reader of an HSM. For more information on OCS use, properties, and K-of-N values, see Operator Card Sets (OCS).
-
Softcards are logical tokens (passphrases) that protect the key and authorize its use. For more information on softcards use, see Softcards.
-
Module protection has no passphrase.
Follow your organization’s security policy to select an authorization access method.
Depending on the protection method selected, you may need to define some environment variables.
You have the option to set these environment variables with the Windows set command, or edit file C:\Program Files\nCipher\nfast\cknfastrc.
As reference, all environment variables are listed in nShield PKCS #11 library environment variables.
Enable softcard protection:
C:\Users\Administrator.INTEROP>set CKNFAST_LOADSHARING=1
Enable Module protection:
>set CKNFAST_FAKE_ACCELERATOR_LOGIN=1
Sample C:\Program Files\nCipher\nfast\cknfastrc file:
# Enable Softcard protection
CKNFAST_LOADSHARING=1

# Enable Module protection
CKNFAST_FAKE_ACCELERATOR_LOGIN=1

# OCS Preload file location and card set state
NFAST_NFKM_TOKENSFILE="C:\Program Files\nCipher\nfast\preloadtoken"
CKNFAST_NONREMOVABLE=1
Create the OCS or Softcard
If using OCS protection, create the OCS now.
-
If using remote administration, edit file
C:\ProgramData\nCipher\Key Management Data\config\cardlistadding the serial number of the card(s) to be presented, or the wildcard "*". -
Open a command window as Administrator.
-
Run the
createocsutility as described below. Enter a passphrase or password at the prompt.Follow your organization’s security policy for the values K/N. In this example note that
slot 2remote via a TVD, is used to present the card, and K=1 and N=1.Administrator Card Set (ACS) authorization is required to create an OCS in FIPS 140 level 3.
After an OCS card set has been created, the cards cannot be duplicated. You may want to create extras in case of a card failure or a lost card.
The preload utility loads OCS onto the HSM. This feature makes the OCS available for use after been physically removed from the HSM for safe storage or other reasons. Add the -p (persistent) option to the command below to have authentication after the OCS card has been removed from the HSM front panel slot, or from the TVD.
> createocs -m1 -s2 -N testOCS -Q 1/1

FIPS 140-2 level 3 auth obtained.

Creating Cardset:
 Module 1: 0 cards of 1 written
 Module 1 slot 0: Admin Card #1
 Module 1 slot 2: empty
 Module 1 slot 3: empty
 Module 1 slot 2: blank cardSteps:

 Module 1 slot 2:- passphrase specified - writing card
Card writing complete.

cardset created; hkltu = a165a26f929841fe9ff2acdf4bb6141c1f1a2eed
The authentication provided by the OCS as shown in the command line above is non-persistent and only available while the OCS card is inserted in the HSM front panel slot, or the TVD.
-
Verify the OCS created:
>nfkminfo -c
Cardset list - 1 cardsets:  (P)ersistent/(N)ot, (R)emoteable/(L)ocal-only
 Operator logical token hash               k/n timeout  name
 7aaf758bc6790206198ea5218040d4faa09f035f  1/5  none-NL testOCSnopassphrase
The
rocsutility also shows the OCS created:>rocs `rocs' key recovery tool Useful commands: `help', `help intro', `quit'. rocs> list cardset No. Name Keys (recov) Sharing 1 testOCSnopassphrase 0 (0) 1 of 5 rocs> quit
If using Softcard protection, create the Softcard now.
-
Run the following utility and enter a passphrase/password at the prompt:
>ppmk -n testSC Enter new pass phrase: Enter new pass phrase again: New softcard created: HKLTU d9414ed688c6405aab675471d3722f8c70f5d864 -
Verify the Softcard was created:
>nfkminfo -s
SoftCard summary - 1 softcards:
 Operator logical token hash               name
 d9414ed688c6405aab675471d3722f8c70f5d864  testSC
The
rocsutility also shows the OCS and Softcard created.>rocs `rocs' key recovery tool Useful commands: `help', `help intro', `quit'. rocs> list cardset No. Name Keys (recov) Sharing 1 testOCS 0 (0) 1 of 1 2 testSC 0 (0) (softcard) rocs>quit
Register the CNG provider
-
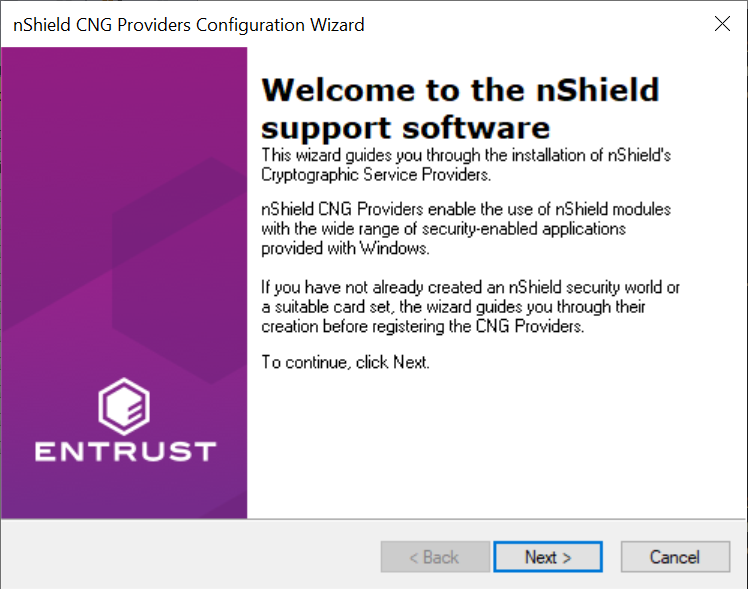
Select Start > Entrust nShield Security Worls > CNG configuration wizard.
-
Select Next on the Welcome window.
-
Select Next on the Enable HSM Pool Mode window, leaving Enable HSM Mode for CNG Providers un-checked.
If you intend to use multiple HSMs in a failover and load-sharing capacity, select Enable HSM Pool Mode for CNG Providers. If you do, you can only use module protected keys. Module protection does not provide conventional 1 or 2 factor authentication. Instead, the keys are encrypted and stored as an application key token, also referred to as a Binary Large Object (blob), in the
kmdata/localdirectory. -
In the Initial setup window select Use existing security world. Then select Next.
-
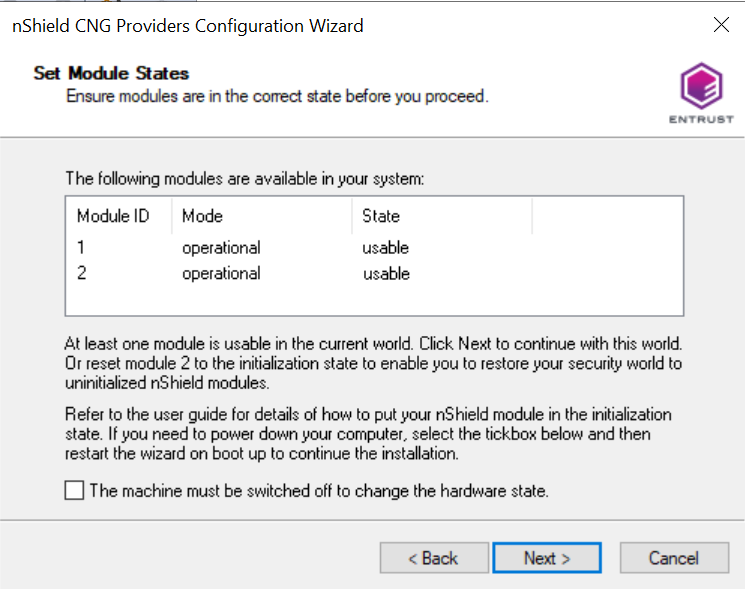
In the Set Module States window, select the HSM (Module) if more than one is available. In this example two HSM are usable and will be selected. Then select Next.
-
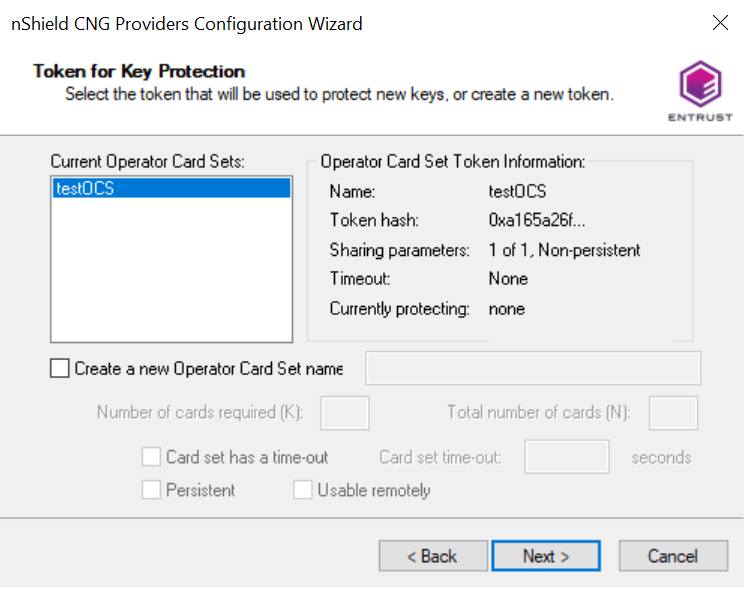
In Key Protection Setup, select Operator Card Set protection. Then select Next.

-
Choose from the Current Operator Card Sets list. Then select Next and Finish.
-
Verify the provider with the following commands:
>certutil -csplist | findstr nCipher Provider Name: nCipher Security World Key Storage Provider >cnglist.exe --list-providers | findstr nCipher nCipher Primitive Provider nCipher Security World Key Storage Provider -
Check the registry in
CNGRegistry:HKEY_LOCAL_MACHINE\SYSTEM\ControlSet001\Control\Cryptography\Providers\nCipherSecurityWorldKeyStorageProvider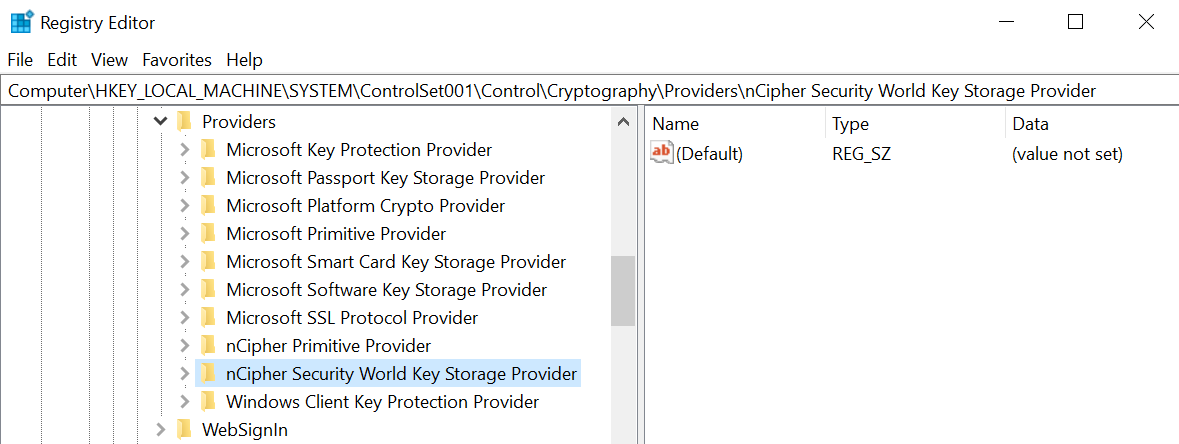
Install and configure SqlServer PowerShell module
-
Open a PowerShell session as Administrator and run.
PS C:\Users\Administrator> [Net.ServicePointManager]::SecurityProtocol = [Net.SecurityProtocolType]::Tls12 PS C:\Users\Administrator> Install-PackageProvider Nuget -force -verbose ... VERBOSE: Imported provider 'C:\Program Files\PackageManagement\ProviderAssemblies\nuget\2.8.5.208\Microsoft.PackageManagement.NuGetProvider.dll' . -
Update PowerShellGet.
PS C:\Users\Administrator> Install-Module -Name PowerShellGet -force -verbose ... VERBOSE: Module 'PowerShellGet' was installed successfully to path 'C:\Program Files\WindowsPowerShell\Modules\PowerShellGet\2.2.5'. -
Download and install the SqlServer module to configure Always Encrypted using Power Shell:
PS C:\Users\Administrator> Install-Module -Name SqlServer -force -verbose -AllowClobber
...
VERBOSE: Module 'SqlServer' was installed successfully to path 'C:\Program Files\WindowsPowerShell\Modules\SqlServer\22.4.5.1'.
The
-AllowClobberparameter allows you to import the specified command if it exists in the current session. -
Once installed, confirm the install by running the command below.
If you are using PowerShell ISE, refresh the Commands pane. If you are using PowerShell, open a new session.
PS C:\Users\Administrator> Get-Module -list -Name SqlServer


    Directory: C:\Program Files\WindowsPowerShell\Modules


ModuleType Version    Name                                ExportedCommands
---------- -------    ----                                ----------------
Script     22.4.5.1   SqlServer                           {Add-RoleMember, Add-SqlAvailabilityDatabase, Add-SqlAvail...