Setup
To enable Microsoft 365 to use a specified TSS appliance for its default time stamp service, you must:
Install the root certificate of TSS on the client machine
To install the root certificate of TSS on the client machine:
-
Log into the TSS as the security officer (superuser).
-
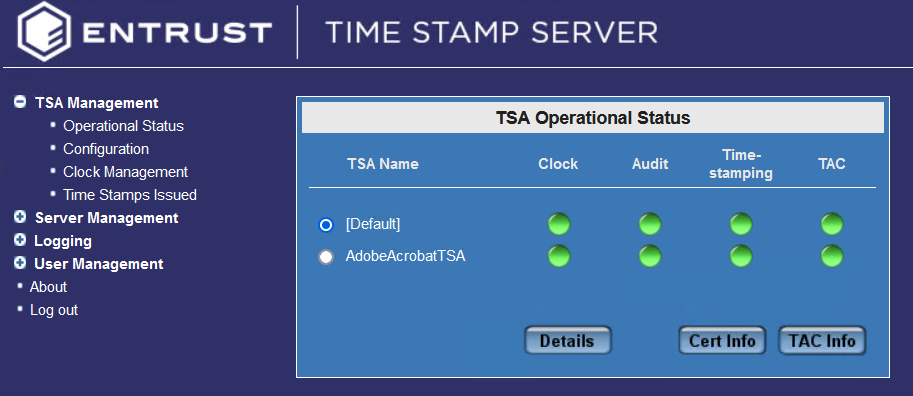
In the left pane, navigate to TSA Management > Operational Status. For example:

-
Select the TSA Name, then select Cert Info.
-
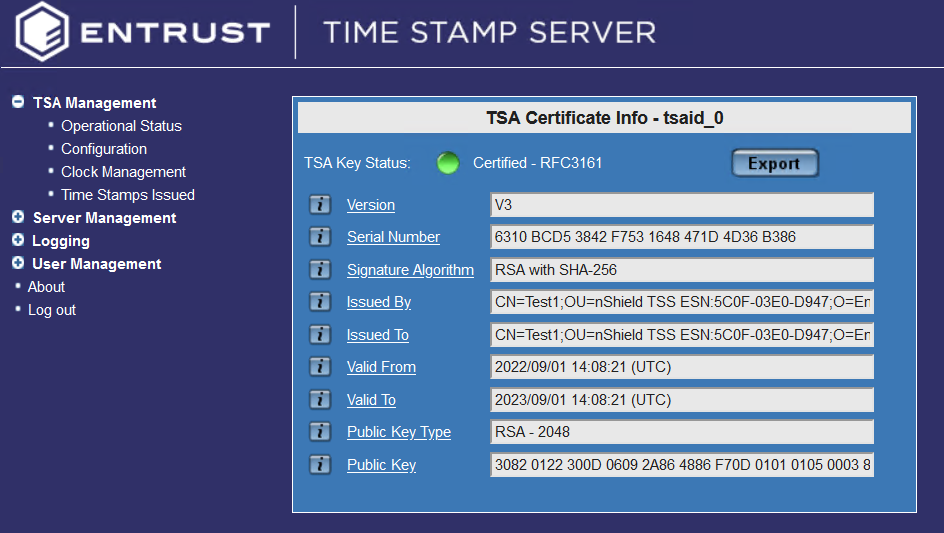
Select the certificate and Export it to a
.cerfile. For example:
-
On the client machine, enter certmgr on the Windows Start menu to start the Microsoft Certificate Manager.
-
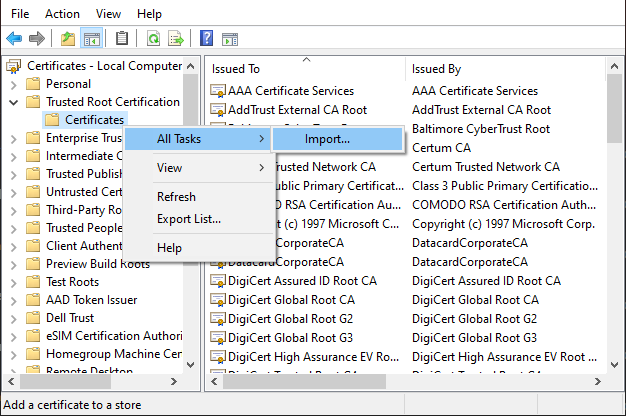
In the left pane, navigate to Certificates > Trusted Root Certificate Authorities > Certificates.
-
Import the exported
.cerfile. For example:
The certificate is added.
Edit the registry settings
To edit the registry settings:
-
On the Microsoft 365 computer, enter regedit on the Windows Start menu to start the Registry Editor.
-
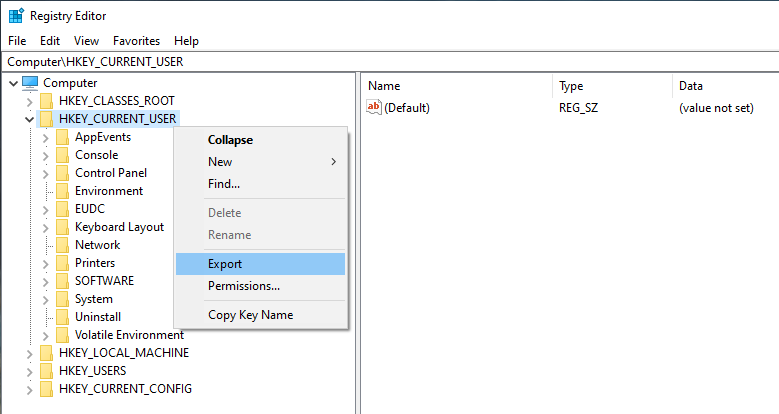
In the left pane, navigate to Computer > HKEY_CURRENT_USER.
-
Export the HKEY_CURRENT_USER registry settings as a backup before you continue. For example:

-
Navigate to the following registry path:
Computer\HKEY_CURRENT_USER\Software\Microsoft\Office\16.0\Common\Signatures.If the registry path does not already exist, you must create it. -
Add the following variables to the registry path:
Name Type Data MinXAdESLevel
REG_DWORD
2
Timestamp Required
REG_DWORD
1
TSALocation
REG-SZ
XAdESLevel
REG_DWORD
5
In this table,
<TSS_IP_address>is the IP address of the TSS appliance. You may use a host name instead of an IP address.