Configure KeyControl as GCP KMS
Create a KeyControl Vault CSP account for the GCP service account
The following steps establish the connection between KeyControl Vault and GCP, making KeyControl Vault the CSP of the GCP service account. You must have created a service account in GCP and downloaded the JSON file before you can add a CSP account. For more information see GCP Service Account Requirements.
-
Log into the KeyControl Cloud Key Management Vault webGUI using an account with Cloud Admin privileges.
-
Select the CLOUDKEYS icon on the toolbar.
-
Select the CSP Accounts tab.
-
Select the Action icon and then Add CSP Account from the drop-down menu that appears.
The Add CSP Account dialog appears.
-
In the Details tab:
-
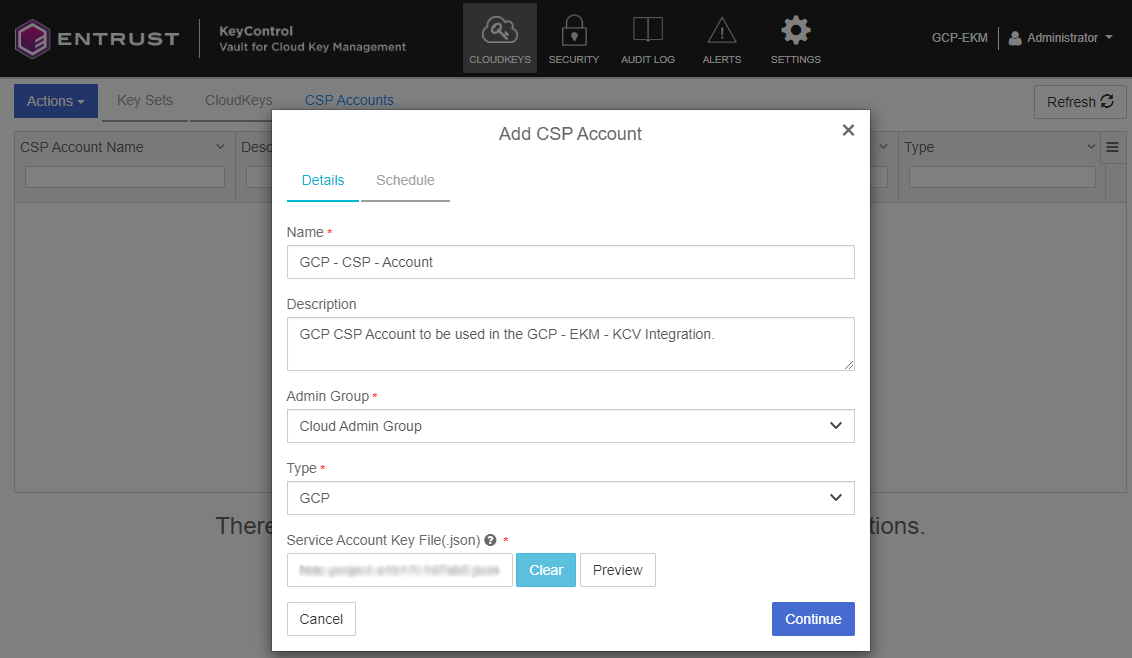
Enter the Name and Description.
-
From the Admin Group drop-down menu box, select Cloud Admin Group.
-
From the Type drop-down menu box, select GCP.
-
In the Service Account Key File (.json) field, select the file download to your computer in configure-gcp.adoc#create-key-for-service-account.
For example:
-
-
Select Continue.
-
In the Schedule tab, select Never.
-
Select Add.
When the service account keys are rotated, the KeyControl Cloud Key Management Vault creates a new key and replaces the key that was used when you registered the CSP account. Do not delete the service account key.
Update the EKM, Key Access Justification Policy, and EKM Access Control List sections
Before you can use KeyControl Vault as a GCP EKM provider, you must set up the following parameters in the CSP Account details page.
-
External Key Manager (EKM URI)
-
Key Access Justification Policy (optional)
-
EKM Access Control List (optional)
-
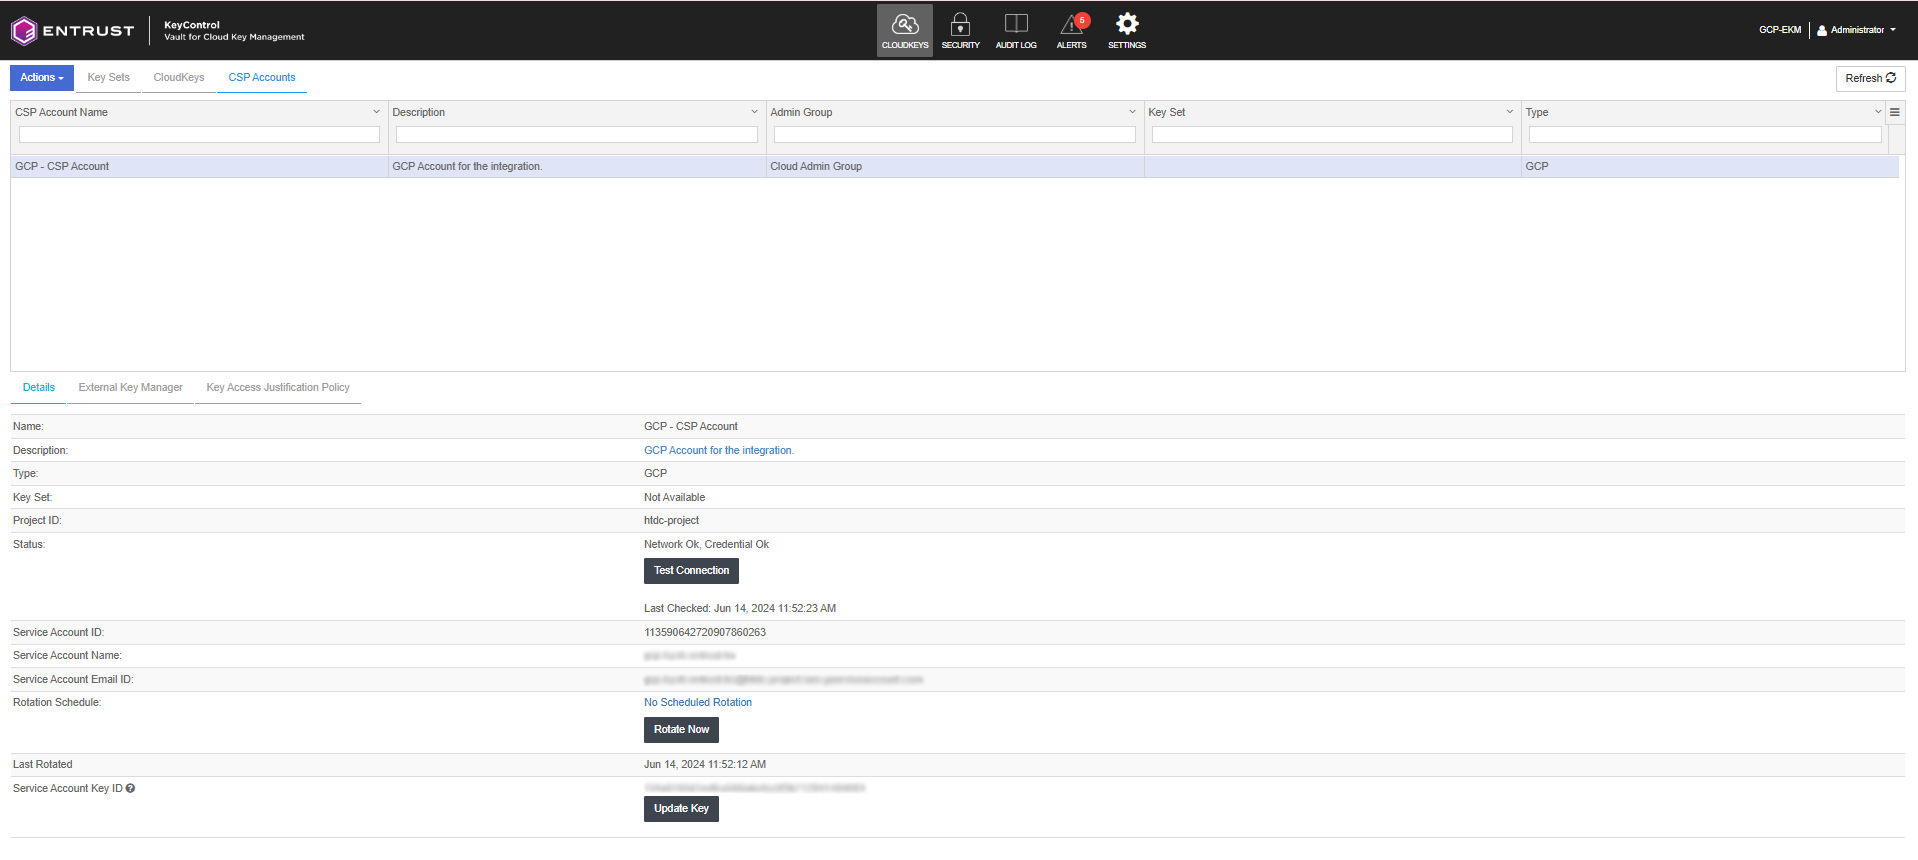
View the Details tab on the CSP account that you created.
-
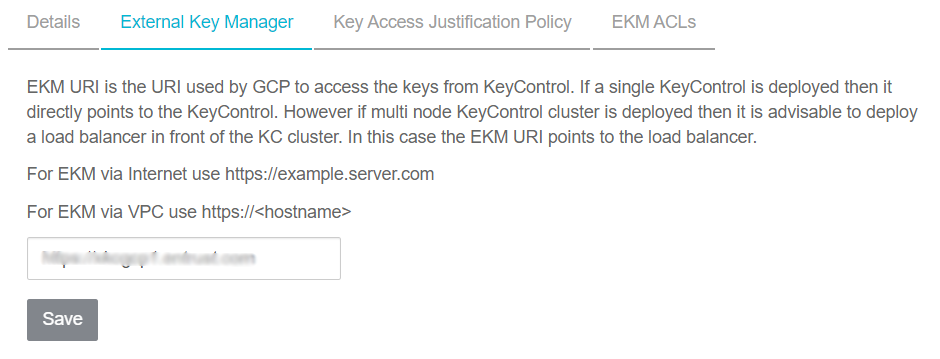
Select the External Key Manager tab and enter the URI for the KeyControl Vault server.
Keep in mind that the EKM URI is the URI used by GCP to access the keys from KeyControl Vault. If a single KeyControl Vault is deployed, then it directly points to that vault. However if you deploy a KeyControl Vault cluster with multiple nodes, then we recommend deploying a load balancer in front of the KeyControl Vault cluster. In this case the EKM URI points to the load balancer.
-
Select Save.
-
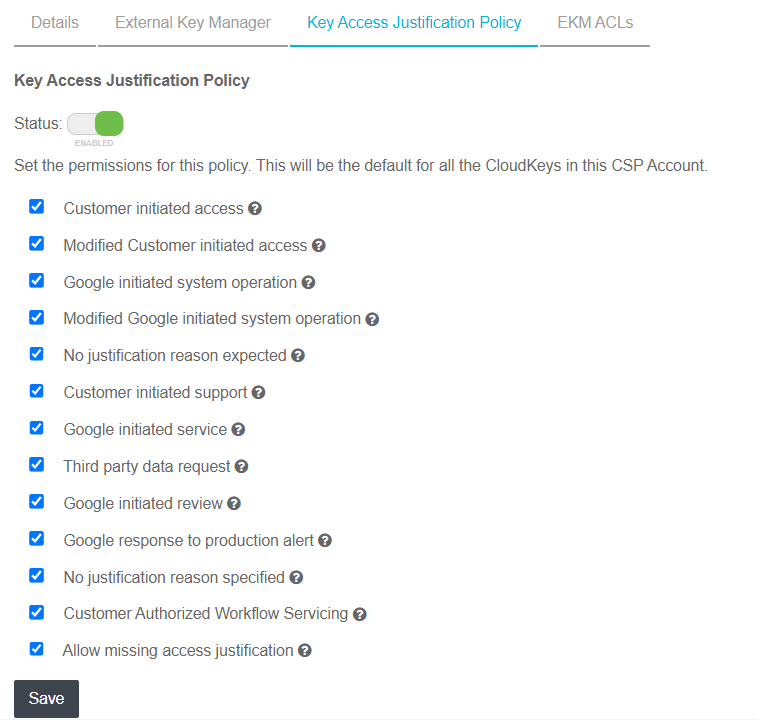
Select the Key Access Justification Tab. We highly recommend that you create a Key Access Justification policy at the CSP and KeySet level that specifies access justification reasons. These apply to all the keys created in this keyset, unless the policy is specified at the key level, which overrides this policy.
-
Select Save.
-
(Optional)
Select the EKM ACLs tab to configure the EKM access control list.
This policy also applies to all the keys which are created in the associated KeySet (to this CSP account) unless a policy at Key level overrides it. For GCP Control plane access so-called coordinated keys, only the CSP level permissions apply. The EKM ACL specifies the list of GCP identities and permissions they have. The identities can be specified with their service account email, that is:
xxxx@htdc-project.iam.gserviceaccount.comThe supported permissions are:
-
wrap -
unwrap -
asymmetricSign -
getPublicKey -
checkCryptoSpacePermissions -
createKey -
destroyKey
-
Create a KeySet for GCP
-
Log into the KeyControl Cloud Key Management Vault webGUI using an account with Cloud Admin privileges.
-
In the top menu bar, select CloudKeys.
-
Select the Key Sets tab.
-
Select Actions > Create Key Set.
-
Select the type of key to be contained in the Key Set: GCP Key
-
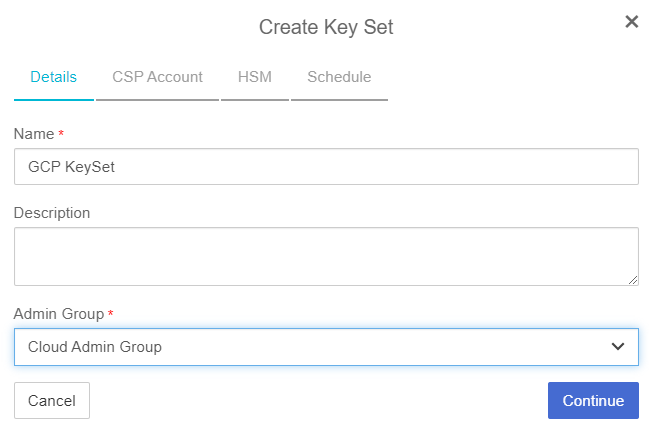
On the Details tab of the Create Key Set dialog box, enter the following:
-
Name*- Enter the name for the Key Set.
-
Description - Enter the optional description for the Key Set.
-
Admin Group - Select the Admin Group: Cloud Admin Group
-
-
Select Continue.
-
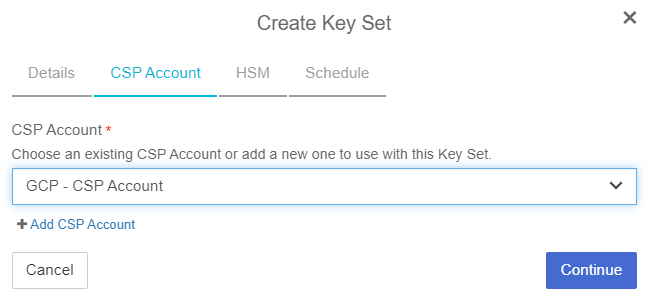
On the CSP Account tab, select an existing CSP Account or add a new account to use with this Key Set. Select the account you created earlier.
-
Select Continue.
-
On the HSM tab, check the Enable HSM checkbox if you plan to use an HSM to create CloudKeys that can be uploaded to the cloud.
When the key material is in the KMS, the HSM is no longer required. However, if you remove the CloudKey from the cloud, you will need to use the HSM to upload the key again.
If you selected Enable HSM, select Verify HSM connection to test the connectivity and suitability of the configured HSM. KeyControl Vault checks if the HSM is accessible and if it supports the creation and export of relevant keys.
Some HSM servers with old version of firmware do not support key creation and wrapping. If the connection test fails, check the firmware version of the HSM server. If it is old, update it to the latest version.
-
Select Continue.
-
On the Schedule tab, determine the default rotation schedule for the CloudKeys created in this Key Set.
This rotation schedule is applied to all CloudKeys created in the Key Set, unless a different value is explicitly selected. If there are existing CloudKeys in the Key Set, you can update the rotation schedule of the CloudKeys to align with your selected rotation schedule by checking Apply to all CloudKeys.
-
Select Apply.
Create a CloudKey for GCP
Before you can create a CloudKey, you must Create a KeySet for GCP. This procedure is for creating an External Key Manager (EKM) key.
-
Log into the KeyControl Cloud Key Management Vault webGUI using an account with Cloud Admin privileges.
-
In the top menu bar, select CloudKeys.
-
Select the CloudKeys tab and select the Key Set and the Key Ring.
If you do not finish the selections on the CloudKeys page, you will need to add them on the Details tab of the Create CloudKey dialog box.
-
Select Actions > Create CloudKey.
-
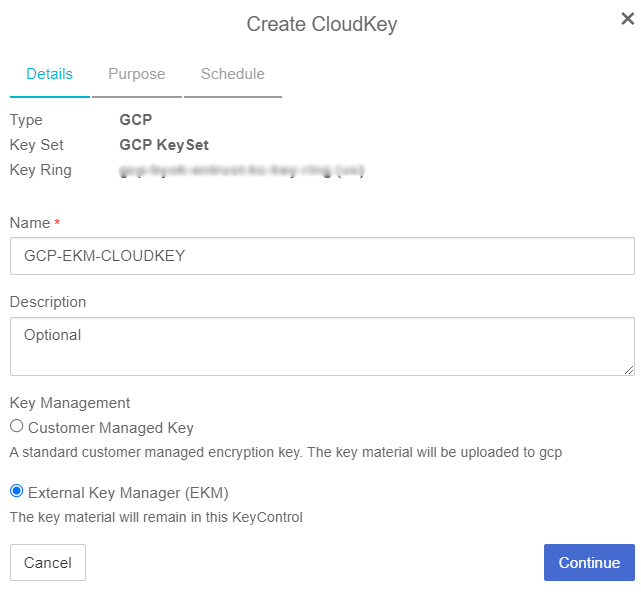
On the Details tab of the Create CloudKey dialog box, enter the following:
-
Name: Enter the name for the CloudKey.
-
Description: Enter the optional description for the CloudKey
-
Key Management: Select External Key Management (EKM).
-
-
Select Continue.
-
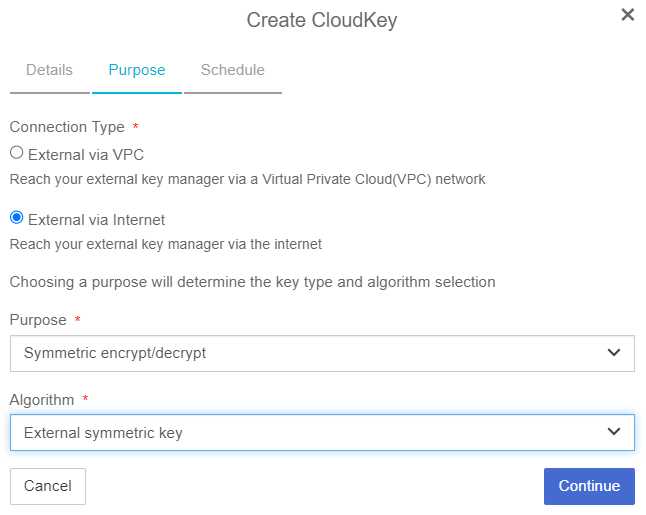
On the Purpose tab, complete the following:
-
Connection Type: Select how the external key manager will be reached.
-
Purpose: This can be one of the following:
-
Symmetric encrypt/decrypt
-
Asymmetric Sign
-
-
Algorithm: Select the algorithm that matches the purpose you selected. This can be one of the following:
-
For Symmetric encrypt/decrypt: External symmetric key
-
For Asymmetric Sign:
-
Elliptic Curve P-256 - SHA256 Digest
-
Elliptic Curve P-384 - SHA384 Digest
-
2048 bit RSA - PKCS#1 v1.5 padding - SHA256 Digest
-
3072 bit RSA - PKCS#1 v1.5 padding - SHA256 Digest
-
4096 bit RSA - PKCS#1 v1.5 padding - SHA256 Digest
-
4096 bit RSA - PKCS#1 v1.5 padding - SHA512 Digest
-
2048 bit RSA - PSS Padding - SHA256 Digest
-
3072 bit RSA - PSS Padding - SHA256 Digest
-
4096 bit RSA - PSS Padding - SHA256 Digest
-
4096 bit RSA - PSS Padding - SHA512 Digest
-
-
-
-
Select Continue.
-
On the Schedule tab, determine the rotation schedule for the CloudKey. This can be one of the following:
-
Inherit from Key Set—The - CloudKey will use the default schedule from the Key Set. If the Key Set schedule changes after the CloudKey is created, the CloudKey schedule will not be updated.
-
Never — The CloudKey will never be rotated.
-
Once a year — The CloudKey will be rotated once a year.
-
Every 6 months — The CloudKey will be rotated once every 6 months.
-
Every 30 days — The CloudKey will be rotated once every 30 days.
-
Other — The CloudKey will be rotated at the interval you select.
-
-
Select when the CloudKey should expire. This can be
Never, or you can select a specific date.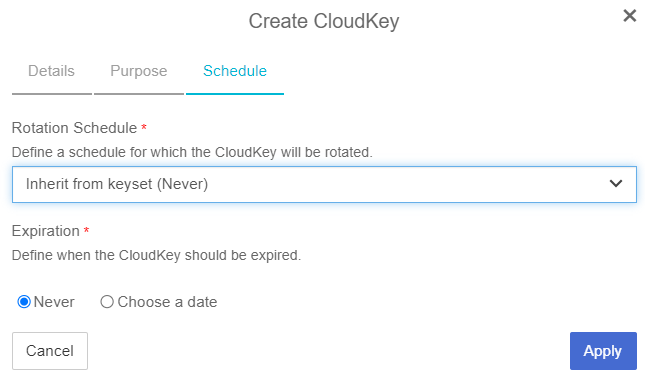
If you selected an expiration date, select the Expire Action to define what happens to the CloudKey when it expires.
When the CloudKey expires, the selected Expire Action is performed on the key. The KeyControl Vault handles the expiration date and expire action. The expire date is not set in the cloud service provider.
-
Select Apply.
If you get errors about not being able to validate the TLS server certificate for the key, you will need to install the SSL certificate in the KeyControl Vault node.
Verify the CloudKey
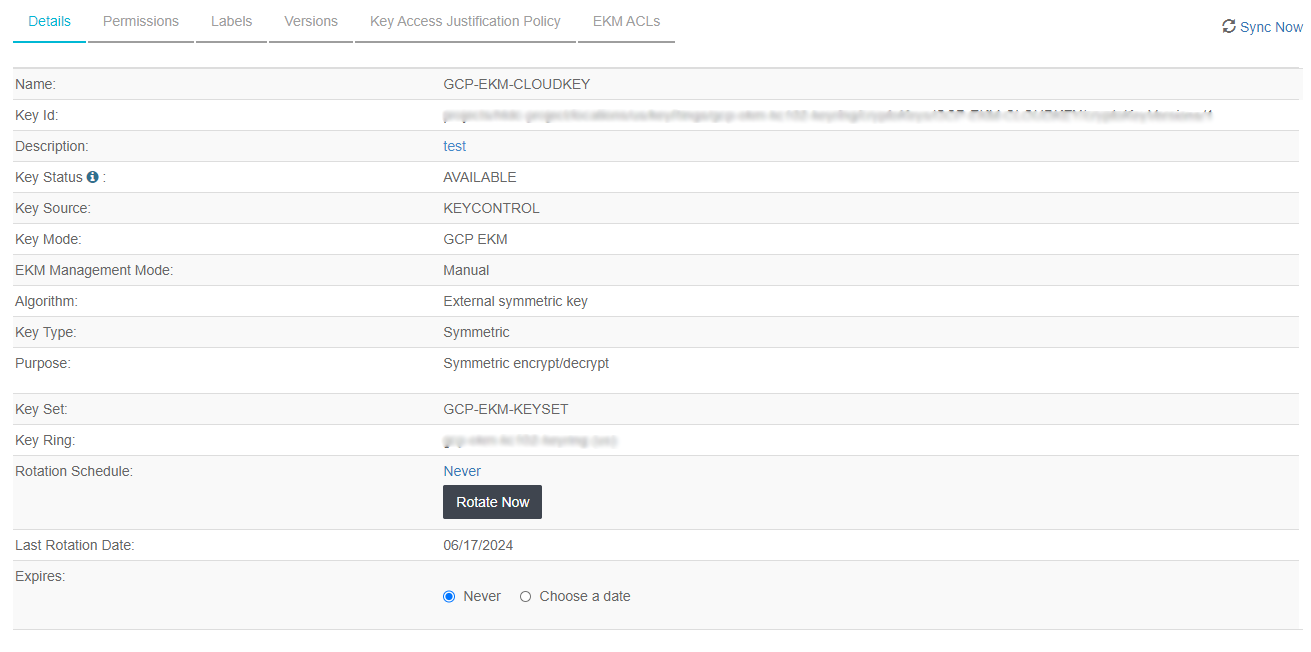
You need to make sure the CloudKey status is AVAILABLE so it can be used in GCP.
-
Verify the Key is Available, by selecting the CloudKey and checking its status in the details tab.
-
Verify the Key status in the GCP Platform.
-
Open a browser and sign in to the GCP portal: https://console.cloud.google.com.
-
In the navigation menu select Security > Key Management.
-
Look for the key ring that was used in the CloudKey creation process in KCV and select on it to view its details. You should see the CloudKey you created. Its protection level should state External Via Internet.

-