Test the integration
Create a single-region cloud key in KeyControl
-
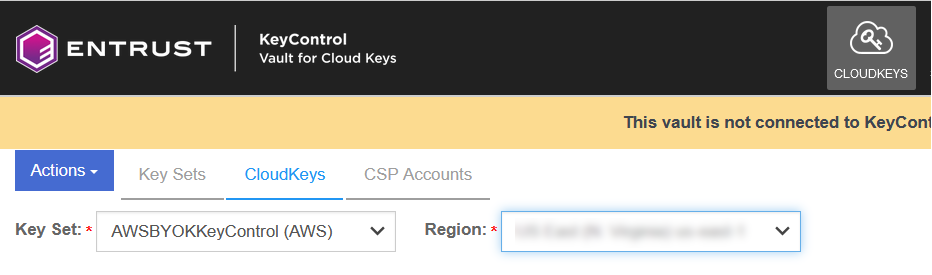
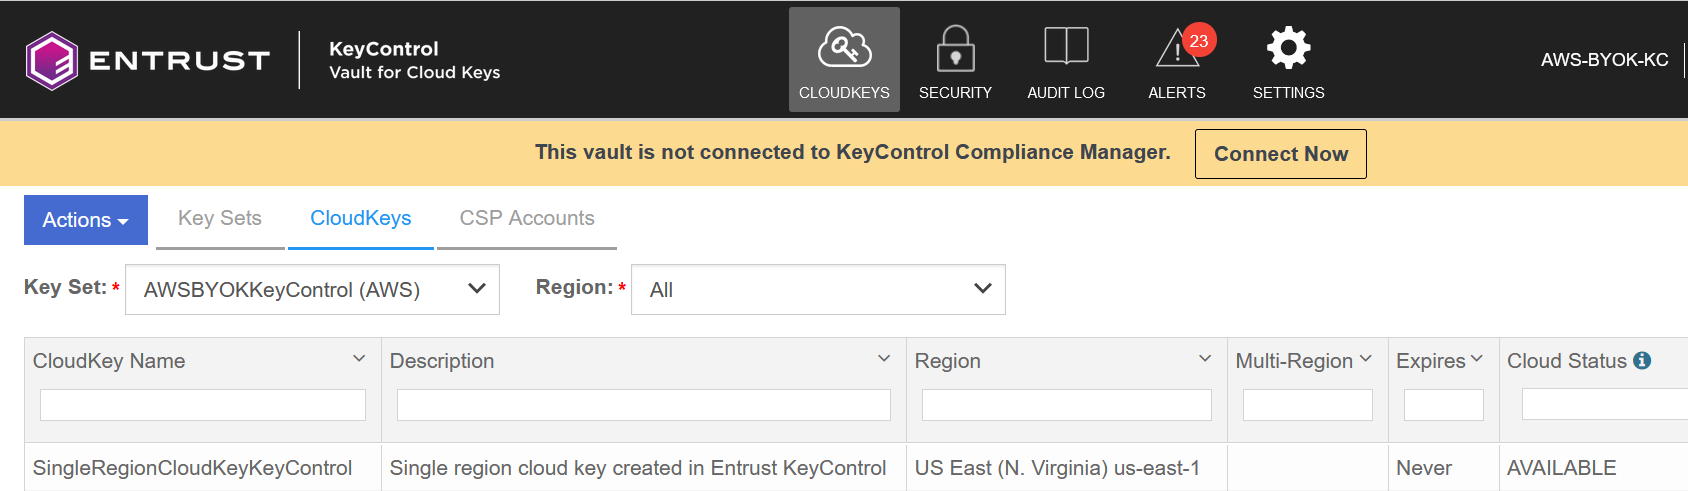
Sign in to the cloud keys vault URL created in deploy-entrust-kc.adoc#create-cloud-keys-vault.
-
Select the CloudKeys tab.
-
In the Key Set pull-down menu, select the key set created in integrate-kc-aws-byok.adoc#create-key-set-for-aws. In the Region pull-down menu, select your region.
For example:
-
In the Actions pull down menu, select Create CloudKey. The Create CloudKey window appears.
-
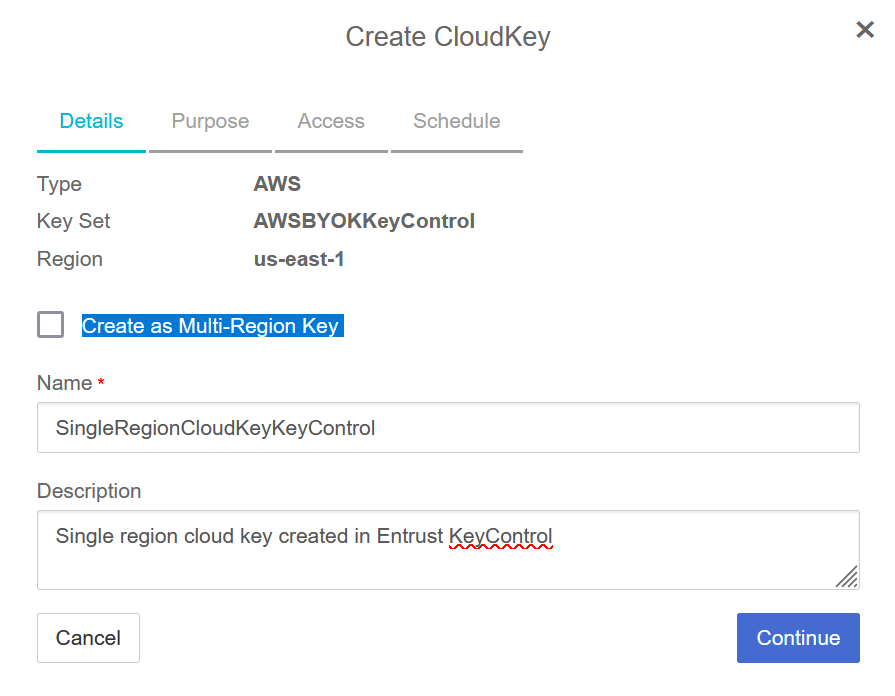
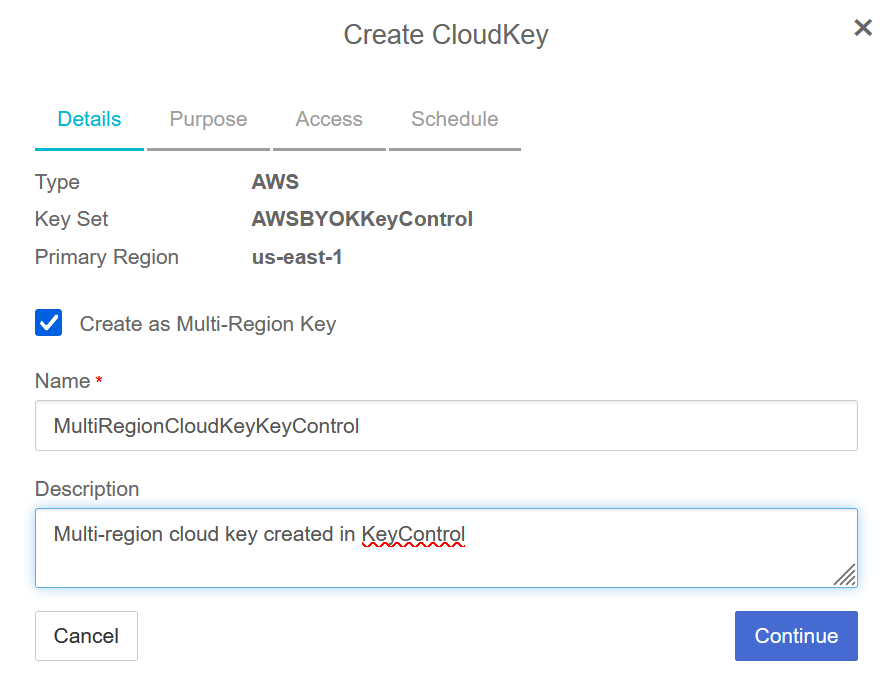
In the Details tab, enter the Name and Description. Uncheck Create as Multi-Region Key. Then select Continue.
For example:
-
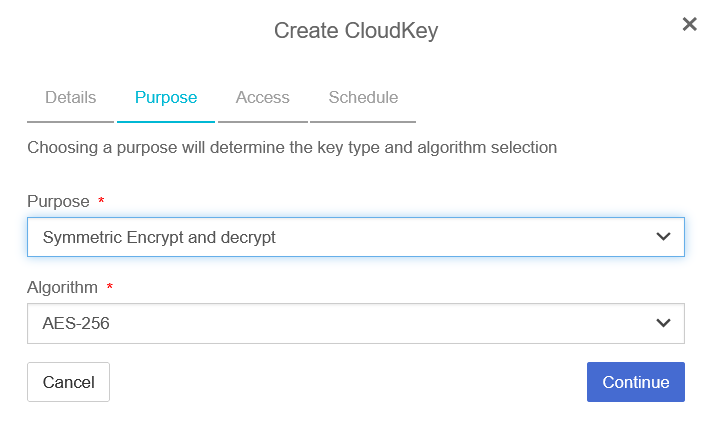
In the Purpose tab, select from the Purpose and Algorithm pull-down menus. Then select Continue.
For example:

-
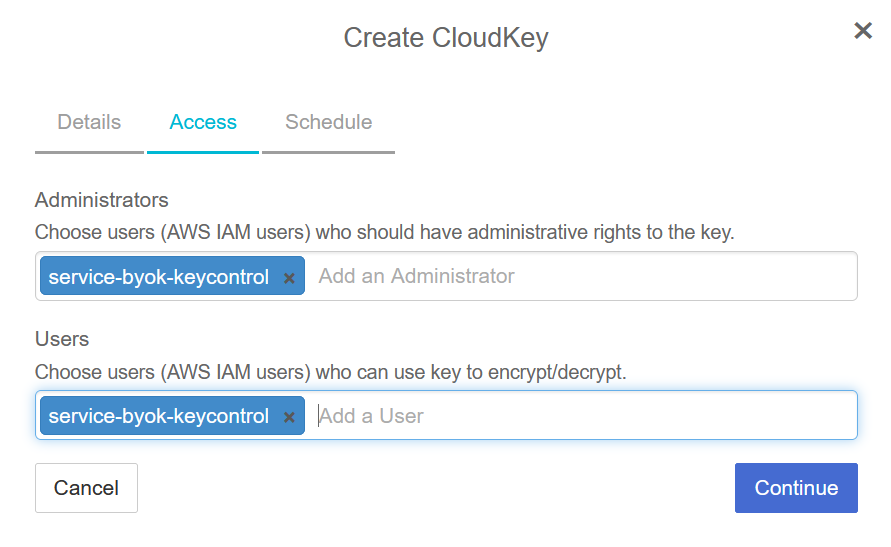
In the Access tab, choose the Administrators and Users. Then select Continue.
For example:
-
In the Schedule tab, select your Rotation Schedule and Expiration date. Then select Apply.
For example:

-
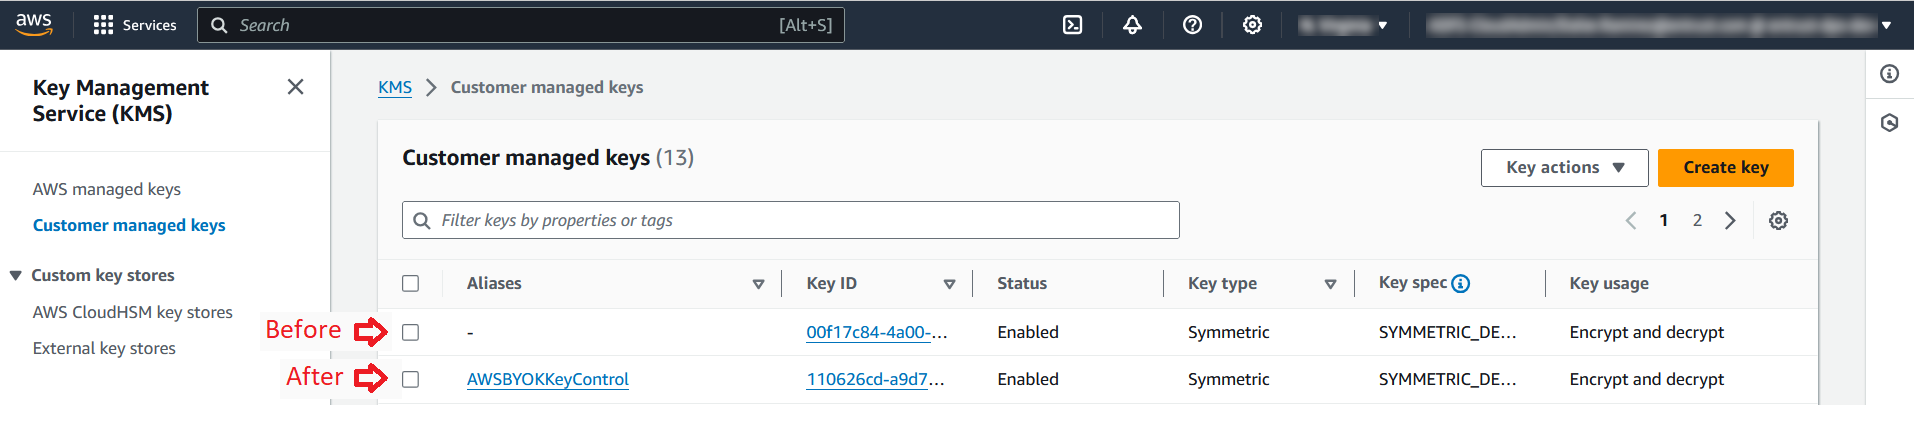
Notice the newly created cloud key.
Create a multi-region cloud key in KeyControl
-
Repeat the steps in Create a single-region cloud key in KeyControl, this time checking the box for Create as Multi-Region Key.
For example:
-
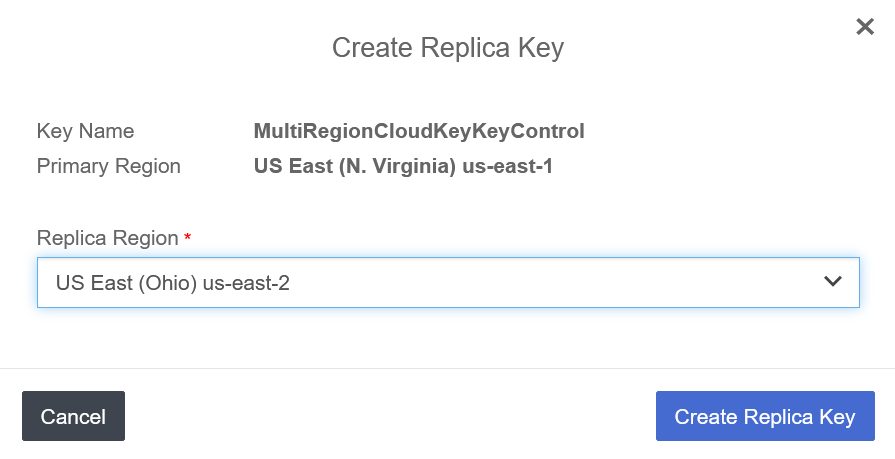
Select the multi-region cloud key just created. In the Actions pull down menu, select Create Replica CloudKey.
-
In the Create Replica Key window, select a Replica Region from the pull-down menu. Then select Create Replica Key.
For example:
-
Notice the newly created multi-region cloud key.

-
Verify the newly created multi-region cloud key is visible in AWS Key Management Service.
-
Select the newly created multi-region cloud key. In the regionality tab, notice the second region.
For further information, refer to Creating a CloudKey in the KeyControl online documentation.
Create a cloud key in AWS Key Management Service
-
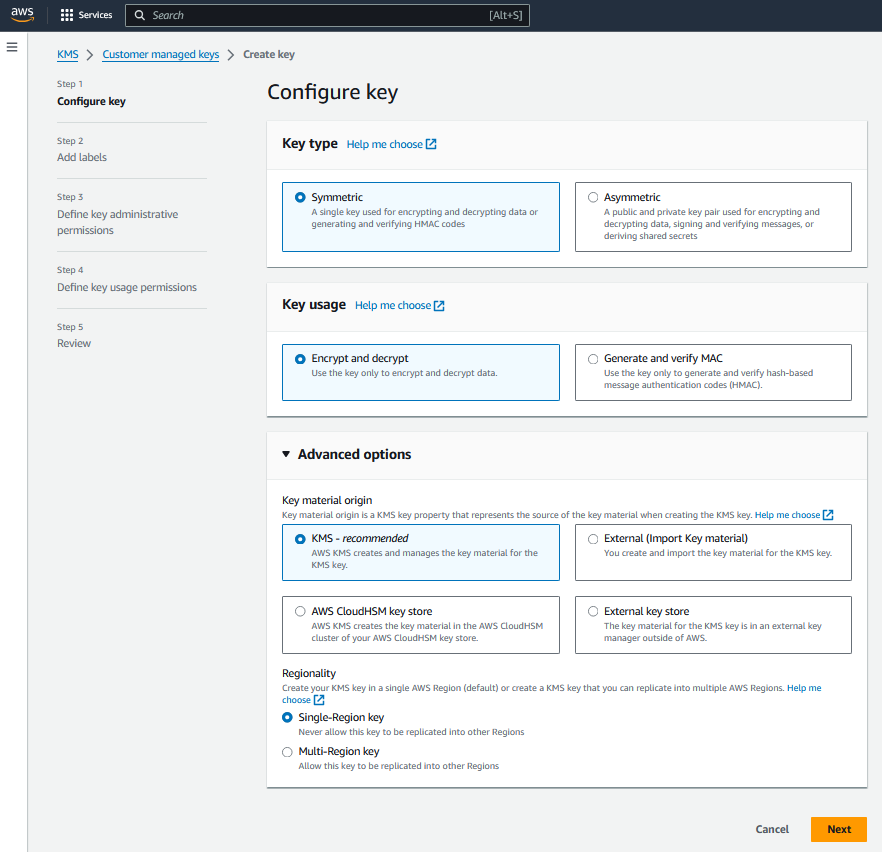
In AWS, navigate to Key Management Service > Customer managed keys. Then select the Create key icon.
-
In the Configure key window, select the Key type and Key usage. Then expand the Advance options and select the Key material origin. For Regionality select the Multi-Region key radio button. Then select Next.
For example:
-
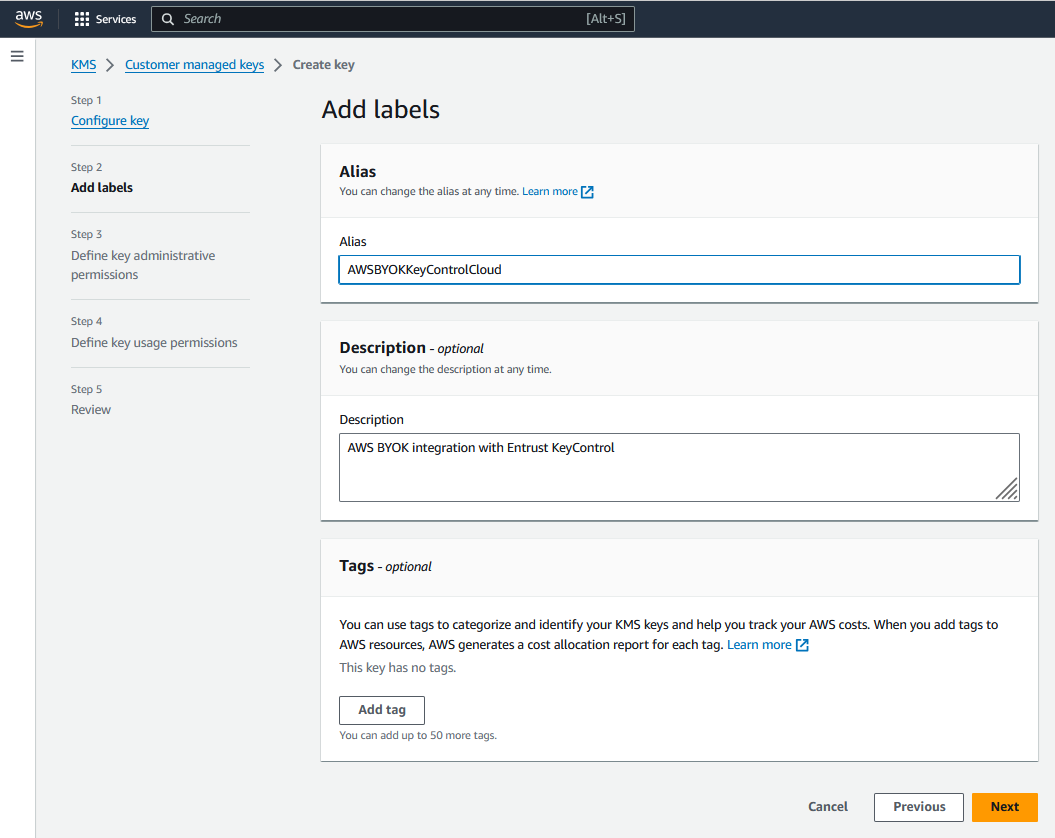
In the Add labels window, enter the Alias and Description. Then select Next.
For example:
-
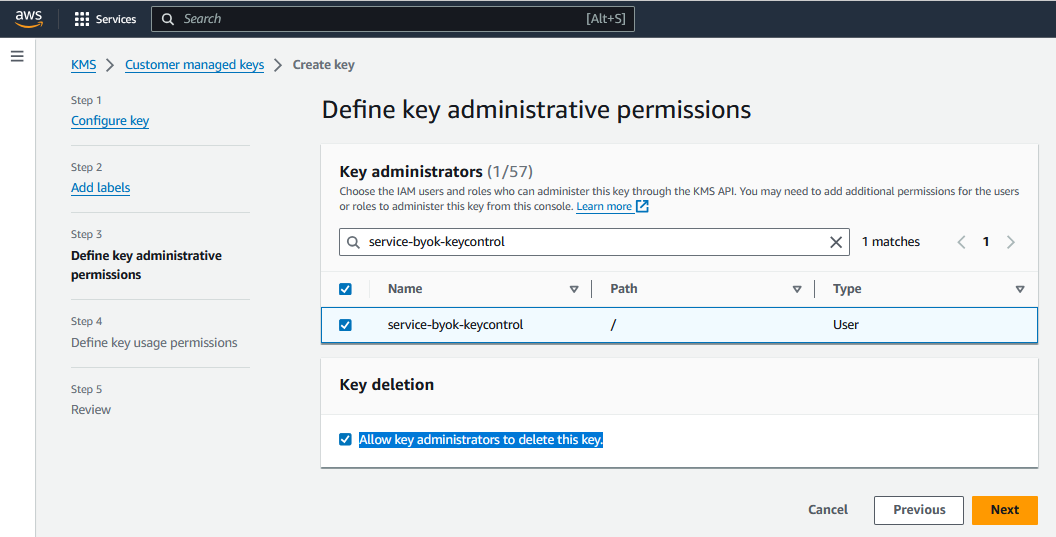
In the Define key administrative permissions - optional window, enter the service account name created in create-aws-iam-user.adoc#create-aws-iam-user and select it. In the Key deletion section, check Allow key administrators to delete this key. Then select Next.
For example:
-
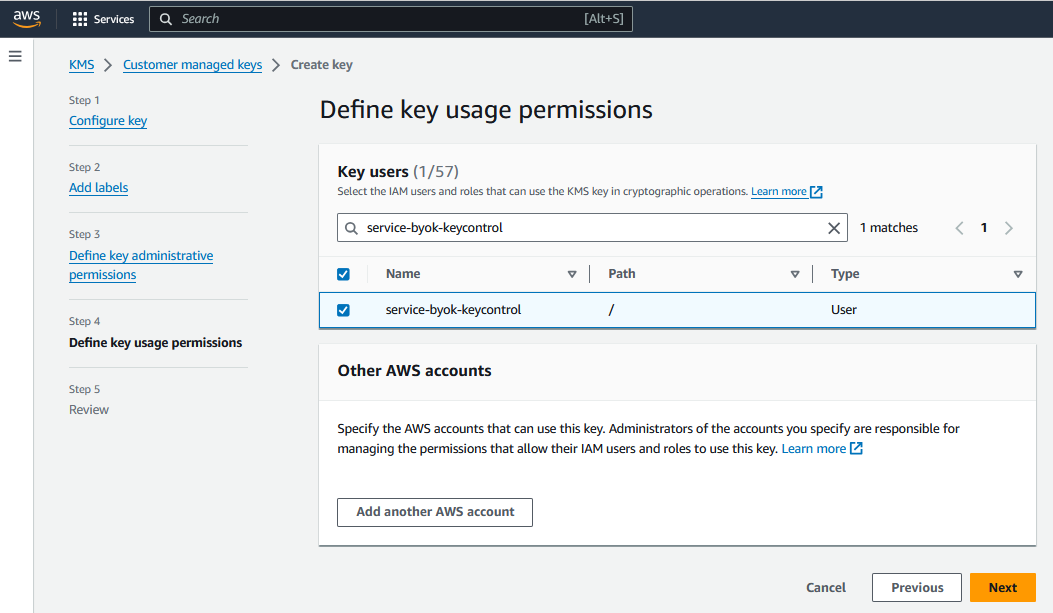
In the Define key usage permissions - optional window, enter the service account name created in create-aws-iam-user.adoc#create-aws-iam-user and select it. Then select Next.
For example:
-
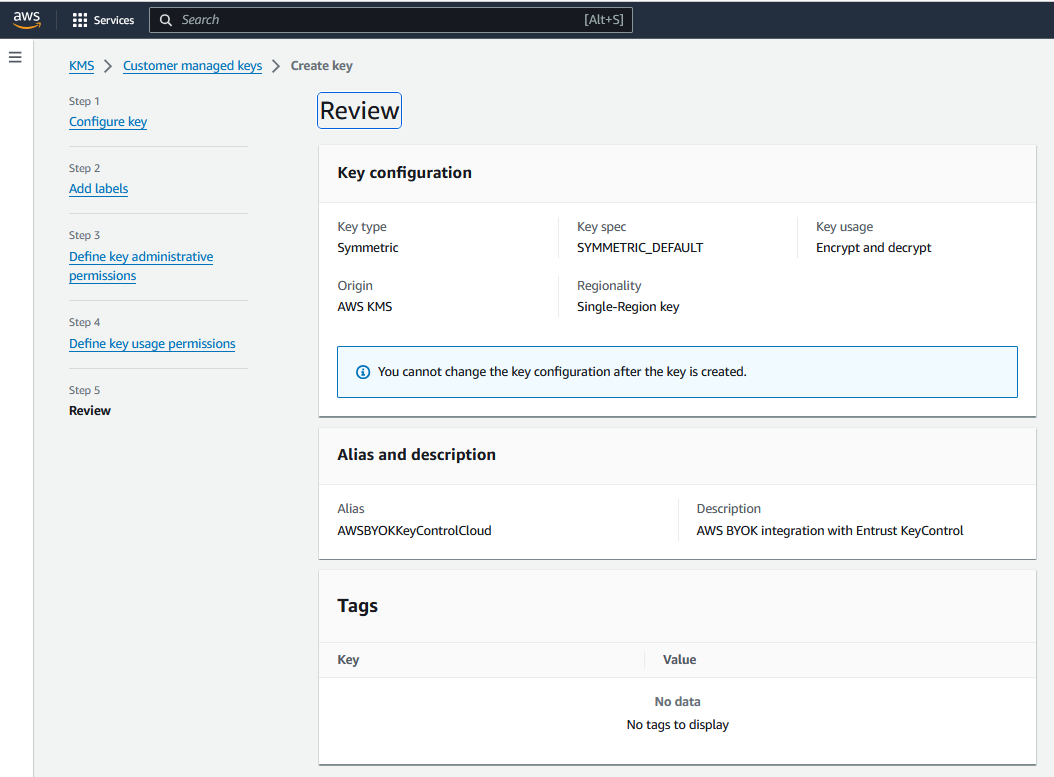
In the Edit key policy - optional window, select Next.
-
In the Review window, select Finish.
-
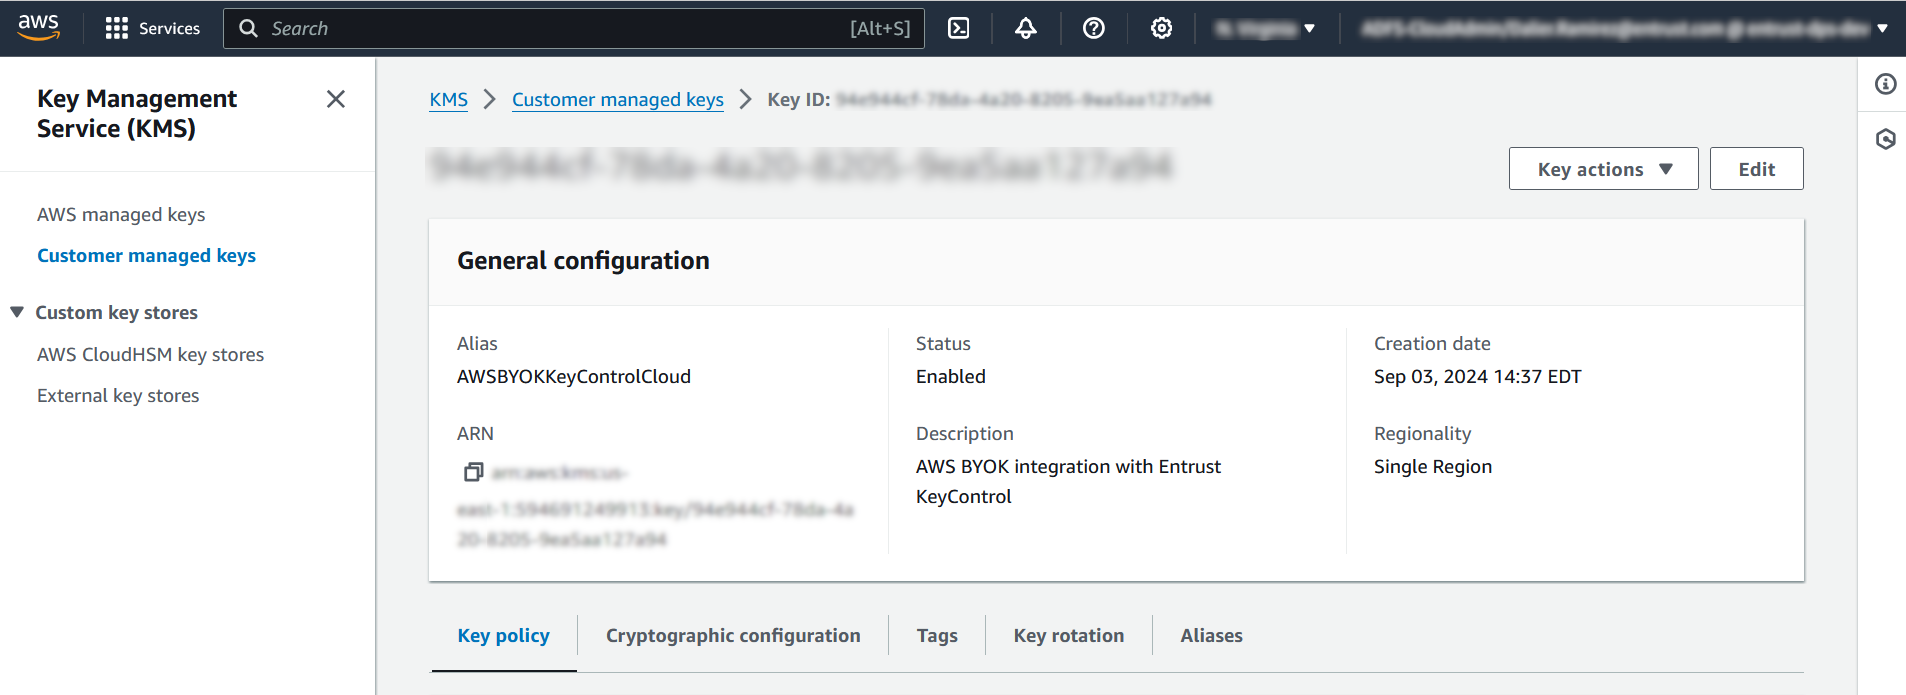
Notice the newly created cloud key in AWS Key Management Service.
Import a cloud key created in AWS Key Management Service into KeyControl
-
Sign in to the cloud keys vault URL created in deploy-entrust-kc.adoc#create-cloud-keys-vault.
-
Select the Key Sets tab. Then select the key set created in integrate-kc-aws-byok.adoc#create-key-set-for-aws.
-
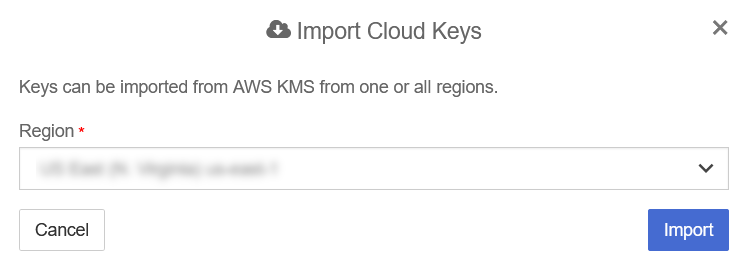
In the Actions pull down menu, select Import CloudKeys. The Import Cloud Keys window appears.
-
Select your region. Then select Import.
-
Select the CloudKeys tab and select Refresh.
-
Verify the imported key is visible in the KeyControl cloud keys vault.
For further information, refer to Importing CloudKeys in the KeyControl online documentation.
Remove a cloud key in KeyControl
-
Sign in to the cloud keys vault URL created in deploy-entrust-kc.adoc#create-cloud-keys-vault.
-
Select the CloudKeys tab.
-
In the Key Set pull-down menu, select the key set created in integrate-kc-aws-byok.adoc#create-key-set-for-aws. In the Region pull-down menu, select your region.
-
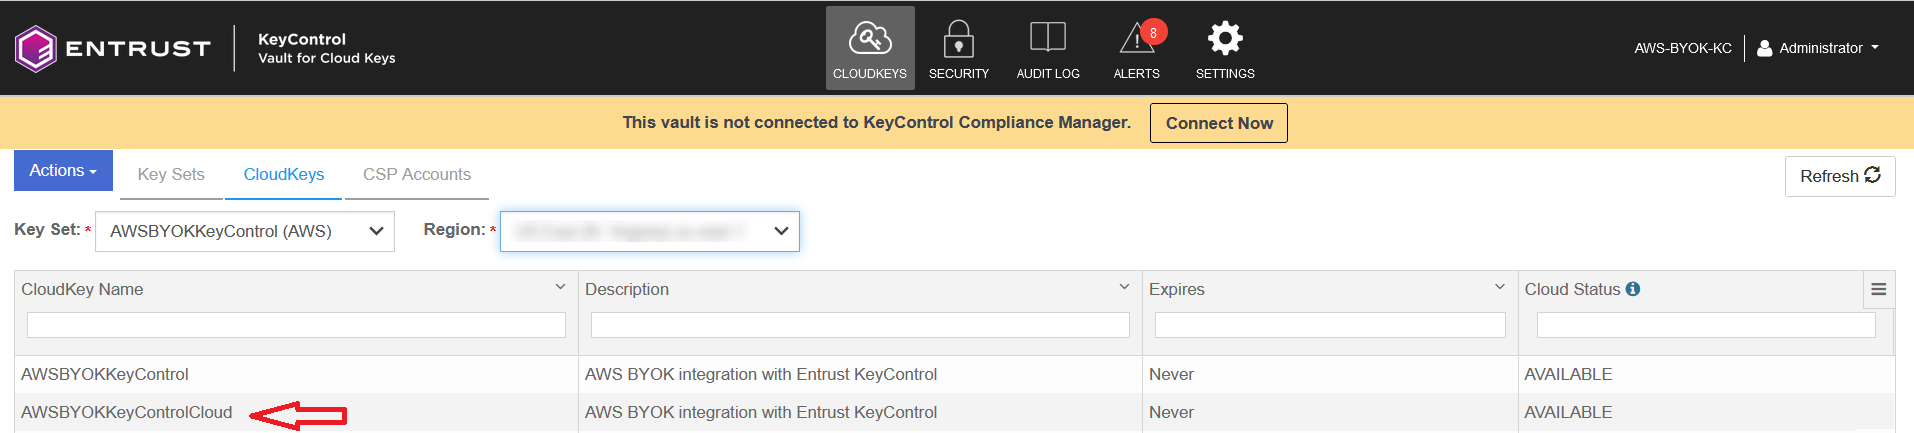
Select the key to be removed from the cloud.
-
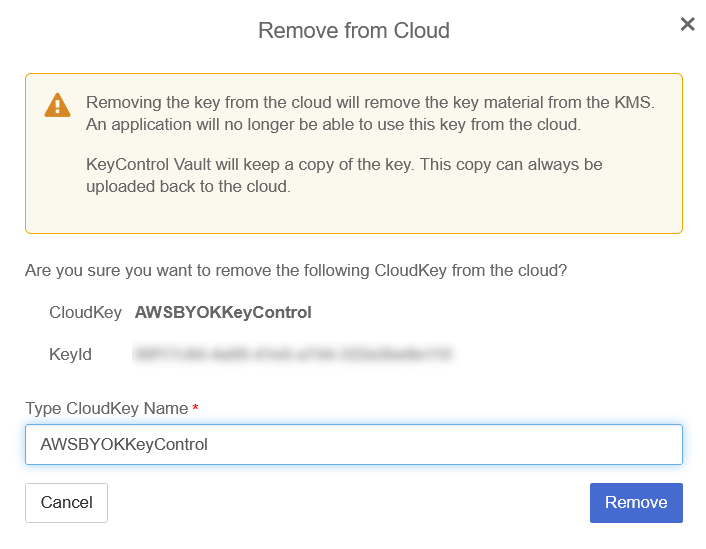
In the Actions pull down menu, select Remove from Cloud. The Remove from Cloud dialog appears.
-
Type the name of the key in the Type CloudKey Name text box. Then select Remove.
For example:
-
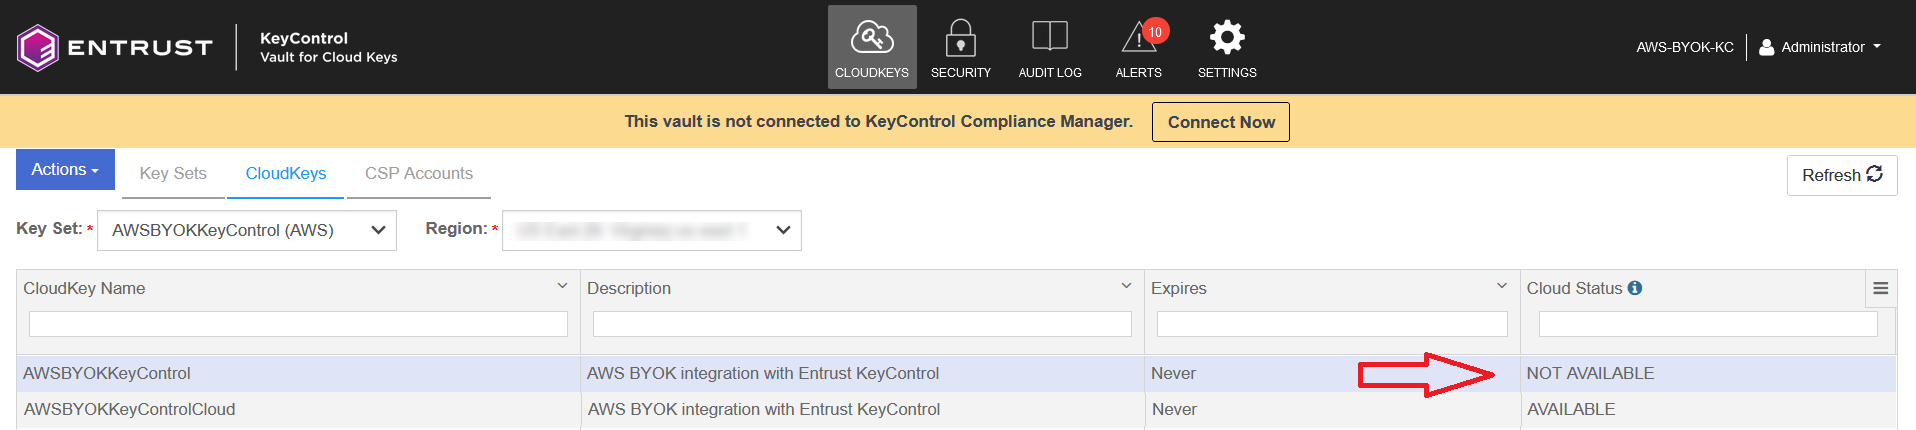
Notice the key Cloud Status becomes NOT AVAILABLE.
For example:
-
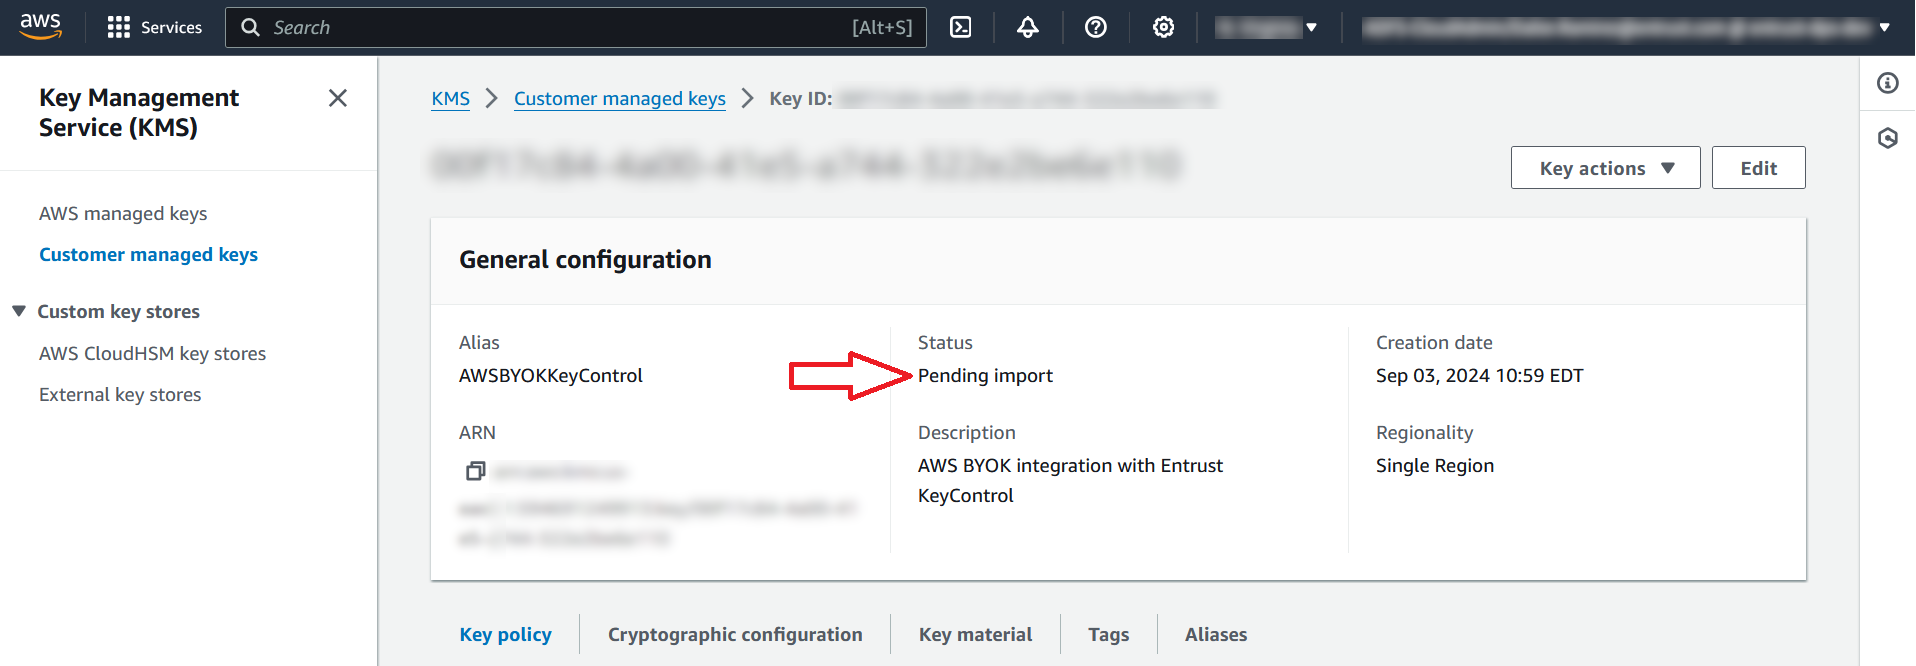
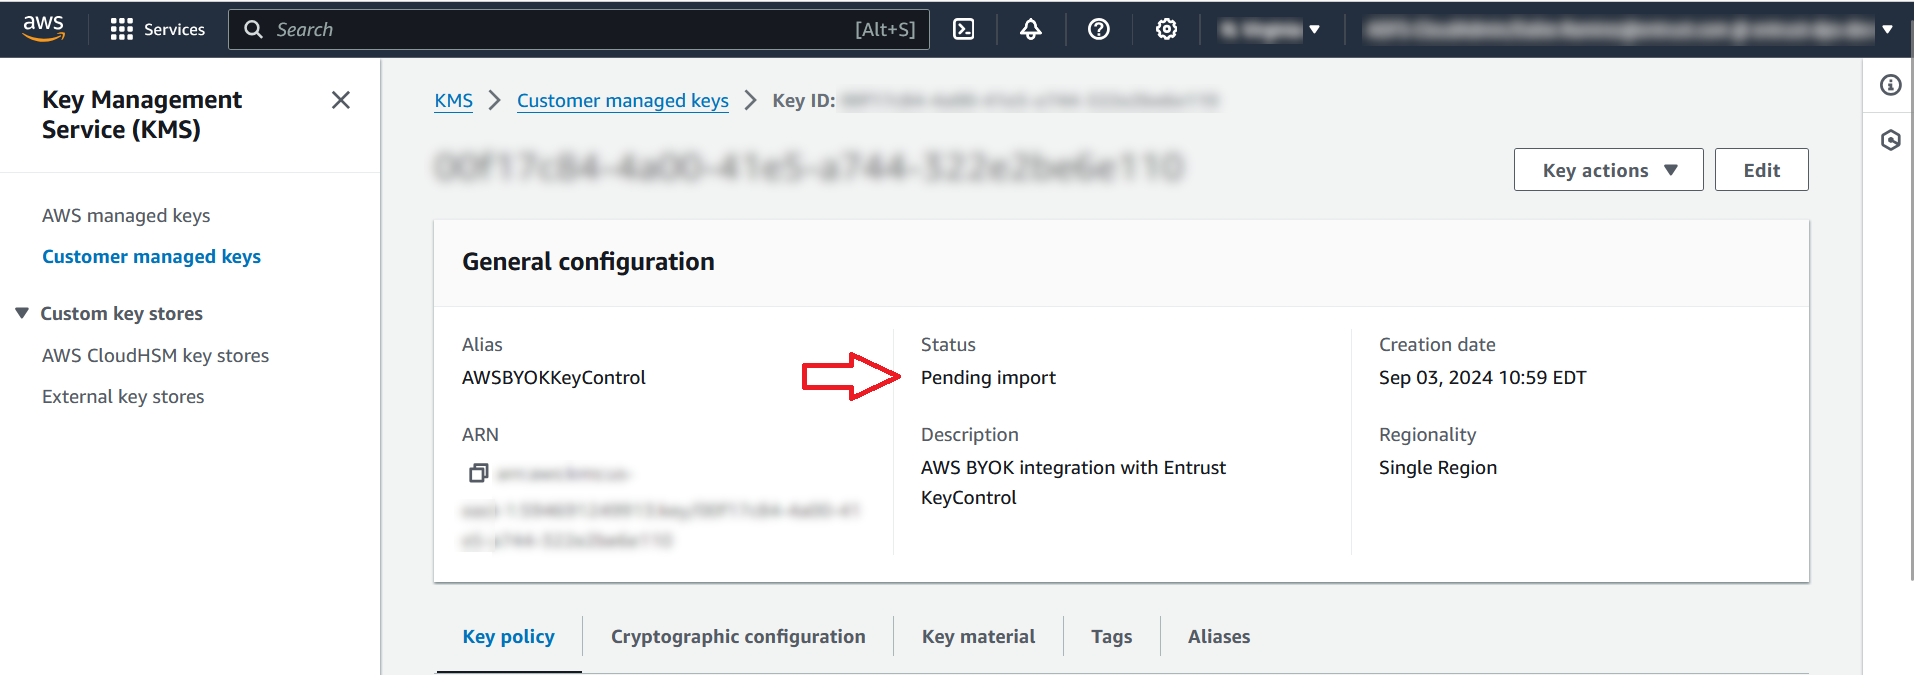
Verify the key Status changed in AWS Key Management Service.
For further information, refer to Removing a CloudKey from the Cloud in the KeyControl online documentation.
Delete a cloud key in KeyControl
-
Sign in to the cloud keys vault URL created in deploy-entrust-kc.adoc#create-cloud-keys-vault.
-
Select the CloudKeys tab.
-
In the Key Set pull-down menu, select the key set created in integrate-kc-aws-byok.adoc#create-key-set-for-aws. In the Region pull-down menu, select your region.
-
Select the key to be deleted.
-
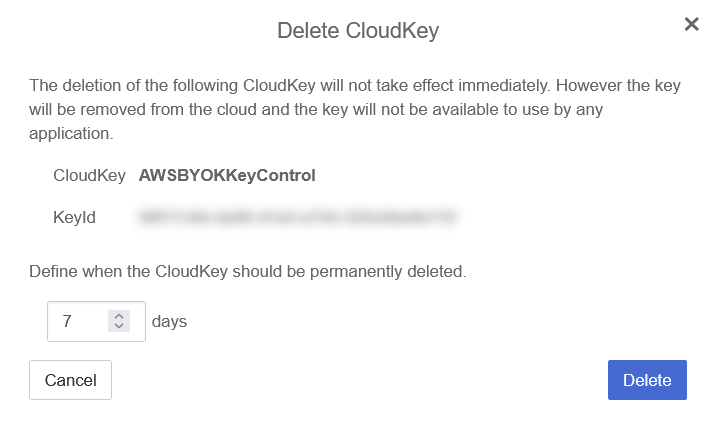
In the Actions pull down menu, select Delete CloudKey. The Delete CloudKey dialog appears.
-
Select a time in Define when the CloudKey should be permanently deleted. Then select Delete.
For example:
-
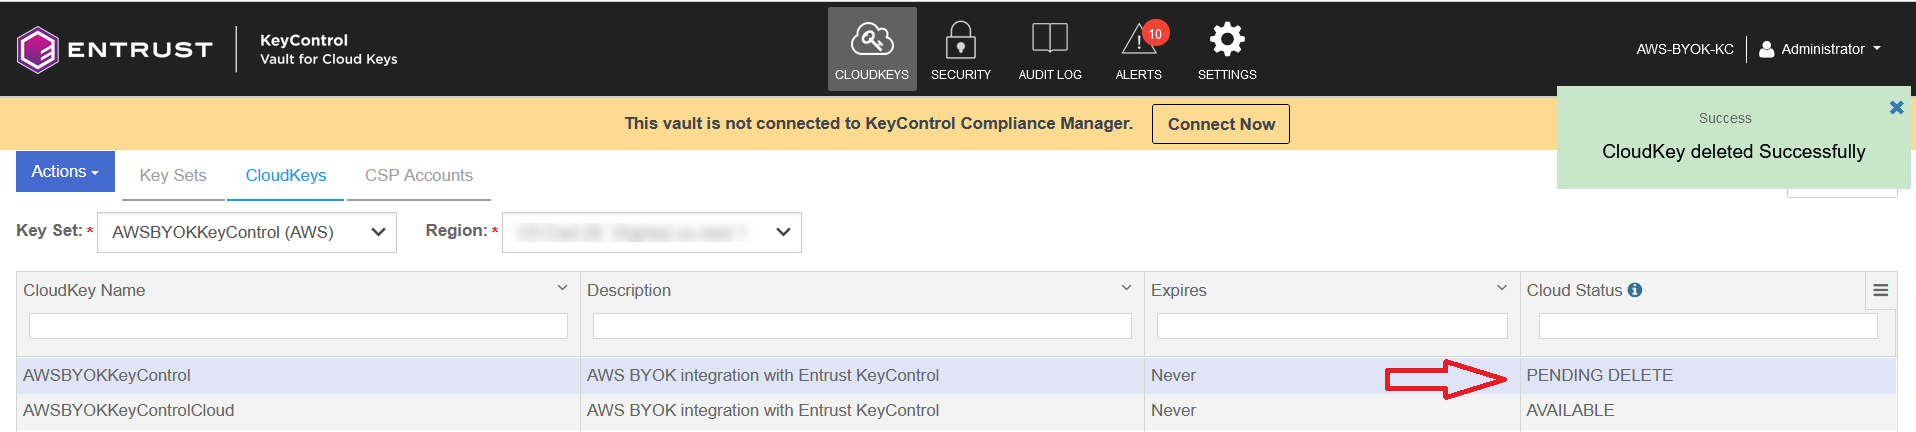
Notice the key Cloud Status becomes PENDING DELETE.
-
Verify the key Status changed in AWS Key Management Service.

For further information, refer to Deleting a CloudKey in the KeyControl online documentation.
Cancel a cloud key deletion in KeyControl
-
Sign in to the cloud keys vault URL created in deploy-entrust-kc.adoc#create-cloud-keys-vault.
-
Select the CloudKeys tab.
-
In the Key Set pull-down menu, select the key set created in integrate-kc-aws-byok.adoc#create-key-set-for-aws. In the Region pull-down menu, select your region.
-
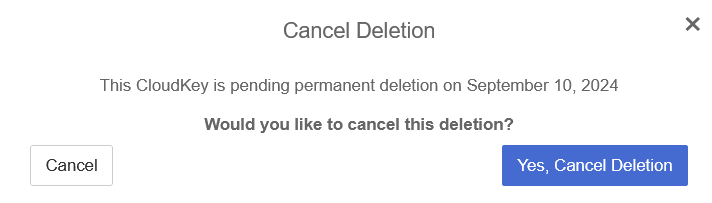
Select the key who’s scheduled deletion is going to be cancelled.
-
In the Actions pull down menu, select Cancel Deletion. The Cancel Deletion dialog appears.
-
Select Yes, Cancel Deletion.
-
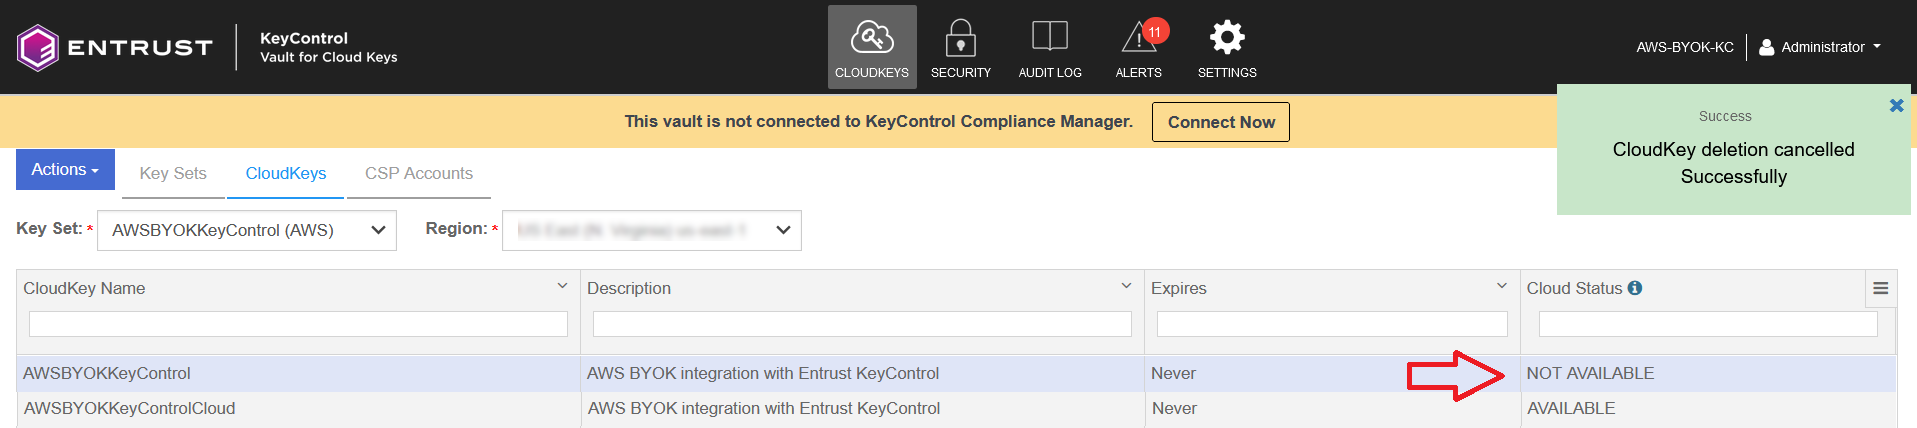
Notice the key Cloud Status becomes NOT AVAILABLE.
-
Verify the key Status changed in AWS Key Management Service.
-
Back in KeyControl, In the Actions pull down menu, select Upload to Cloud. The Upload to Cloud dialog appears.
-
Select Upload.

-
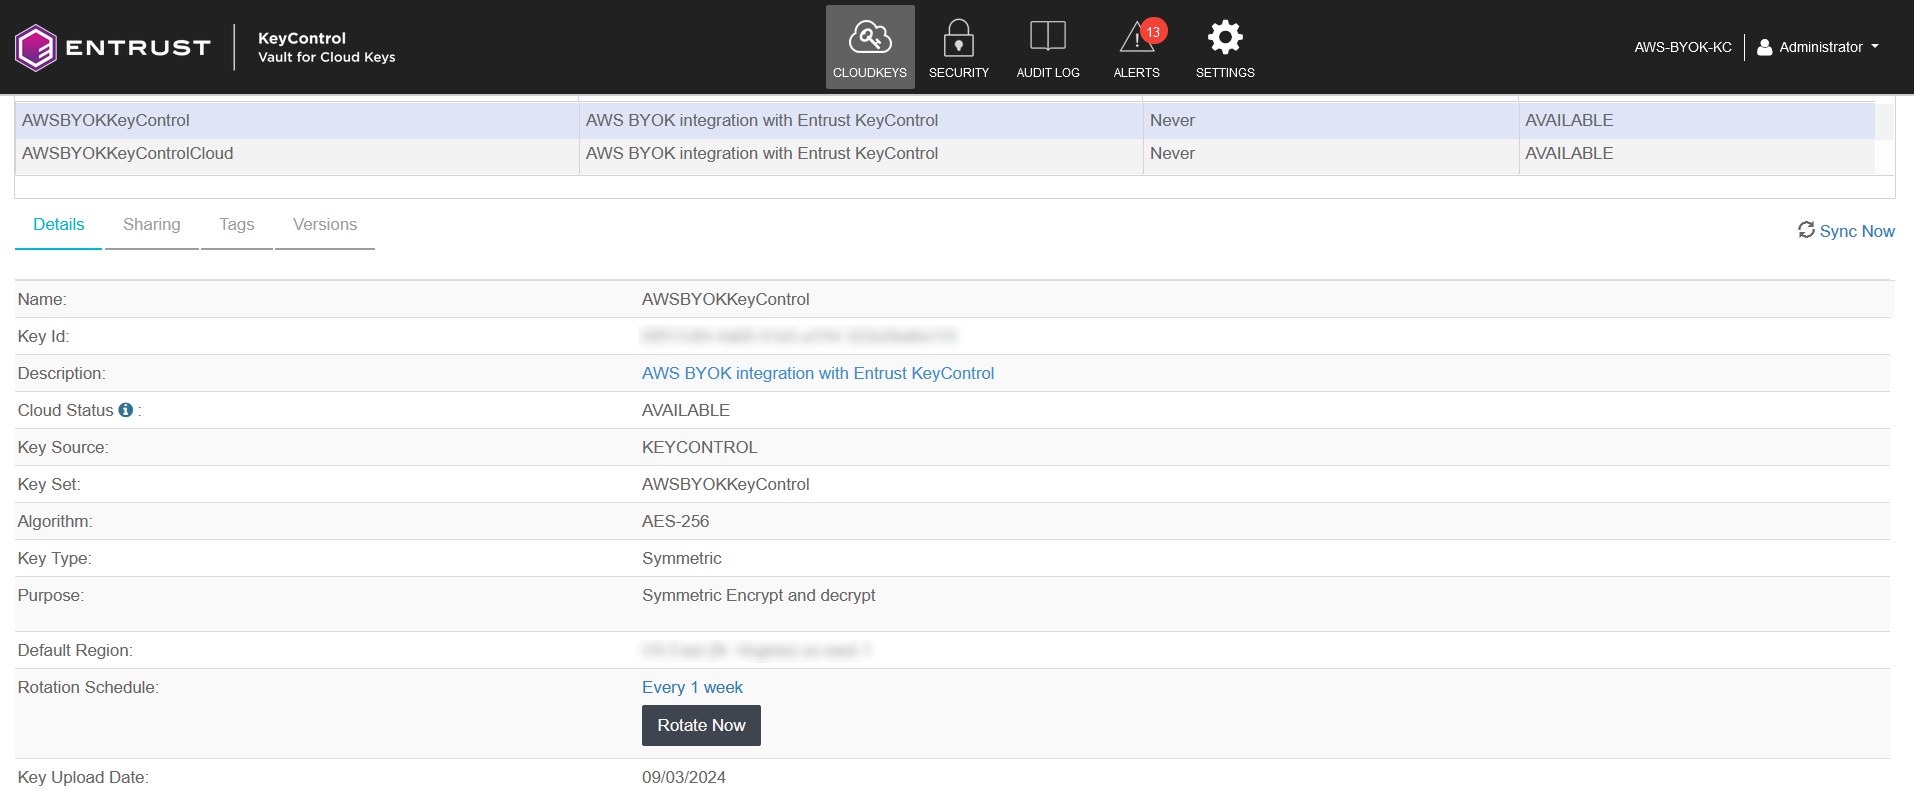
Notice the key Cloud Status becomes AVAILABLE.

-
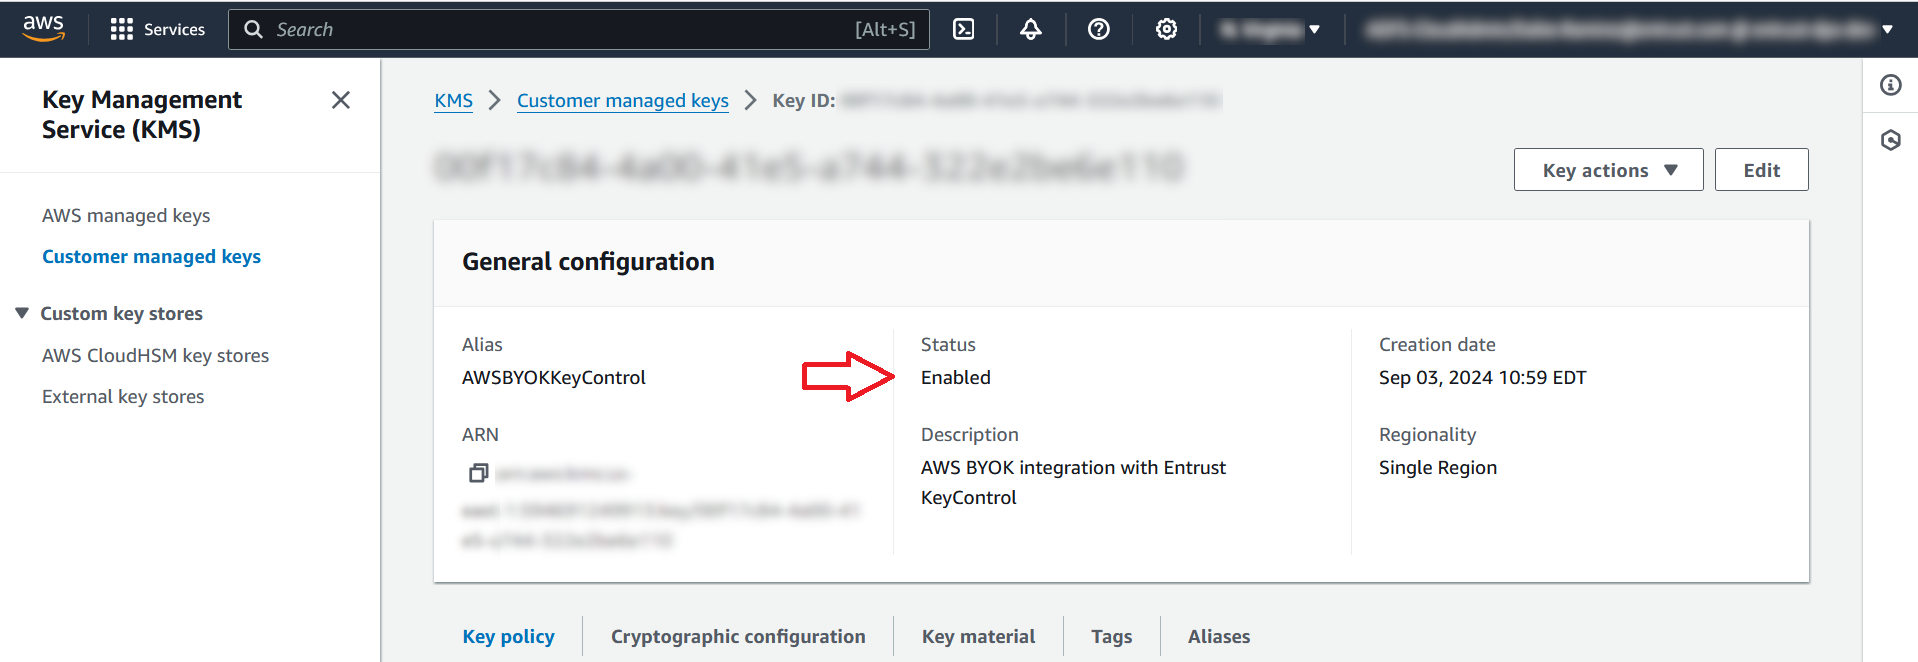
Verify the key Status changed in AWS Key Management Service.
For further information, refer to Canceling a CloudKey Deletion in the KeyControl online documentation.
Rotate a cloud key in KeyControl
-
Sign in to the cloud keys vault URL created in Create a Cloud Keys Vault in the KeyControl.
-
Select the CloudKeys tab.
-
In the Key Set pull-down menu, select the key set created in integrate-kc-aws-byok.adoc#create-key-set-for-aws. In the Region pull-down menu, select your region.
-
Select the key to be rotated.
-
Scroll down, select the Details tab, and select the Rotate Now icon.
-
Verify the key has been rotated in AWS Key Management Service.