5c 10G Configuration using KeySafe 5
The 5c 10G HSM does not use an RFS for its configuration. Instead, KeySafe 5 is used for configuration and management of the HSM. This section describes what needs to take place in the KeySafe 5 WebUI so the 5c 10G can be used by this integration. The assumption is that KeySafe 5 is already installed and that you have already provisioned the 5c 10G according to the 5c 10G Quick Start Guide.
Add the OpenShift nodes and deployment server as clients of the HSM.
You will need to add all OpenShift nodes and the deployment server as clients of the HSM. Since you don’t know what node will be used by Openshift to deploy the pods, all nodes must be added as clients.
-
Log in to the KeySafe 5 UI that you have installed:
https://xx.xxx.xxx.xxx:18080 -
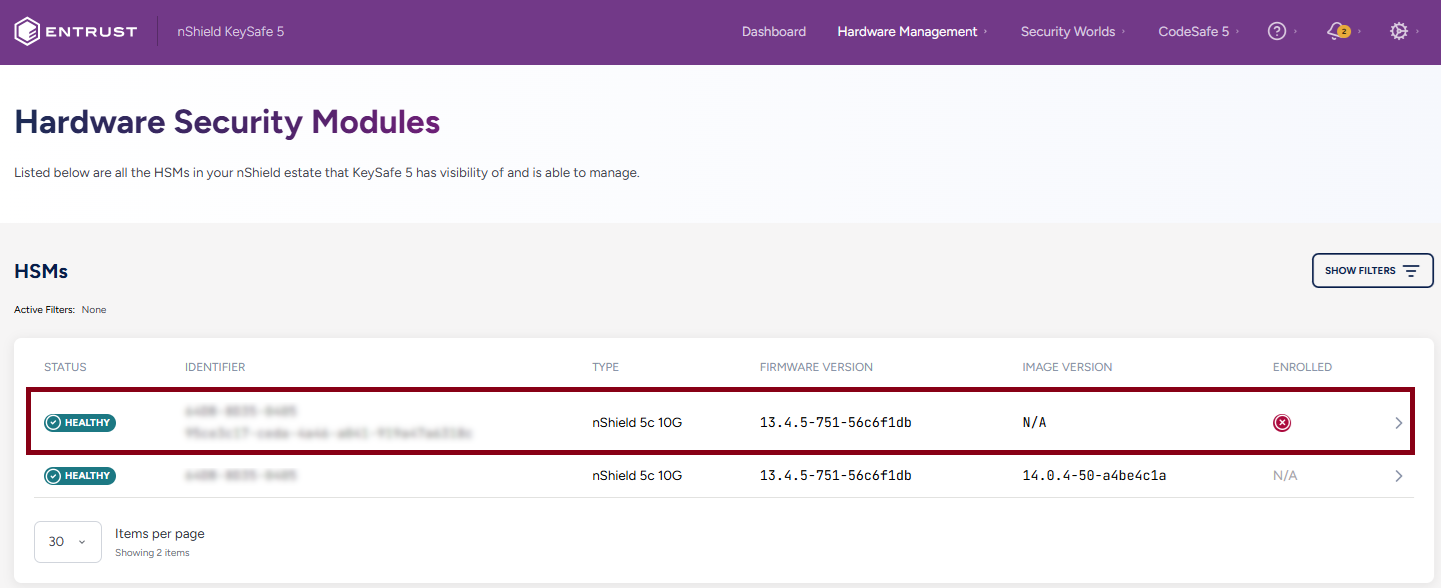
Select Hardware Management > HSMs.

-
Select the Tenant HSM.
The Tenant HSM is the HSM with the ESN displayed with the KeyHash.
-
Select the Clients tab.
-
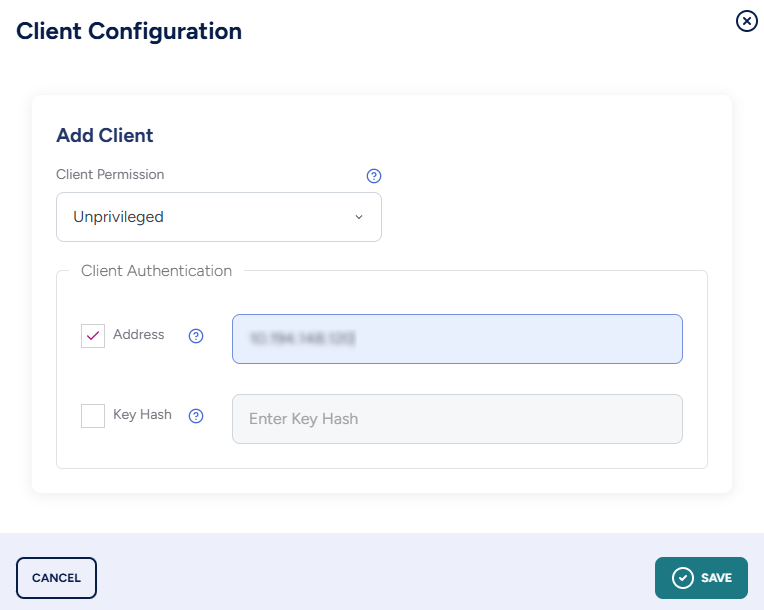
Select Add New Client.
-
In the Client Configuration dialog:
-
For Client Permission: select unprivileged.
-
For Client Authentication: Select Address and enter the IP address.
-
Select Save.
-
-
Once saved, the new client should be listed.

-
Do this for the deployment server and every OpenShift node.
Now the HSM is ready to be enrolled at the client.
TVD - Remote Administration Client
If you have to present Cards to clients of the HSM using a TVD, you must use RA Enable cards. You do this by Enabling Dynamic Slots on the HSM.
-
In the KeySafe 5 UI, in the Tenant HSM, select the Configuration Tab.
-
Select Dynamic Slots.
-
Select Edit.
-
In the Edit Dynamic Slots Dialog:
-
For Number of Dynamic Slots: Enter 4.
-
Select Save.
-
-
The KeySafe 5 UI will indicate the Module must be cleared for the configuration changes to take effect.
-
Select Close.
-
Select Actions > Clear HSM for the changes to take effect.