Procedures
Integration procedures include:
Select the protection method
For this integration, IIS binding is only possible with:
-
OCS without a passphrase.
-
Module protection.
Follow your organization’s security policy to select which one.
Install the nShield HSM
Install the HSM and Security World software using the instructions in the Installation Guide for the HSM. Entrust recommends that you do this before installing and configuring IIS.
Install the Security World software and create a Security World
-
Install the Security World software. For instructions, see the Installation Guide and the User Guide for the HSM.
-
Add the Security World utilities path
C:\Program Files\nCipher\nfast\binto the Windows system path. -
Open the firewall port 9004 for the HSM connections.
-
Install the nShield Connect HSM locally, remotely, or remotely via the serial console. See the following nShield Support articles and the Installation Guide for the HSM:
Access to the Entrust nShield Support Portal is available to customers under maintenance. To request an account, contact nshield.support@entrust.com. -
Open a command window and confirm that the HSM is
operational:C:\Users\Administrator.INTEROP>enquiry Server: enquiry reply flags none enquiry reply level Six serial number 5F08-02E0-D947 6A74-1261-7843 mode operational version 12.80.4 ... Module #1: enquiry reply flags none enquiry reply level Six serial number 5F08-02E0-D947 mode operational version 12.72.1 ... -
Create your Security World if one does not already exist, or copy an existing one. Follow your organization’s security policy for this.
-
Confirm that the Security World is
usable:C:\Users\Administrator.INTEROP>nfkminfo World generation 2 state 0x3737000c Initialised Usable ... ... Module #1 generation 2 state 0x2 Usable ...
Create the OCS
If using OCS protection, create the OCS now. Follow your organization’s security policy for the value N of K/N. As required, create extra OCS cards, one for each person with access privilege, plus spares.
| Administrator Card Set (ACS) authorization is required to create an OCS in FIPS 140 level 3. |
| After an OCS card set has been created, the cards cannot be duplicated. |
-
If using remote administration, ensure the
C:\ProgramData\nCipher\Key Management Data\config\cardlistfile contains the serial number of the card(s) to be presented. -
Open a command window as administrator.
-
Execute the following command. Follow your organization’s security policy for the values K/N. The OCS cards cannot be duplicated after they are created. Do not enter a passphrase or password at the prompt, just press Return. Notice
slot 4, remote via a Trusted Verification Device (TVD), is used to present the card. In this example, K=1 and N=1.>createocs -m1 -s4 -N testOCS -Q 1/1 FIPS 140 level 3 auth obtained. Creating Cardset: Module 1: 0 cards of 1 written Module 1 slot 0: Admin Card #1 Module 1 slot 4: blank card Module 1 slot 3: unknown card Module 1 slot 2: empty Module 1 slot 5: empty Module 1 slot 4:- no passphrase specified - writing card Card writing complete. cardset created; hkltu = 991b6cb36db1adbe317964086273eee97e466123Add the
-p(persistent) option to the command above to retain authentication after the OCS card has been removed from the HSM front panel slot, or from the TVD. If using OCS card protection and the non-persistent card configuration, OCS cards must be be inserted in the nShield front panel or always present in the TVD. The authentication provided by the OCS as shown in the command line above is non-persistent and only available for K=1, and while the OCS card is present in the HSM front panel slot, or TVD. -
Verify the OCS created:
>nfkminfo -c
Cardset list - 1 cardsets:  (P)ersistent/(N)ot, (R)emoteable/(L)ocal-only
 Operator logical token hash               k/n timeout  name
 991b6cb36db1adbe317964086273eee97e466123  1/1  none-NL testOCS
The
rocsutility also shows the OCS created:>rocs `rocs` key recovery tool Useful commands: `help`, `help intro`, `quit`. rocs> list cardset No. Name Keys (recov) Sharing 1 testOCS 0 (0) 1 of 1 rocs> quit
Install and register the CNG provider
-
Select Start > Entrust > CNG configuration wizard.
-
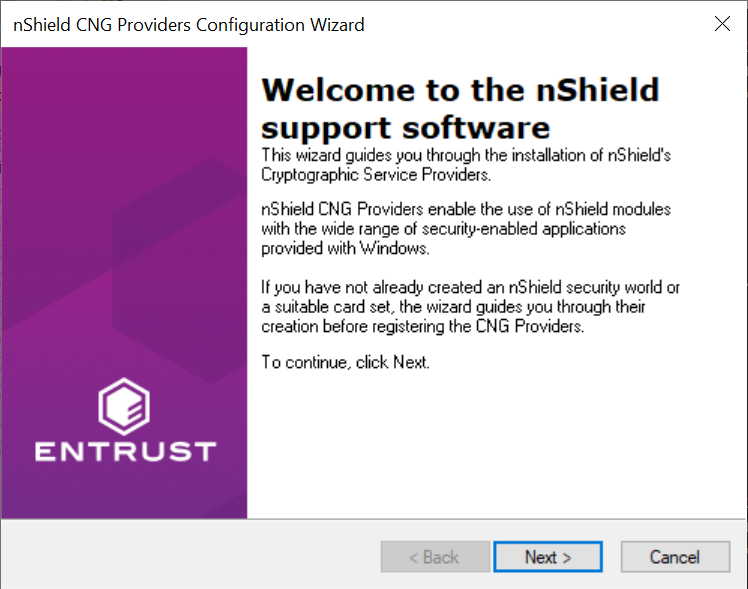
Select Next on the Welcome window.
-
Select Next on the Enable HSM Pool Mode window, leaving Enable HSM Mode for CNG Providers un-checked.
If you intend to use multiple HSMs in a failover and load-sharing capacity, select Enable HSM Pool Mode for CNG Providers. If you do, you can only use module protected keys. Module protection does not provide conventional 1 or 2 factor authentication. Instead, the keys are encrypted and stored as an application key token, also referred to as a Binary Large Object (blob), in the kmdata/localdirectory. -
Select Use existing security world on the Initial setup window. Then select Next.
-
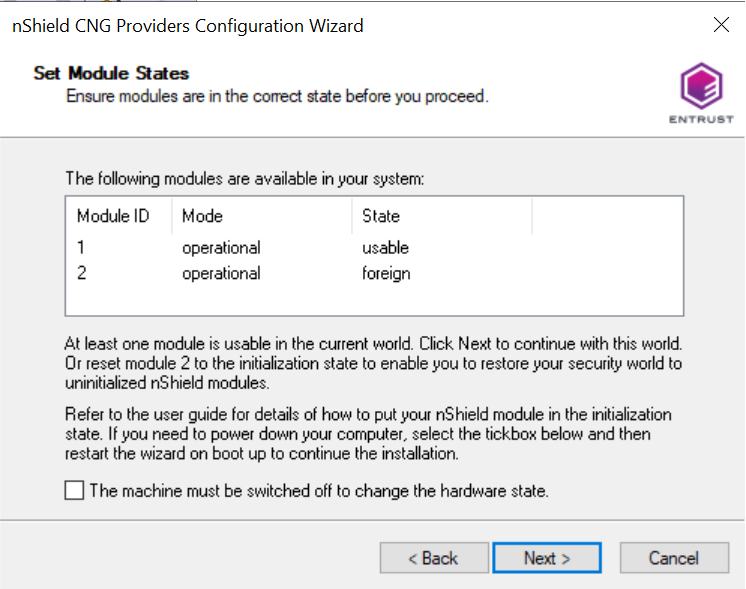
Select the HSM (Module) if more than one is available on the Set Module States window. Then select Next.
-
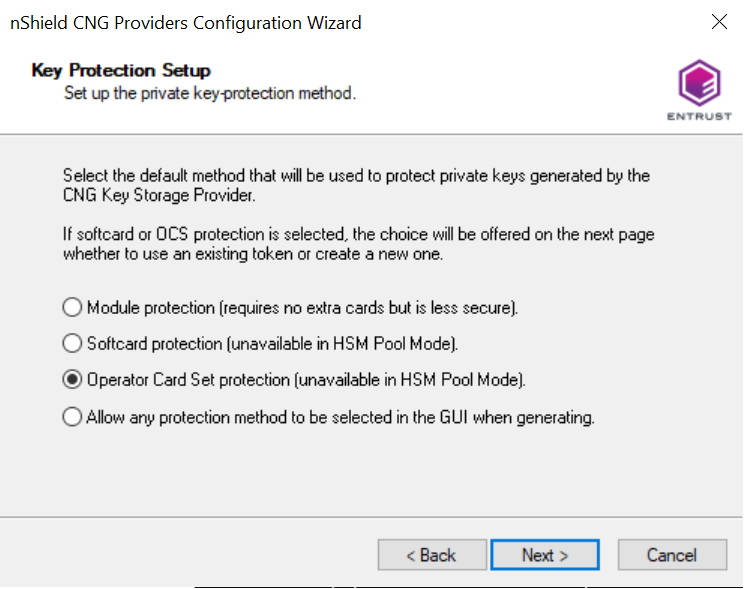
In Key Protection Setup, select Operator Card Set protection. Then select Next.
-
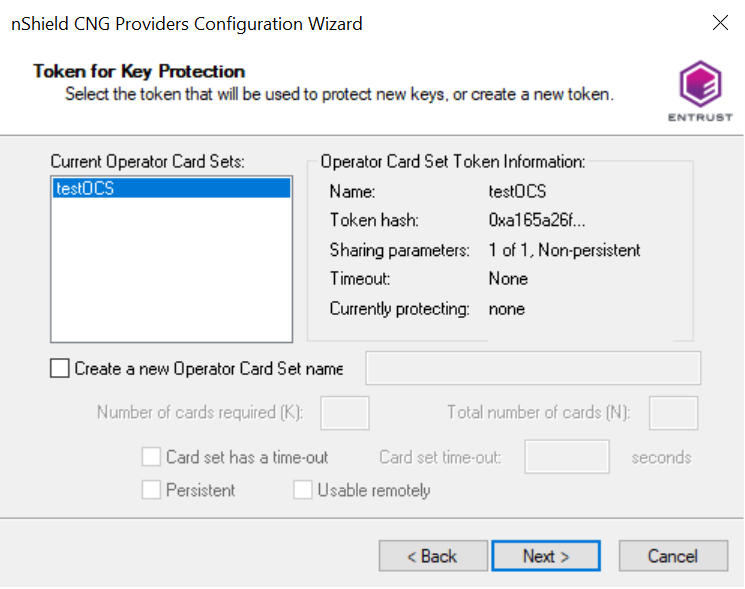
Choose from the Current Operator Card Sets or Current Softcards list. Notice these were created above. Then select Next and Finish.
-
Verify the provider with the following commands:
>certutil -csplist | findstr nCipher Provider Name: nCipher DSS Signature Cryptographic Provider Provider Name: nCipher Enhanced Cryptographic Provider Provider Name: nCipher Enhanced DSS and Diffie-Hellman Cryptographic Provider Provider Name: nCipher Enhanced DSS and Diffie-Hellman SChannel Cryptographic Provider Provider Name: nCipher Enhanced RSA and AES Cryptographic Provider Provider Name: nCipher Enhanced SChannel Cryptographic Provider Provider Name: nCipher Signature Cryptographic Provider Provider Name: nCipher Security World Key Storage Provider >cnglist.exe --list-providers | findstr nCipher nCipher Primitive Provider nCipher Security World Key Storage Provider -
Check the registry in
CNGRegistry:HKEY_LOCAL_MACHINE\SYSTEM\ControlSet001\Control\Cryptography\Providers\nCipherSecurityWorldKeyStorageProvider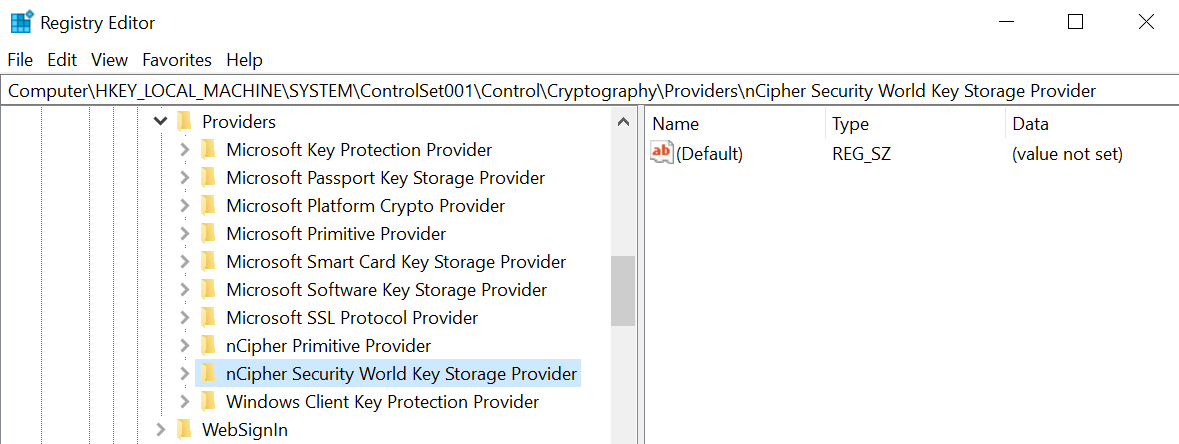
Install IIS
To install Microsoft Internet Information Services:
-
Open Server Manager by selecting Start > Server Manager.
-
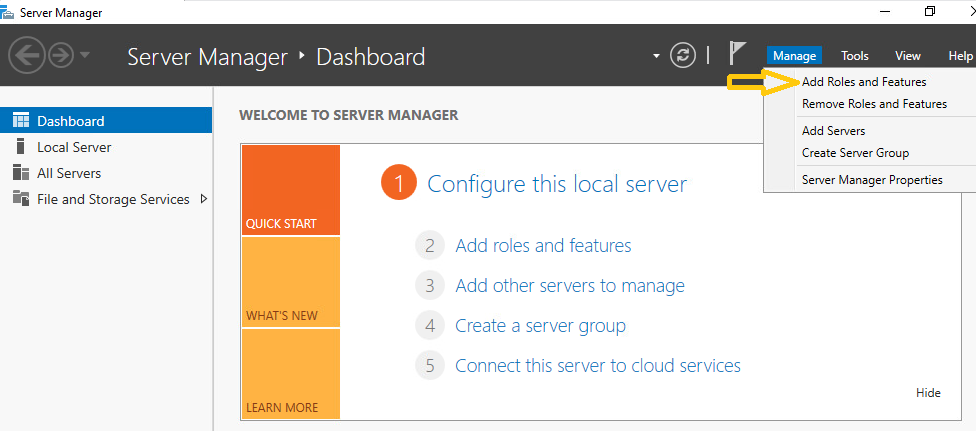
Select Manage and then select Add Roles and Features.
-
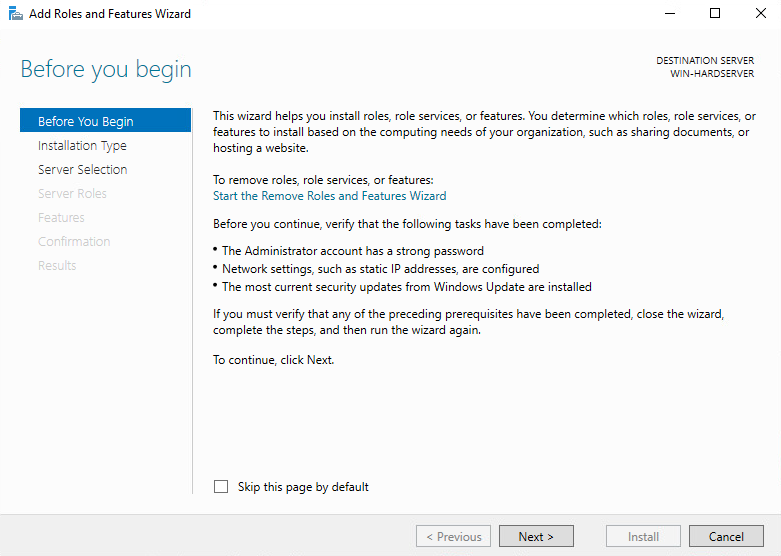
On the Before you begin screen, select Next.
-
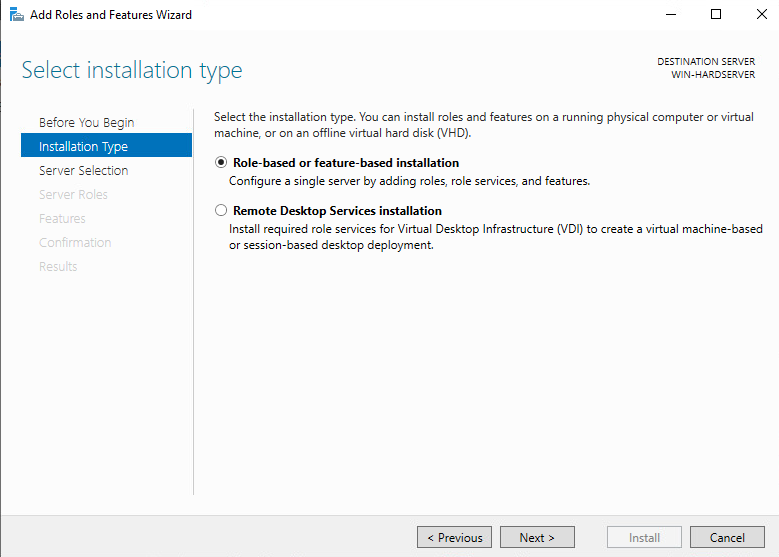
On the Select installation type screen, ensure the default selection of Role or Feature Based Installation is selected and select Next.
-
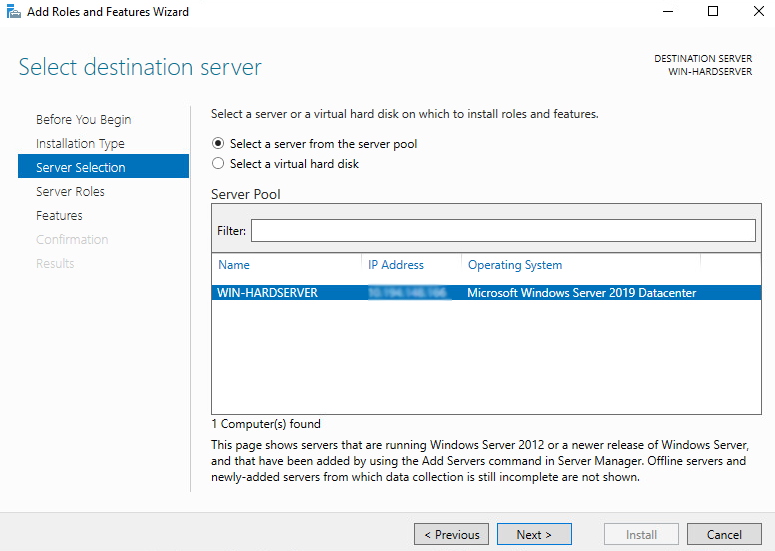
On the Server Selection screen, select a server from the server pool and select Next.
-
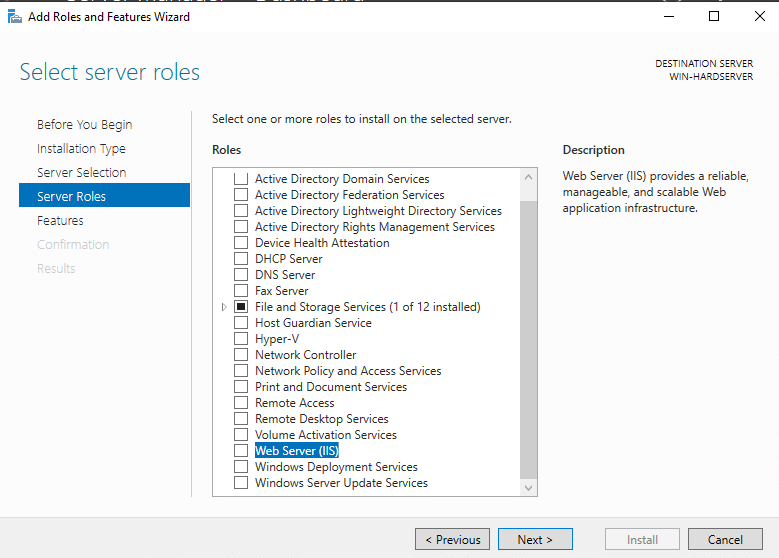
On the Select server roles screen, select the Web Server (IIS) Role and select Next
-
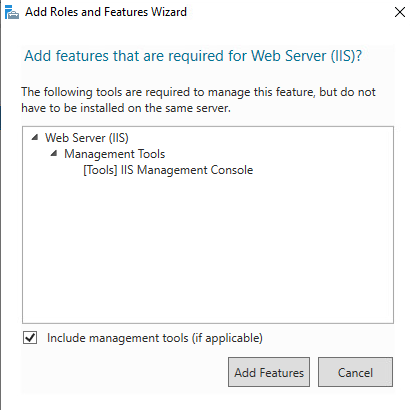
When prompted to install Remote Server Administration Tools, select Add Features and select Next.
-
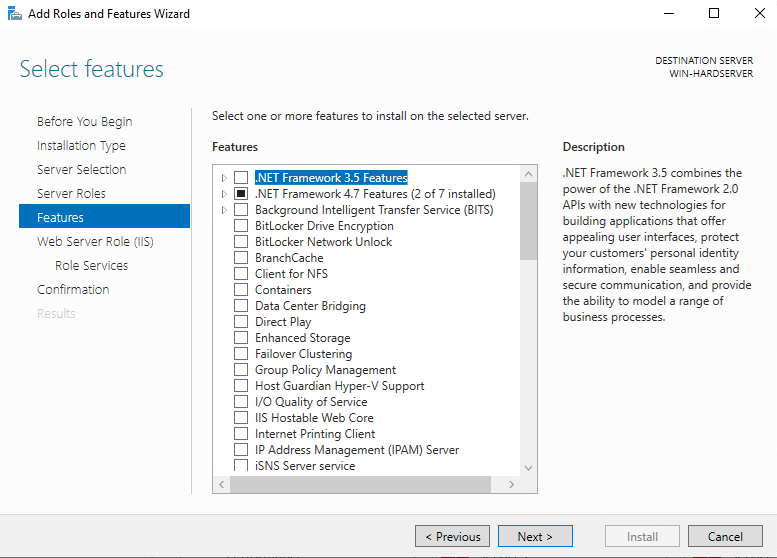
On the Select features screen, keep the default selection and select Next.
-
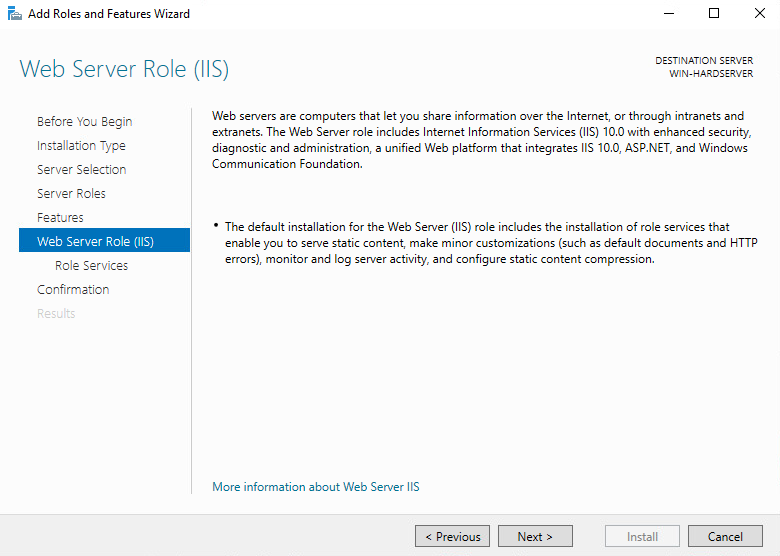
On the Web Server Role (IIS) screen, select Next.
-
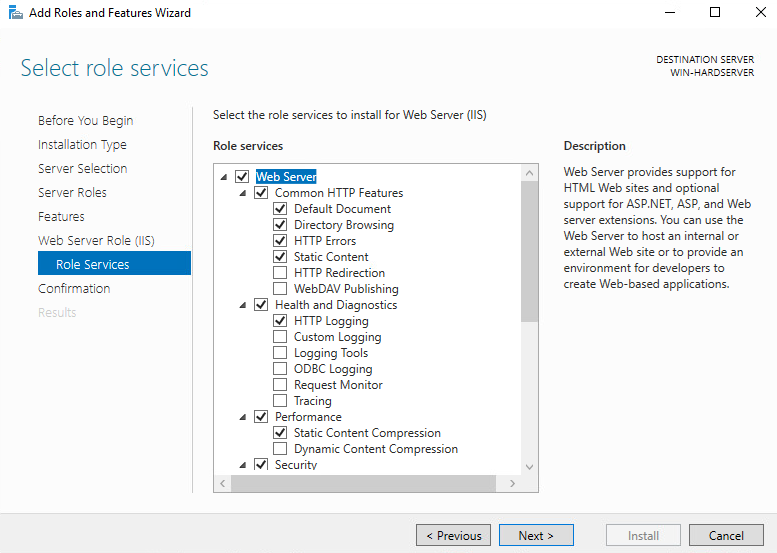
On the Select Role Service screen, select Next.
-
On the confirmation screen, select Install.

-
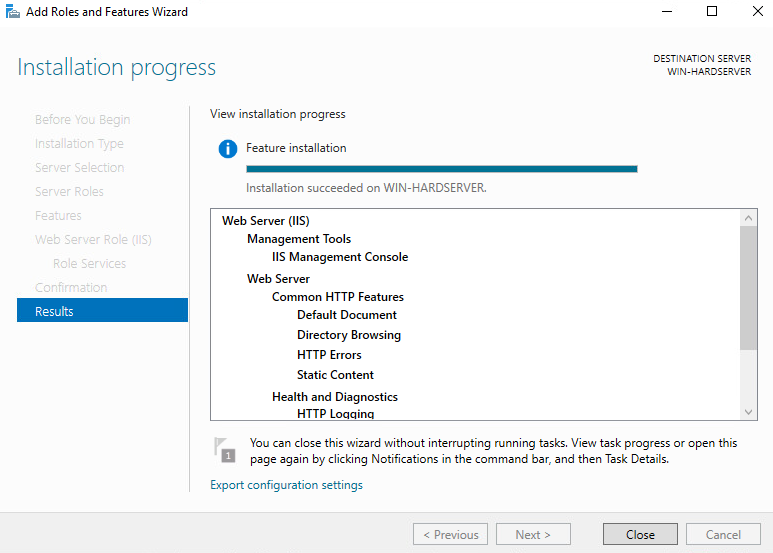
Once the installation completes, Select Close.
Create a certificate request
IIS Manager does not support the creation of certificates protected by CNG Keys and these must be created using the Microsoft command line utilities. Commands executed in this section are run on a PowerShell in Windows.
| Due to limitations of IIS itself, no GUI prompts (even via nShield Service Agent) can be displayed, so any OCS protection must be passphrase-less 1/n quorum. For this reason, use only OCS or module protection. |
Complete the following steps to create a certificate request:
-
Make sure the nCipher Primitive Provider and nCipher Security World Key Storage Providers are listed:
% cnglist.exe --list-providers

Microsoft Key Protection Provider
Microsoft Passport Key Storage Provider
Microsoft Platform Crypto Provider
Microsoft Primitive Provider
Microsoft Smart Card Key Storage Provider
Microsoft Software Key Storage Provider
Microsoft SSL Protocol Provider
Windows Client Key Protection Provider
nCipher Primitive Provider
nCipher Security World Key Storage Provider
If the nCipher Primitive ProviderandnCipher Security World Key Storage Providerare not listed, follow the steps in Install and register the CNG provider. -
Set up a template file:
-
Generate a request for an SSL certificate linked to a 2K RSA key by creating a file called
request.infwith the following information:[Version] Signature= "$Windows NT$" [NewRequest] Subject = "CN=interop.com,C=US,ST=Florida,L=Sunrise,O=InteropCom,OU=WebServer" HashAlgorithm = SHA256 KeyAlgorithm = RSA KeyLength = 2048 ProviderName = "nCipher Security World Key Storage Provider" KeyUsage = 0xf0 MachineKeySet = True [EnhancedKeyUsageExtension] OID = 1.3.6.1.5.5.7.3.1Your
request.inffile can vary from the code given above. This is an example, not a definitive model. -
Specify the subject details of the Domain Controller which is issuing the certificate.
-
Specify the key algorithm and key length as required, for example RSA 2048.
-
Specify the Provider name as nCipher Security World Key Storage Provider.
-
After you set up the template successfully, save it as
request.infon theC:\drive.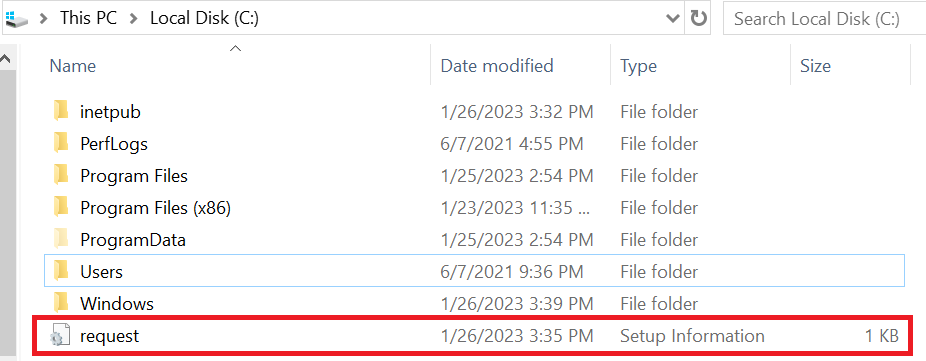
-
-
Open a command prompt and go to the local drive, in this case
C:\. -
To create the certificate request for the Certification Authority, execute the command:
% certreq.exe -new request.inf IISCertRequest.csr

CertReq: Request Created
A certificate request called
IISCertRequest.csris generated and placed on theC:\drive. This file is used to be sent to a Certificate Authority.
Get the signed certificate
-
Submit the CSR file to a CA such as VeriSign, Entrust, and so on.
-
The CA authenticates the request and returns a signed certificate or a certificate chain.
-
Save the reply from the CA in the current working directory.
In this guide the signed certificate file is IISCertRequest.cer.
Install the certificate
Make the certificate available to be used in IIS and bind the certificate with the https settings in IIS.
Commands used in this section are run from a Windows PowerShell.
Make the certificate available for use in IIS
To make the certificate available for use in IIS, run the following command:
% certreq -accept IISCertRequest.cerWhere IISCertRequest.cer is the binary certificate exported from the CA.
Running this command makes the CA certificate trusted on the Web Server.
Installed Certificate:
  Serial Number: 1c00000002685e0d9d05770729000000000002
  Subject: CN=interop.com, OU=WebServer, O=InteropCom, L=Sunrise, S=Florida, C=US
  NotBefore: 1/25/2023 2:18 PM
  NotAfter: 1/25/2024 2:28 PM
  Thumbprint: 7a814f14f77db1eae717a4c753fd7b184d6a6037
Bind the certificate with a secure IIS web server
-
Go to Start > Internet Information Service Manager.
-
Select the hostname, then double-click Server Certificates and verify the certificate you accepted in the previous step is listed.
-
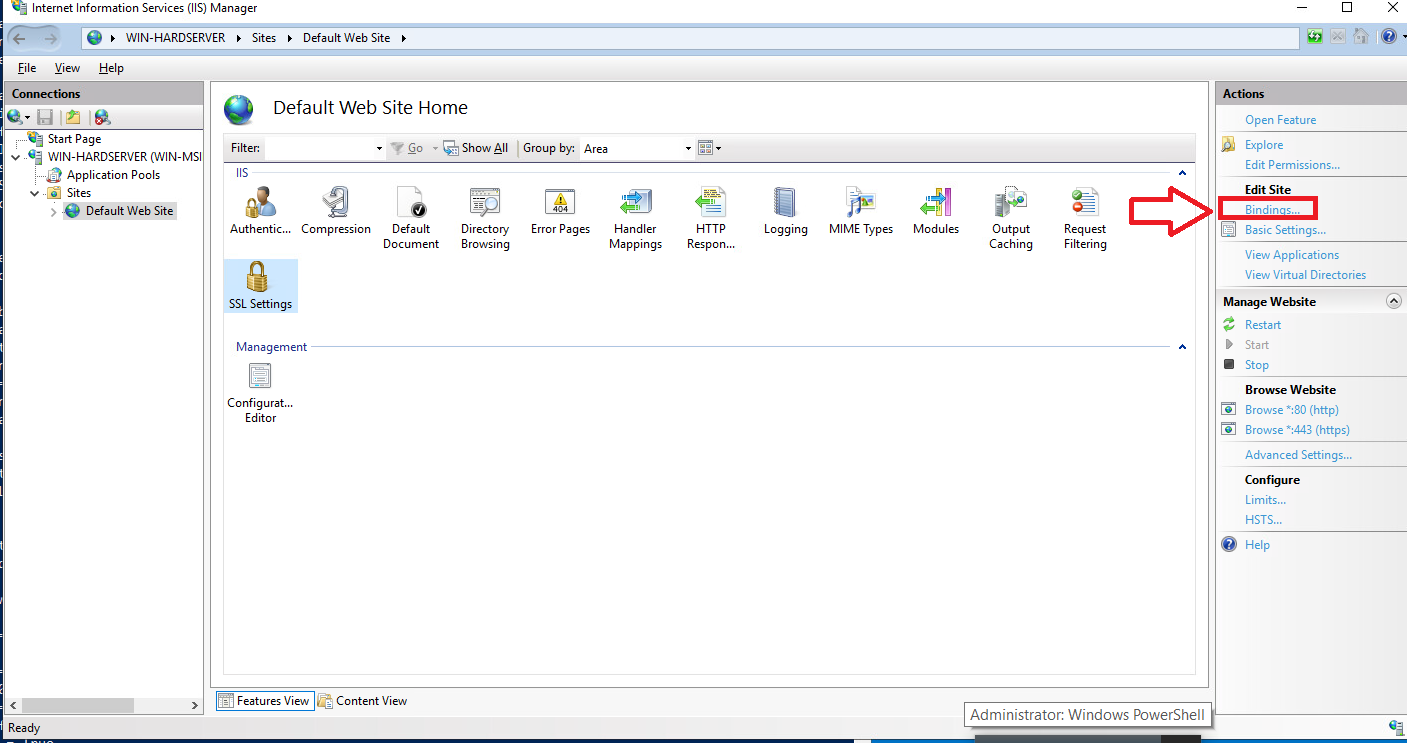
Under Sites on the left-hand side of the IIS Manager screen, select Default website.
-
Select Bindings link on the right-hand side of the IIS Manager.
-
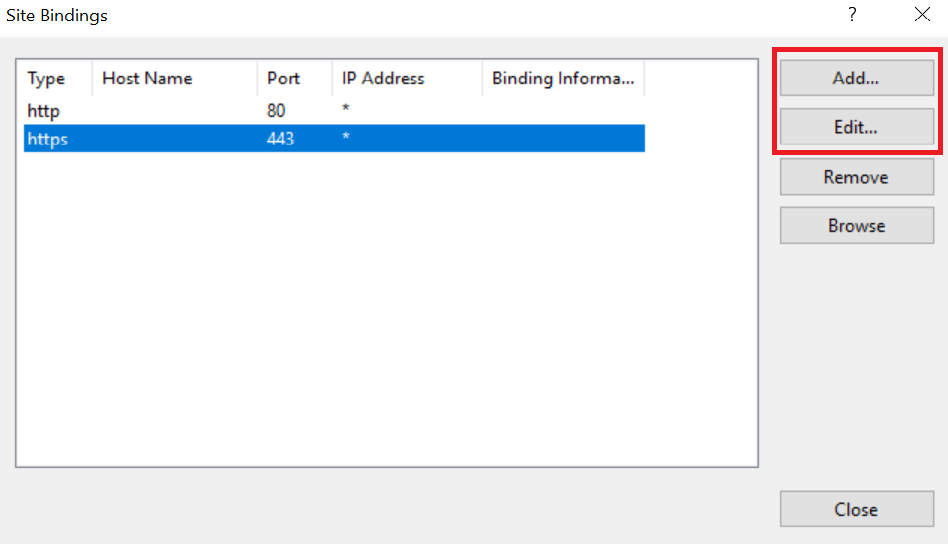
Access the Site Bindings screen.
-
If the https protocol is not listed, you must add it now. To do this, select Add, set the protocol as https and select the required certificate from the list.
-
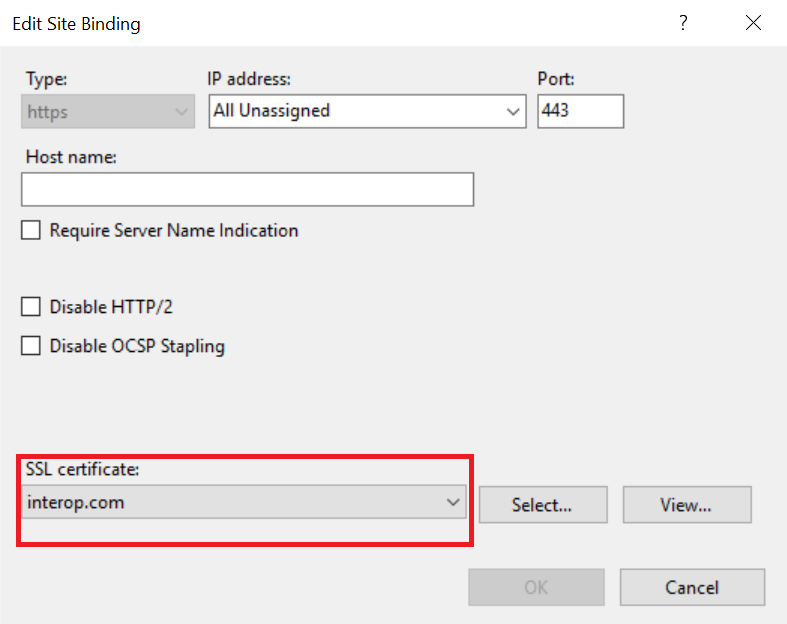
Select the https protocol, select Edit, and then select the certificate from the list:
-
Select OK to complete the certificate binding for SSL connection.
-
Select Close on the Site Bindings screen.
-
Restart the IIS server.
Integrate an nShield HSM with an existing IIS deployment
This section describes how to upgrade an existing IIS server installation to use an nShield HSM to protect the private key. It is assumed that the existing certificate must continue to be used by the server afterwards.
The Prerequisites to integrate are:
-
An IIS set-up with software-protected certificate and private key.
-
nShield Software installed and a Security World created using The CNG Configuration Wizard, or the front panel of an nShield Connect.
Export the software-protected certificate
Complete the following procedure to export the software-protected certificate:
-
Type
MMCat the command prompt and select OK.The Microsoft Management Console starts.
-
On the initial screen, select File > Add/Remove Snap-in and select Add.
-
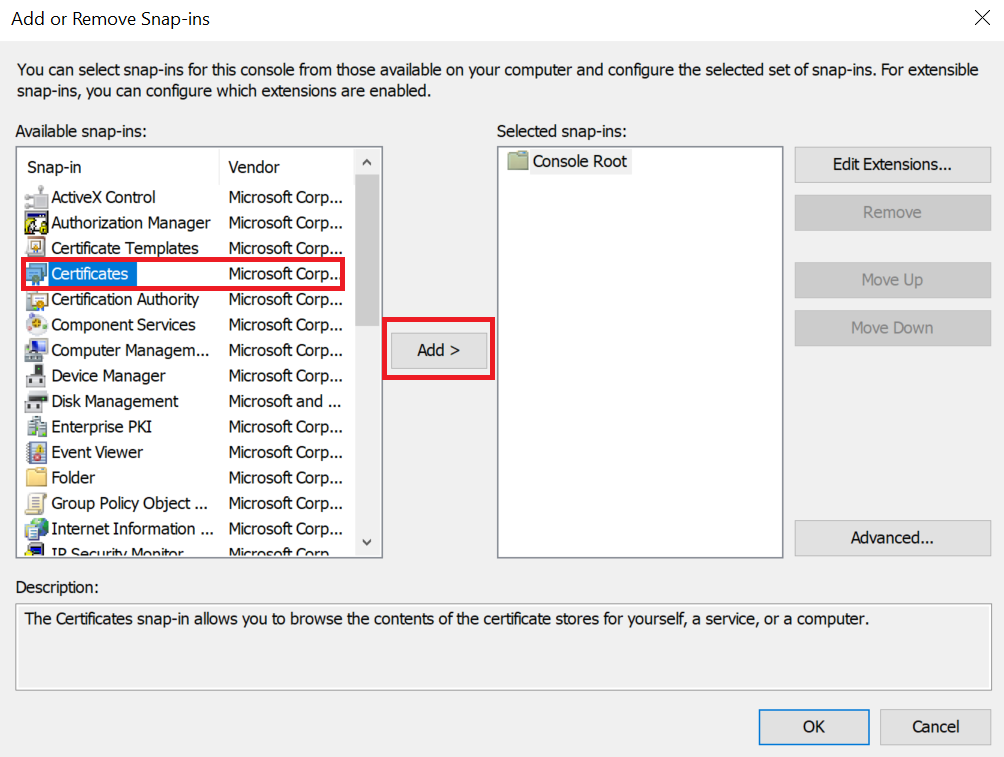
Select Certificates from Available Standalone Snap-ins and select Add.
-
On the Certificates snap-in screen, select Computer account and select Next.
-
On the Select Computer screen, select Local computer, select Finish then OK.
-
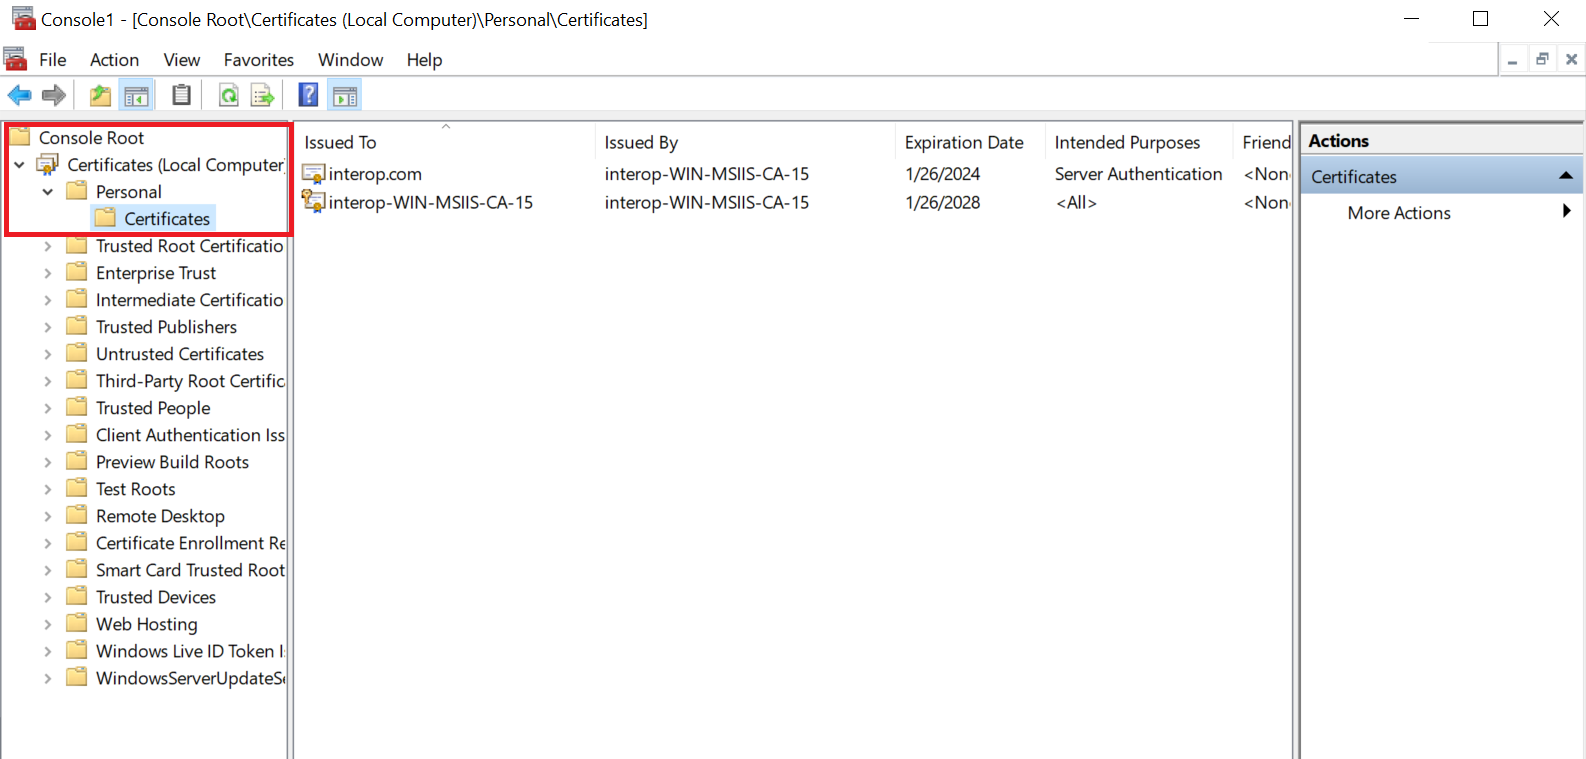
Navigate to Certificates (Local Computer) > Personal > Certificates.
-
Right-select the certificate file and select All Tasks > Export.
-
The Welcome to the Certificate Export Wizard screen appears. Select Next.
-
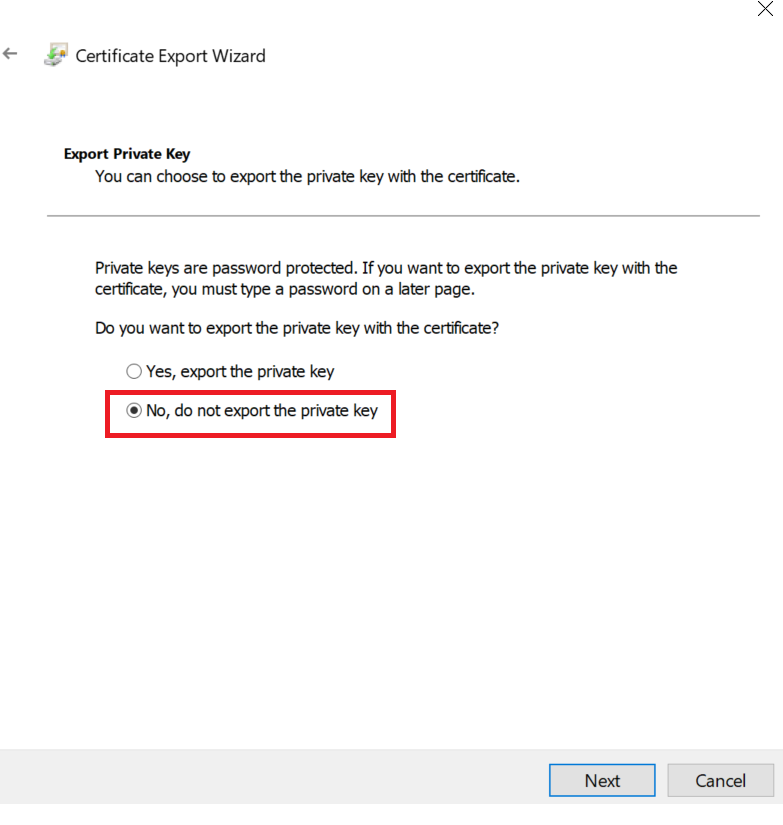
On the Export Private Key screen, select No, do not export the private key and select Next.
-
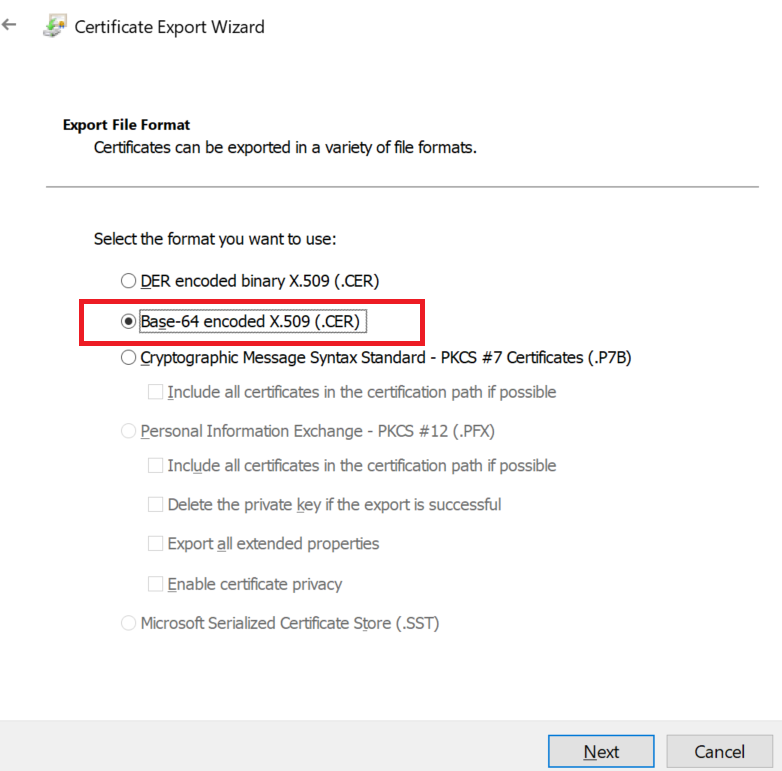
On the Export File Format screen, select Base-64 encoded X.509 (.Cer) and select Next.
-
On the File to Export screen, select an absolute path and filename to save the exported Certificate.
Select Next.
-
The Completing the Certificate Export Wizard screen appears.
Select Finish.
-
After exporting the certificate, delete the certificate from the certificate store.
Import a certificate into the certificate store
-
Go to the command prompt and type
MMC, then select OK to open the Microsoft Management Console. -
On the initial screen, select File > Add/Remove Snap-in and select Add.
-
From Available Standalone Snap-ins, select Certificates and select Add.

-
On the Certificates snap-in screen, select Computer account and select Next.
-
On the Select Computer screen, select Local computer, select Finish and select OK.
-
Navigate to Certificates (Local Computer) > Personal > Certificates.
-
Right-click the certificate folder and select All Tasks > Import.
-
The Welcome to the Certificate Import Wizard screen appears. Select Next.
-
Navigate to the location of the certificate from the Origin Server and select Next.
-
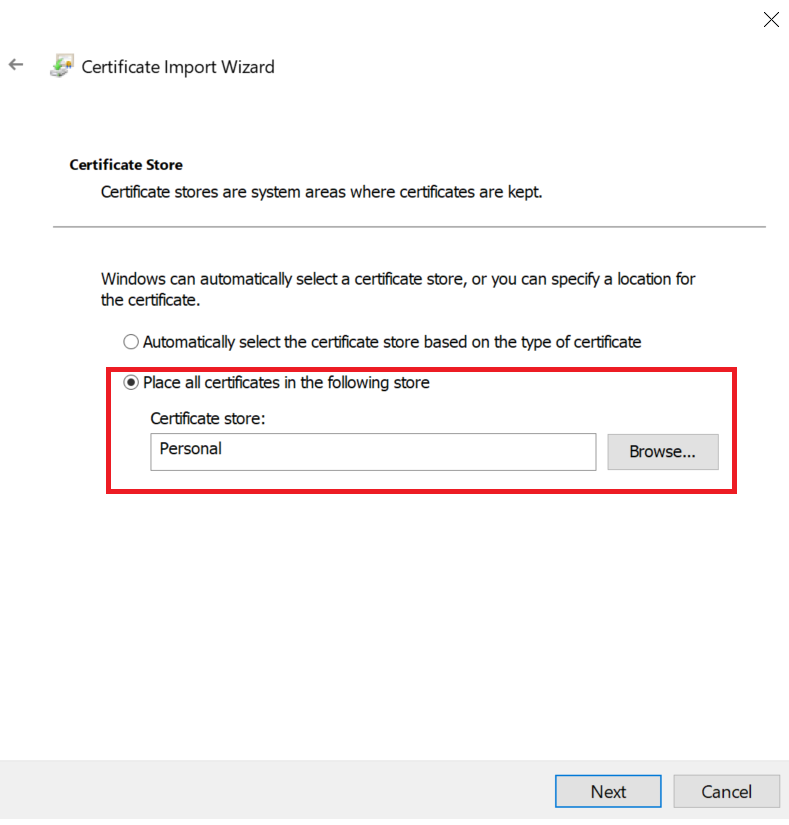
On the Certificate Store screen, select Place all certificates in the following store.
-
Make sure that the default selection in Certificate Store is Personal, then select Next.
-
The Completing the Certificate Import Wizard screen appears.
Select Next, then select OK.
-
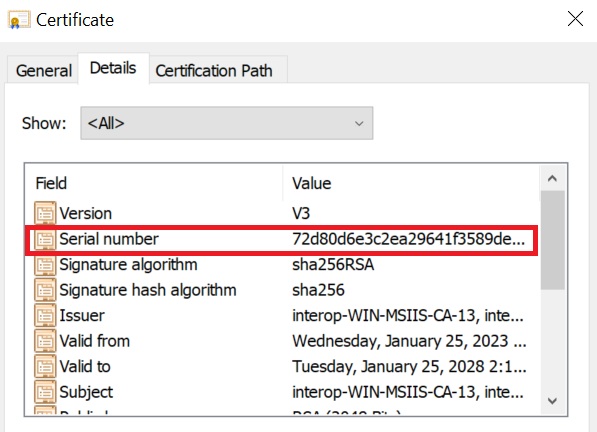
Locate the serial number for the certificate. To do this on the Microsoft Management Console, access Certificates, select the certificate, and select the Details tab to see the Serial Number.
-
Run the following command from the Windows terminal:
certutil -f -csp "nCipher Security World Key Storage Provider" -repairstore my <serial number of certificate> -
Open the IIS Manager from Start > Internet Information Services (IIS) Manager.
-
Under Sites on the left-hand side of the IIS Manager screen, select the required web site.
-
On the right-hand side of the IIS Manager screen, select Bindings.
-
On the Site Bindings screen, select Add.
-
Select the protocol HTTPS.
-
Select the certificate from the drop-down list.
-
To complete the certificate binding for SSL connection, select OK.