Configure Microsoft Azure
Create an app registration in Azure
The app registration provides trust between your app and Azure.
-
Open a browser and sign in to the Azure portal https://portal.azure.com/#home.
-
Navigate to Home > Azure Active Directory > App registrations.
-
Select New registration.
The Register an application dialog.
-
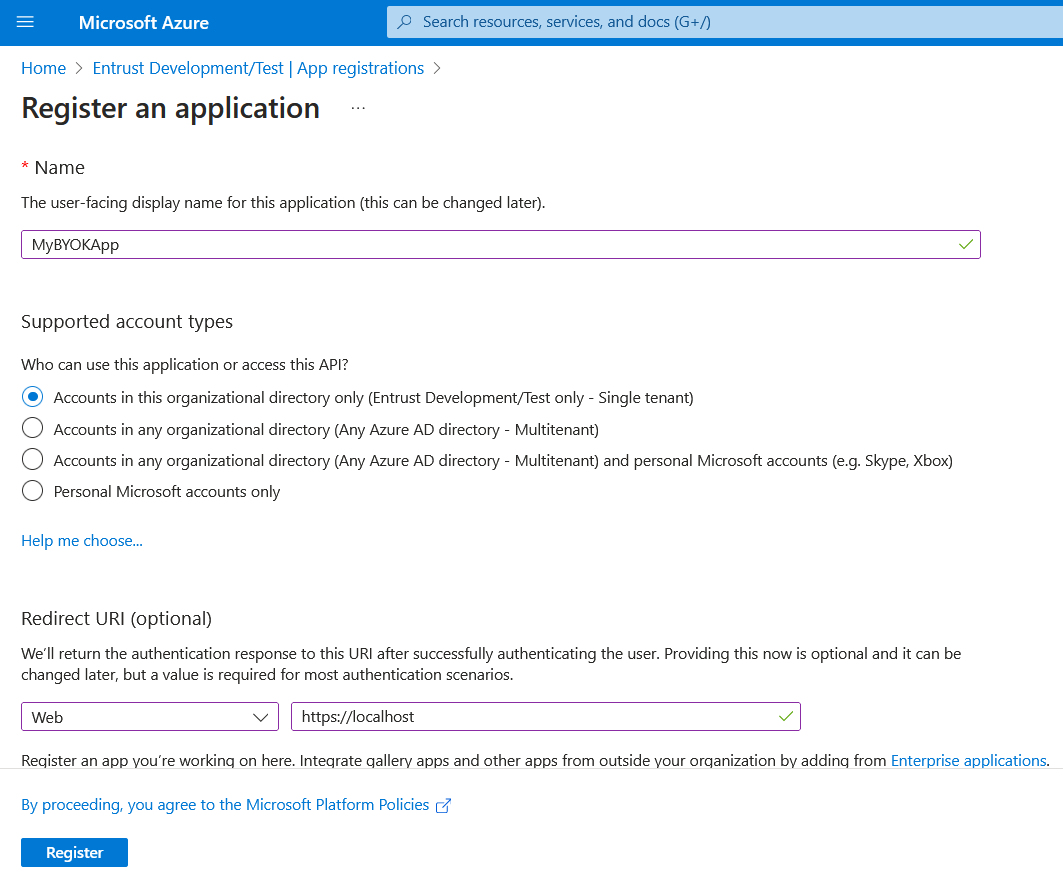
Enter the Name, a user-facing or friendly name. Select the applicable Supported account types and enter a Redirect URI.
For example:
-
Select Register.
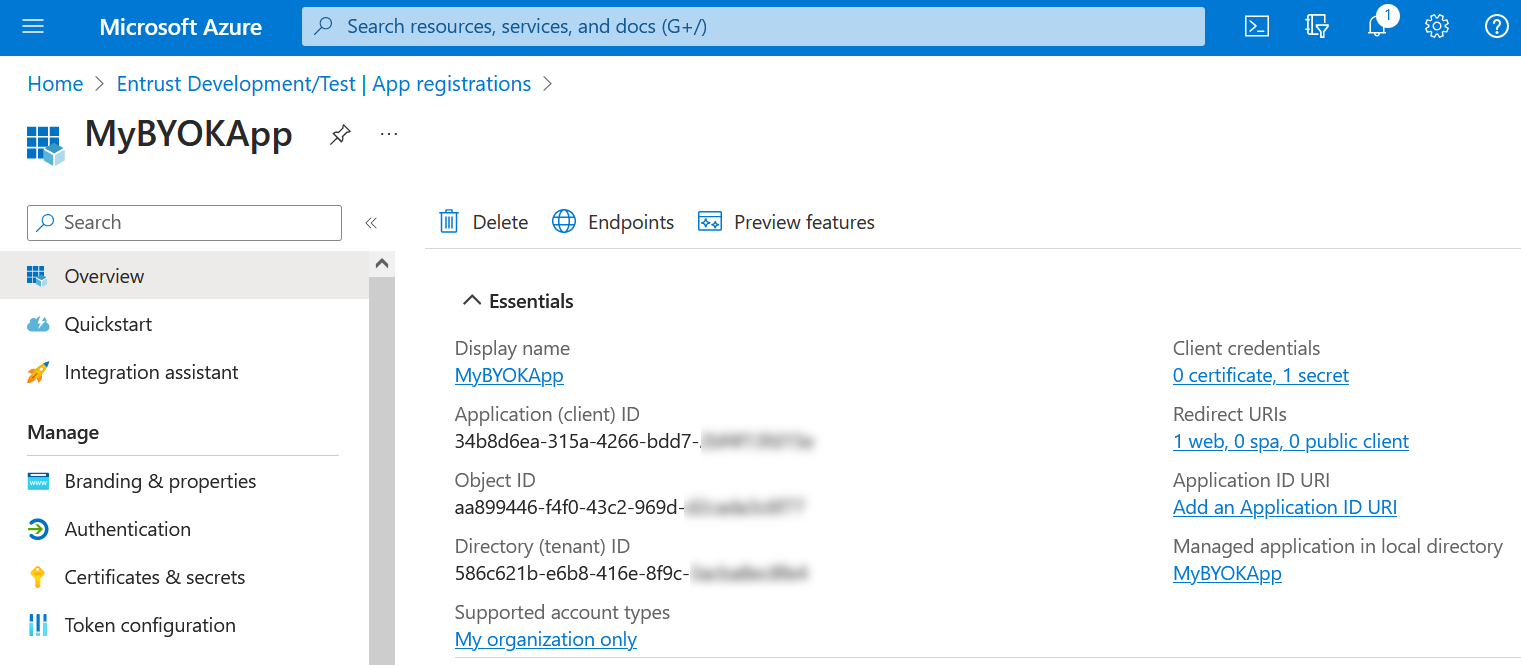
The newly created registration appears.
-
Select API permissions. Alternatively, select Home > Azure Active Directory > App Registrations > <Display name> > API permissions.
-
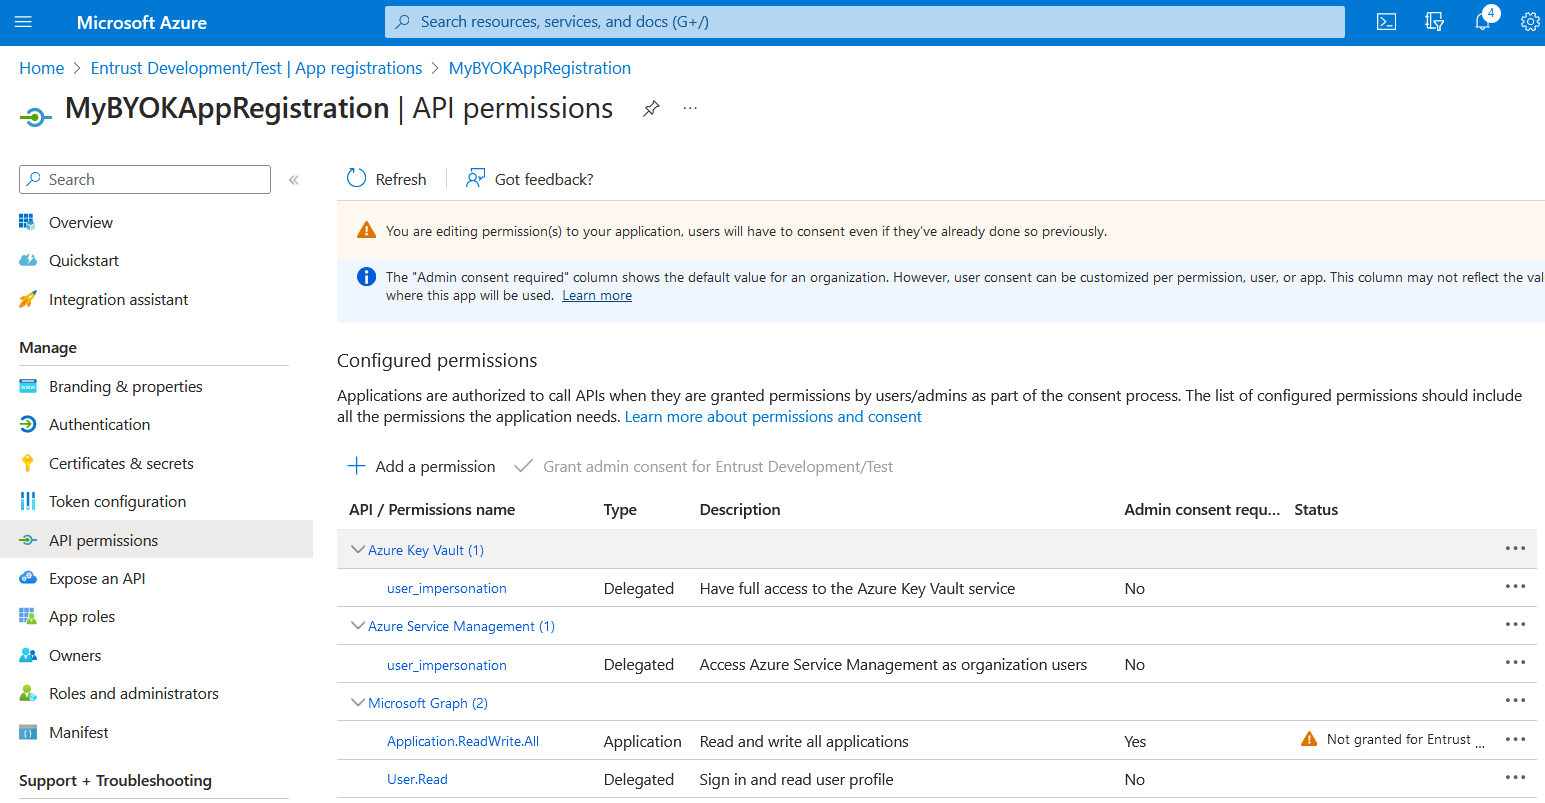
Select Add a permission and add the following permissions:
Microsoft API Permission Type Microsoft Graph
Application.ReadWrite.AllApplication
Microsoft Graph
User.Read(granted by default)Delegated
Azure Key Vault
user_impersonationDelegated
Azure Service Management
user_impersonationDelegated
For example:
For additional information, see Creating a Service Principal.
Add the app to the subscription Reader Role list
| The Owner permission of the subscription is required to perform this operation. |
-
Navigate to Home > Subscriptions.
-
Select your subscription.
-
Select Access control (IAM).
-
Select Add and then select Add role assignment from the pull-down menu.

-
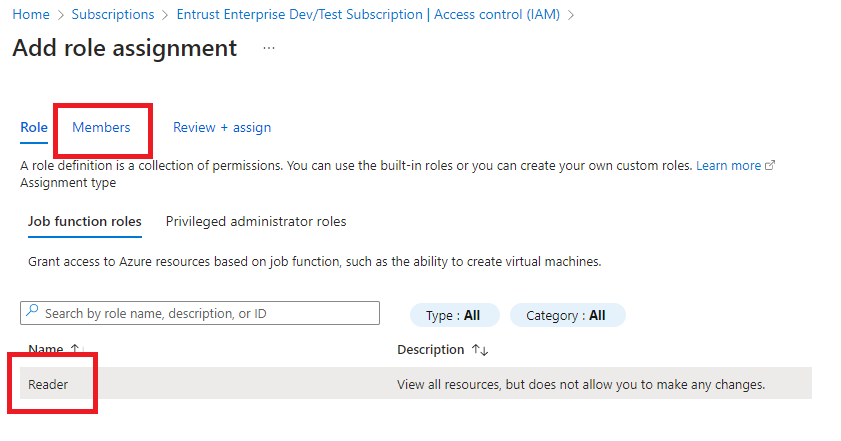
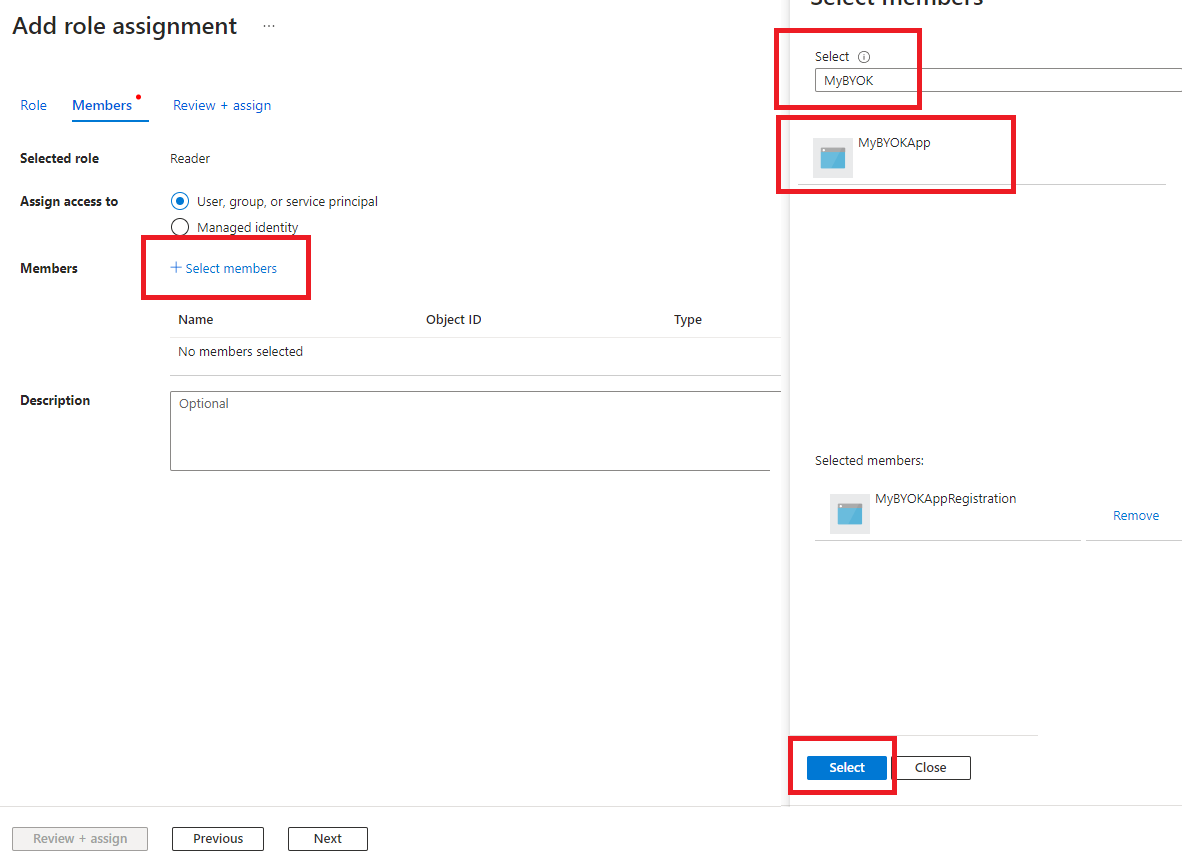
In the Add role assignment dialog, select the Reader role and then select the Members tab.
-
Select Select members, search for the app Display name, and select it.
-
Select Save.
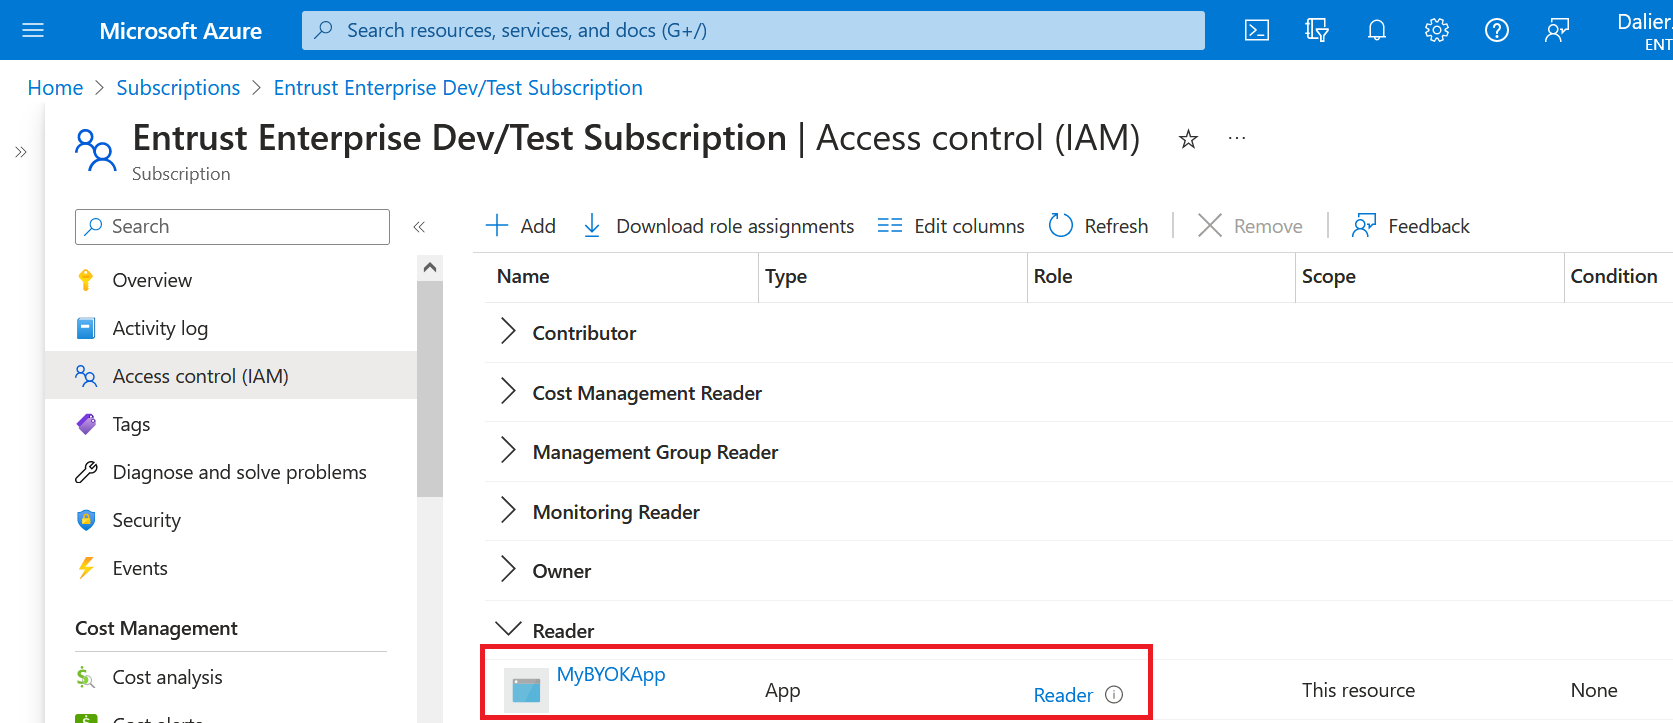
The new subscription Reader role is added.
Create an Azure key vault
An existing Azure key vault with Permission model equals Vault access policy can be used for this integration. A new Azure key vault was created in this integration to show the entire process.
For an existing Azure key vault, proceed to section Add the app registration to the key vault access policies directly, skipping this section entirely.
-
Open a browser and sign in to the Azure portal https://portal.azure.com/#home.
-
In the home page, select the Create a resource icon.
-
Select Key Vault.
The Create a key vault dialog appears.
-
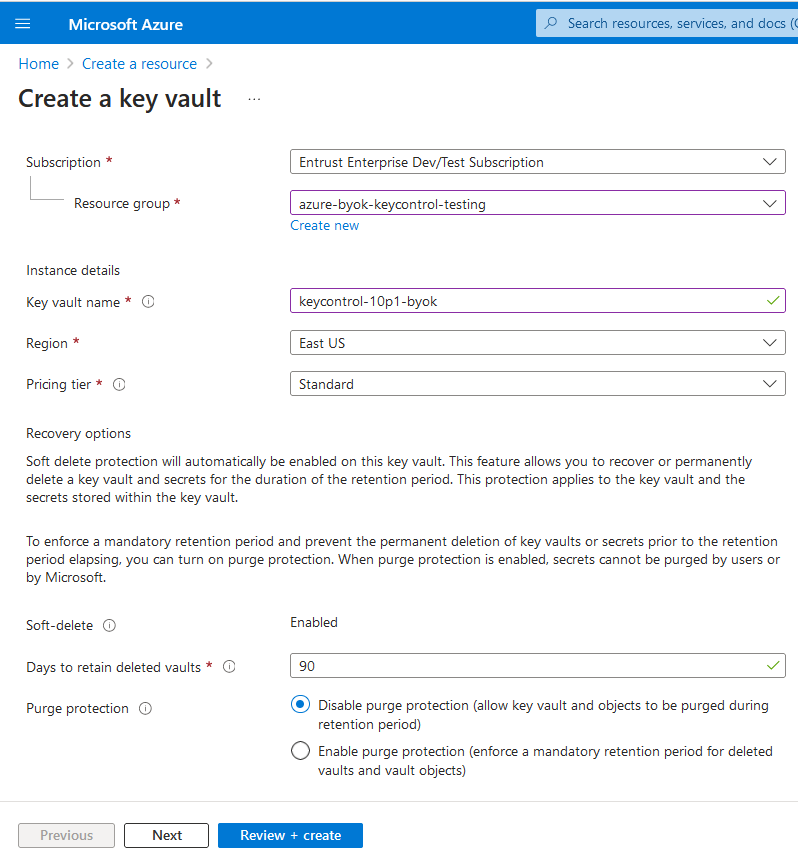
In the Basics tab select the Subscription and Resource group from the pull-down menu. Enter the instance details.
-
Select Next.
For example:
-
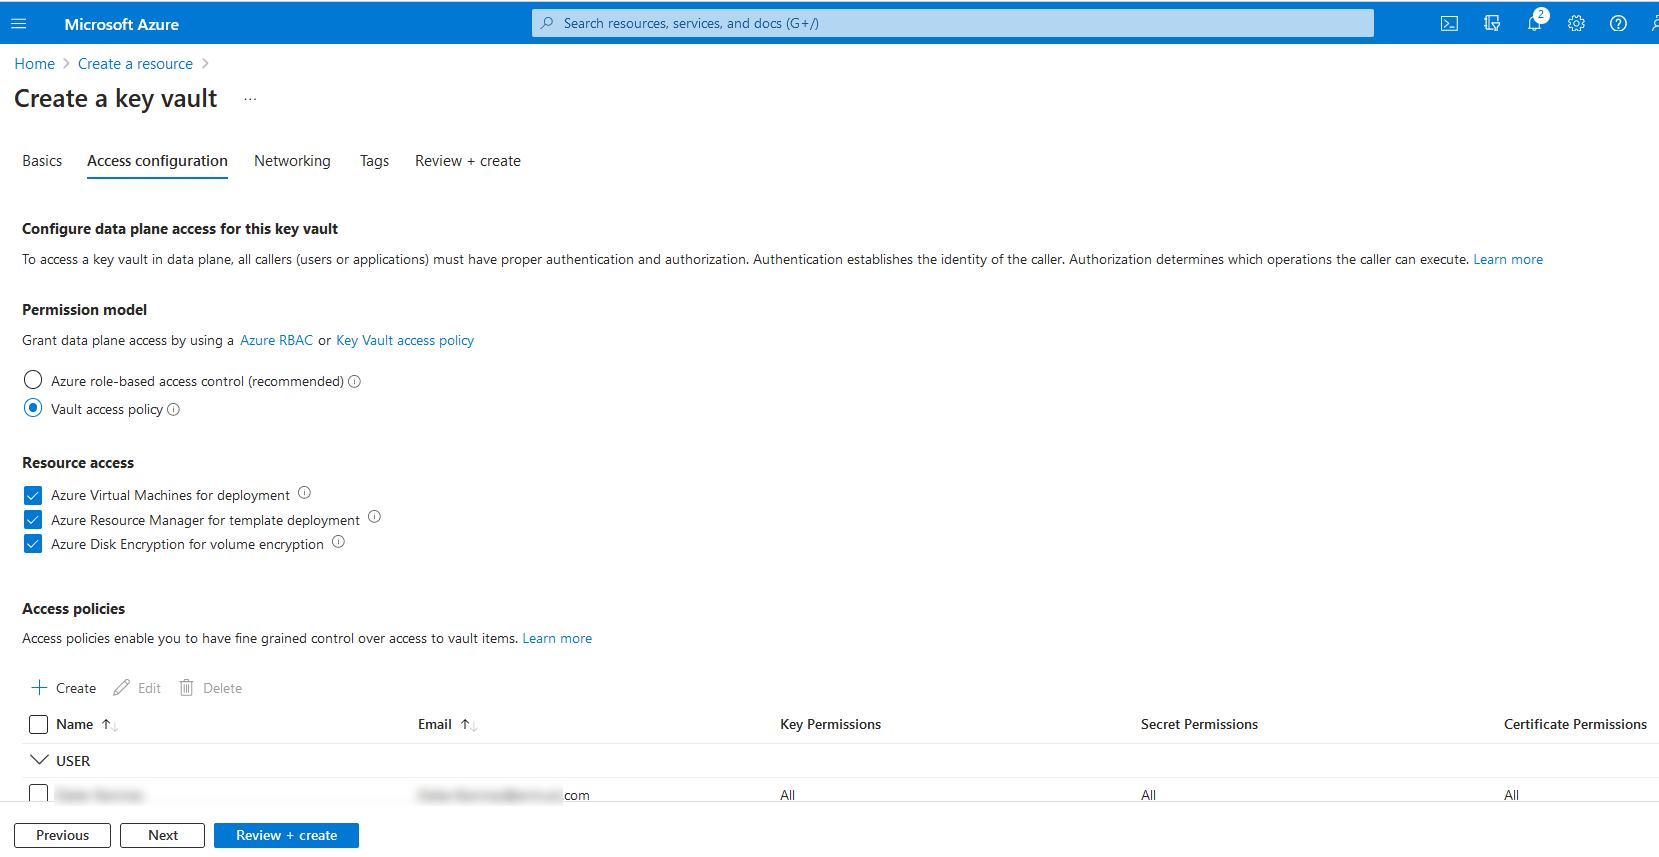
In the Access configuration tab, select the Permission model, Resource access, and Access policies.
-
If you are using Vault access policy for the Permission model:
-
Select the user.
-
Select Edit and select all permissions that apply.
-
Select Save and Next.
All Key Permissions, Secrets Permissions, and Certificate Permissions were selected for the purpose of this integration.
-
-
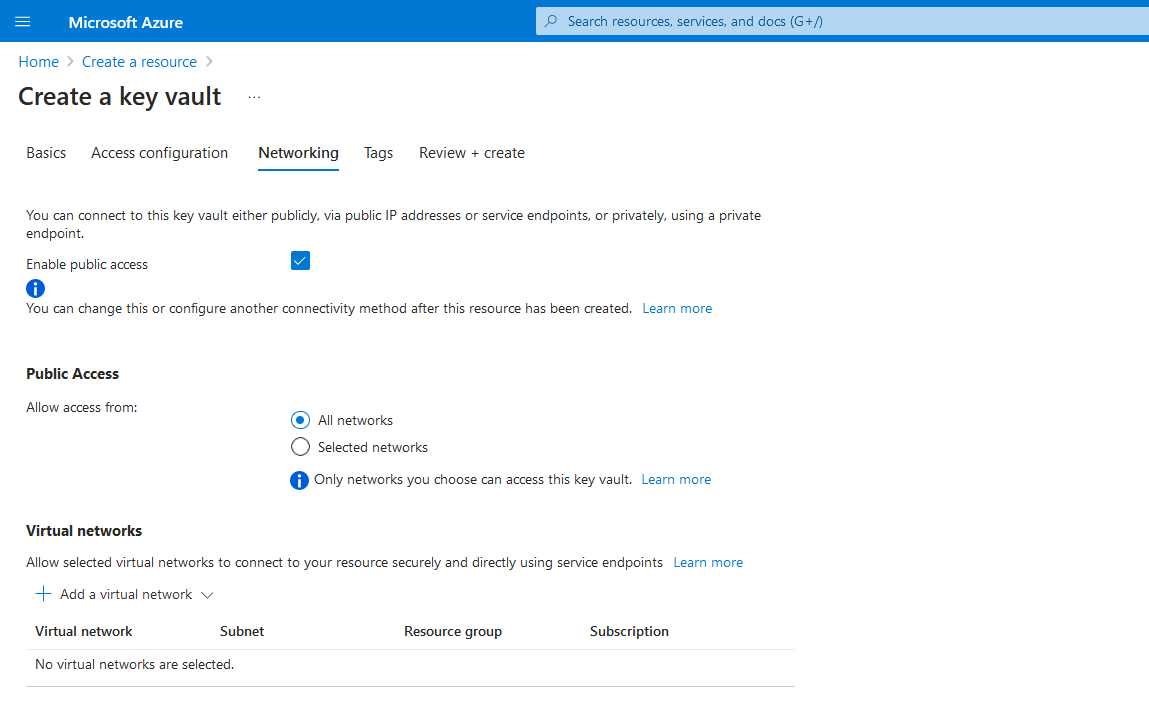
In the Networking tab, select Enable public access.
-
Under Public access, select All networks.
-
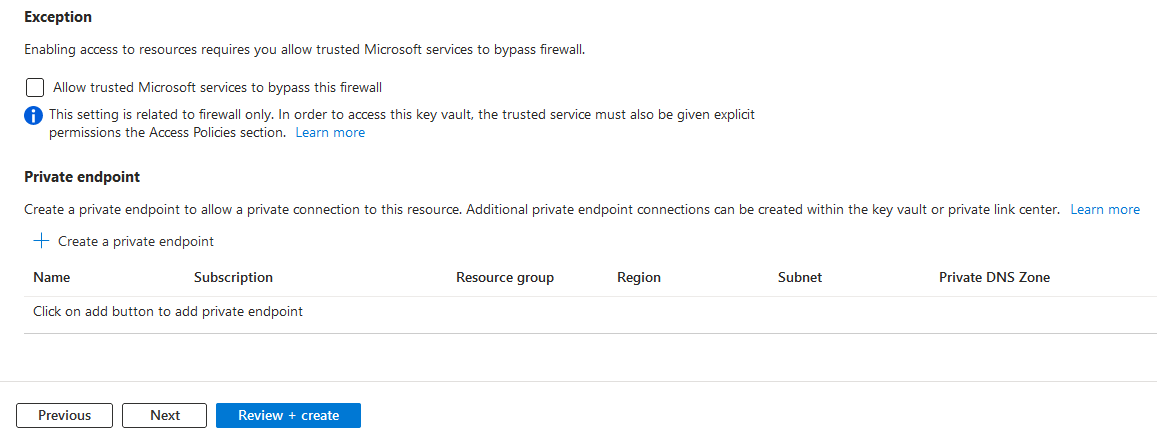
Select Next.
-
In the Tags tab enter the required Name and Value. These were left blank for the purpose of this integration.
-
Select Next.
-
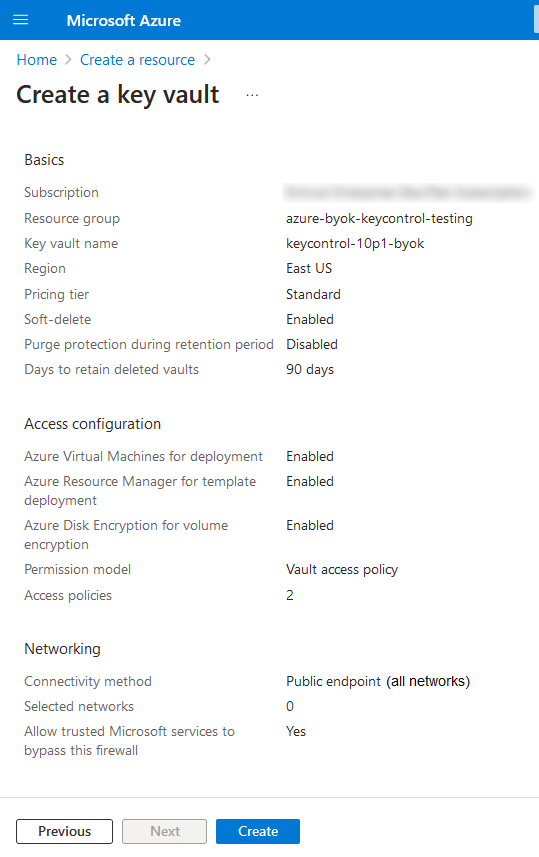
Review the information and select Create.
-
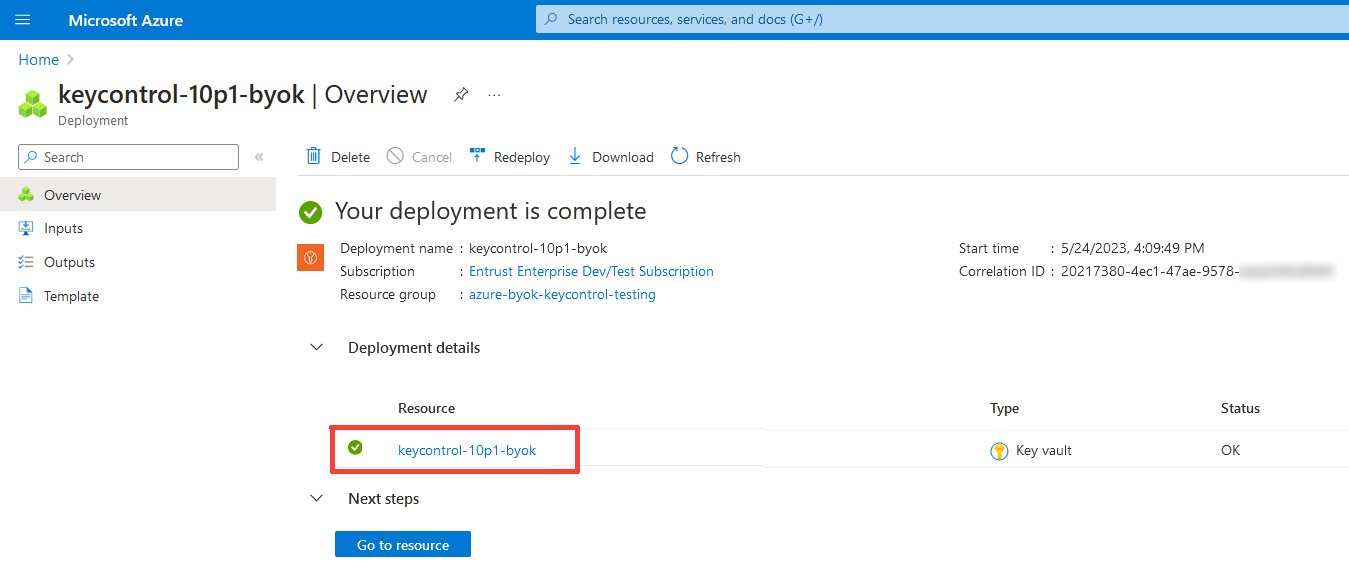
A deployment page appears. The newly created Azure vault is included.
Add the app registration to the key vault access policies
These steps configure the key vault policies to allow access by the app.
-
Navigate to Home > Key vault > <Key_vault_name> > Access policies.
-
Select Create.
The Create and access policy dialog appears.
-
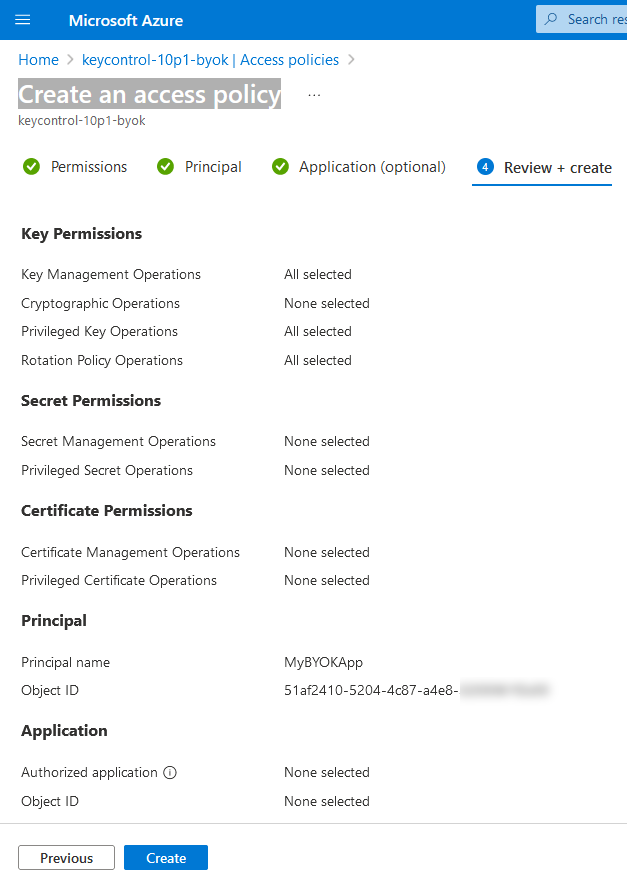
In the Permissions tab select the following Key permissions.
Key permissions Selection Key Management Operations
All
Privileged Key Operations
All
Rotation Policy Operations
All
-
Select Next.
-
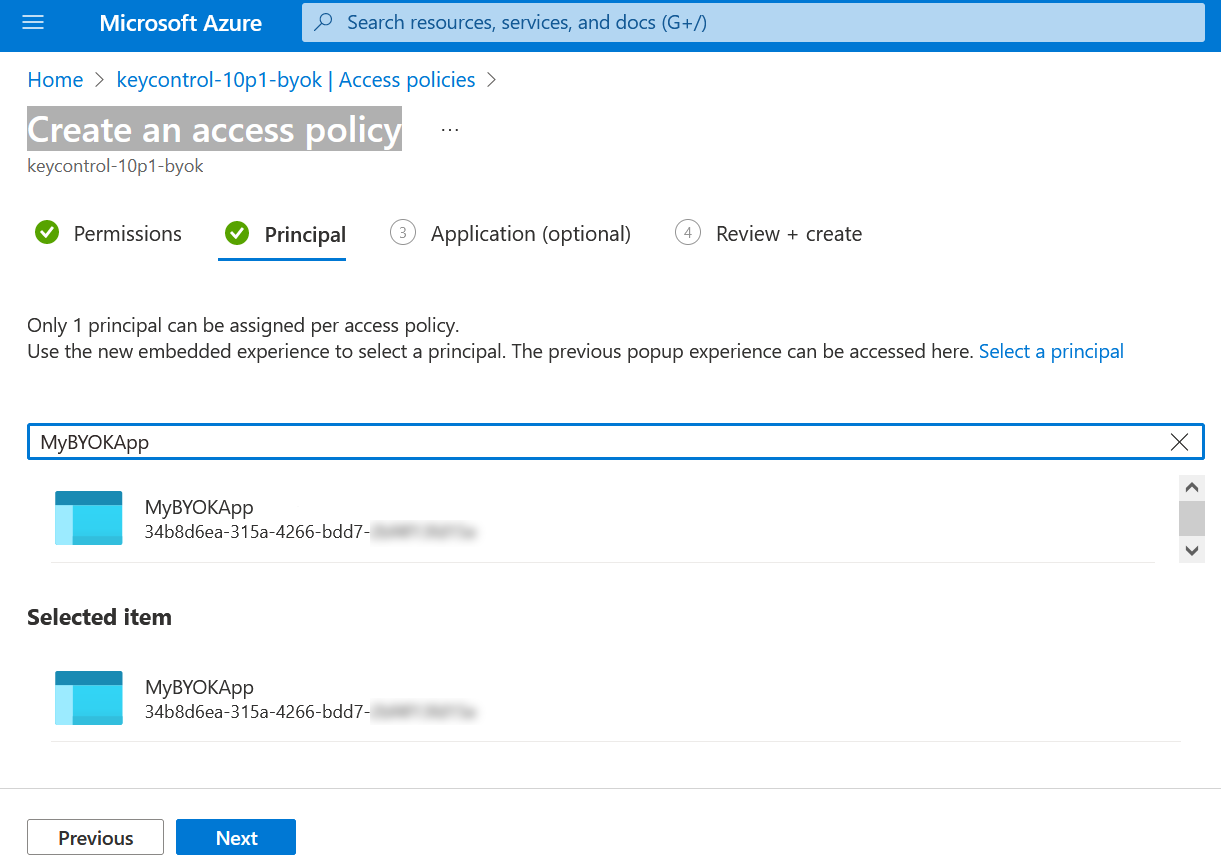
In the Principal tab, enter the Display name of the app. After the app is found, select the app.
-
Select Next.
For example:
-
Select Next in the Application (optional) tab.
-
Review the information and select Create.
For example:
-
The Access policies page appears. The new vault access policy is included.

For additional information, see Set Permissions for the BYOK Service by Configuring Each Azure Key Vault.