Procedures
Follow these steps to install and configure KeyControl with VSP.
Deploy a KeyControl cluster
This deployment consists of two nodes.
-
Download the KeyControl software from https://my.hytrust.com/s/software-downloads. This software is available both as an OVA or ISO image. The OVA installation method in VMware is used in this guide for simplicity.
-
Install KeyControl as described in KeyControl OVA Installation.
-
Configure the first KeyControl node as described in Configuring the First KeyControl Node (OVA Install).
-
Add second KeyControl node to cluster as described in Adding a New KeyControl Node to an Existing Cluster (OVA Install).
Both nodes need access to an NTP server, otherwise the above operation will fail. Log in the console to change the default NTP server if required. -
Install the keyControl license as described in Managing the KeyControl License.
Specify an LDAP/AD authentication server
-
Log into the KeyControl webGUI using an account with Security Admin privileges.
-
Select Settings in the top menu bar.
-
Select Authentication in the General Settings pane.
-
Select LDAP in the Type drop-down box.
-
Enter your account info on the Domain tab and then select Apply.
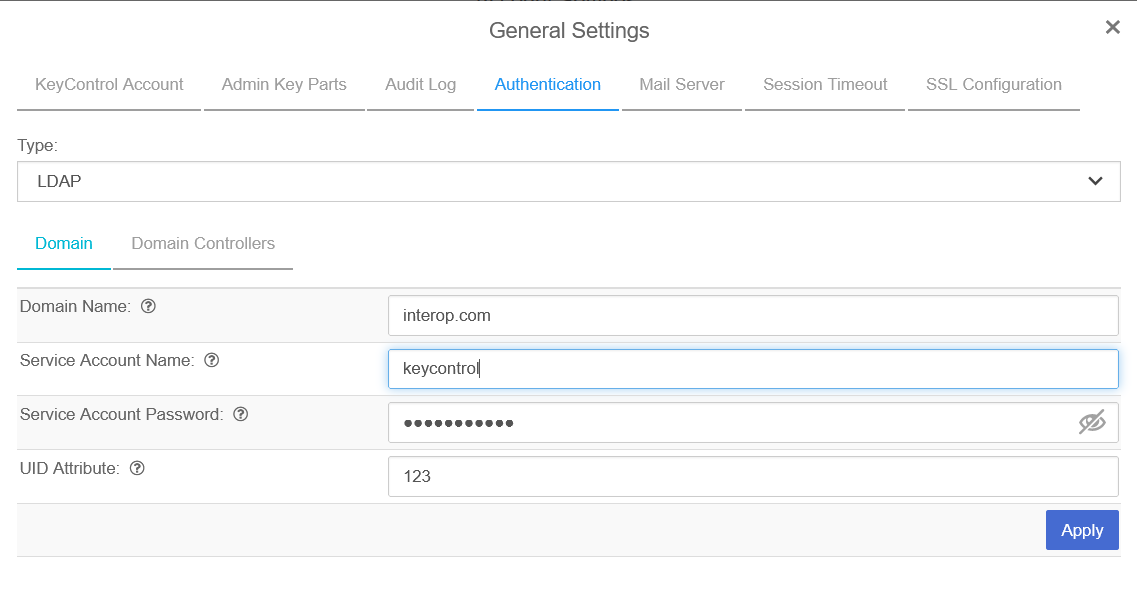
-
Select Add Domain Controller in the Domain Controllers tab.
-
Select LDAP in the Server URL drop-down box.
-
Enter a Server URL, User Search Context, and Group Search Context. Then select Save and Close.
The user and group search context can be found by running the following command lines on a terminal in the required domain:
dsquery user -name <known username>dsquery group -name <known group name>For example:
C:\Windows\system32>dsquery user -name "Hitachi VSP"
"CN=Hitachi VSP,CN=Users,DC=interop,DC=com"
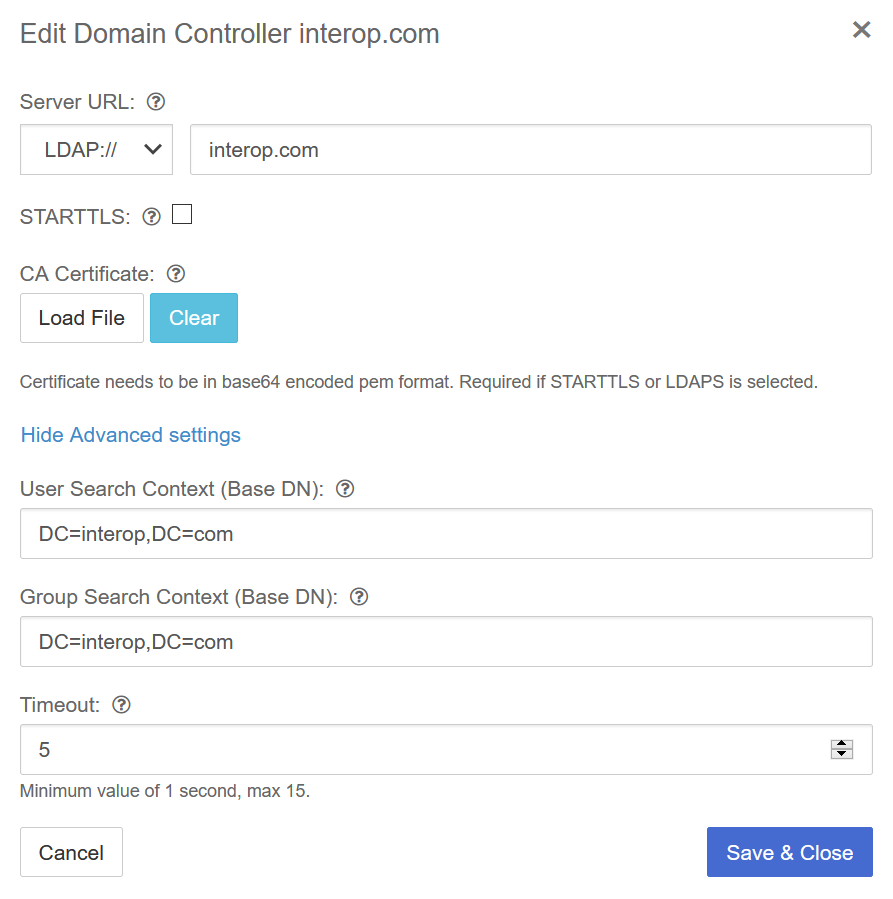
Notice the added domain controller.
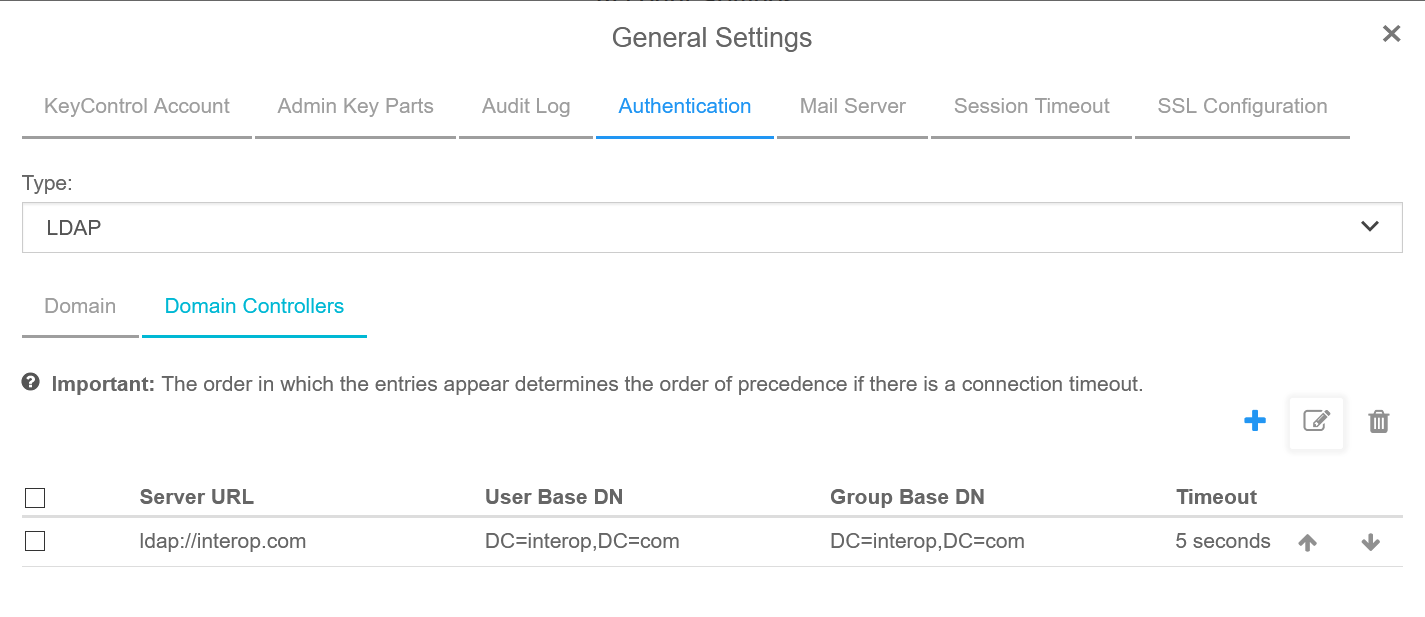
See the following link for additional information Specifying an LDAP/AD Authentication Server.
Enable KMIP
-
Select KMIP in the menu bar in the KeyControl webGUI.
-
Select the Settings tab.
-
For State, select Enable. Then select Apply.
-
In the Overwrite all existing KMIP Server settings? dialog, select Proceed.
Create tenant
-
Select KMIP in the menu bar in the KeyControl webGUI.
-
Select the Tenants tab.
-
Select Actions > Create a KMIP Tenant.
-
Enter the name and description. Then select Next.
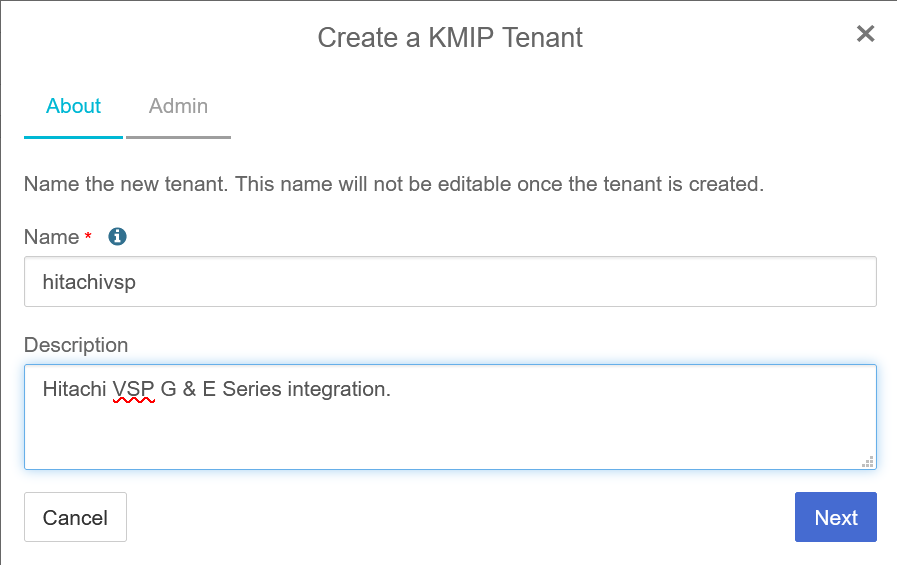
-
On the Admin tab, select the Active Directory.
-
Enter the required user in the search box.
-
Enter email address and select Create.
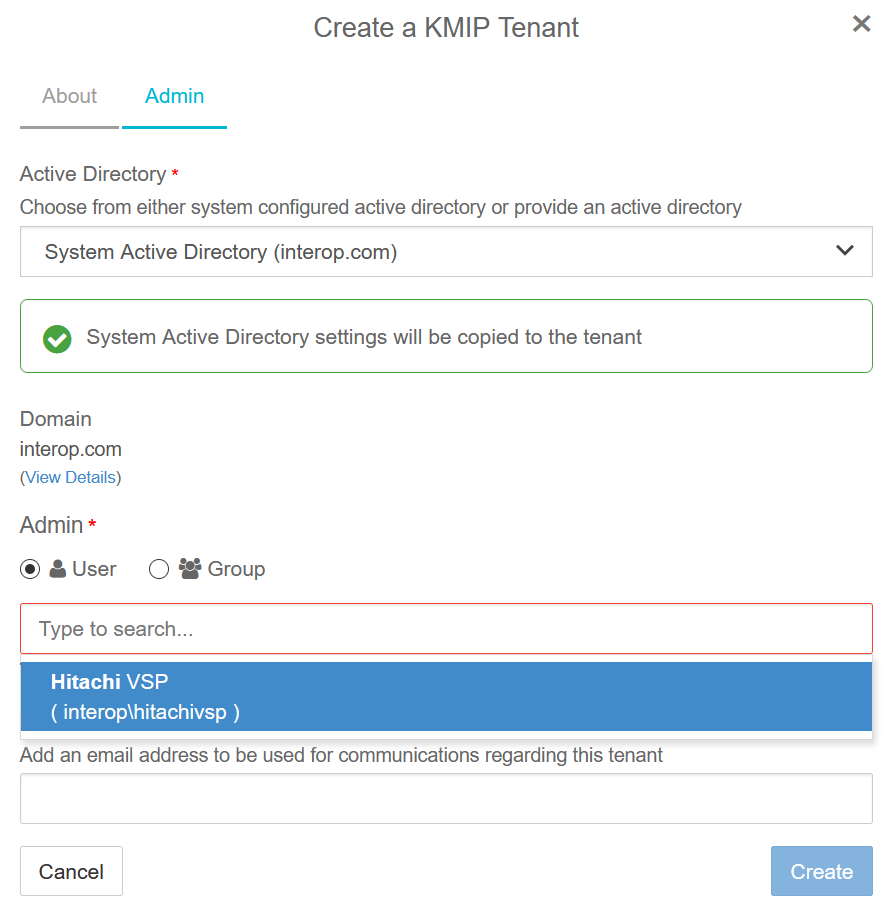
See the following link for additional information Creating a KMIP Tenant.
Add x509v3 extensions to the OpenSSL configuration file
The VSP requires the x509v3 extensions in the client certificate. KeyControl will generate the client certificate based on the client certificate request (CSR). As a result the CSR must contain the x509v3 extensions.
OpenSSL was used in this integration to generate the CSR. The following steps configure OpenSSL to generate a CSR with the x509v3 extensions.
-
Display the version of OpenSSL:
# /usr/local/bin/openssl version
OpenSSL 3.0.3 3 May 2022 (Library: OpenSSL 3.0.3 3 May 2022)
-
Edit
/usr/local/ssl/openssl.cnf. -
Add the following lines to the [ req ] section:
-
req_extensions = v3_req
-
x509_extensions = usr_cert
-
-
Un-comment the following lines in the [ usr_cert ] section:
-
keyUsage = nonRepudiation, digitalSignature, keyEncipherment
-
extendedKeyUsage = critical,timeStamping
-
-
Add the following line to the [ v3_req ] section:
-
keyUsage = nonRepudiation, digitalSignature, keyEncipherment
-
extendedKeyUsage = serverAuth, clientAuth, codeSigning, emailProtection
-
Create CSR
-
Create a key:
# /usr/local/bin/openssl genrsa -out svp.key 2048
-
Create a CSR from the key above:
# /usr/local/bin/openssl req -new -config /usr/local/ssl/openssl.cnf -key svp.key -out svp.csr
-
Notice the CSR contains the x509v3 extensions:
# openssl req -text -noout -verify -in svp.csr
verify OK
Certificate Request:
    Data:
        Version: 1 (0x0)
        ...
        Requested Extensions:
            X509v3 Basic Constraints:
                CA:FALSE
            X509v3 Key Usage:
                Digital Signature, Non Repudiation, Key Encipherment
            X509v3 Extended Key Usage:
                TLS Web Server Authentication, TLS Web Client Authentication, Code Signing, E-mail Protection
...
Create tenant client certificate bundle
-
Select KMIP in the menu bar in the KeyControl webGUI.
-
Select the Tenants tab.
-
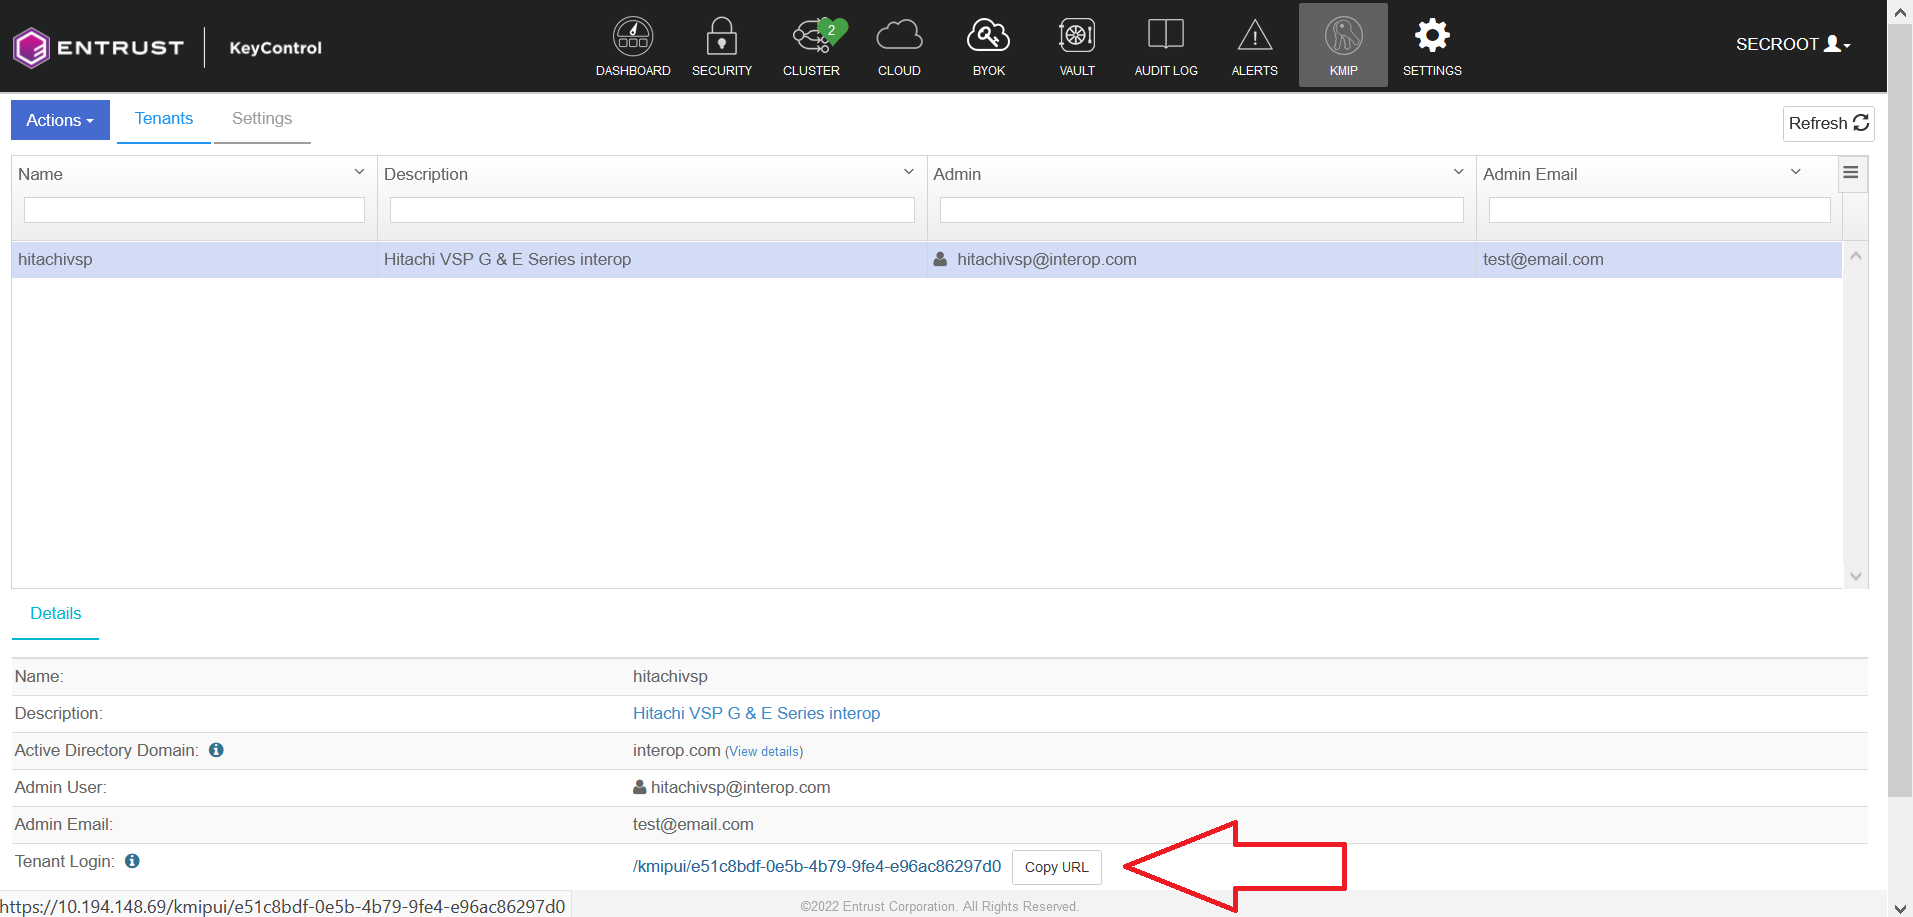
Highlight the required tenant.
-
Select the link on Tenant Login. A new tab in the browser opens.
-
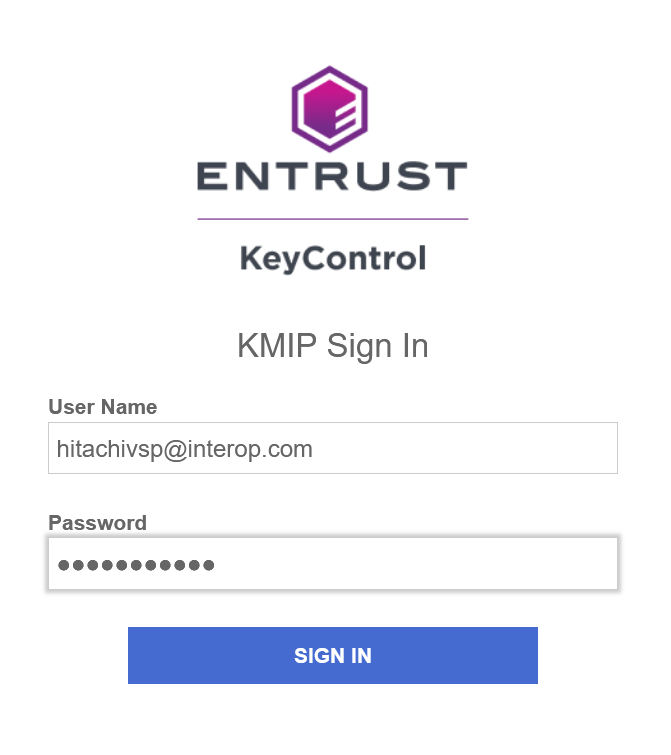
Log in with the tenant credentials.
-
Select Security > Client Securities.
-
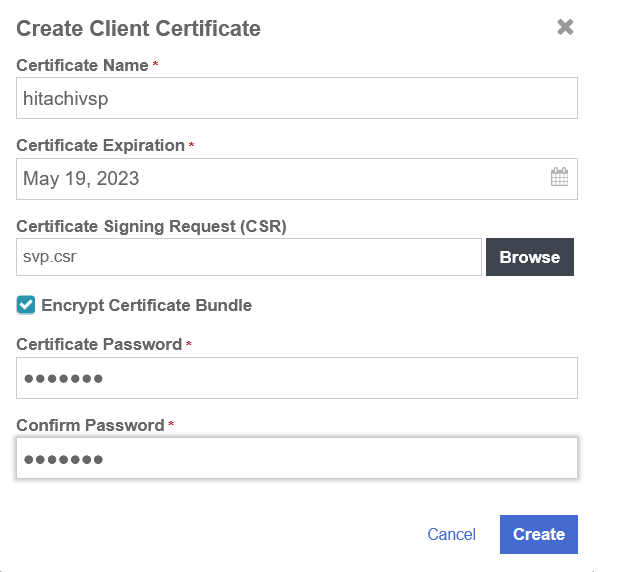
Select the + icon on right top corner to create new client certificate.
-
Specify the options and then select Create.
-
Select the certificate bundle you created and select Download.
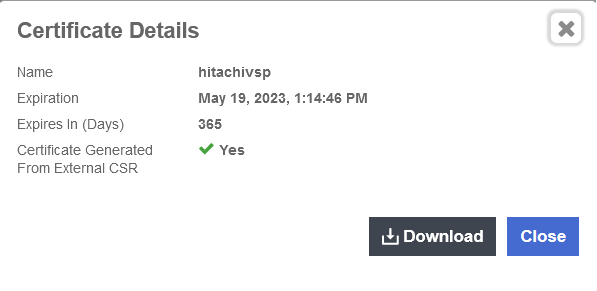
See the following link for additional information KMIP Tenant Client Certificates.
Convert tenant client certificate to PKCS #12 format
-
Extract the
hitachivsp.pemfile from the tenant client certificate bundle zip file created in Create tenant client certificate bundle. Save thecacert.pemfile for use in Import tenant client certificate into the VSP.
-
Convert to PKCS #12 format using OpenSSL:
# /usr/local/bin/openssl pkcs12 -export -out hitachivsp.p12 -in hitachivsp.pem -inkey svp.key -passin pass:hitachi -passout pass:hitachi
-
View the content of PKCS #12 formatted tenant client certificate bundle:
# # /usr/local/bin/openssl pkcs12 -in hitachivsp.p12 -info -nodes
Enter Import Password:
MAC: sha256, Iteration 2048
MAC length: 32, salt length: 8
PKCS7 Encrypted data: PBES2, PBKDF2, AES-256-CBC, Iteration 2048, PRF hmacWithSHA256
Certificate bag
Bag Attributes
    localKeyID: 39 7C CD 50 10 5A D1 08 F4 1D 36 5D EC 2C 9F D4 03 DF 09 7F
subject=C = US, ST = Florida, L = Sunrise, O = Entrust, OU = Testing, CN = Interop, emailAddress = test@entrust.com
issuer=C = US, O = HyTrust Inc., CN = HyTrust KeyControl Certificate Authority
-----BEGIN CERTIFICATE-----
MIIEGzCCAwOgAwIBAgIERWwmATANBgkqhkiG9w0BAQsFADBXMQswCQYDVQQGEwJV
UzEVMBMGA1UEChMMSHlUcnVzdCBJbmMuMTEwLwYDVQQDEyhIeVRydXN0IEtleUNv
bnRyb2wgQ2VydGlmaWNhdGUgQXV0aG9yaXR5MB4XDTIyMDUxOTE3MTQ0NloXDTIz
MDUxOTE3MTQ0NlowgYgxCzAJBgNVBAYTAlVTMRAwDgYDVQQIDAdGbG9yaWRhMRAw
DgYDVQQHDAdTdW5yaXNlMRAwDgYDVQQKDAdFbnRydXN0MRAwDgYDVQQLDAdUZXN0
aW5nMRAwDgYDVQQDDAdJbnRlcm9wMR8wHQYJKoZIhvcNAQkBFhB0ZXN0QGVudHJ1
c3QuY29tMIIBIjANBgkqhkiG9w0BAQEFAAOCAQ8AMIIBCgKCAQEA4lspigtffsEm
AQTYNlXelvo8rG9AOPAmpKNJ6vZyazUmMJXLthh1LZC4YL0png2KPCRMMgzhlaVP
Xd71ygtsF+Y2nKOy3zTfxVn/G0XpsfiPqIKrvBfkLoBOJ1RBPsXOb7DTHqTafZ4E
9I+FLPlXfqi/UGyaNUOgrfVchszZbnT07N3W8IblKszSdCMa8Z7BO5xeHOqG9E+9
qembYLHmhMYJi8Ce+d5Jy+N5FKGWnyNHl2Az+WAlcTLPpnEE5LSPk4DHGrj2jBow
KUdoHiRKYTN50S7nqG6YztSkdsrLZ04IYrmv+5ajkveqbCU5RyvOtLSVpzOnkLm+
8TrxBueGpQIDAQABo4G8MIG5MAkGA1UdEwQCMAAwLAYJYIZIAYb4QgENBB8WHU9w
ZW5TU0wgR2VuZXJhdGVkIENlcnRpZmljYXRlMB0GA1UdDgQWBBRTuD8eezyJhW6A
d0t8tJxR+JFiTjAfBgNVHSMEGDAWgBTZyL94G7MojJrAs23seS67OEqowTALBgNV
HQ8EBAMCBeAwMQYDVR0lBCowKAYIKwYBBQUHAwEGCCsGAQUFBwMCBggrBgEFBQcD
AwYIKwYBBQUHAwQwDQYJKoZIhvcNAQELBQADggEBAM1gRZKGjWTQARYeoqDyhPkw
6evjZmIpWzohSeN+iDHGp8yU8SwM5YaFyihKTcPIy5xNtz1R30701SlhdqVX0FqO
ioSOKuS75mvIS/cQ90wFST0ge3qnC7kEqj8XtXrNTJM7FoOWgFKOk/8IbTNbKnNL
wr6KJr0TMFoYUf2OUYC3RByvdzJ3xs2VMViTuXgviUw1ZVV/OJpNL1Tdmxh9Ii2h
qhIQujcu3MQ/teaWn+K4FDMql5xVFCSyAFOfy62Z8M9jFsKfNJTHQq99uqYNTxGp
bruaJADX74yNn3F10pjFjJmP869gtfN3tBp1evYCBQTOQMObEl3dUn2FU990DQY=
-----END CERTIFICATE-----
PKCS7 Data
Shrouded Keybag: PBES2, PBKDF2, AES-256-CBC, Iteration 2048, PRF hmacWithSHA256
Bag Attributes
    localKeyID: 39 7C CD 50 10 5A D1 08 F4 1D 36 5D EC 2C 9F D4 03 DF 09 7F
Key Attributes: <No Attributes>
-----BEGIN PRIVATE KEY-----
MIIEvQIBADANBgkqhkiG9w0BAQEFAASCBKcwggSjAgEAAoIBAQDiWymKC19+wSYB
BNg2Vd6W+jysb0A48Cako0nq9nJrNSYwlcu2GHUtkLhgvSmeDYo8JEwyDOGVpU9d
3vXKC2wX5jaco7LfNN/FWf8bRemx+I+ogqu8F+QugE4nVEE+xc5vsNMepNp9ngT0
j4Us+Vd+qL9QbJo1Q6Ct9VyGzNludPTs3dbwhuUqzNJ0IxrxnsE7nF4c6ob0T72p
6ZtgseaExgmLwJ753knL43kUoZafI0eXYDP5YCVxMs+mcQTktI+TgMcauPaMGjAp
R2geJEphM3nRLueobpjO1KR2ystnTghiua/7lqOS96psJTlHK860tJWnM6eQub7x
OvEG54alAgMBAAECggEAaGLgGjA6fsr2CrxANXaOKxQFjQPVGyzstTo0aW3zwCsH
jJpYEobe6v91d+9kVOYrnKakmORF1+wfWMvsj5uK4s6g2sXHRJYup+Vj9yDbr95P
6ccxCZH/Ac7bu9loKVmxZOKnydb+h7Wq1VmmceIfDmMlryIWT3/7hp3DaMrpbr0U
+t0bN0DNSiUO+0hWXfF63muW5WebEtrEAmrROgd+5TlhustVujiggKTeB8WGOSLz
kaLzPVjkfiOU6RDTzJexSK+It7uciaAPbvCwtoCcaGqKw+qw899tZnw1S1x46mxB
FBuqiUPjLXDctfpFtgsUU4zyZMd6/l/nke1NuroqIQKBgQDyHThEEQ8wNFMbIBJW
+sIiBHEbJNZA81WOW5O+A5DR/9lRKBKsQ5G53gP6cK9zfyOMCZctZtIxwHipMhP8
YOAH+X8pPLAFJF6icC4B+A9DxbFCZLP3/Tr8Gv3Mh5TmtoJXk1IYfBDSArr5HQf5
pdC9VI8zcq9HLFWq9b0IixnFPQKBgQDvVpQ79JWGxjmrq5ZNyIe5mf9U4koFugw6
UwvhCGKxOTSo1haWLVSG1pONVu21Di8te9uI08rLwsBgId097xya6SwEE7ekX6fC
Arj+AQEsCay6TdSfILDeoM0YkSYnLOkaoJ/9kzz4PIHTlN4uSe0lDi0KkrEVxyOt
pRHYl8ptiQKBgBY+Uv4F5zRRilUSpDyzewRvDgklYD3FXVXf2fn6D+MLM2b+XIDR
EGFYIVtv4N6mjph+BRKZwLPrb+pzfFySdeKlrGYYej9usPcRgViS9qwOTJPB9rrQ
3AtvW2PgDPEJUX5EPaWcOFti/tSGM0ZfUocibqmWXr4WN6SmQQC47twtAoGBALbB
OsGpWsAl/wV6KXRNqm3sDI9Jl9JVpV6n6Us1Nv8yumYty+Nyy7eGg/cKKMr3AMlP
aWxKpPEAThtZ4HGZcxNK90RJthG6xQOdRpsWM0noPU+pfLDhqozk5pdaxnJllb2y
Z1iepJC8yzm/1AQuiPmhoH0RVE1X2YOPp1fnWDhZAoGABV/Ne1oaXJT2gEgAqXCm
Qlco/VfKaFFyIv/pViEPcW3W4pO5+AaVmSff8gid4VJ6YNIH2cbszaMwUnRKnZhY
89uLNOlaVMEbjN0GJkqZUbl8YaOyI8pg1wzDrVhpoV9CNWQPq/J9WytVyYfmflLr
e2DXuNht5BmG7ouca7XEnU0=
-----END PRIVATE KEY-----
Import tenant client certificate into the VSP
-
Import the
hitachivsp.p12andcacert.pemcertificates into the VSP as required. -
You can now use standard API calls to interact with KeyControl.
Configuration to support the Hitachi VSP
A change to KeyControl configuration file is required to support the Hitachi VSP. Contact Entrust customer support so they can perform this change remotely.
Once the KeyControl server instance is configured for the Hitachi VSP, it may not work with other KMIP client integrations. A separate KeyControl instance may be required to support other clients.