Configure the Entrust Certificate Authority
Establish a preload session
The OCS or Softcard must be preloaded before you configure the Entrust Security Manager.
-
Create an empty folder called
preloadon theC:drive. -
Edit the environment variables in
cknfastrc. The file is located at%NFAST_HOME%\cknfastrc, by defaultC:\Program Files\nCipher\nfast\cknfastrc. Edit the file to include:# Softcard CKNFAST_LOADSHARING=1 # Enable Module Protection CKNFAST_FAKE_ACCELERATOR_LOGIN=1 # Other variables CKNFAST_NO_UNWRAP=1 CKNFAST_OVERRIDE_SECURITY_ASSURANCES=none # Preload file location NFAST_NFKM_TOKENSFILE=C:\preload\entrustsmtoken # PCKS #11 log level and file location CKNFAST_DEBUG=10 CKNFAST_DEBUGFILE=C:\preload\pkcs11.logUseful information about environment variables:
-
NFAST_NFKM_TOKENSFILE=C:\preload\entrustsmtokenis user-defined and is referenced by thepreloadutility. For example,%NFAST_HOME%\Bin>preload -c <OCS Name> -f C:\preload\entrustsmtoken pause. -
When using a K-of-N Card Set where K>1, set
CKNFAST_LOADSHARING=0. When using a K-of-N Card Set where K=1, setCKNFAST_LOADSHARING=1. This also applies when using Softcard protection. -
For Enhanced Database Protection (EDP), use
CKNFAST_LOADSHARING=0after enabling database hardware protection. Restart the system for load sharing to work. -
When using nShield with ePassport CVCA, set
CKNFAST_ASSUME_SINGLE_PROCESS=0. If ePassport Document Verifier Certificate requests are canceled, this setting ensures that the associated physical key is deleted in the Entrust nShield HSM.
For more information about the environment variables used in
cknfastrc, see Environment variables -
-
Restart the hardserver.
C:\Users\Administrator>net stop "nFast Server" The following services are dependent on the nFast Server service. Stopping the nFast Server service will also stop these services. nShield Audit Log Service nFast Remote Administration Service Do you want to continue this operation? (Y/N) [N]: y ... The nFast Server service was stopped successfully. C:\Users\Administrator>net start "nFast Server" The nFast Server service is starting. The nFast Server service was started successfully -
Open a command window to run preload exclusively.
Do not close this window throughout the Entrust Certificate Authority configuration. Otherwise you will shut down the session and the configuration will fail. It is OK to minimize the window. When using a Softcard in FIPS Level 3, you must present an OCS card for FIPS authorization. -
Preload the OCS by running the utility
preload -c, orpreload -sfor the Softcard. Present the OCS cards and / or passphrase when prompted.For example:
C:\Users\Administrator>preload -c testOCS -f C:\preload\entrustsmtoken pause
2025-10-23 14:24:12: [1960]: INFO: Preload running with: -c testOCS -f C:\preload\entrustsmtoken pause
2025-10-23 14:24:12: [1960]: INFO: Created a (new) connection to Hardserver
2025-10-23 14:24:12: [1960]: INFO: Modules newly usable: [1].
2025-10-23 14:24:12: [1960]: INFO: Found a change in the system: an update pass is needed.
2025-10-23 14:24:12: [1960]: INFO: Loading cardset: testOCS in modules: [1]

Loading `testOCS':
 Module 1 slot 2: `testOCS' #2
 Module 1 slot 0: Admin Card #11
 Module 1 slot 3: empty
 Module 1 slot 4: empty
 Module 1 slot 5: empty
 Module 1 slot 2:- passphrase supplied - reading card
Card reading complete.

2025-10-23 14:24:16: [1960]: INFO: Stored Admin key: kfips (003e...) in module #1
2025-10-23 14:24:16: [1960]: INFO: Loading cardset: Cardset: testOCS (edb3...) in module: 1
2025-10-23 14:24:16: [1960]: INFO: Stored Cardset: testOCS (edb3...) in module #1
2025-10-23 14:24:16: [1960]: INFO: Maintaining the cardset testOCS protected key(s)=[].
2025-10-23 14:24:16: [1960]: INFO: Loading complete. Now pausing...
If non-persistent cards are used, then the last card in the quorum must remain inserted in the card reader. If persistent cards are used, then the last card in the quorum can be removed from the card reader. -
Confirm the OCS or Softcard has been preloaded by running the following utility back on the main window. The Pre-Loaded Objects will be reported.
# preload -f <location of file above> nfkminfoFor example:
C:\Users\Administrator>preload -f C:\preload\entrustsmtoken nfkminfo
2025-10-23 14:29:08: [316]: INFO: Preload running with: -f C:\preload\entrustsmtoken nfkminfo
2025-10-23 14:29:08: [316]: INFO: Created a (new) connection to Hardserver
2025-10-23 14:29:08: [316]: INFO: Modules newly usable: [1].
2025-10-23 14:29:08: [316]: INFO: Found a change in the system: an update pass is needed.
2025-10-23 14:29:08: [316]: INFO: Maintaining the cardset testOCS protected key(s)=[].
2025-10-23 14:29:08: [316]: INFO: Loading complete. Executing subprocess nfkminfo

 ...

Pre-Loaded Objects (  2):  objecthash   module objectid  generation
 003e04e3c07fb5791f651c992da5527779159f87   1 0x89fa8799 1
 edb3d45a28e5a6b22b033684ce589d9e198272c2   1 0x89fa8782 1
Useful information concerning OCS:
-
You must present sufficient different OCS cards to fulfill the quorum.
-
The tokens file generated by the
preloadutility is valid for one continuous session only. If the session is lost, then the token authorization is lost. You cannot reuse the same token file once the session is lost, even if you use the exact same OCS cards again. To restart re-run preload. -
A session, and token authorization is lost if:
-
There is a temporary power failure.
-
The window running preload is closed.
-
The last card in the quorum is removed if using non-persistent OCS cards.
-
The tokens file represents a security risk if permissions to access it are not restricted to authorized persons only. -
Configure the Entrust nShield Edge
If you are using an Entrust nShield Edge HSM, continue with this section. Otherwise, proceed to Configure the Entrust Certificate Authority.
The Entrust nShield Edge exhibits slower service startup times compared to the other Entrust nShield HSMs. To ensure optimal performance, increase the Entrust Certificate Authority timeout settings as follows.
-
Navigate to the directory containing the
entMgr.inifile, by default:C:\Program Files\Entrust\Certificate Authority\etc\ini. -
Edit the
entMgr.inifile in the [login] section and add the following:serviceStartStopWaitSeconds=3600 clusterStartWaitSeconds=1800 clusterStopWaitSeconds=300
Configure the Entrust Certificate Authority
This section describes how to configure the Entrust Certificate Authority before it can be used. During configuration, you provide the following:
-
Your directory and database connection parameters.
-
Your choice of certificate algorithms, lifetimes, and other options.
The configuration is stored in C:\Program Files\Entrust\Certificate Authority\etc\ini\entMgr.ini.
Verify its settings before initializing the CA.
|
-
Navigate to the Certificate Authority
\bindirectory, by defaultC:\Program Files\Entrust\Certificate Authority\bin. -
Double-click
entConfig.exe. -
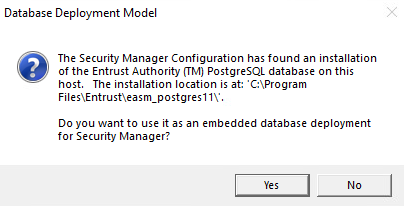
In the Database Deployment Model window, select according to your setup. We selected Yes in this integration to use the Entrust Certificate Authority PostgreSQL database installed locally as described in install-certificate-authority.adoc#install-authority-database.
-
In the Entrust Certificate Authority Configuration window, select Next.
-
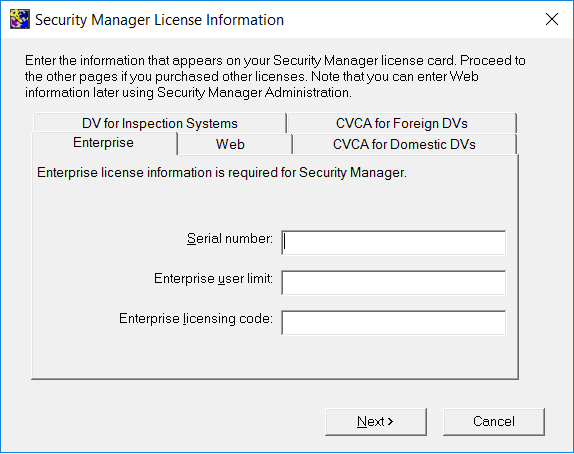
In the Certificate Authority License Information window, enter the Enterprise licensing information that appears on your Entrust licensing card. Then select Next.
-
In the Certificate Authority Data and Backup Locations window, enter your location or accept the defaults. Then select Next.
-
Data files:
c:\authdata. -
Backup files:
c:\entbackup.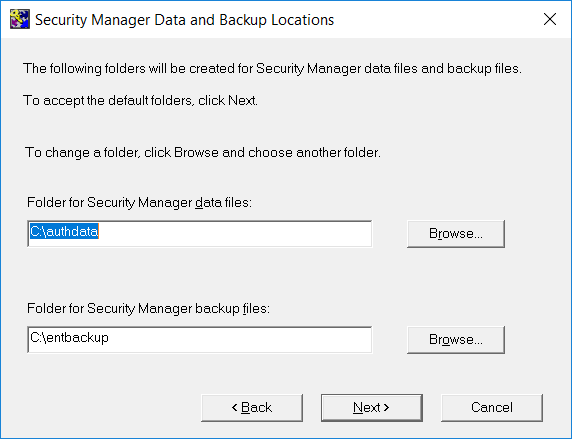
-
-
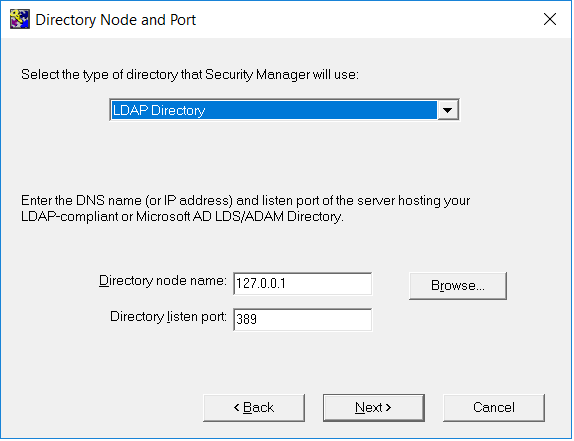
In the Directory Node and Port window, enter your directory information. We used the directory described in directory-service.adoc#configure-directory-service. Then select Next.
For example:
-
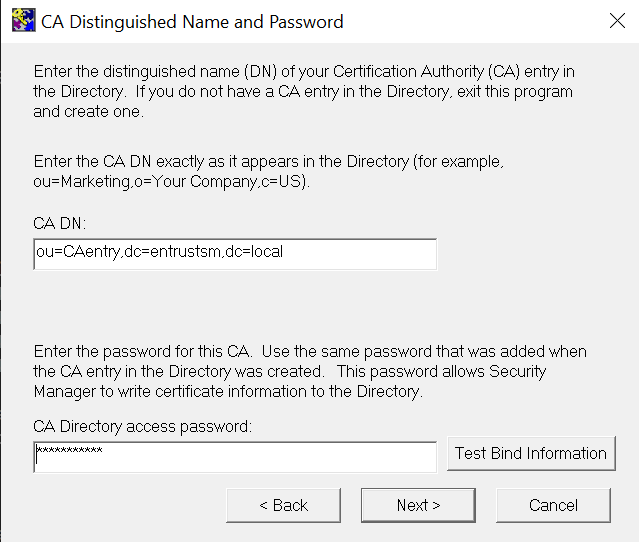
In the CA Distinguished Name and Password window, enter your CA DN and CA Directory access password, then select Test Bind Information.
-
If the bind is successful, select OK. Otherwise, correct any errors in your directory settings using the Back button and retest. Then select Next.
-
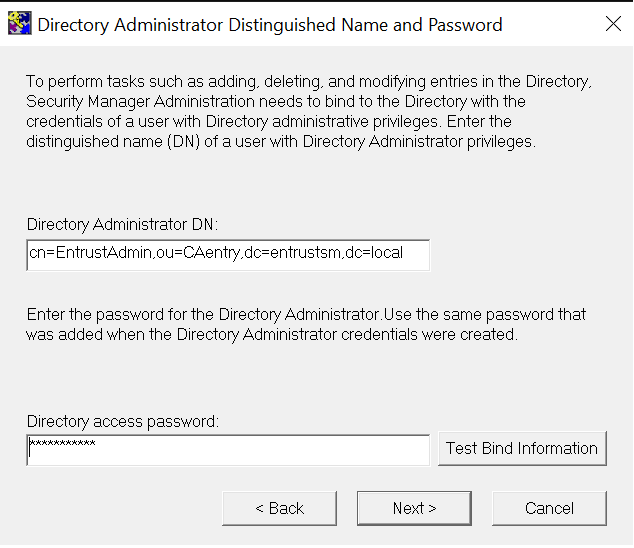
In the Directory Administrator Distinguished Name and Password window, enter your Directory administrator DN and Directory access password, then select Test Bind Information.
-
If the bind is successful, select OK. Otherwise, correct any errors in your directory settings using the Back button and retest. Then select Next.
-
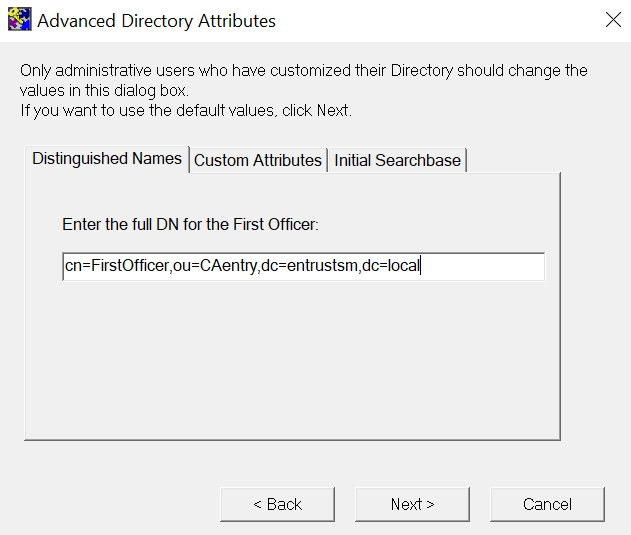
In the Advanced Directory Attributes window, enter the full DN of the first officer. Then select Next.
-
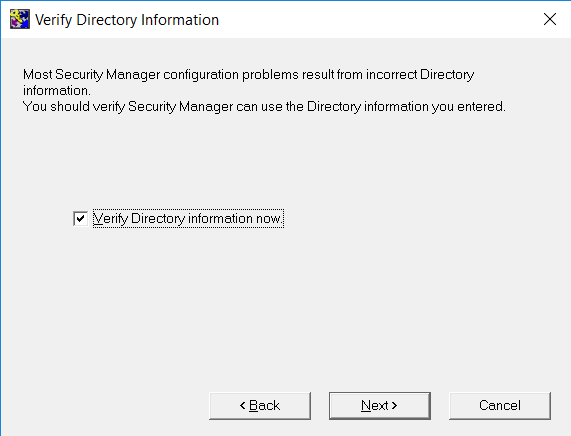
In the Verify Directory Information window, check Verify Directory information now. Then select Next.
-
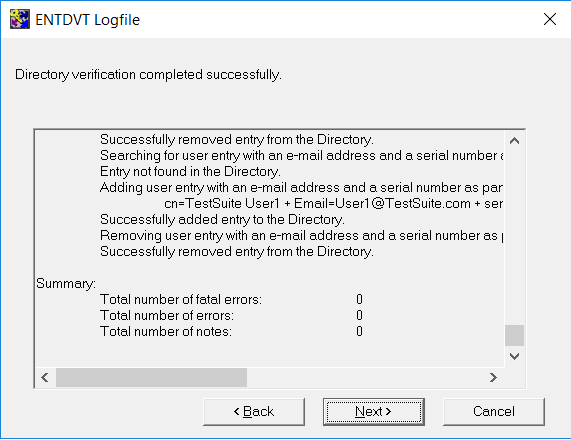
In the ENTDVT Logfile window, verify there are no fatal errors, errors, or notes in the Summary section. Correct any errors in your directory settings using the Back button before proceeding. Then select Next.
-
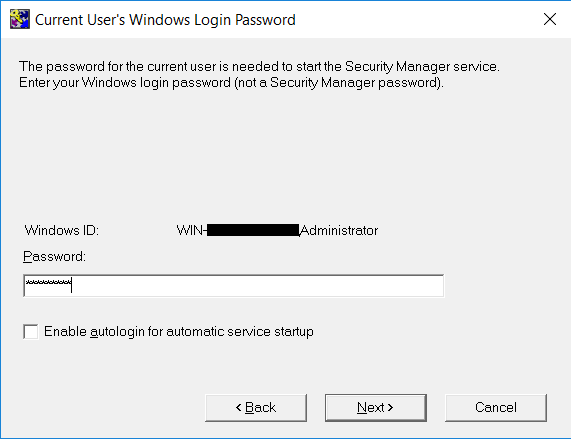
In the Current User’s Windows Login Password window, log in with your Windows credentials. Uncheck Enable autologin for automatic service startup. Then select Next.
-
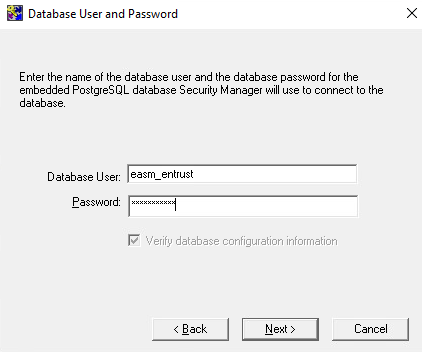
In the Database User and Password window, enter your database user credentials. Then select Next.
-
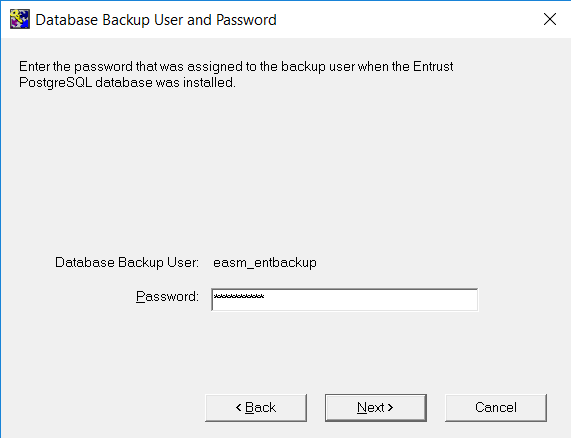
In the Database Backup User and Password window, enter your database backup user credentials. Then select Next.
-
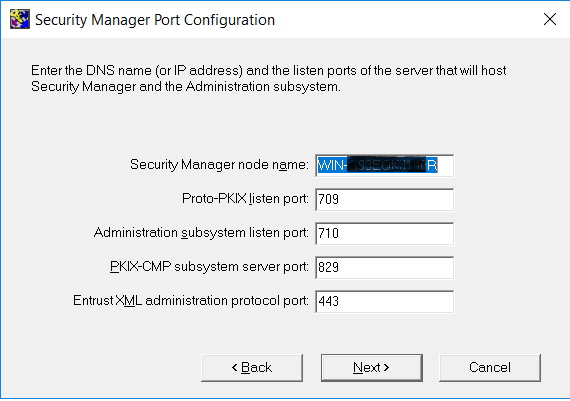
In the Entrust Certificate Authority Port Configuration window, enter your information, then select Next.
-
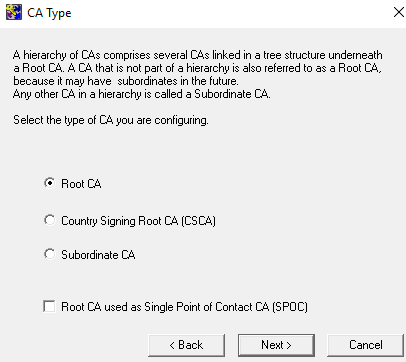
In the CA Type window, select the Root CA radio button. Uncheck Root CA used as Single Point of Contact CA (SPOC), then select Next.
-
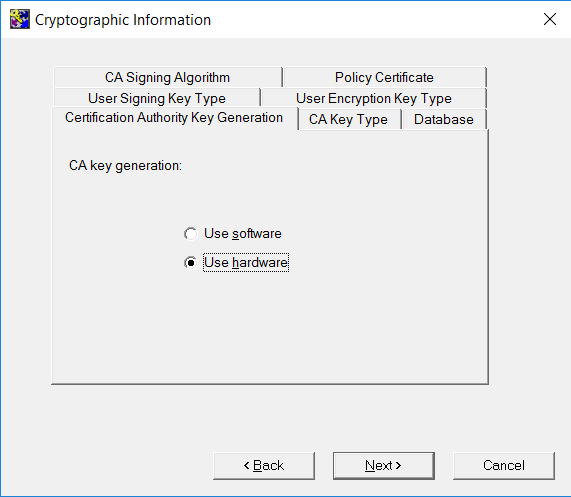
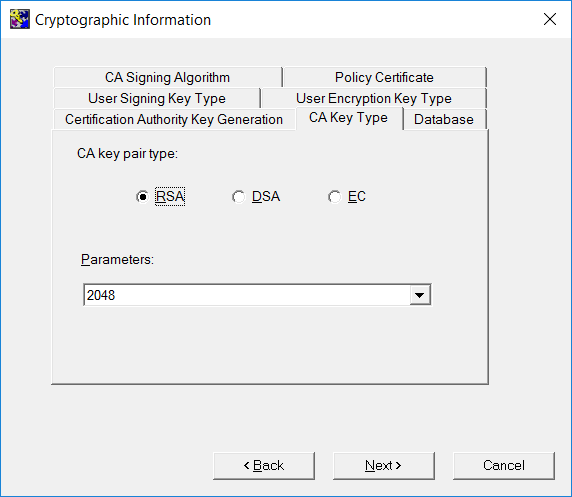
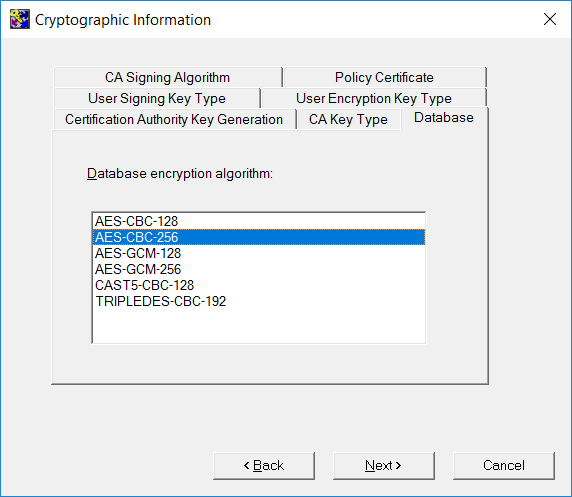
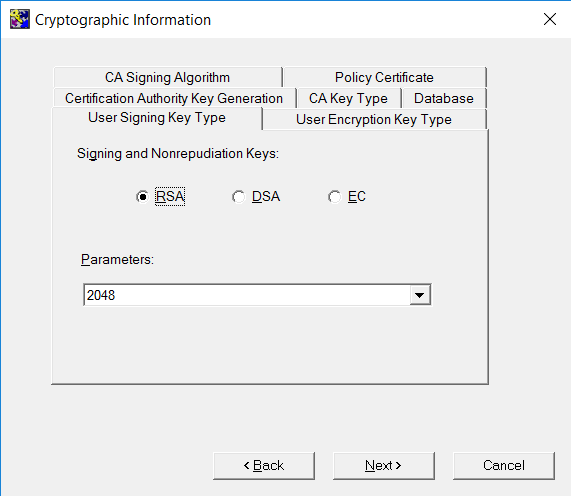
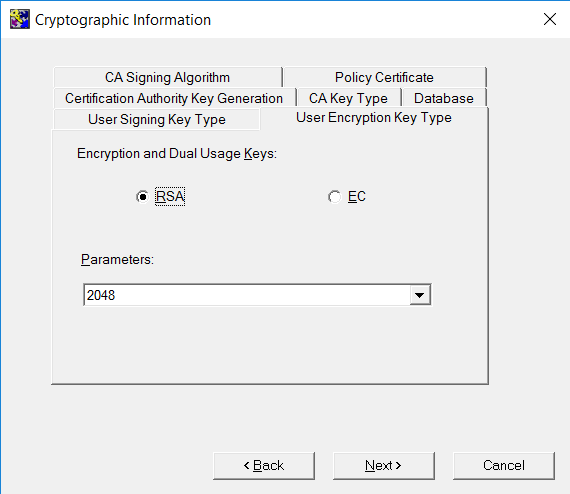
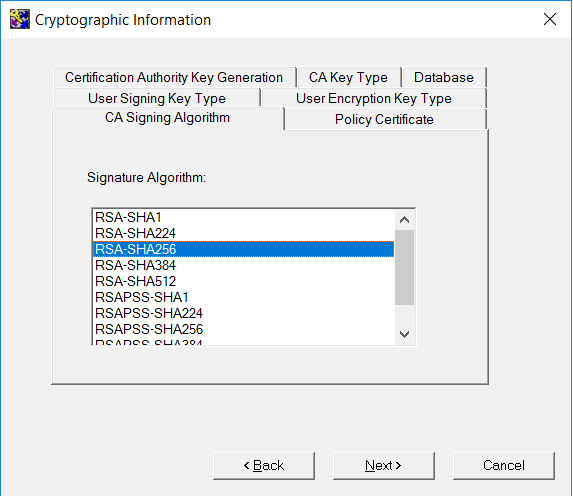
In the Cryptographic Information window, select in each tab as follows. Select Next each time.
-
On the Certification Authority Key Generation tab, select Use hardware.
-
On the CA Key Type tab, select the key type and length. For a PQ workflow, select the ML-DSA key type and appropriate size, either 44, 65, or 87.
-
On the Database tab, select the database encryption algorithm.
-
On the User Signing Key Type tab, select the key type and length. For a PQ workflow, select the ML-DSA key type and appropriate size, either 44, 65, or 87.
-
On the User Encryption Key Type tab, select the key type and length. For a PQ workflow, select the ML-KEM key type and appropriate size, either 512, 768, or 1024.
-
On the CA Signing Algorithm Type tab, select the type.
-
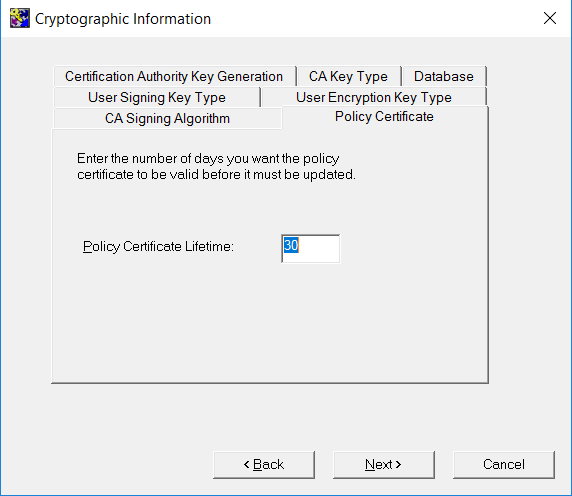
On the Policy Certificate tab, enter the policy certificate lifetime.
For this integration to work with EC-P and RSAPSS, the ECC activation feature must be enabled for the Entrust nShield HSM. In the
%NFAST_ HOME%\bindirectory, runFET.exe. -
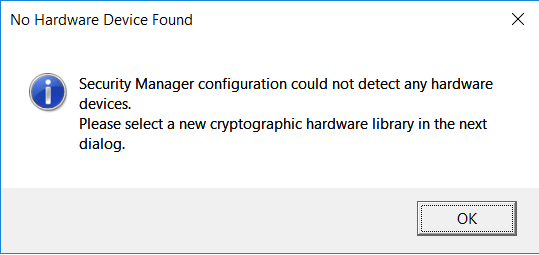
If you are using the Entrust nShield Edge, go to the step after next. Otherwise, the No Hardware Device Found dialog appears. Select OK.
-
In File Explorer, select the nShield PKCS11 library
%NFAST_HOME%\toolkits\pkcs11\cknfast.dll.
The default location isC:\Program Files\nCipher\nfast\toolkits\pkcs11\cknfast.dll.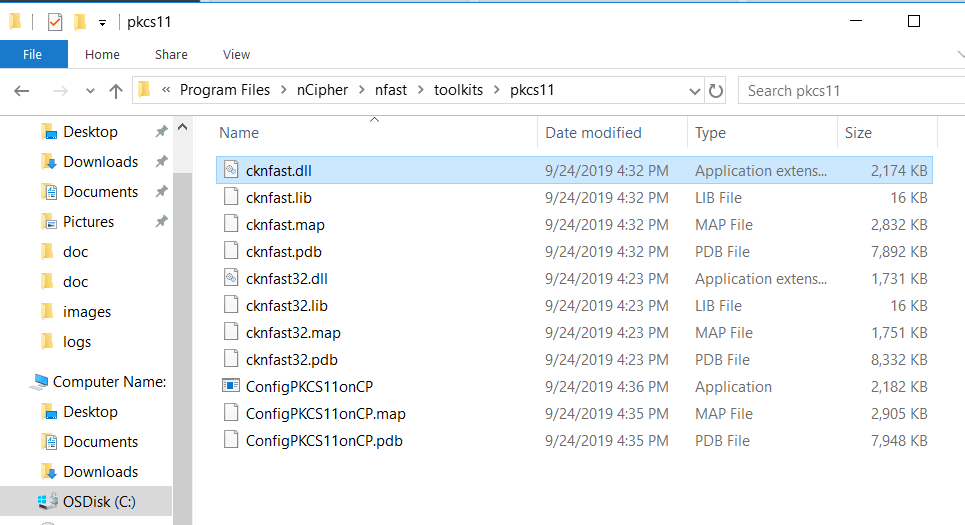
-
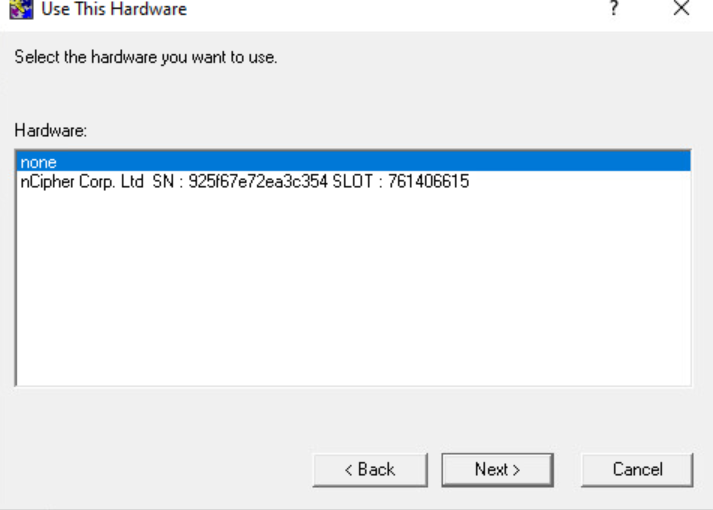
In the Use This Hardware window, select the Entrust nShield HSM entry with a valid serial number, then select Next.
-
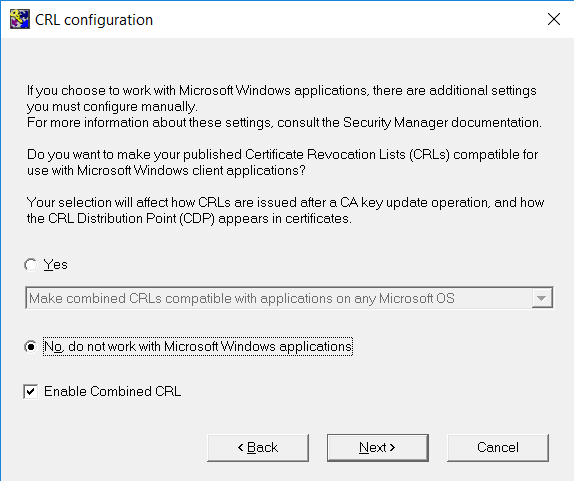
In the CRL Configuration window, select No, do not work with Microsoft Windows applications, then select Next.
-
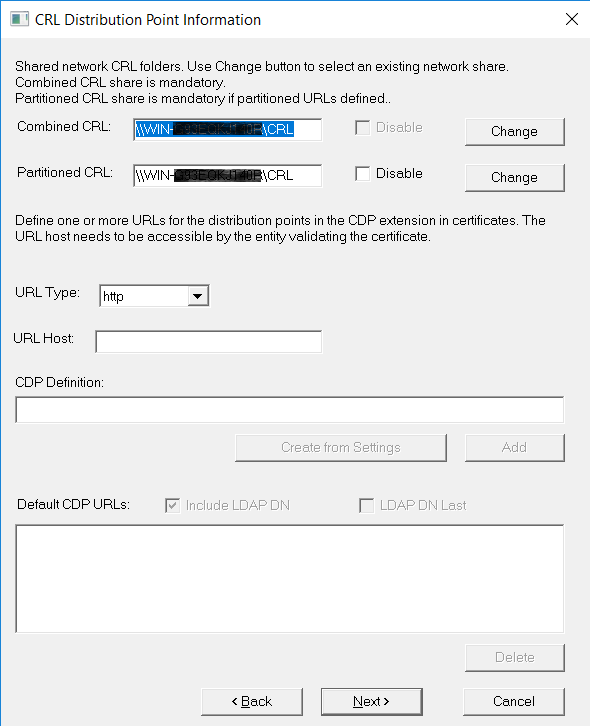
In the CRL Distribution Point Information window, select the CRL location, then select Next.
-
In the CA Certificate Properties window, enter the CA certificate lifetime and private key usage period, then select Next.
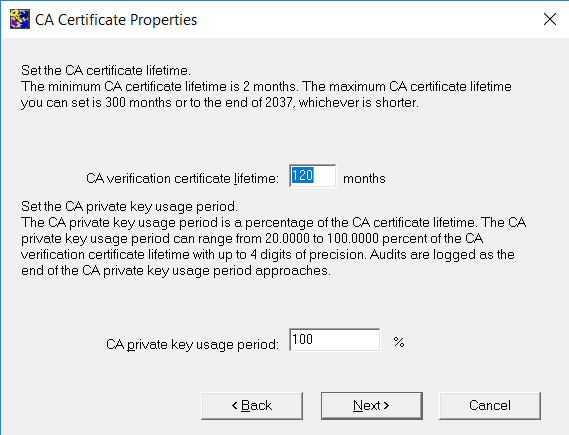
Consult your organization’s security policy for recommendations on the CA lifetime.
-
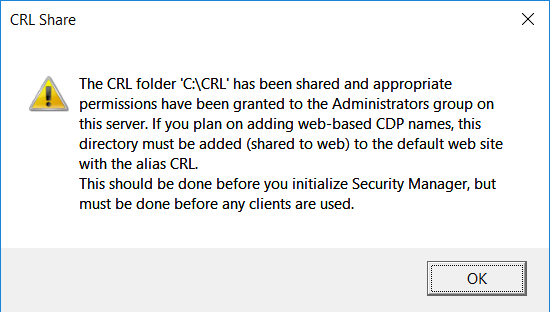
In the CRL Share Warning window, select OK.
-
In the Configuration Complete window, leave Run Entrust Certificate Authority Control Command Shell now unchecked, then select OK.
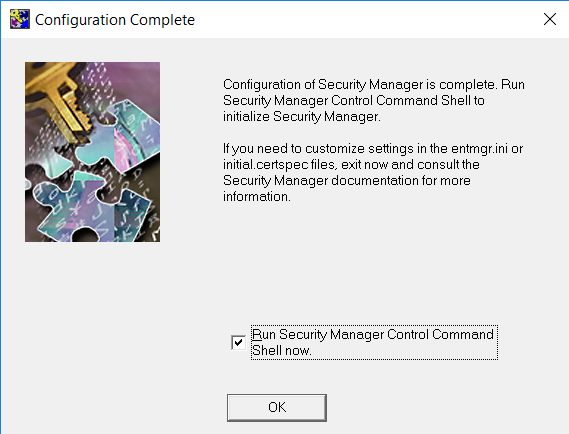
Close the configuration utility and any remaining dialogs.
-
Verify the configuration file before initializing the CA:
-
Back up
C:\authdata\manager\entmgr.ini. -
In
[Comms]:-
Verify the directory server and listener ports.
-
Add
Mgrlisten=709if it is missing.
-
-
In
[policy]:-
Check that
diradminPWandCADsaPwmatch the configured directory administrator and CA entry passwords.
-
-
In
[Authorization]:-
Add a Web Server license if required.
-
Check that
WebSerialNumber,WebUserLimit, andWebKeyare present. If not, add them to the existing section using your license values; keep the Enterprise fields and do not create a second section. You can also add this information later through the Certificate Authority Administration utility.
-
-
-
Verify both authenticated directory binds before continuing.
Run the following commands fromC:\OpenLDAP\ClientTools, replacing<directory_server_name>with the directory server’s hostname. Enter each password when prompted:& ".\ldapsearch" -x -h "<directory_server_name>" -D "cn=EntrustAdmin,ou=CAentry,dc=entrustsm,dc=local" -W -b "ou=CAentry,dc=entrustsm,dc=local" -s base "(objectClass=*)" & ".\ldapsearch" -x -h "<directory_server_name>" -D "ou=CAentry,dc=entrustsm,dc=local" -W -b "ou=CAentry,dc=entrustsm,dc=local" -s base "(objectClass=*)"Continue only if both commands return
result: 0 Success. If either command returns a failure, check that the LDAP server is working and was set up correctly. -
Initialize the CA manually:
-
Open a new Administrator PowerShell window and set
AUTHDATDIR:[Environment]::SetEnvironmentVariable('AUTHDATDIR', 'C:\authdata', 'Machine') $env:AUTHDATDIR = 'C:\authdata' -
Start the CA shell:
Set-Location 'C:\Program Files\Entrust\Certificate Authority\bin' .\entsh.exe -
At the
entshprompt, runinit.
-
-
Enter and confirm the following passwords. Note these for future use.
Parameter Value HSM
OCS or softcard passphrase created in install-entrust-hsm.adoc#create-OCS-Softcard.
Master1-3
Master user’s new passwords
First Officer
First officer’s new password
For example:
Starting First-Time Initialization... A Hardware Security Module (HSM) will be used for the CA key: nCipher Corp. Ltd SN : <HSM serial> The HSM requires a password. Enter password for CA hardware security module (HSM): Enter new password for Master1: Confirm new password for Master1: Enter new password for Master2: Confirm new password for Master2: Enter new password for Master3: Confirm new password for Master3: Enter new password for First Officer: Confirm new password for First Officer: Initialization starting; creating ca keys... Initialization complete. Starting the services... Creating CA profile... Creating First Officer profile... You are logged in to Entrust Certificate Authority Control Command Shell. Performing database backup... SUCCESS: Full backup completed successfully. Press return to exit -
Close the window above.