Create and Manage Hyper-V Virtual Machines in Hyper-V Core
Prerequisites for using nShield Monitor with Hyper-V virtual machines
It is recommended to have at least 8 GB main memory when using Hyper-V Manager with nShield Monitor. The following Hyper-V image files are required:
-
nShieldMonitor-2.7.0-1.vhd -
nShieldMonitor-2.7.0-2.vhdx -
nShieldMonitor-2.7.0-3.vhdx -
nShieldMonitor-2.7.0-4.vhdx -
nShieldMonitor-2.7.0-5.vhdx
Install Hyper-V
With Windows Server Core installations, you can install Hyper-V using the following applications:
-
The legacy Hyper-V Manager.
-
Windows Admin Center.
Install Hyper-V on Windows Server Core with PowerShell
At the PowerShell command prompt, run:
Install-WindowsFeature -Name Hyper-V -IncludeAllSubFeature -RestartWindows Server Core will install the Hyper-V role and restart automatically.
Add the Hyper-V role using Windows Admin Center
-
Connect your Windows Admin Center Gateway Server to your Windows Server Core installation.
-
In Windows Admin Server, select Server Manager > Roles and Features > Install, then select Hyper-V.
Windows Admin Center will calculate the dependencies of role and feature installations and then prompt you to proceed with the installation, including automatic reboot options.
-
When Windows Server has rebooted, check in Server Manager > Roles and Features that the State for the Hyper-V role is Installed.
Configure a new virtual machine with Hyper-V
-
In Windows Admin Center, select Server Manager, then launch Hyper-V Manager.
-
Select New > Virtual Machine.
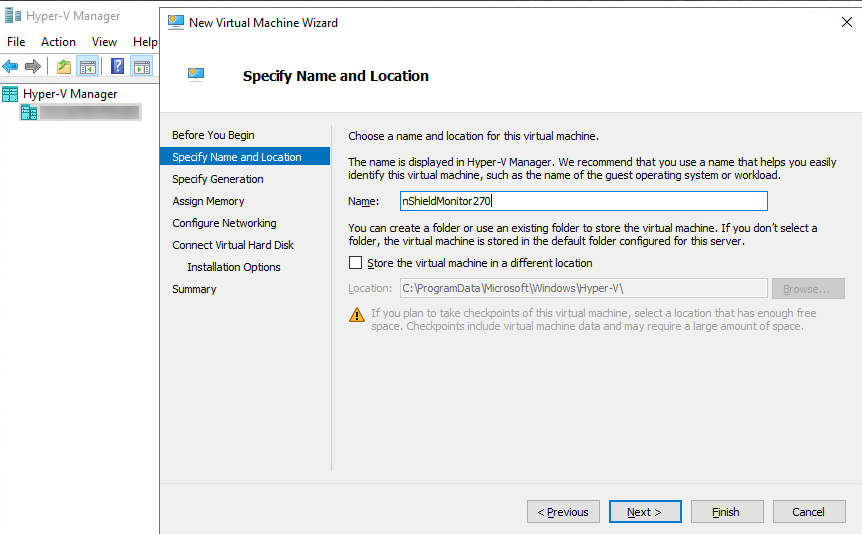
The New Virtual Machine Wizard opens.
-
Specify the Name and Location of the virtual machine, then select Next.
-
Select Generation 1, then select Next.
-
Set the RAM Size, then select Next.
-
Set the Connection to Default Switch, then select Next.
-
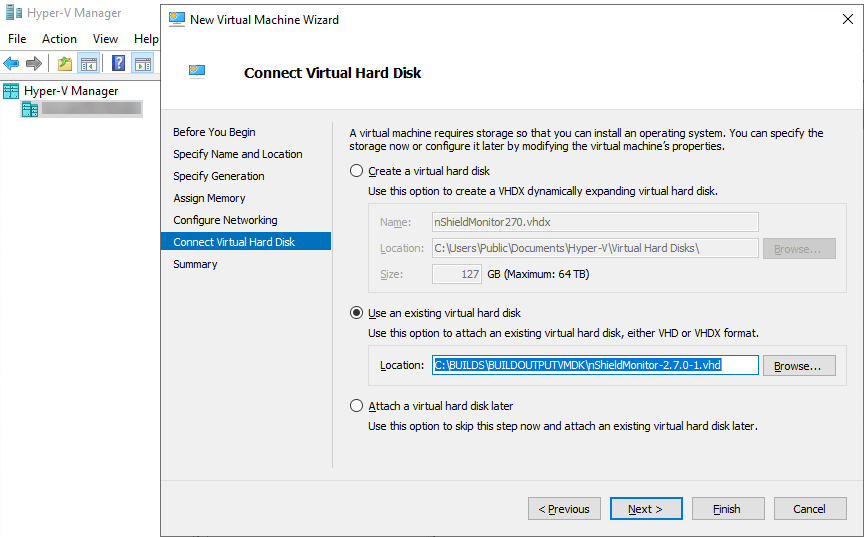
Attach the boot hard disk (VHD file) for nShield Monitor.
-
Select Next, then select Finish.
-
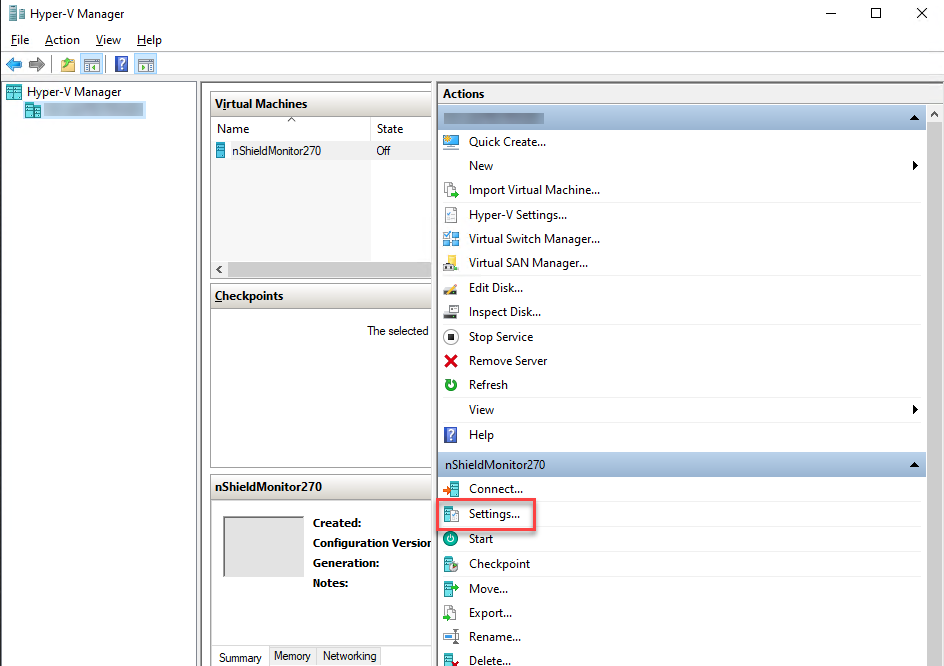
In the new machine, select Settings.
-
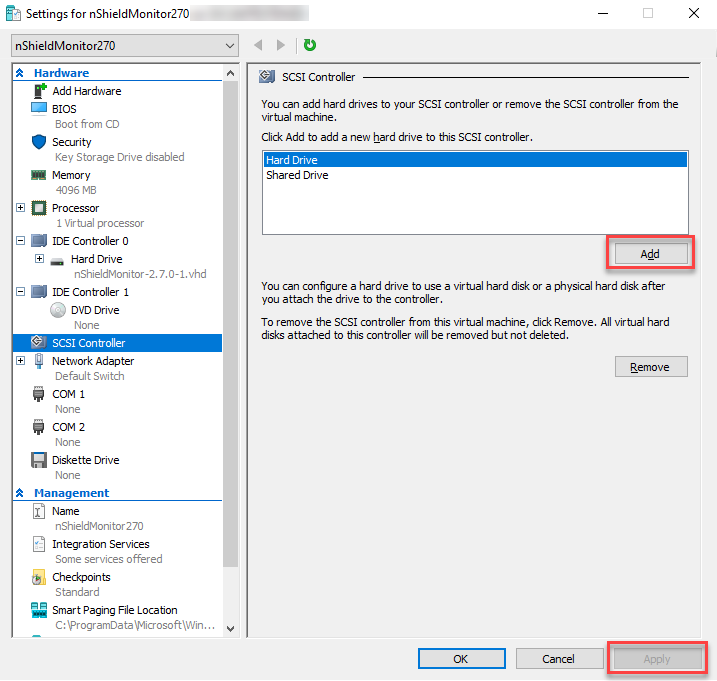
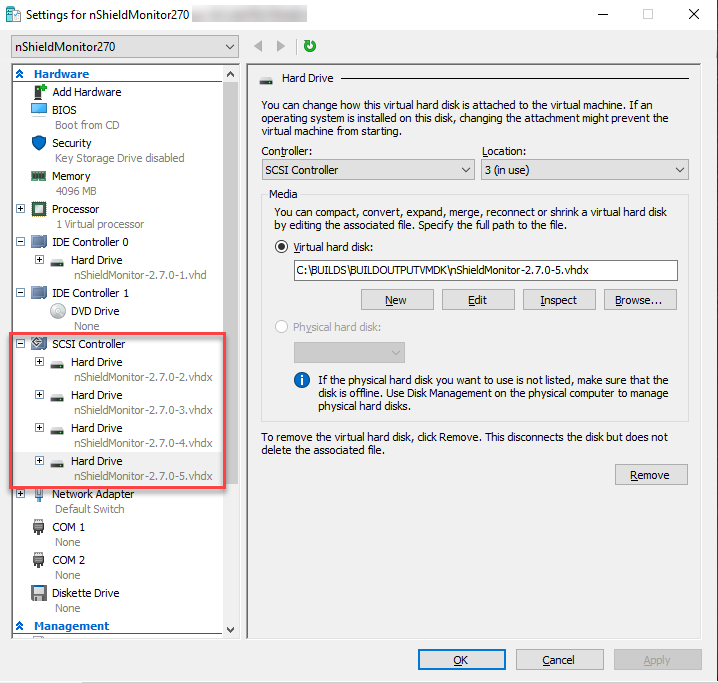
Select SCSI Controller, then add the remaining four hard drives of nShield Monitor.
-
Select Hard Drive, then select Add.
-
In the New Virtual Hard Disk Wizard, select Copy the contents of the specified virtual hard disk, browse to the -2.vhdx file, and add it.
-
Back on the SCSI Controller page, select Apply.
-
Add the other three virtual hard disk files (
-3.vhdx,-4.vhdx, and-5.vhdx), repeating steps a-c for each of them.All four virtual hard disk files added to the SCSI Controller:
-
-
From Hyper-V Manager, select Start and Connect to see the nShield Monitor image running.