Install and configure Entrust KeyControl
A two-node cluster was deployed for this integration. KeyControl can be deployed on AHV using the ISO image. The ISO image is available at Software Downloads. Installation instructions are available at ISO Installation.
Upload the KeyControl ISO in AHV
For reference see the following Nutanix online documentation:
-
Log into the Nutanix Prism Element web UI.
-
Select the Settings control on the top tool bar.
-
In the left menu, select Image Configuration.

-
Select Upload Image.
-
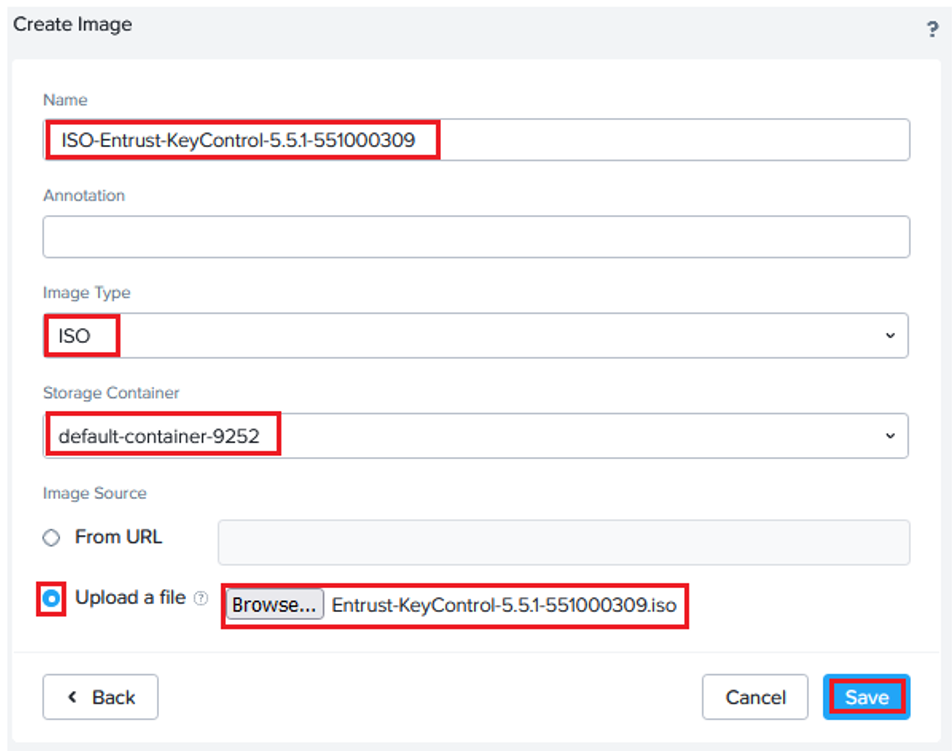
In the Create Image window, enter the following: Then select Save.
Parameter Value Name
Enter a unique name.
Image Type
ISO
Storage Container
Select the required container.
Upload a file
Browse to the ISO file and select it.
-
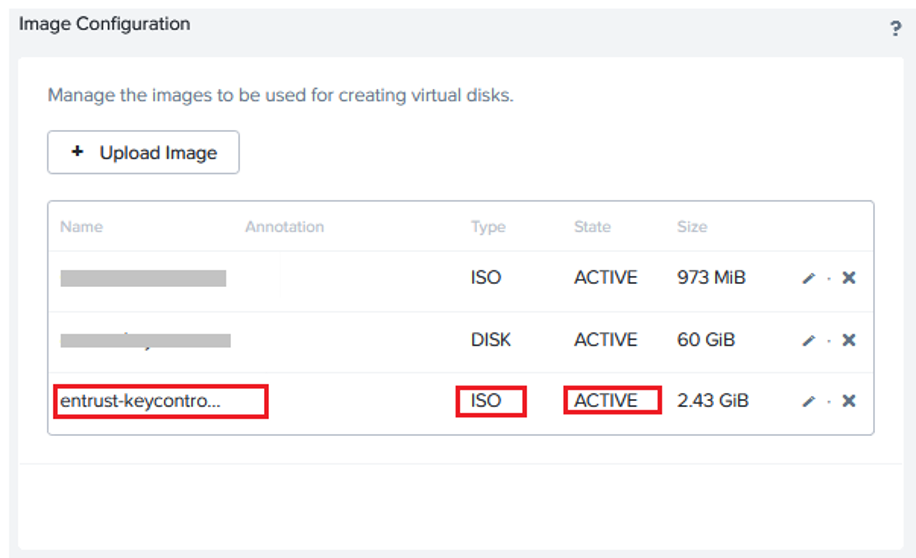
In the Image Configuration window, confirm that the image is ACTIVE.
Deploy an KeyControl node on AHV
For reference see VM Management in the Nutanix online documentation.
-
Log in to the Nutanix Prism Element webUI.
-
Select VM from the pull-down menu on the top tool bar.

-
Select the Table tab.
-
Select Create VM.
-
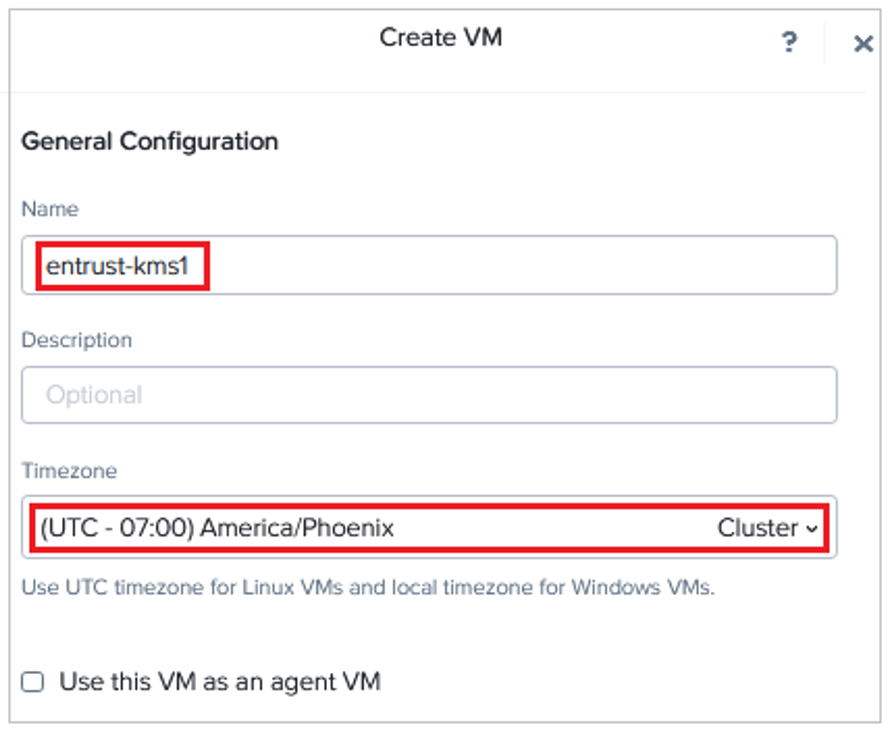
In the General Configuration window, enter the following:
Parameter Value Name
Enter a unique name for the VM.
Timezone
Select your timezone.
Use this VM as an agent VM
Un-check
-
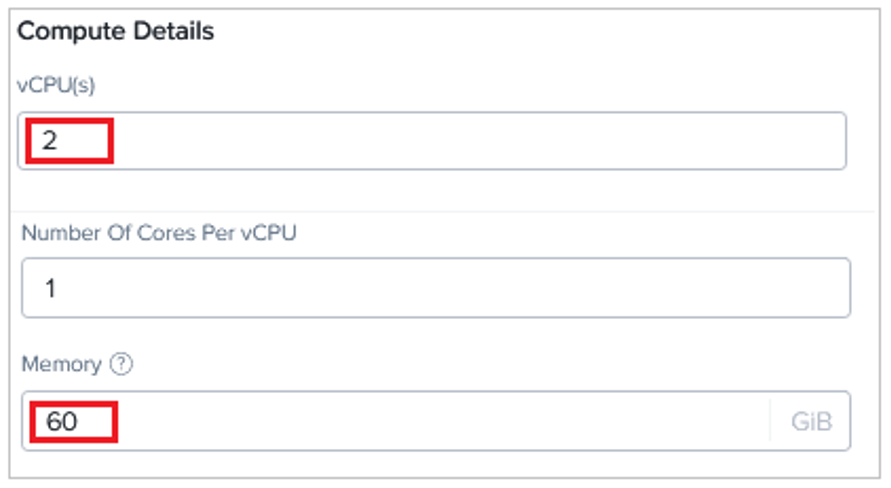
In the Compute Details window, enter the following:
Parameter Value vCPUs
2 (Number of cores per vCPU =1)
Memory
8
-
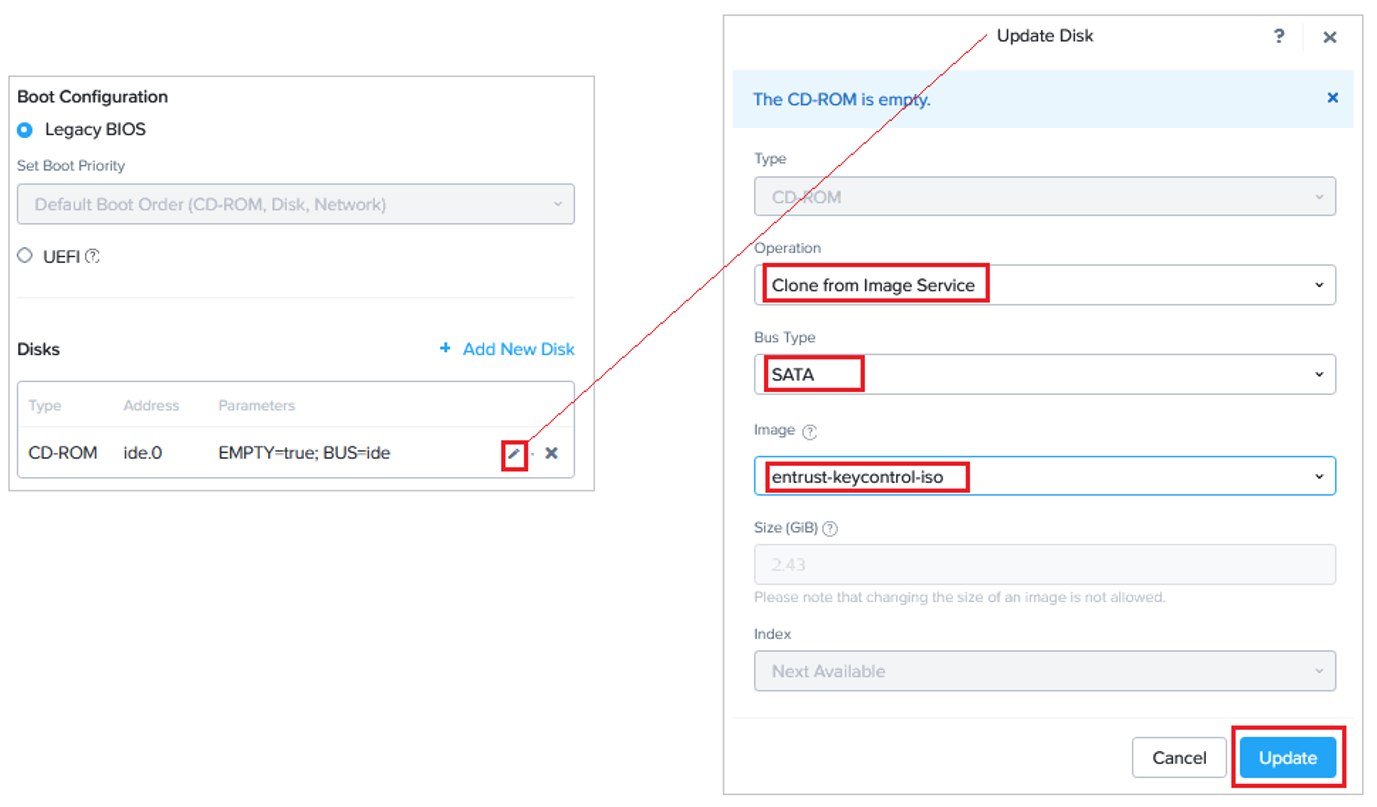
In the Boot Configuration, enter the following:
-
Select Legacy BIOS.
-
Under Disks, select the edit button for the CD-ROM entry.
-
-
In the Update Disk window, enter the following. Then select Update.
Parameter Value Operation
Clone from Image Service
Bus Type
SATA
Image
Enter the image file name.
-
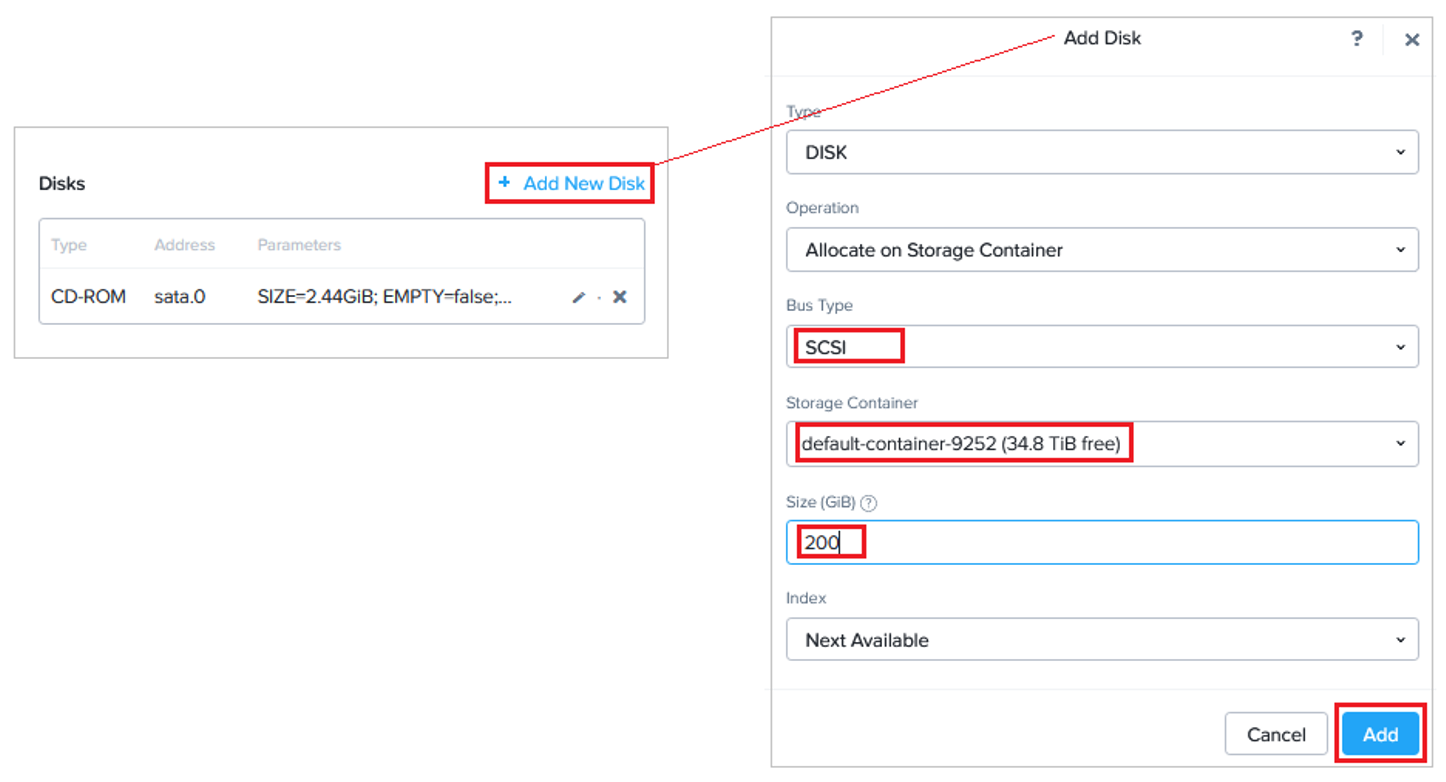
Select Add New Disk.
-
In the Add Disk window, enter the following. Then select Add.
Parameter Value Operation
Allocate on Storage Container
Bus Type
SCSI
Storage Container
Select the required service container.
Size
200
Index
Next Available
-
Under Network Adapters (NIC), select Add New NIC.
-
In the Create NIC window, select your Subnet Name. Then select Add.
Select a static network as DHCP network deployment is not supported. 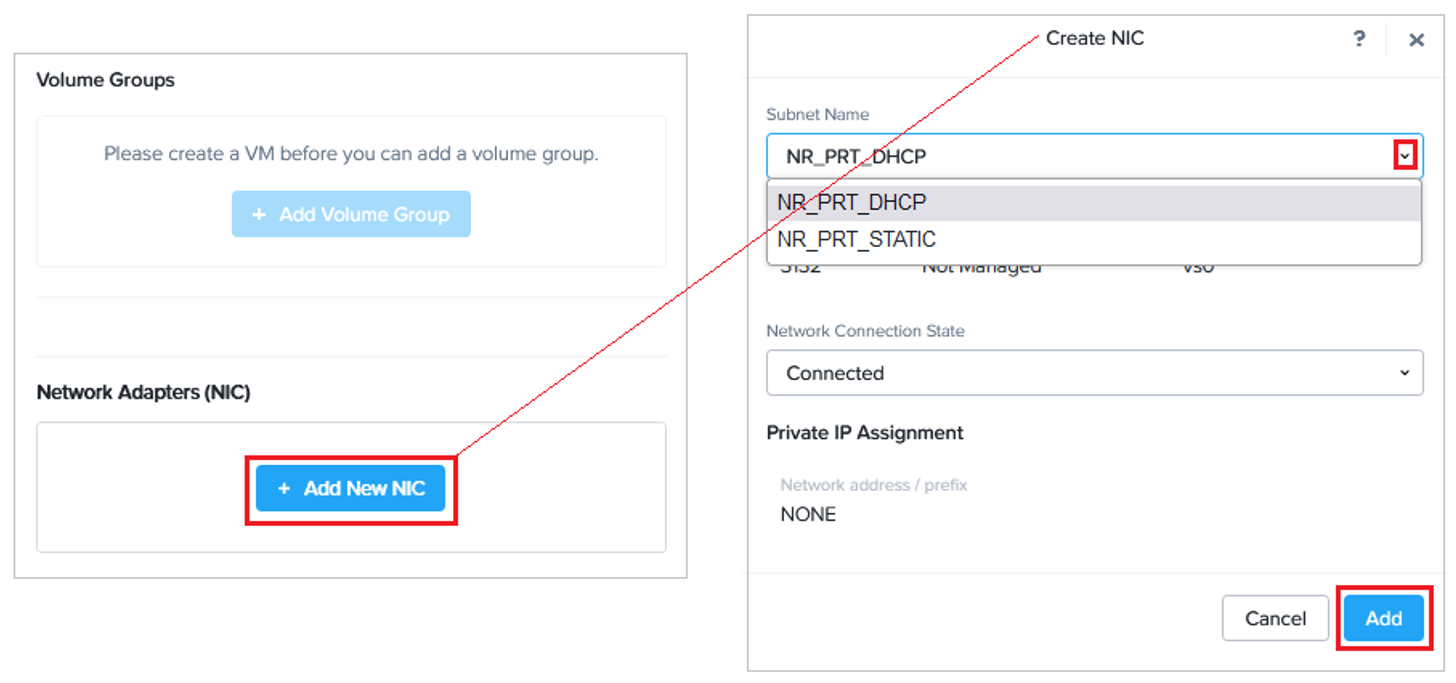
-
At the bottom of the Create VM window, select Save.
-
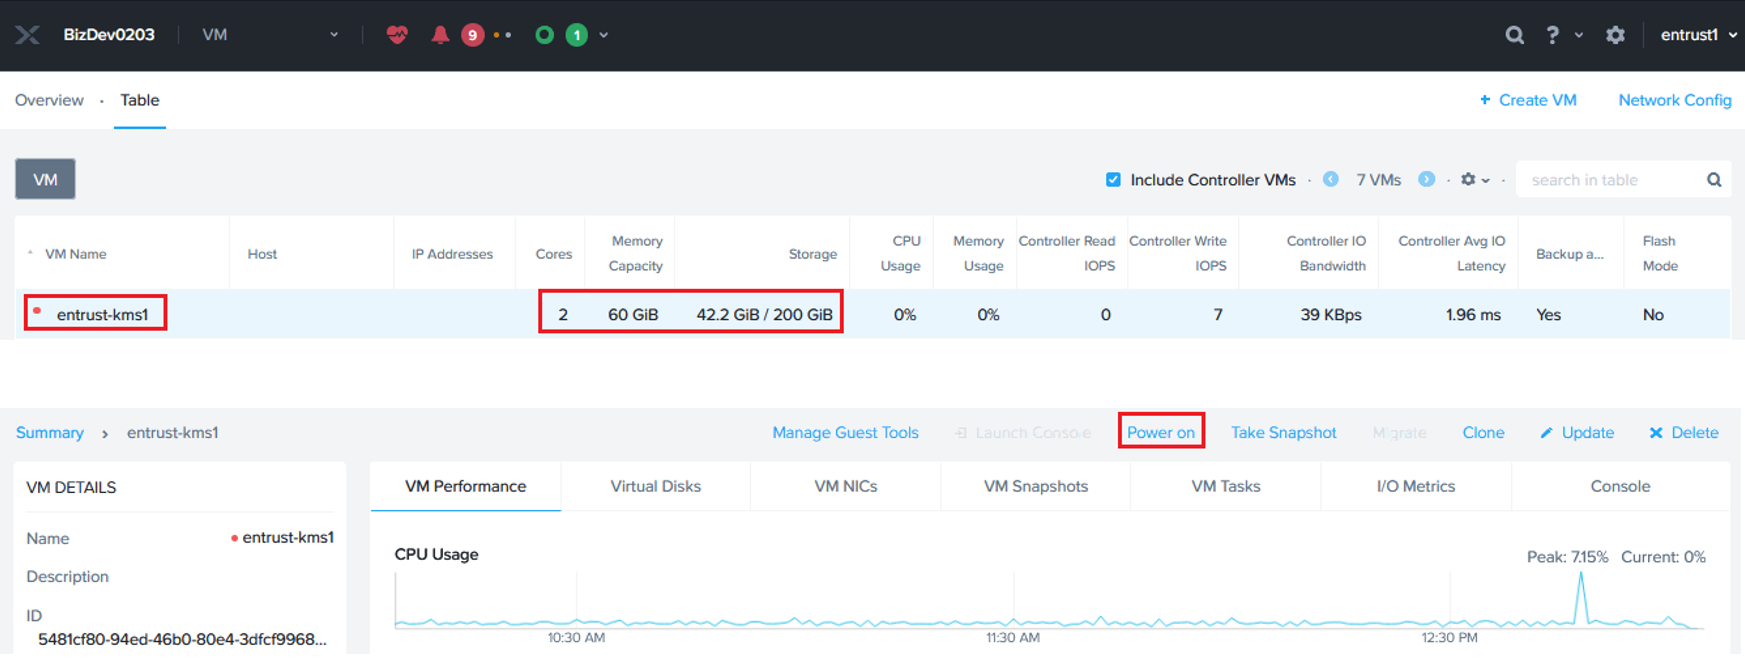
On the VM page, confirm the VM was created.
-
Select Power on to start the VM.
-
Repeat all steps to create a second Entrust KeyControl node.
Join the two KeyControl nodes to form a cluster.
Join the two KeyControl nodes in a high availability cluster following the instructions in Installing a New KeyControl Vault Cluster Additional information can be found at Entrust Documentation (search for the KeyControl).
Create a KeyControl vault
-
Sign in to the KeyControl Appliance Manager.
-
In the Appliance Management home page select Vault Management.

-
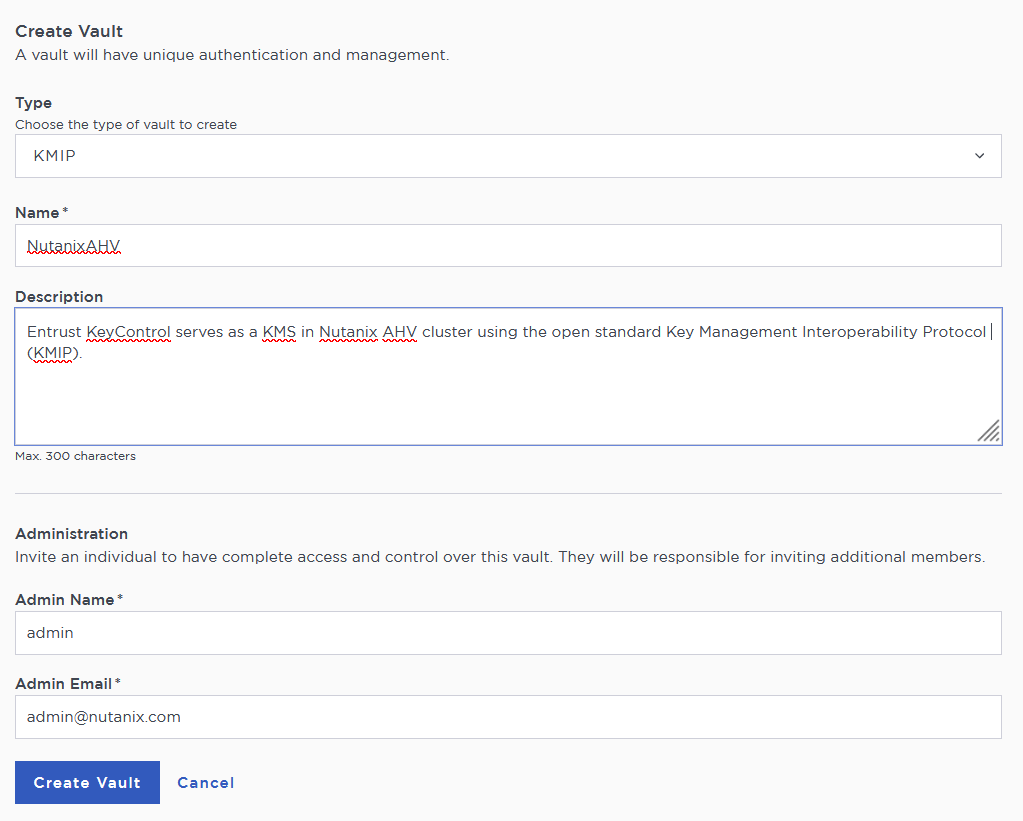
In the Vault Management home page, select Create Vault. The Create Vault dialog appears.

-
In the Type drop-down box, select KMIP. Enter the required information, then select Create Vault.
-
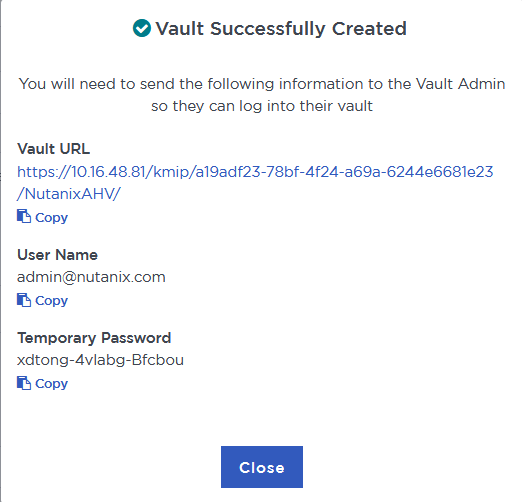
Bookmark the following URL and save the credentials. You will receive an email with the above information if the SMTP was set.
-
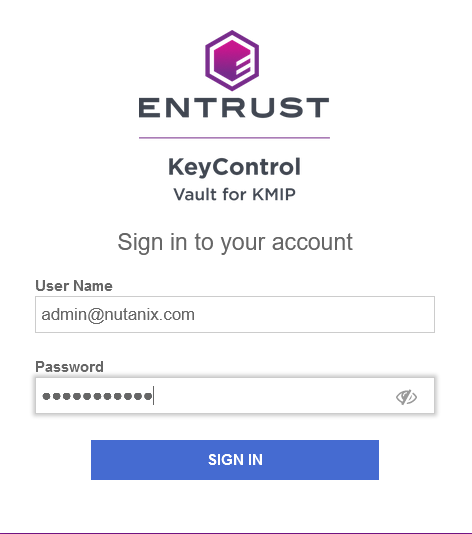
Sign in to the URL provided above with the temporary password. Change the initial password when prompted. Sign in again to verify.
-
Notice the new vault.
