Procedures
The following steps summarize the integration procedure.
Guardian Server:
Guarded Host:
| For this guide both the Guardian Server and Guarded Host were implemented on virtual machines. Microsoft recommends installing the Host Guardian Service role on a physical machine for security purposes. |
| The Host Guardian Service should be installed in a dedicated Active Directory forest. Ensure the Guardian Server and Guarded Host are not joined to a domain. |
Install and configure the nShield Security World software and nShield HSM
Install the HSM using the instructions in the Installation Guide for the nShield HSM.
To install the Security World software and create the Security World:
-
Install the latest version of the Security World software as described in the User Guide for the HSM. Entrust recommends that you uninstall any existing Security World software before installing the new Security World software.
-
Add the Security World utilities path
C:\Program Files\nCipher\nfast\binto the Windows system path. -
Open the firewall port 9004 for the HSM connections.
-
Install the nShield Connect HSM locally, remotely, or remotely via the serial console.
See the following nShield Support articles and the Installation Guide for the HSM:
-
How to remotely set up a new or replacement nShield Connect XC Serial Console model
Access to the Entrust nShield Support Portal is available to customers under maintenance. To request an account, contact nshield.support@entrust.com.
-
Open a command window and run the following to confirm that the HSM is
operational:> enquiry Server: enquiry reply flags none enquiry reply level Six serial number 530E-02E0-D947 mode operational ... Module #1: enquiry reply flags none enquiry reply level Six serial number 530E-02E0-D947 mode operational ... -
Create your Security World if one does not already exist or copy an existing one. Follow your organization’s security policy for this. The Security World can also be created later, when configuring the CNG provider via its GUI, see Install and register the nShield CNG. Skip the next step if doing so.
-
Confirm that the Security World is
usable:>nfkminfo World generation 2 state 0x37270008 Initialised Usable ... ... Module #1 generation 2 state 0x2 Usable ...
Install and register the nShield CNG
It is necessary to install and register the nShield Cryptography API: Next Generation (CNG) provider on the Guardian Server. This can be done using either the command line or the CNG Configuration wizard.
Before proceeding, check that no legacy providers are installed.
-
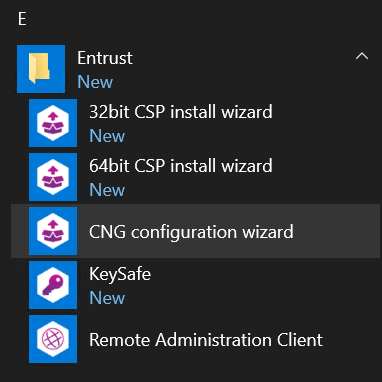
Select the Start button to access all applications. Look for the recently installed nShield utilities.
-
Double-click the CNG Configuration wizard and run it as Administrator.
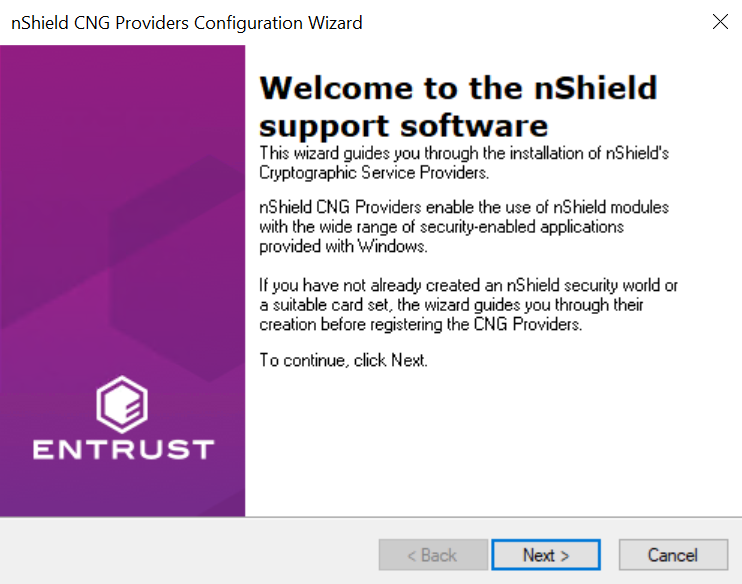
The nShield CNG Providers Configuration Wizard starts.
-
On the Welcome panel, select Next.
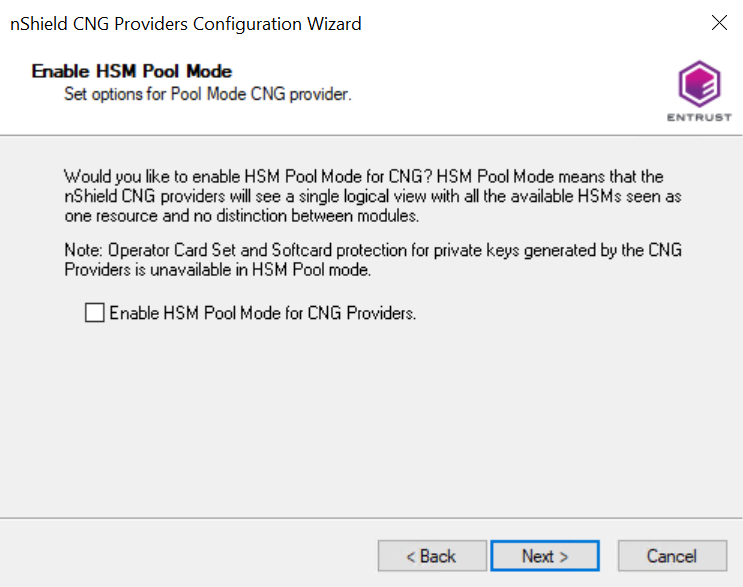
The Enable HSM Pool Mode panel appears.
-
If you intend to use multiple HSMs in a failover and load-sharing capacity, select Enable HSM Pool Mode for CNG Providers. If you do, you can only use module protected keys.
Module protection does not provide conventional 1 or 2 factor authentication. Instead, the keys are encrypted and stored as an application key token, also referred to as a Binary Large Object (blob), in the kmdata/localdirectory of the HGS server. -
Select Next.
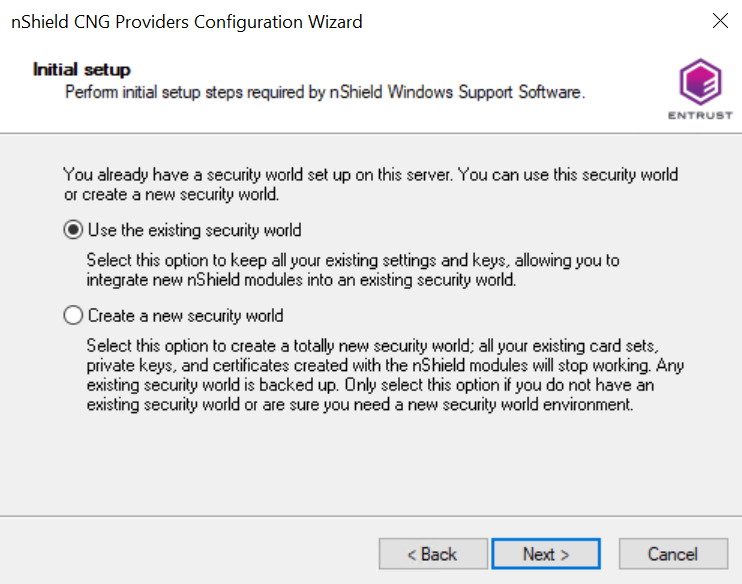
The Initial setup panel appears:
-
Select Use the existing security world if you already have a Security World that you intend to use. The corresponding
worldandmodule_xxxx-xxxx-xxxxfiles must be present in the%NFAST_KMDATA%\localdirectory. Be prepared to present the quorum of Administrator cards. -
Select Create a new Security World if you do not currently have a Security World or would like to create a new Security World.
For the purposes of this guide, an existing Security World is used. For instructions on how to create and configure a new Security World, see the Installation Guide and User Guide for your HSM. -
-
Select Next.
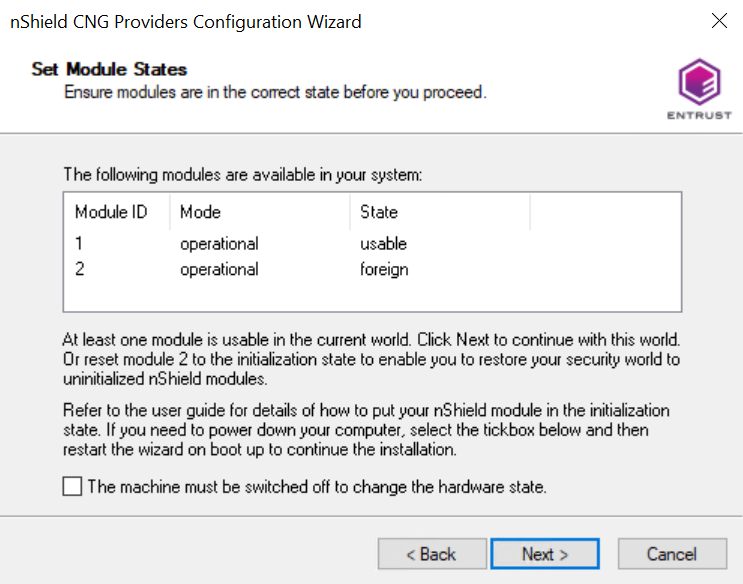
The Set Module States panel appears.
-
Select the desired HSM among those available.
-
Select Next.
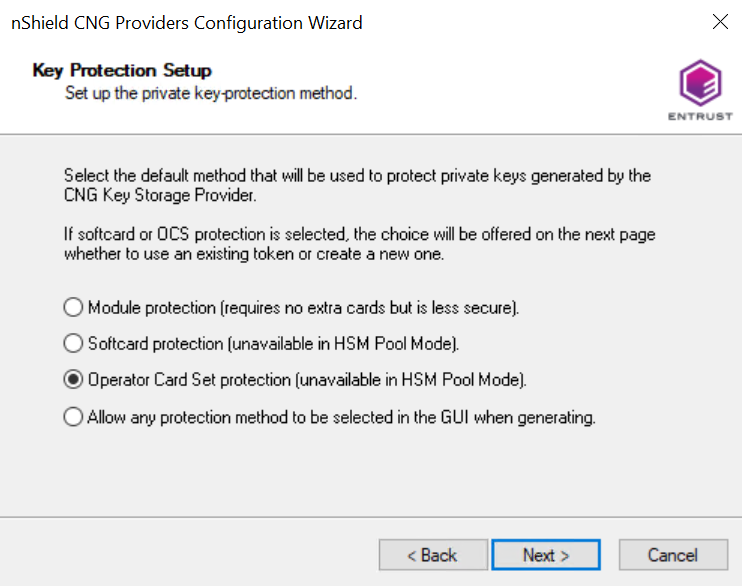
The Key Protection Setup panel appears.
-
Select the required protection method.
For the purposes of this guide, Operator Card Set is used. You can choose Module Protection or Softcard Protection instead.
-
Select Next.
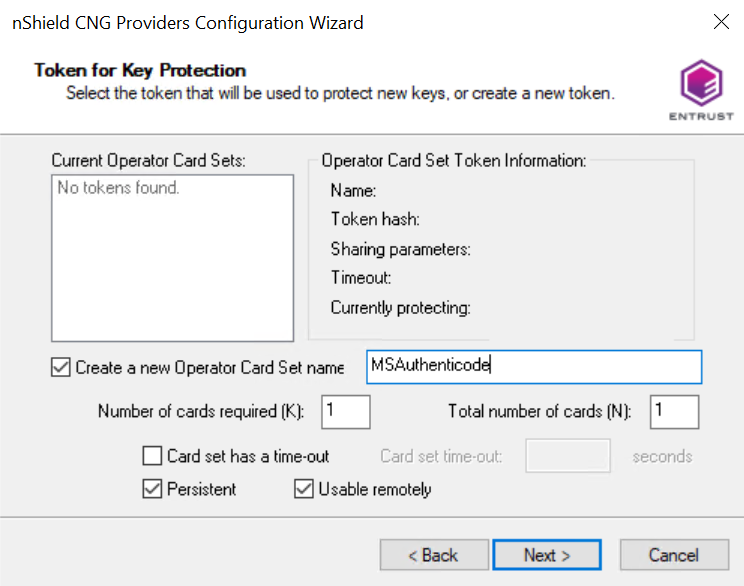
The Token for Key Protection panel appears.
-
Enter the OCS name, K and N values, select Persistent, and select Usable remotely.
-
Select Next.
You must now present the cards.
-
First present the ACS to the HSM.
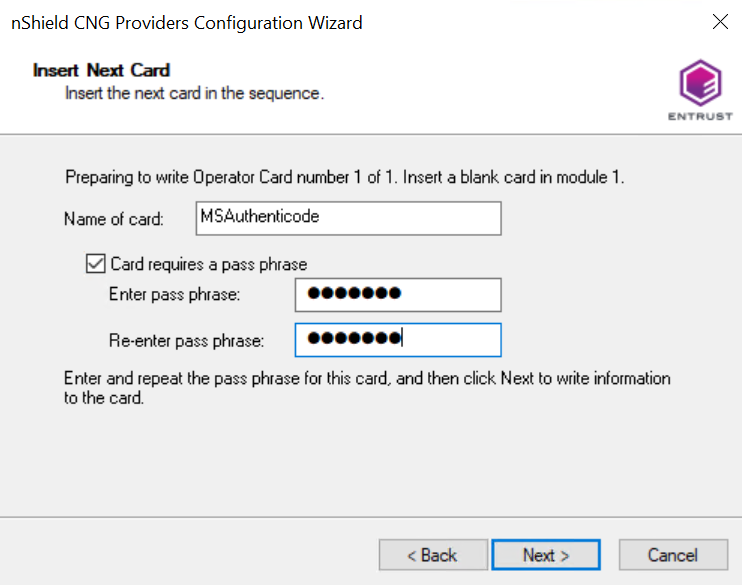
Then remove the ACS and insert a blank Operator Card in the HSM. On the Insert Next Card screen enter a name for the OCS and corresponding passphrase.
-
Select Next and repeat until all cards in the OCS have been presented.
-
Select Finish.
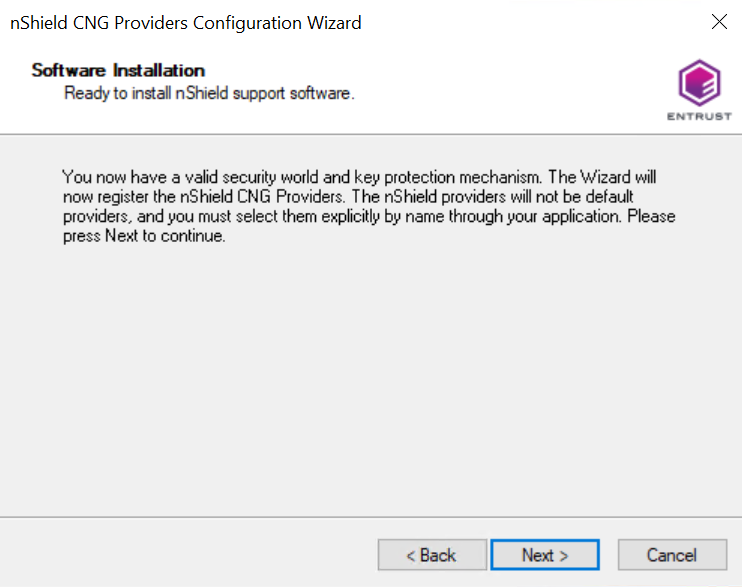
The nShield CNG providers will now be installed and the Key Storage Provider will be registered.
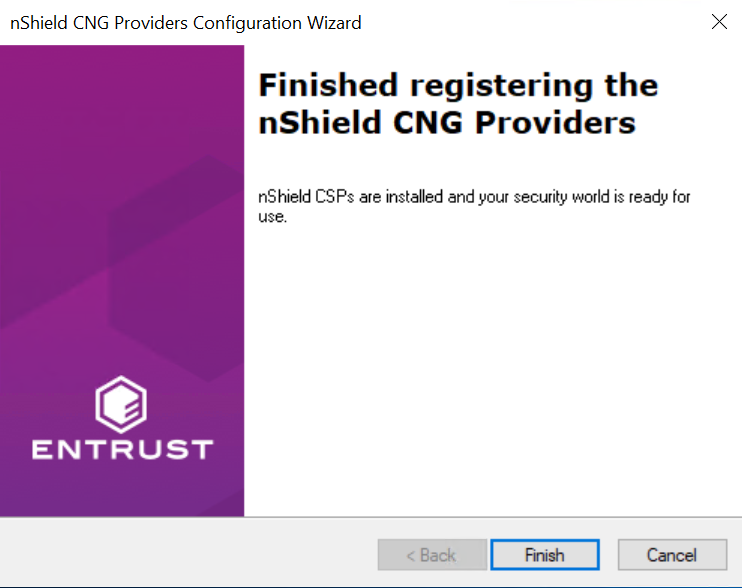
After this process completes, the Finished Registering the nShield CNG Providers panel appears.
-
Open a command window as Administrator and run the following command to confirm the KSP has been successfully registered:
> cnglist.exe --list-providers
Microsoft Key Protection Provider
Microsoft Passport Key Storage Provider
Microsoft Platform Crypto Provider
Microsoft Primitive Provider
Microsoft Smart Card Key Storage Provider
Microsoft Software Key Storage Provider
Microsoft SSL Protocol Provider
Windows Client Key Protection Provider
nCipher Primitive Provider
nCipher Security World Key Storage Provider
Look for the nCipher Security World Key Storage Provider entry.
-
Run the following from PowerShell after the Host Guardian Service has been installed:
> Show-DnsServerKeyStorageProvider Microsoft Software Key Storage Provider nCipher Security World Key Storage Provider Microsoft Passport Key Storage Provider Microsoft Platform Crypto Provider Microsoft Smart Card Key Storage Provider -
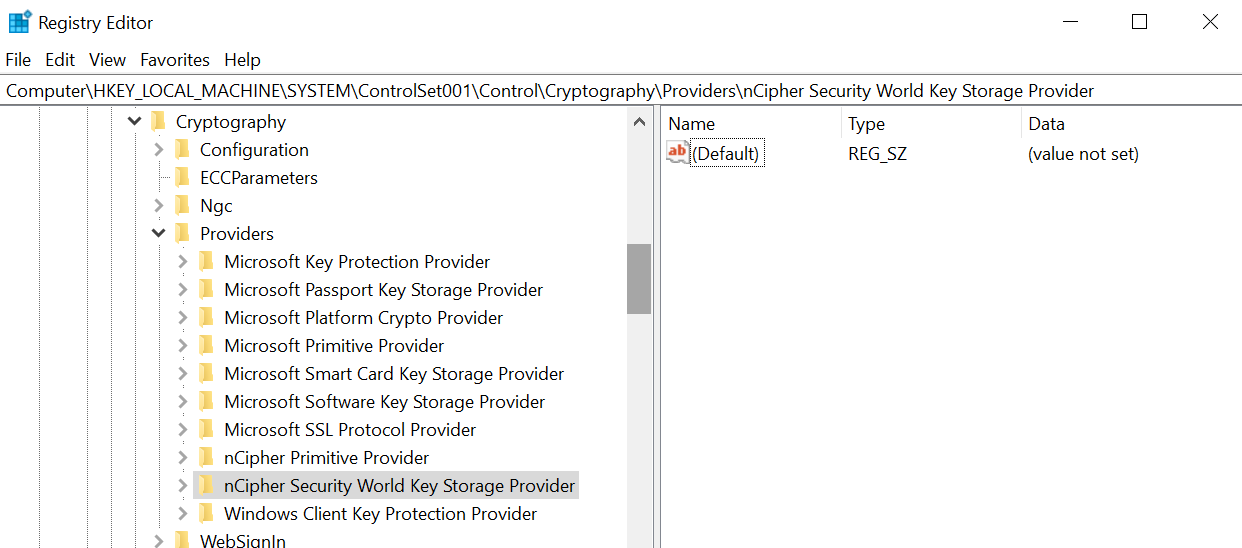
Check that the registry also shows the nCipher Security World Key Storage Provider:
HKEY_LOCAL_MACHINE\SYSTEM\ControlSet001\Control\Cryptography\Providers\nCipherSecurityWorldKeyStorageProviderFor example:
Install the Host Guardian Service in a new forest
This section describes how to install the Host Guardian Service in a new Active Directory forest:
Microsoft has documented the full process in https://technet.microsoft.com/en-us/windows-server-docs/security/guarded-fabric-shielded-vm/guarded-fabric-deploying-hgs-overview.
Add the Host Guardian Server role using the Server Manager GUI
| You can also add the Host Guardian Server role using PowerShell, see Add the Host Guardian Server role using PowerShell. |
To add the Host Guardian Server using the Server Manager GUI:
-
Open Server Manager and under Manage, select Add Roles and features.
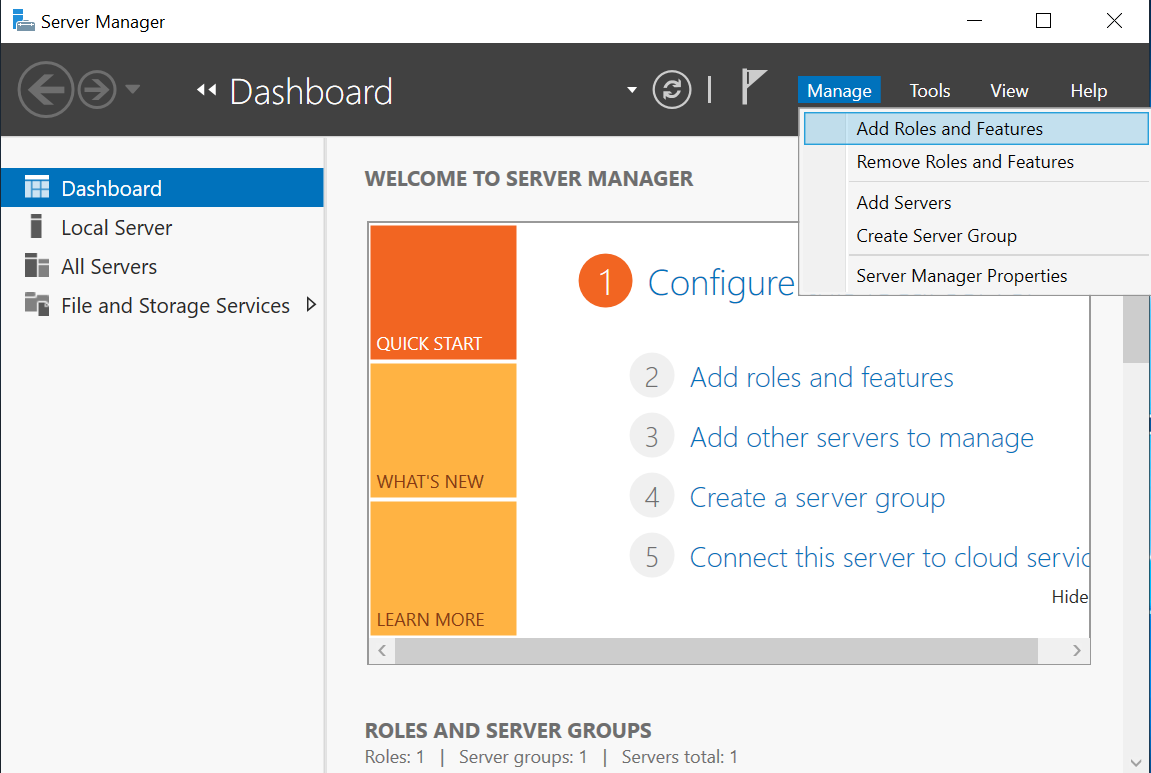
The Add Roles and Features Wizard starts.
-
Select Next until you reach the Select destination server panel.
-
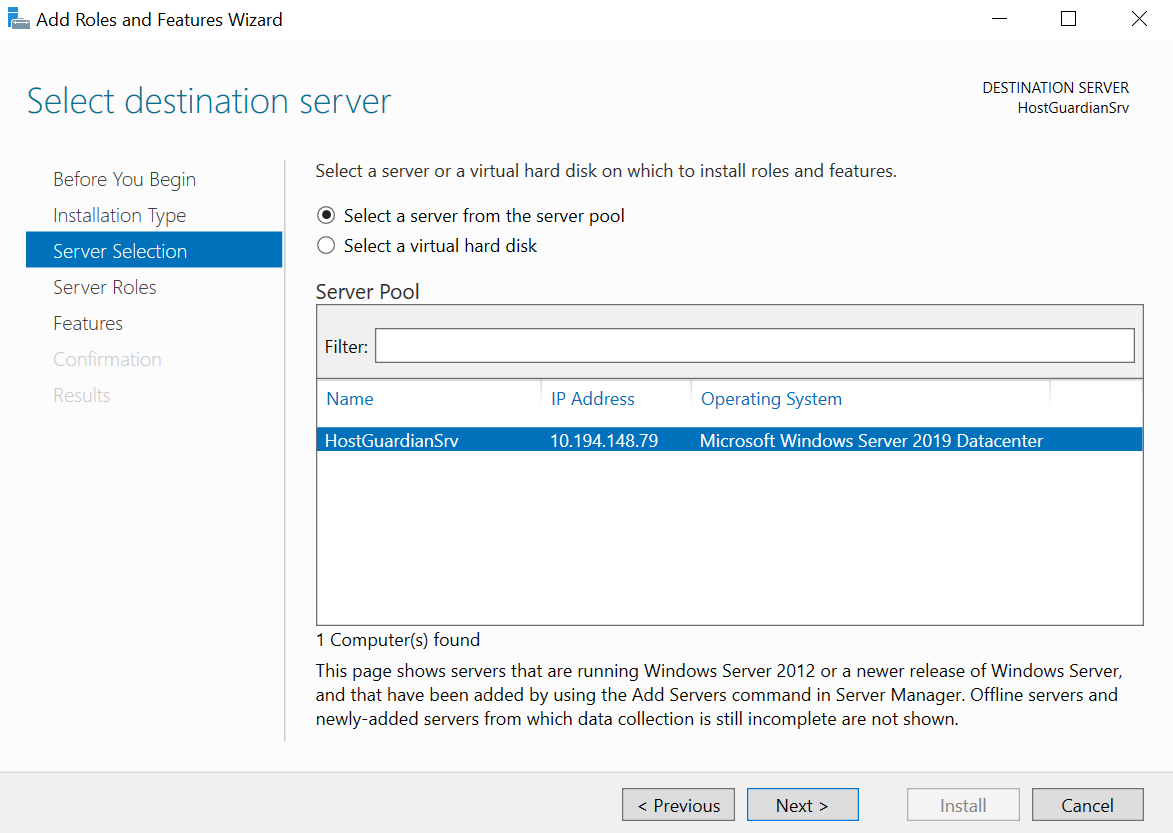
On the Select destination server panel, select the Guardian Server. For example:
-
Select Next.
The Select server roles panel appears.
-
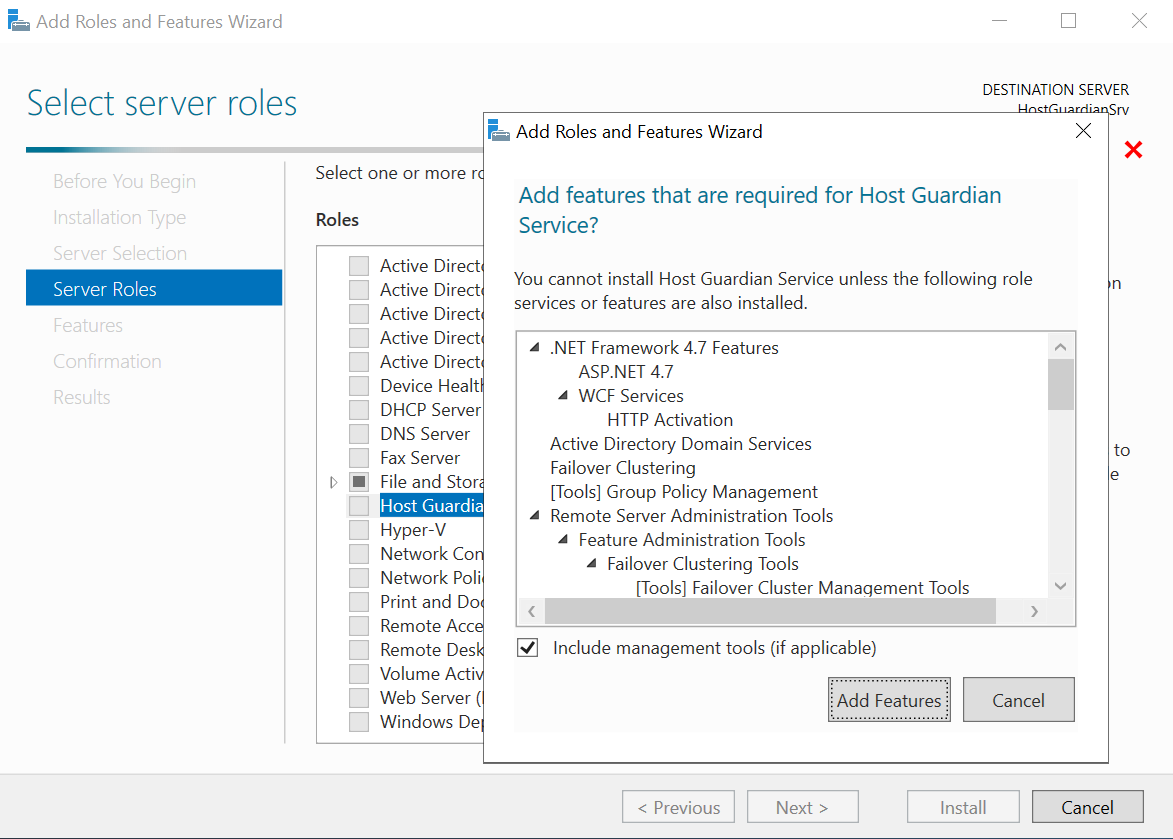
Select Host Guardian Service.
The Add features that are required for Host Guardian Service? dialog appears.
-
In the dialog, select Add Features and select Next.
-
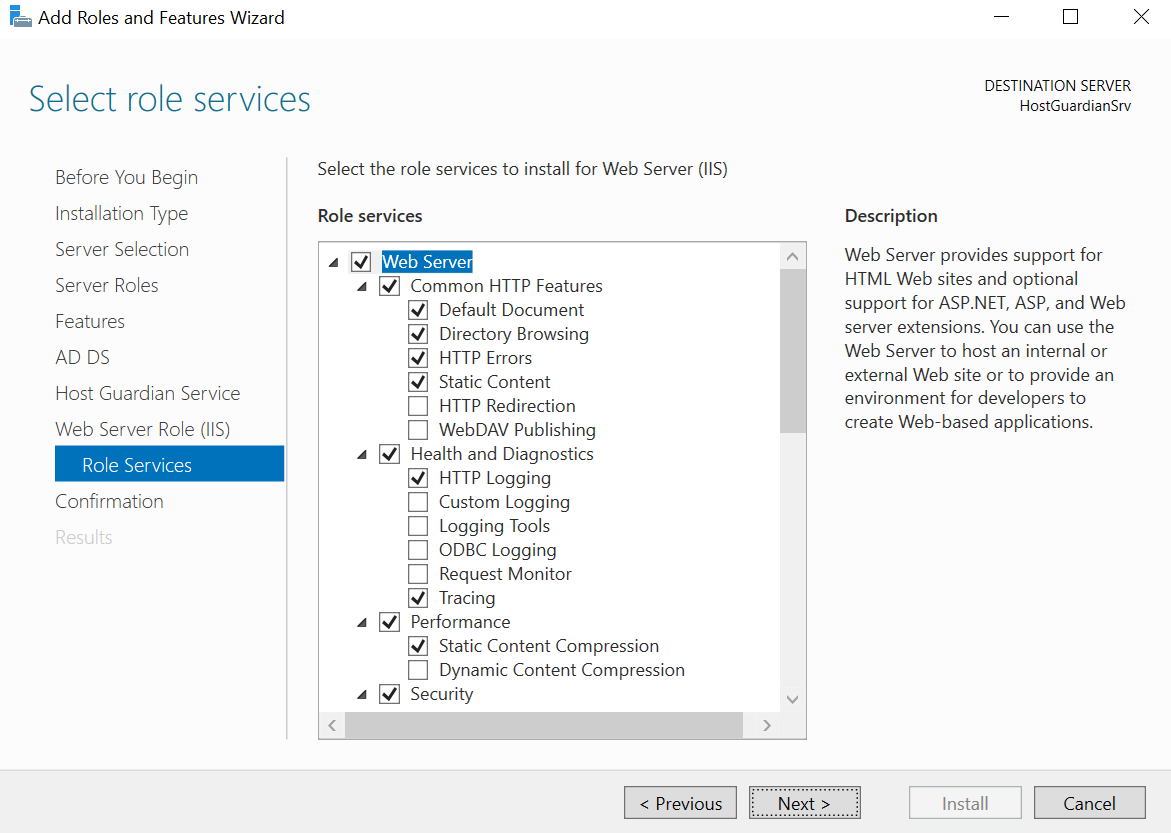
Select Next multiple times until the install for the Select role services panel for Web Server Role (IIS) appears.
-
Select Next to install IIS and then select Install.
After the installation completes, a server restart is required.
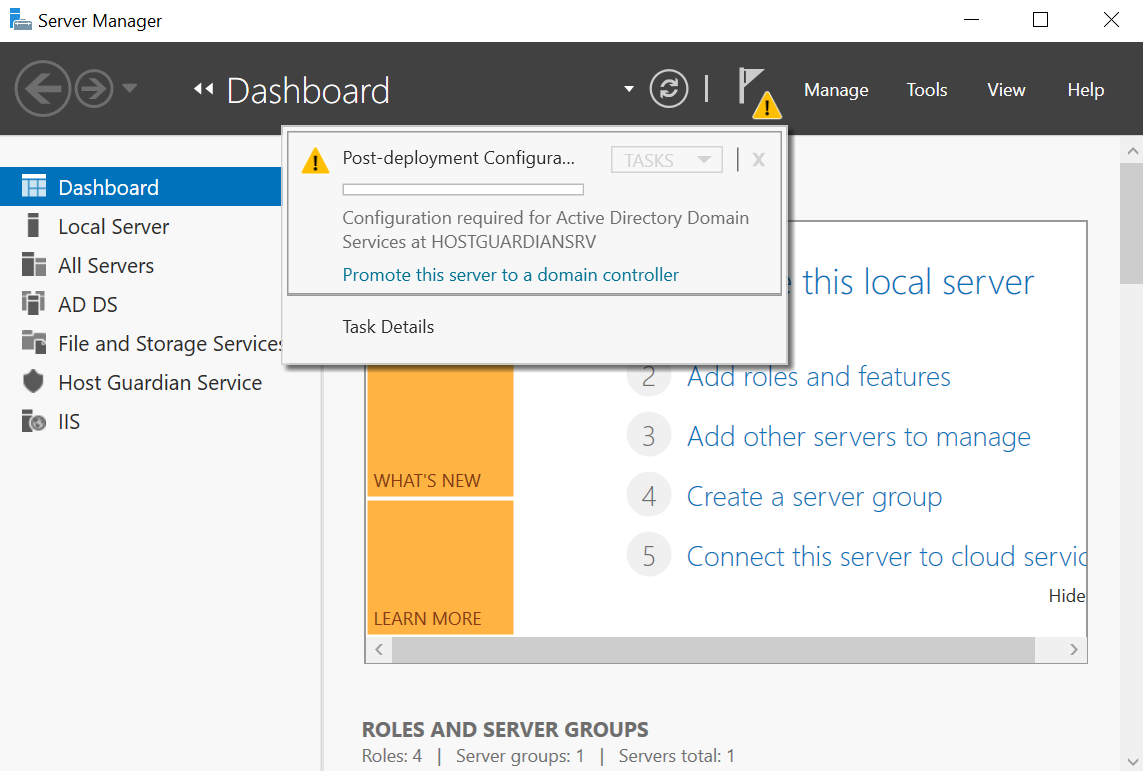
After the role has been added, you are prompted to continue with Post-deployment Configuration by promoting the server to a domain controller. This is shown by expanding the notification flag in the Server Manager Dashboard.
| Do not promote to domain controller at this time. The server will be promoted as part of the HGS installation process below. |
Add the Host Guardian Server role using PowerShell
| You can also add the Host Guardian Server role using the Server Manager GUI, see Add the Host Guardian Server role using the Server Manager GUI. |
To add the Host Guardian Server role using PowerShell:
-
Start PowerShell in an elevated Admin mode.
-
Run the following command:
Install-WindowsFeature -Name HostGuardianServiceRole -IncludeAllSubFeature -IncludeManagementTools -RestartDo not promote to domain controller at this time. The server will be promoted as part of the HGS installation process below.
Install the Host Guardian Service
To install the Host Guardian Service:
-
Launch PowerShell as Administrator.
-
Run the script (below) to install the Host Guardian Service and configure its domain.
$hgsDomainName = "hgs.com"

$adminPassword = ConvertTo-SecureString -AsPlainText "xxxxxxxxxxx" -Force

Install-HgsServer -HgsDomainName $hgsDomainName -SafeModeAdministratorPassword $adminPassword -Restart
The password you specify here will only apply to the Directory Services Repair Mode password for Active Directory. It will not change your admin account’s password.
You may provide any domain name of your choosing for
-HgsDomainName.The server will reboot after executing the above script.
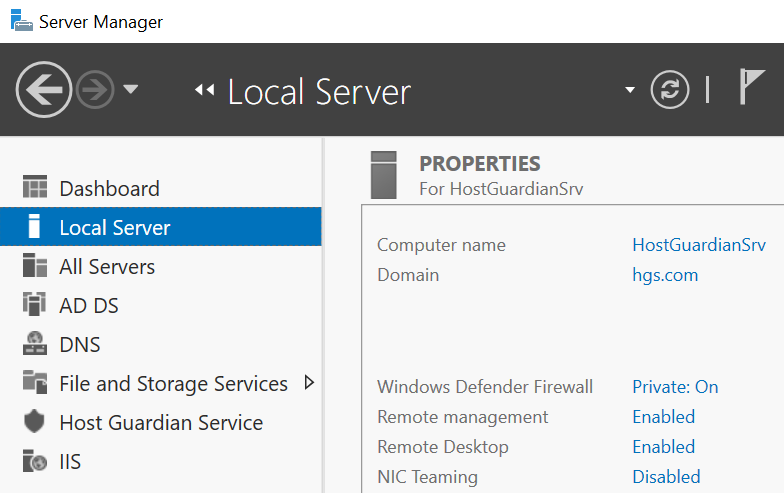
The Host Guardian Service domain is created.
Generate certificates
The following sections describe how to generate certificates:
Generate certificates using the nShield key storage provider
The HGS requires certificates and associated keys.
Keys are used for “attestation”, one of the two services that run as part of HGS, to affirm the health of the Guarded Hosts and the associated Hyper-V virtual machines.
Other keys called Transport Keys (TKs) are used for “Key Protection Service” (KPS), to unlock and run the Shielded VMs on positively attested Guarded Hosts.
Run certutil -store my for the certificates currently available in the machine store.
For example:
>certutil -store my
my "Personal"
CertUtil: -store command completed successfully.| It is possible to use conventionally backed Certificates from a Certificate Authority and import these into the HSM Security World, but this is not within the scope of this document. |
The following sections generate these keys and certificates using the nShield KSP.
Generate encryption certificate
To generate an encryption certificate:
-
Launch PowerShell as Administrator.
-
Run the following script:
$cngProviderName = "nCipher Security World Key Storage Provider"

$subjectName = "HGS Encryption Certificate"

$friendlyName = "HGS_Encryption_SelfCert"

# $locationName = "Cert:\CurrentUser\My"
$locationName = "Cert:\LocalMachine\My"

New-SelfSignedCertificate -Subject $subjectName -FriendlyName $friendlyName -CertStoreLocation $locationName -Provider $cngProviderName -KeyExportPolicy NonExportable
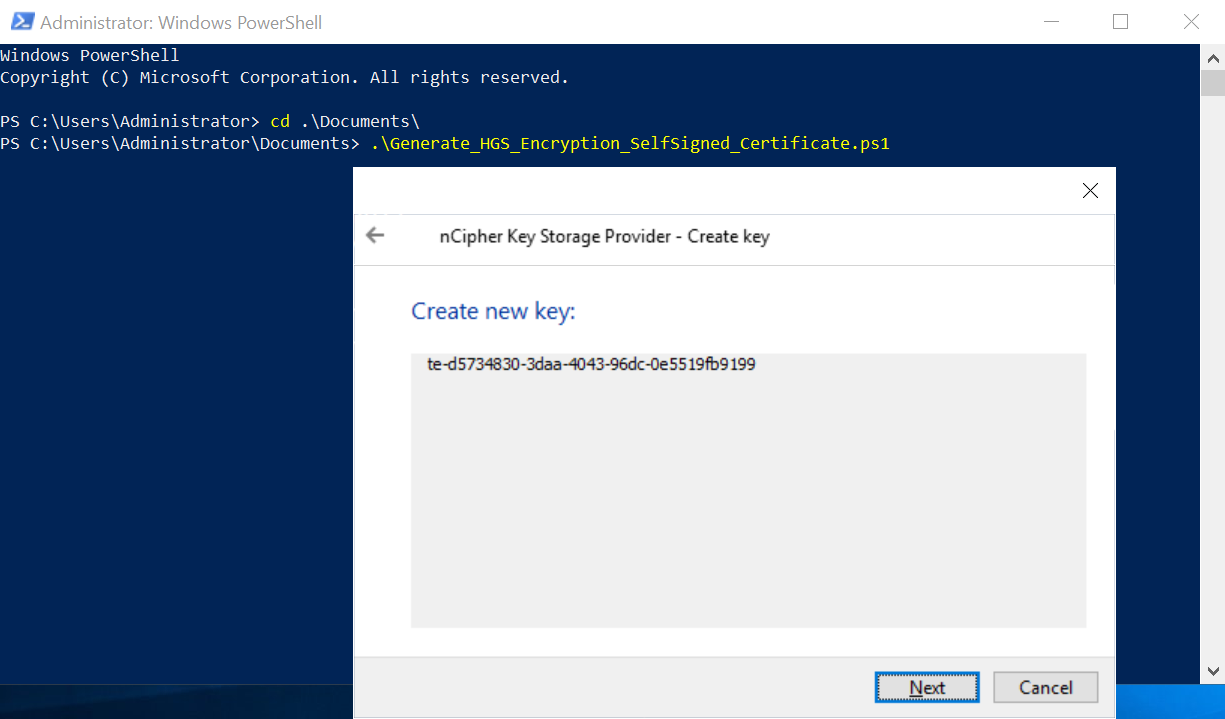
The nCipher Key Storage Provider - Create key wizard appears.
-
In the Create new key panel, select Next.
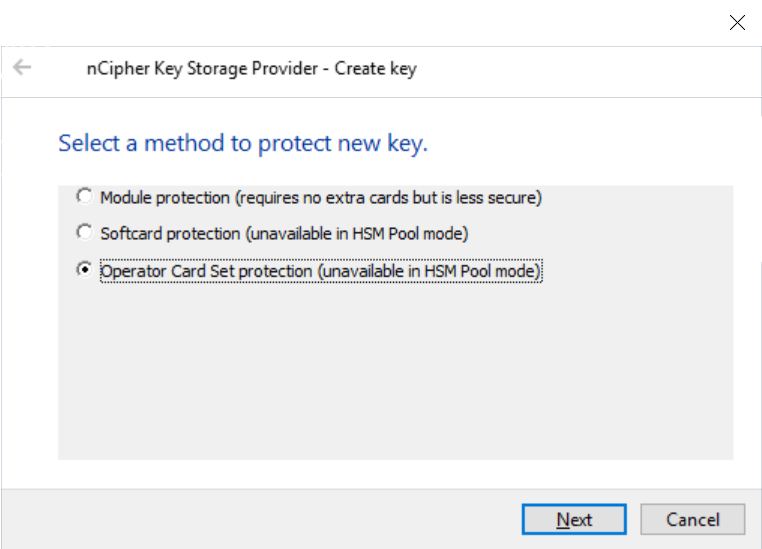
The Select a method to protect new key panel appears.
| If you are using a FIPS 140-2 Level 3 Security World, you will need to present an OCS for FIPS authorization, irrespective of your chosen protection method. |
-
Select the Operator Card Set protection and select Next.
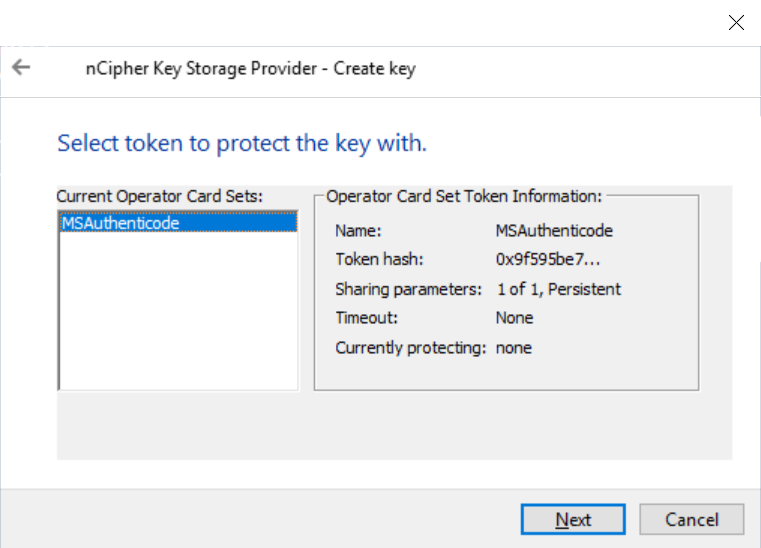
The Select token to protect key with panel appears.
-
Present the OCS created before and select Next.
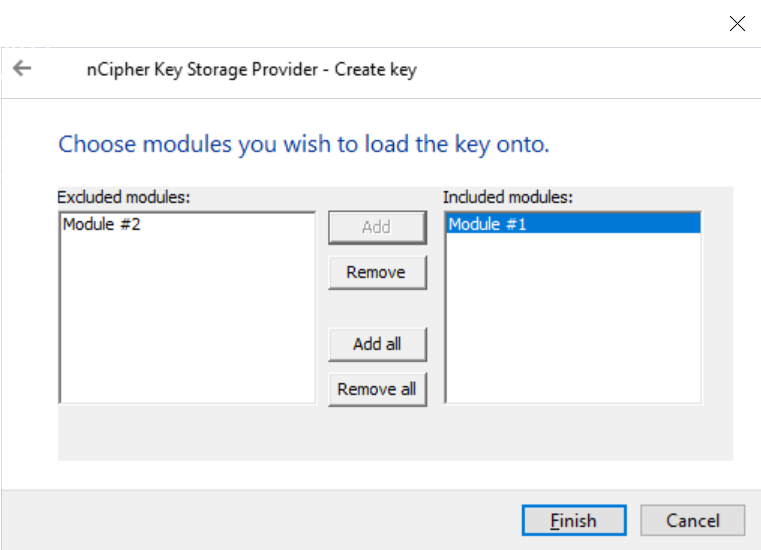
The Choose modules you wish to load the keys onto panel appears.
-
Select the required HSM and select Add to move the HSM to the Included modules list. In this example, two HSMs are available.
-
Select Finish.
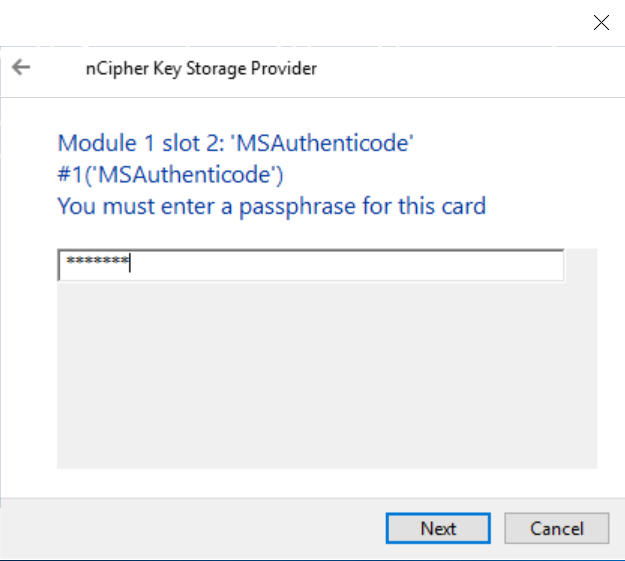
A passphrase dialog appears.
-
Enter the passphrase for the OCS and select Next.
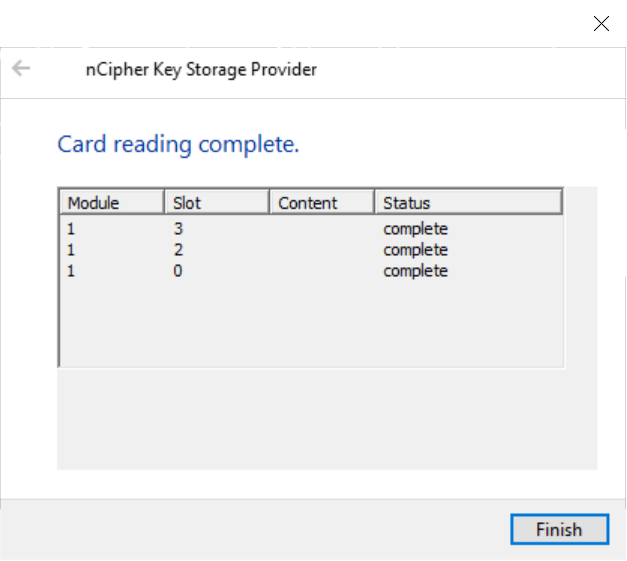
An OCS status dialog appears.
-
Select Finish after the card reading is completed.
The output will look like the following:
   PSParentPath: Microsoft.PowerShell.Security\Certificate::LocalMachine\My

Thumbprint                                Subject
----------                                -------
4AC08FF75C0C311CF4CF3591336FD85F0BEB539A  CN=HGS Encryption Certificate
Generate signing certificate
To generate a signing certificate:
-
Launch PowerShell as Administrator.
-
Run the following script:
$cngProviderName = "nCipher Security World Key Storage Provider" $subjectName = "HGS Signing Certificate" $friendlyName = "HGS_Signing_SelfCert" # $locationName = "Cert:\CurrentUser\My" $locationName = "Cert:\LocalMachine\My" New-SelfSignedCertificate -Subject $subjectName -FriendlyName $friendlyName -CertStoreLocation $locationName -Provider $cngProviderName -KeyUsageProperty Sign -KeyExportPolicy NonExportable -
Select the protection method, present the OCS, select the HSM, and enter the passphrase when prompted. This is similar process to the previous section.
If you are using a FIPS 140-2 Level 3 Security World, you will need to present an OCS for FIPS authorization, irrespective of your chosen protection method. + The output will look like the following:
+
   PSParentPath: Microsoft.PowerShell.Security\Certificate::LocalMachine\My

Thumbprint                                Subject
----------                                -------
586F6B0A44C4F498525965B41B0570F365E4577C  CN=HGS Signing Certificate
Confirm certificates and keys
When keys are generated by the HSM:
-
The key’s blobs are stored in the
C:\ProgramData\nCipher\Key Management Data\localdirectory. -
On the HGS the certificates are in the
\LocalMachine\My storedirectory.
To verify that the certificates are in the correct location using PowerShell:
> Get-ChildItem Cert:\LocalMachine\My -DnsName hgs*


   PSParentPath: Microsoft.PowerShell.Security\Certificate::LocalMachine\My

Thumbprint                                Subject
----------                                -------
586F6B0A44C4F498525965B41B0570F365E4577C  CN=HGS Signing Certificate
4AC08FF75C0C311CF4CF3591336FD85F0BEB539A  CN=HGS Encryption Certificate
To verify the certificates via the command line, use certutil (see below).
Present the OCS, select the HSM, and enter the passphrase when prompted.
For example:
C:\Users\Administrator>certutil -store my
my "Personal"
================ Certificate 0 ================
Serial Number: 37dbec23d4a2b4a74be186edc9f7bd0a
Issuer: CN=HGS Signing Certificate
 NotBefore: 1/7/2026 11:23 AM
 NotAfter: 1/7/2027 11:43 AM
Subject: CN=HGS Signing Certificate
Signature matches Public Key
Root Certificate: Subject matches Issuer
Cert Hash(sha1): 586f6b0a44c4f498525965b41b0570f365e4577c
  Key Container = te-3a421e61-fc7d-4af4-9774-a172e94949a0
  Provider = nCipher Security World Key Storage Provider
Private key is NOT exportable
Signature test passed

================ Certificate 1 ================
Serial Number: 18f94a311e2dc3804ec0f6cc736cf979
Issuer: CN=HGS Encryption Certificate
 NotBefore: 1/7/2026 11:21 AM
 NotAfter: 1/7/2027 11:41 AM
Subject: CN=HGS Encryption Certificate
Signature matches Public Key
Root Certificate: Subject matches Issuer
Cert Hash(sha1): 4ac08ff75c0c311cf4cf3591336fd85f0beb539a
  Key Container = te-a126bc32-d971-48aa-852e-154bfd403206
  Provider = nCipher Security World Key Storage Provider
Private key is NOT exportable
ERROR: Could not verify certificate public key against private key
CertUtil: -store command completed successfully.
Make a note of the Cert Hash(sha1) values for the signing certificate and the encryption certificate. You will use these in the next section.
Initialize the Host Guardian Service
To initialize the Host Guardian Service:
-
Launch PowerShell as Administrator.
-
Run the following script:
$hgsServiceName = "HGS"

$encryptionCertificateThumbprint = "4ac08ff75c0c311cf4cf3591336fd85f0beb539a"

$signingCertificateThumbprint = "586f6b0a44c4f498525965b41b0570f365e4577c"

Initialize-HgsServer -HgsServiceName $hgsServiceName -EncryptionCertificateThumbprint $encryptionCertificateThumbprint -SigningCertificateThumbprint $signingCertificateThumbprint -TrustHostKey
In this script:
-
For
hgsServiceName, insert a name of your choosing for the HGS node. This name will be the distributed network name of the cluster and should not be fully qualified. For example, enter HGS if you want the FQDN to be configured as HGS.<domain>.<com>. -
For
encryptionCertificateThumbprint, insert the encryption certificate hash from Confirm certificates and keys. -
For
signingCertificateThumbprint, insert the signing certificate hash from Confirm certificates and keys.
Here is the output:
WARNING: The names of some imported commands from the module 'BitLocker' include unapproved verbs that might make them less discoverable. To find the commands with unapproved verbs, run the Import-Module command again with the Verbose parameter. For a list of approved verbs, type Get-Verb. LogPath: C:\Windows\Logs\HgsServer\260109072007\MS22-HG-SERVER WARNING: Ensure that service account 'interophgs\HGSSVC_EAF46$' has read access to the private key of certificate with thumbprint 'A84663090FD379A7C17A9E104B64BB02E5EAE24F', and that that the private key is both present and accessible on all Host Guardian Service servers. WARNING: Ensure that service account 'interophgs\HGSSVC_EAF46$' has read access to the private key of certificate with thumbprint '5FE1988CF4C50608093538D3A2DCA8881B5C284E', and that that the private key is both present and accessible on all Host Guardian Service servers. -
-
Make a note of the name of the service account that is created during this process.
-
Ensure the service account created above has rights to the HSM backed keys:
-
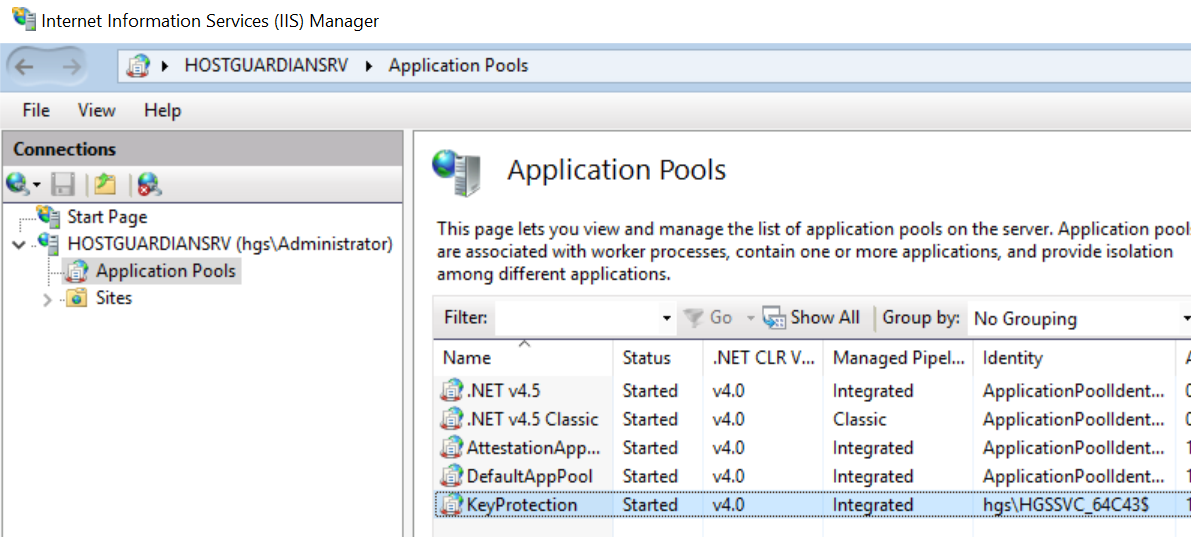
Launch the IIS Manager and select Application Pools and note the Identity under which the KeyProtection app pool is running. For example:
-
Run the Local Machine Certificate Management Console
certlm.msc. Locate the encryption certificate under thePersonalfolder. -
Right-click and select All tasks > manage Private keys.
-
Present the OCS, select the HSM, and enter the passphrase when prompted.
-
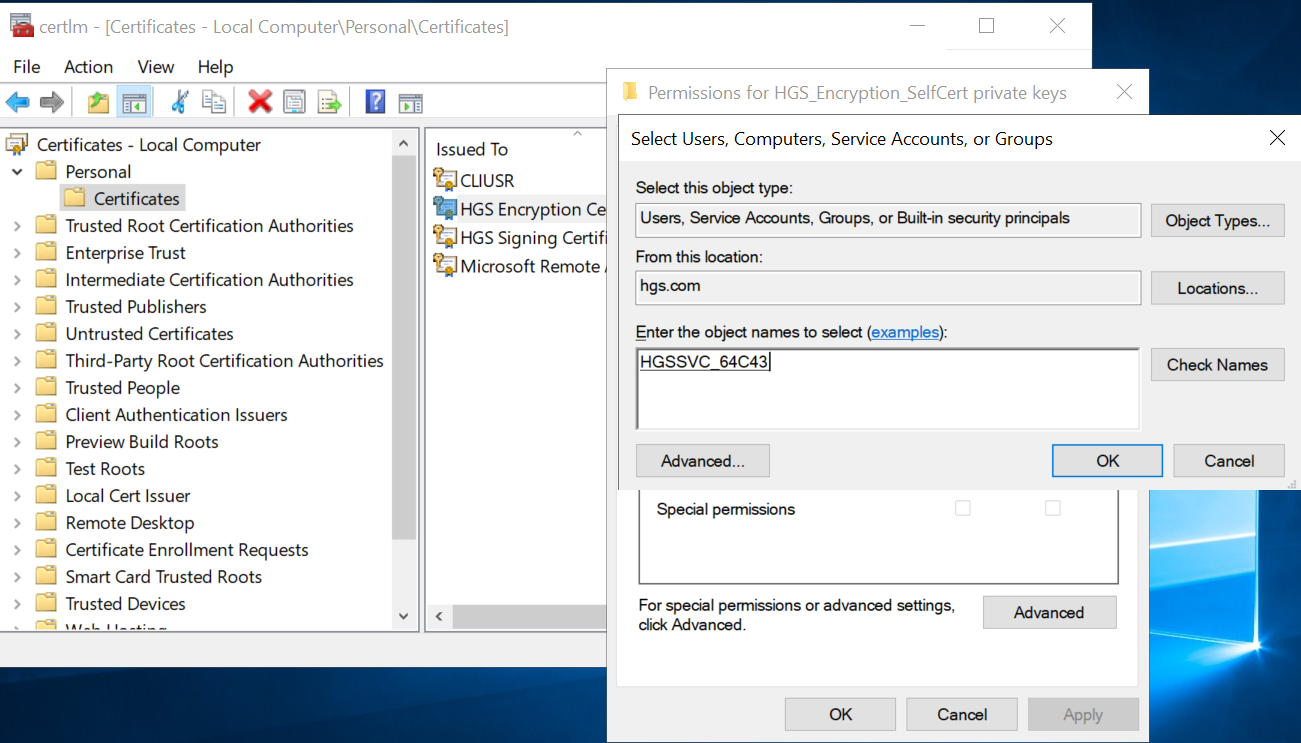
Add the service account above to the list of Groups and Users permitted to manage the private keys.
-
Select Add > Object Types > Service Accounts, then select OK.
-
Under Enter the object names to select, type the account name. The default is HGSSVC.
-
Select Check Names.
-
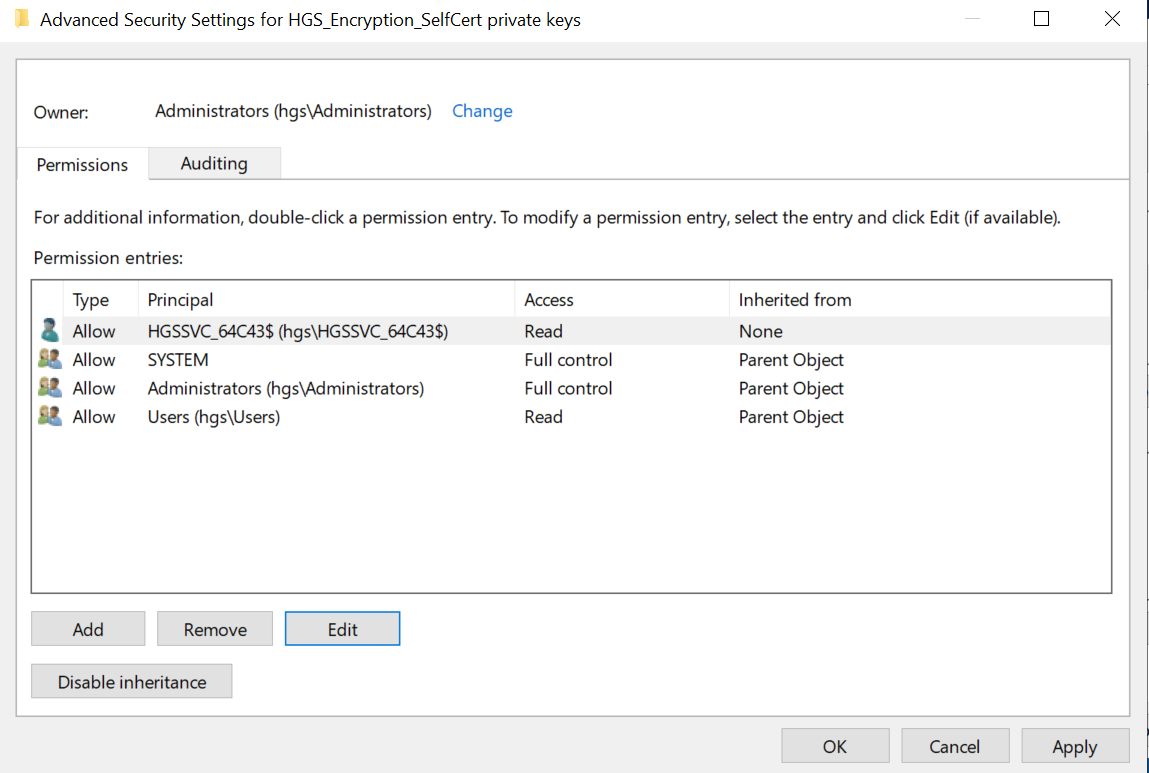
Give the service account Read access to the private keys for the certificate. To do this, select Advanced, select the user account, then select Edit. For example:
-
Repeat the process for the signing certificate.
-
Configure the Guarded Host
The Guarded Host is the host server for the Hyper-V virtual machines that will become Shielded VMs. The Guarded Host will require attestation from the HGS before its shielded VMs will be allowed to run. For the purpose of this guide, the Guarded Host was implemented on a ESXi 7.1 VM.
-
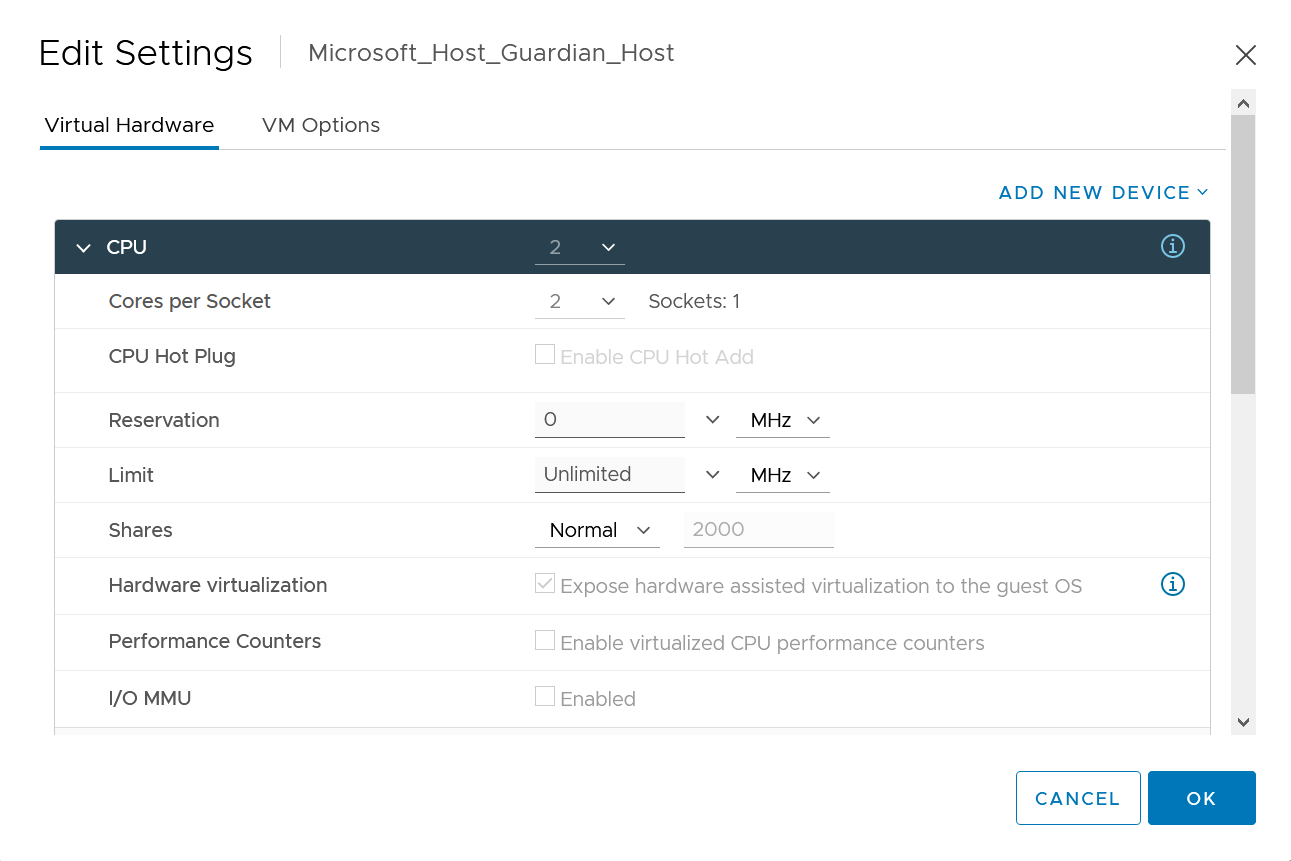
On the ESXi Hypervisor, edit VM settings.
-
On the Virtual Hardware tab, ensure that Expose hardware assisted virtualization to guess OS is selected. For example:
-
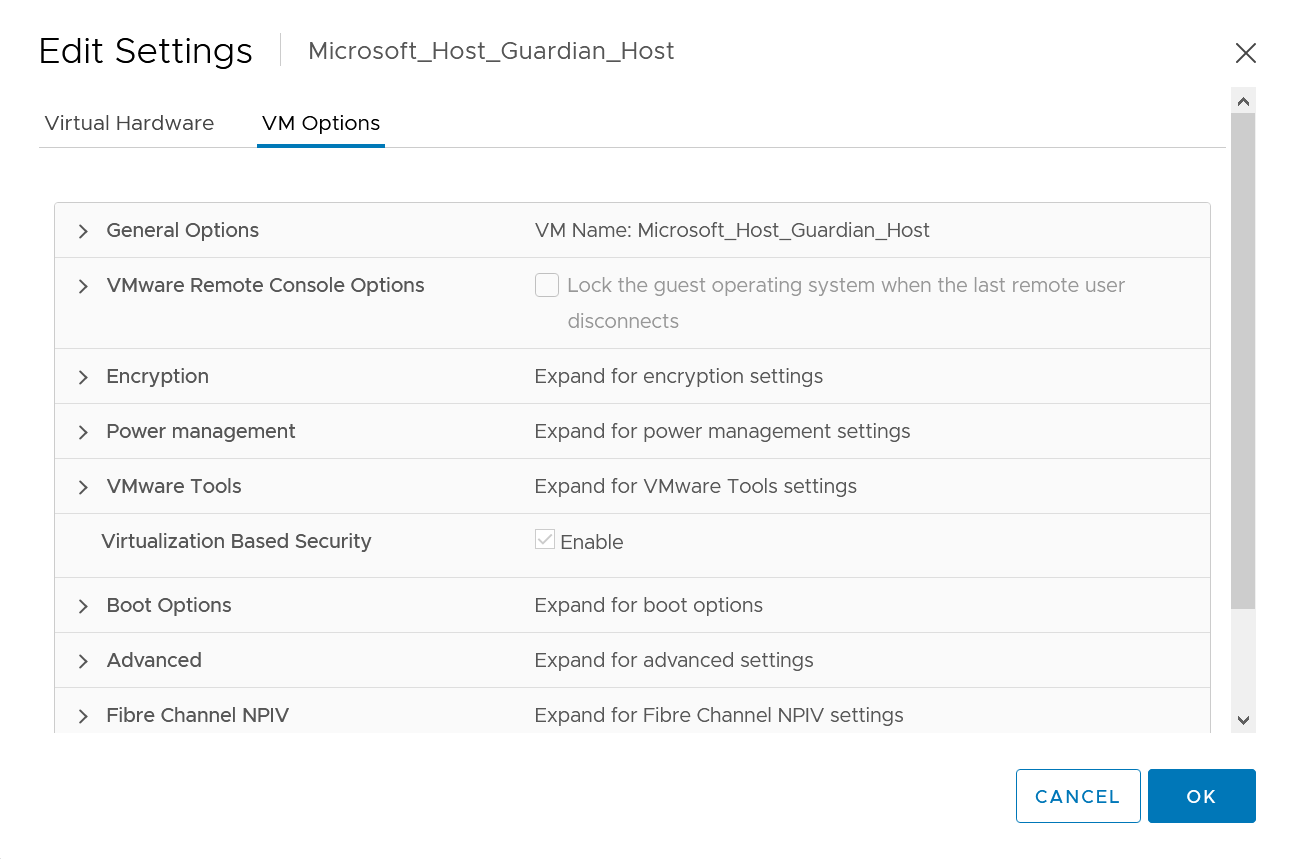
On the VM Options tab, ensure that Virtualization Based Security is enabled.
-
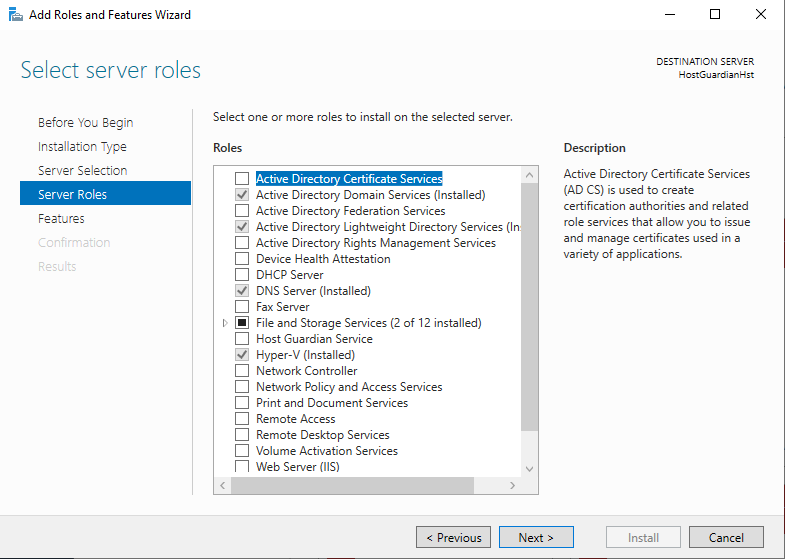
Ensure that the following roles are installed:
-
AD DS
-
DNS
-
AD LDS.
This is required for
netdom.exewhich is used to establish one-way trust from the HGS to the Fabric domain. -
Hyper-V.
This should include the Host Guardian support feature.
-
-
Determine the status of the required roles by selecting Add Roles and Features Server Selection > Server Roles. The installed features are selected. For example:
-
Ensure the hypervisor-protected code integrity (HVCI) is enabled, see Enable virtualization-based protection of code integrity.
-
Promote the DNS server as normal if installing it for the first time.
-
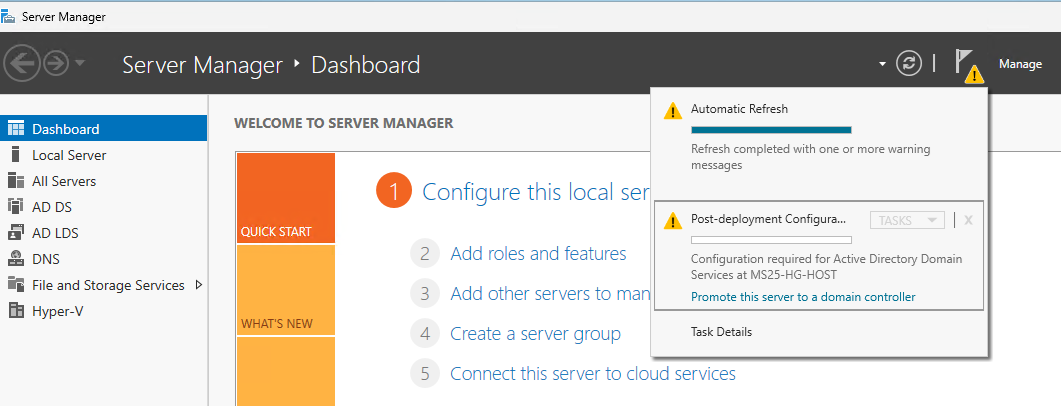
You will notice that after installing all the roles, the DNS configuration still needs to happen.
-
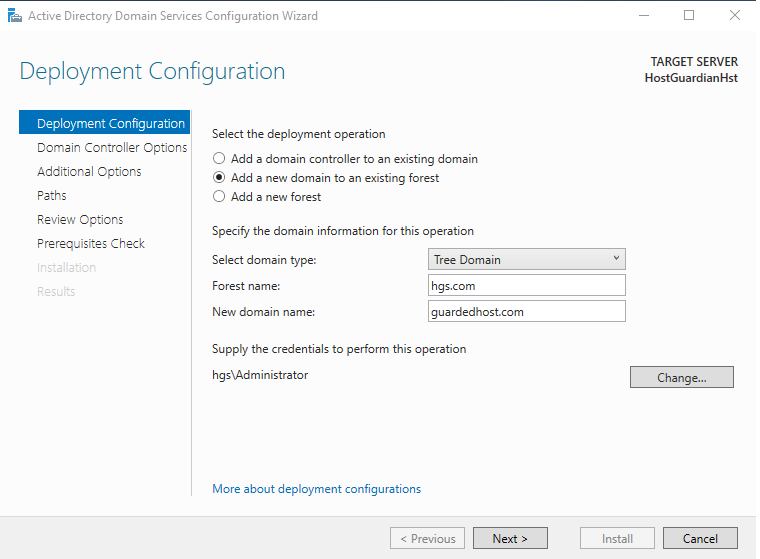
Select Promote this server to a domain controller.
-
On the Deployment Configuration pane, select Add a new domain to an existing forest.
-
For Domain type: Tree Domain.
-
Forest Name: hgs.com.
-
New Domain Name: guardedhost.com
-
Supply the
hgs\Administratorpassword, by selecting Change.
-
-
Select Next.
-
On the Domain Controller Options pane, enter the DSRM password.
-
On the DNS Options pane, select Next.
-
On the Additional options pane, take the default and select Next.
-
On the Paths pane, select Next
-
On the Review Options pane, select Next.
-
On the Prerequisite Check pane, if all Prerequisite checks passed, select Install.
If the installation is successful, the server restarts.
-
-
Add the Host Guardian Server DNS as a conditional forwarder:
-
Open PowerShell as Administrator
-
Run the following:
$hgsDomainName = "hgs.com"

$ipAddressHGSServer = "xxx.xxx.xxx.xxx"

Add-DnsServerConditionalForwarderZone -Name $hgsDomainName -ReplicationScope "Forest" -MasterServers $ipAddressHGSServer
This can also be performed from the DNS Manager GUI.
-
-
Set the Guarded Host domain to trust the Guardian Server domain:
-
Open PowerShell as Administrator.
-
Run the following command:
> netdom trust guardedhost.com /domain:hgs.com /userd:hgs\Administrator /passwordd:nCipher123! /add

The command completed successfully.
-
-
Generate a Guardian Host key automatically or select an existing certificate. Alternatively, you can also use a certificate generated by the nShield HSM as on the Guardian Server.
-
Open PowerShell as Administrator.
-
Run the following command:
> Set-HgsClientHostKey -
Get the public half of the key to provide the HGS server.
You can also provide a
.cerfile that contains the public half of the key. Note that the HGS is only used to store and validate the public key. No certificate information is stored on the HGS and neither the certificate chain nor the expiration date is validated by the HGS.Open PowerShell as Administrator and run:
> Get-HgsClientHostKey -Path "C:\Users\Administrator\Documents\HostGuardianHst-HostKey.cer" Directory: C:\Users\Administrator\Documents Mode LastWriteTime Length Name ---- ------------- ------ ---- -a---- 1/8/2026 11:23 AM 830 HostGuardianHst-HostKey.cer -
Copy the listed certificate file to the Guardian Server using the method of your choice. You will add this certificate to the attestation service.
-
-
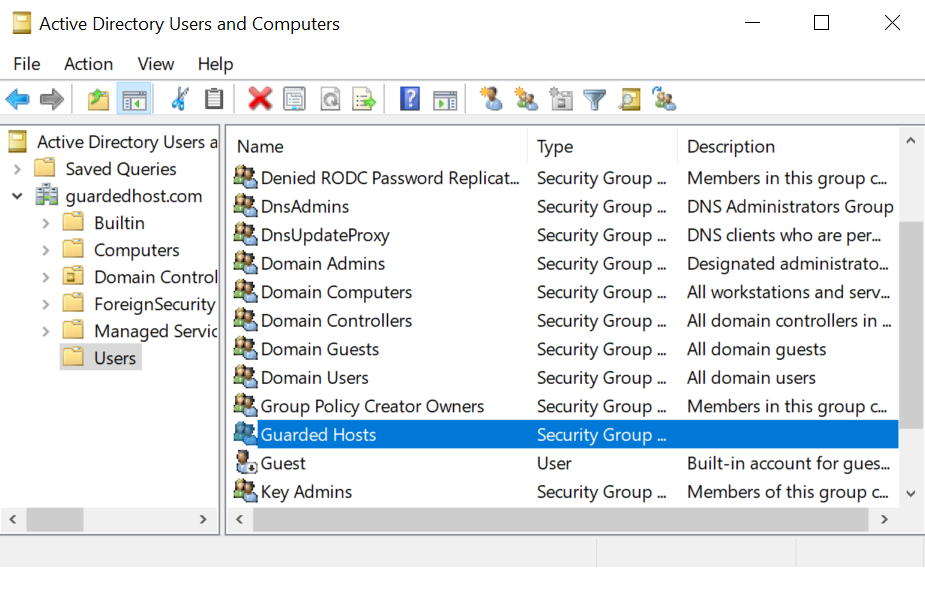
Create a new Global security group to identify the Guarded Hosts that will run the shielded VMs.
-
Open the Server Manager and select Tools >Active Directory Users and Computers.
-
Expand the domain.
-
Right-click Users, select New > Group, and enter the group name.
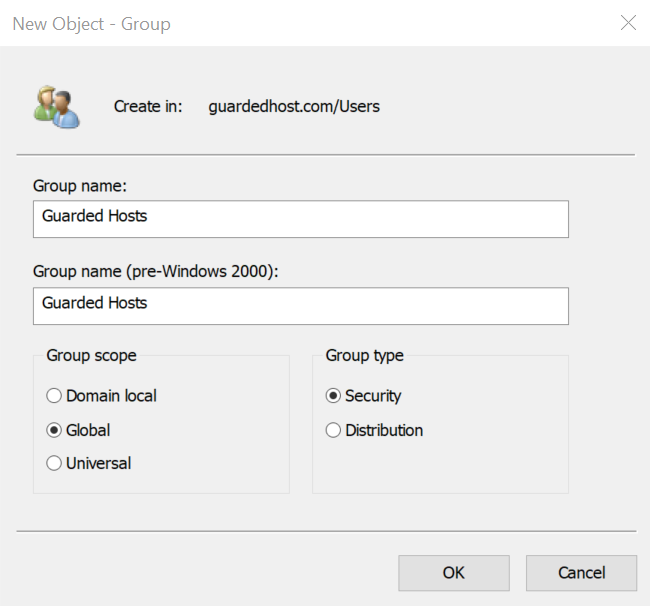
The security group is created. For example:
-
-
Get the Security Identifier (SID) of the security group created above.
-
Open PowerShell as Administrator.
-
Run the following command:
> Get-ADGroup "Guarded Hosts"

DistinguishedName : CN=Guarded Hosts,CN=Users,DC=guardedhost,DC=com
GroupCategory     : Security
GroupScope        : Global
Name              : Guarded Hosts
ObjectClass       : group
ObjectGUID        : b914cb31-fe5f-4d10-be70-60bbcfa95243
SamAccountName    : Guarded Hosts
SID               : S-1-5-21-2491135030-878028546-2245137482-1104
-
Configure attestation on the Guardian Server
Perform the following on the Guardian Server:
-
Register the global security group created in the Guarded Host with the Guardian Server as an Attestation Host Group:
-
Copy the group name and SID from the previous step.
-
Open PowerShell as Administrator and run the commands:
$guardedHostName = "Guarded Hosts"

$SID = "S-1-5-21-2491135030-878028546-2245137482-1104"

Add-HgsAttestationHostGroup -Name $guardedHostName -Identifier $SID
The command line and output look like the following:
WARNING: The current attestation operation mode is: "HostKey". Any "AD" mode specific changes made or content returned
will not take effect until the attestation operation mode is changed to "AD".
S-1-5-21-2491135030-878028546-2245137482-1104:Guarded Hosts
-
-
Confirm that the Guarded Host group was added:
> Get-HgsAttestationHostGroup
WARNING: The current attestation operation mode is: "HostKey". Any "AD" mode specific changes made or content returned will not take effect until the attestation operation mode is changed to "AD".

Name          Identifier
----          ----------
Guarded Hosts S-1-5-21-2491135030-878028546-2245137482-1104
Notice the returned friendly name and SID.
This completes the process of configuring the HGS cluster.
-
Add the Guardian Host certificate copied above to the attestation service. The certificate was copied to
C:\Users\Administrator\Documents.-
Open PowerShell as Administrator.
-
Run the following command:
>  Add-HgsAttestationHostKey -Name HostGuardianHst-HostKey -Path "C:\Users\Administrator\Documents\HostGuardianHst-HostKey.cer"

Name                    PublicKey
----                    ---------
HostGuardianHst-HostKey System.Security.Cryptography.X509Certificates.PublicKey
-
-
The fabric Administrator needs to provide two URLs from the Guardian Server to the Guarded Host. Obtain these URLs by executing the following command:
> Get-HgsServer

Name                           Value
----                           -----
AttestationOperationMode       HostKey
AttestationUrl                 {http://hgs.hgs.com/Attestation}
KeyProtectionUrl               {http://hgs.hgs.com/KeyProtection}
Configure attestation on the Guarded Host
Perform the following on the Guarded Host:
-
Configure the Key Protection and Attestation URLs.
-
Open PowerShell as Administrator and run the following cmdlet.
> Set-HgsClientConfiguration -AttestationServerUrl 'http://hgs.hgs.com/Attestation'-KeyProtectionServerUrl 'http://hgs.hgs.com/KeyProtection' IsHostGuarded : True Mode : HostGuardianService KeyProtectionServerUrl : http://hgs.hgs.com/KeyProtection AttestationServerUrl : http://hgs.hgs.com/Attestation AttestationOperationMode : HostKey AttestationStatus : Passed AttestationSubstatus : NoInformation FallbackKeyProtectionServerUrl : FallbackAttestationServerUrl : IsFallbackInUse : False -
Copy the attestation server URL and key protection server URL from the previous step.
You should now be able to create shielded VM templates as per Microsoft guidelines using either Virtual Machine Manager (VMM) or Windows Azure Pack.