Procedures
Install the MariaDB Community Server
Installing the MariaDB Community Server depends on the operating system on which you are installing it. See the MariaDB documentation for details on how to install MariaDB in your environment.
This integration uses RedHat Linux 8 and the RHEL 8 and CentOS 8 guide from the MariaDB website.
CentOS 8 and RHEL 8 include MariaDB Community Server 10.3 but later MariaDB Server versions include substantial enhancements.
Deploy MariaDB Community Server v11.3.2 on RHEL 8 or CentOS 8 using the mariadb_repo_setup script to configure the MariaDB repositories for YUM.
-
Download the script:
% wget https://downloads.mariadb.com/MariaDB/mariadb_repo_setup -
Run it:
% chmod +x mariadb_repo_setup % sudo ./mariadb_repo_setup -
Install dependencies:
% sudo yum install perl-DBI libaio libsepol lsof boost-program-options galera-4 -
To avoid conflict with the OS-vendor package, use the
--repoflag to specify in which repository to install the MariaDB server.% sudo yum install --repo="mariadb-main" MariaDB-server -
Start the
systemdservice for MariaDB Server usingsystemctl:% sudo systemctl start mariadb.service -
Check the status:
% sudo systemctl status mariadb.service ● mariadb.service - MariaDB 11.3.2 database server Loaded: loaded (/usr/lib/systemd/system/mariadb.service; disabled; vendor preset: disabled) Drop-In: /etc/systemd/system/mariadb.service.d └─migrated-from-my.cnf-settings.conf Active: active (running) since Mon 2024-03-25 14:58:36 EDT; 7s ago Docs: man:mariadbd(8) https://mariadb.com/kb/en/library/systemd/ Process: 52054 ExecStartPost=/bin/sh -c systemctl unset-environment _WSREP_START_POSITION (code=exited, status=0/SUCCESS) Process: 52034 ExecStartPre=/bin/sh -c [ ! -e /usr/bin/galera_recovery ] && VAR= || VAR=`cd /usr/bin/..; /usr/bin/galera_recovery`; [ $? -eq 0 ] && systemctl set-environment _WSREP_START_POSI> Process: 52032 ExecStartPre=/bin/sh -c systemctl unset-environment _WSREP_START_POSITION (code=exited, status=0/SUCCESS) Main PID: 52044 (mariadbd) Status: "Taking your SQL requests now..." Tasks: 12 (limit: 28458) Memory: 148.9M CGroup: /system.slice/mariadb.service └─52044 /usr/sbin/mariadbd Mar 25 14:58:36 mariadb-redhat-8 mariadbd[52044]: 2024-03-25 14:58:36 0 [Note] Plugin 'FEEDBACK' is disabled. Mar 25 14:58:36 mariadb-redhat-8 mariadbd[52044]: 2024-03-25 14:58:36 0 [Note] Plugin 'wsrep-provider' is disabled. Mar 25 14:58:36 mariadb-redhat-8 mariadbd[52044]: 2024-03-25 14:58:36 0 [Note] InnoDB: Loading buffer pool(s) from /var/lib/mysql/ib_buffer_pool Mar 25 14:58:36 mariadb-redhat-8 mariadbd[52044]: 2024-03-25 14:58:36 0 [Note] InnoDB: Buffer pool(s) load completed at 240325 14:58:36 Mar 25 14:58:36 mariadb-redhat-8 mariadbd[52044]: 2024-03-25 14:58:36 0 [Note] Server socket created on IP: '0.0.0.0'. Mar 25 14:58:36 mariadb-redhat-8 mariadbd[52044]: 2024-03-25 14:58:36 0 [Note] Server socket created on IP: '::'. Mar 25 14:58:36 mariadb-redhat-8 mariadbd[52044]: 2024-03-25 14:58:36 0 [Note] mariadbd: Event Scheduler: Loaded 0 events Mar 25 14:58:36 mariadb-redhat-8 mariadbd[52044]: 2024-03-25 14:58:36 0 [Note] /usr/sbin/mariadbd: ready for connections. Mar 25 14:58:36 mariadb-redhat-8 mariadbd[52044]: Version: '11.3.2-MariaDB' socket: '/var/lib/mysql/mysql.sock' port: 3306 MariaDB Server Mar 25 14:58:36 mariadb-redhat-8 systemd[1]: Started MariaDB 11.3.2 database server. -
Enable MariaDB so it starts after a reboot:
% sudo systemctl enable mariadb.service -
Connect to MariaDB:
% mariadb

Welcome to the MariaDB monitor.  Commands end with ; or \g.
Your MariaDB connection id is 3
Server version: 11.3.2-MariaDB MariaDB Server

Copyright (c) 2000, 2018, Oracle, MariaDB Corporation Ab and others.

Type 'help;' or '\h' for help. Type '\c' to clear the current input statement.

MariaDB [(none)]> quit
Bye
To connect to MariaDB with privileged access, use:
% mariadb -u root -p
Install and configure Entrust KeyControl Vault
To install and configure Entrust KeyControl Vault, follow the installation and setup instructions in the Entrust KeyControl Vault nShield HSM Integration Guide. You can access it from the Entrust Document Library and from the nShield Product Documentation website.
Create a KeyControl database vault
Keycontrol Vault Management supports several vault types. This section describes how to create a database vault in Keycontrol Vault Management, see Creating a Vault in the KeyControl Vault Management Admin Guide.
-
Sign in to the Keycontrol Vault Management webGUI through a web browser, using the
secrootcredentials. -
In the header menu, select SWITCH TO: Manage Vaults.
-
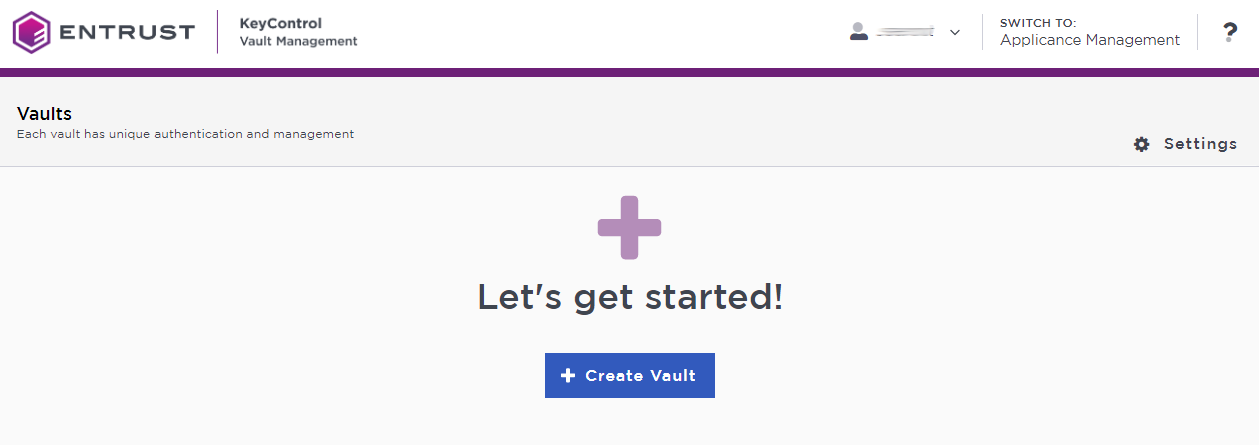
In the KeyControl Vault Management page, select Create Vault.
-
Set the database vault properties:
-
For Type, select Database.
-
For Name, enter the name of the Vault.
-
For Description, enter the description of the Vault.
-
For Admin Name, enter the name of the administrator of the Vault.
-
For Admin Email, enter a valid email for the administrator.
-
-
Select Create Vault.
A temporary password will be emailed to the administrator’s email address. This is the password that will be used to sign in for the first time to the Database Vault space in KeyControl. The password for the user is displayed when you first create the vault. In a closed gap environment where email is not available, that can be copied and sent to the user.
-
Select Close when the Vault creation completes.
The new Vault is added to the Vault dashboard.
Configure the database vault for the integration with MariaDB
| MariaDB does not support envelope key encryption. The TDE key is stored in the KeyControl database vault. The key material is retrieved by the MariaDB database server during creation of encrypted tables. |
-
In the Database Vault space in KeyControl, find the vault URL. Hover over the vault and select View Details.
-
Sign in to the database vault through its vault URL. Use the login URL and credentials provided to the administrator of the vault.
-
Create a cloud VM set.
Under WORKLOADS in the header menu, select Actions > Create New Cloud VM Set.

-
Enter the name of the VM set (vmset1), select Create, then select Close.
-
Create a key set.
Under CLOUDKEYS in the header menu, select Actions > Create Key Set.

-
Set the key set properties:
-
Enter the name of the key set: keyset1.
-
Choose and Admin Group: Cloud Admin Group.
-
Select the Database Type: MariaDB Database Server.
-
For Allow Key Creation from MariaDB: select Yes.
-
-
In the HSM Tab, clear the Enable HSM option. This integration does not link an HSM to KeyControl to generate cryptographic materials for cloudkeys in the key set.
-
In the Schedule tab, leave the Rotation Schedule at Never, select Apply, then select Close.
Install the KeyControl Policy Agent into the MariaDB server
You must install a copy of the KeyControl Policy Agent on the MariaDB server if you want to encrypt the server with KeyControl Vault.
The Entrust KeyControl Policy Agent is a software module that runs inside Windows and Linux operating systems that provides encryption of virtual disks and individual files. All servers that have the Policy Agent installed can also securely share encrypted files and disks. When a user attempts to access an encrypted disk, the Policy Agent queries KeyControl Vault to validate the request, and returns the information to the user if KeyControl Vault authorizes the request. See Policy Agent Installation.
-
Log into the KeyControl Database Vault webGUI.
-
In the header menu, select WORKLOADS.
-
Select Actions > Download Policy Agent.

-
From Available Downloads , download
hcs-client-agent.zipand transfer it to the MariaDB server. -
In the MariaDB server, unzip the policy agent file that you downloaded.
% unzip hcs-client-agent.zip creating: hcs-client-agent/ inflating: hcs-client-agent/hcs-api-10.2-1020001189.tgz.chksum creating: hcs-client-agent/windows/ inflating: hcs-client-agent/windows/hcs-client-agent-10.2-1020001189.exe.chksum inflating: hcs-client-agent/windows/hcs-client-agent-10.2-1020001189.exe inflating: hcs-client-agent/hcs-api-10.2-1020001189.tgz creating: hcs-client-agent/linux/ inflating: hcs-client-agent/linux/hcs-client-agent-10.2-1020001189.run inflating: hcs-client-agent/linux/hcs-client-agent-10.2-1020001189.run.chksum -
As the
rootuser, runhcs-client-agent/linux/hcs-client-agent-10.2-1020001189.run.% sudo ./hcs-client-agent/linux/hcs-client-agent-10.2-1020001189.run Verifying archive integrity... 100% All good. Uncompressing hcs-client-agent-10.2-1020001189.run 100% x86_64 No HyTrust Agent found on this system HyTrust Agent will be installed in /opt/hcs Specify location for installing HyTrust Agent (/opt/hcs): Created symlink /etc/systemd/system/multi-user.target.wants/hcld.service → /usr/lib/systemd/system/hcld.service. Platform is rhel You can now install online encryption driver, the process is described in the Admin Guide Please see the following section of Admin Guide for details Administration Guide > Data Encryption > Linux Encryption Overview Installation successful -
Make sure you have all the information required for the policy agent installation. For details, see Policy Agent prerequisites.
-
The IP addresses of all KeyControl Vault nodes with which you want to register the Policy Agent, or one IP address and the name of the KeyControl Mapping you want to use on the server.
-
The credentials for an Entrust KeyControl Database Vault user account with Cloud Admin privileges.
-
The name of the KeyControl Vault Cloud VM Set with which you want to associate the server.
-
Register the MariaDB server with KeyControl Vault
This integration uses automated authentication. For authentication options for KeyControl vaults, see Policy Agent prerequisites.
-
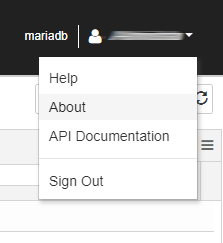
In the KeyControl Database Vault webGUI, select the vault name in the top-right of the header menu, then select About.
-
Copy the
VAULT IDfrom the screen.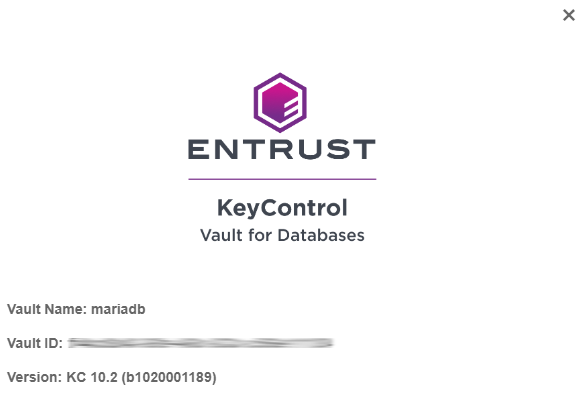
-
In the MariaDB server, run the following command to register the MariaDB server with KeyControl:
% hcl register -a <keycontrol-vault-ip> -v <VAULT ID>
Example:
% sudo hcl register -a 10.194.xxx.yyy -v f4cd6xxx-xxxx-xxxx-833c-c566e1111804

Please provide the Vault login details
username: user.name@webbdomain.com
password:

Available Cloud VM Sets
--------------------------------------------------------------------------------
1 : vmset1
--------------------------------------------------------------------------------

Please select a Cloud VM Set by number to which this VM should be added: 1

The selected Cloud VM Set is -- vmset1
Do you want to continue (y/n)?y
Registered as mariadb-redhat-8 with KeyControl node(s) 10.194.148.215

Completing authentication for mariadb-redhat-8 on KeyControl node(s) 10.194.148.215

Authentication complete, machine ready to use
Getting KeyControl Mapping information

KeyControl Mappings are not available
Enable TDE on the MariaDB server
-
Enable TDE on the server.
% sudo hcs tde enable -y Enabling tde will change permissions of some Files. -
Check that the MariaDB server is now registered in the KeyControl Database Vault:
In the KeyControl WebGUI header menu, select WORKLOADS, then select VMs.
You should see the MariaDB server listed there.

Create a database connector for the key set in the KeyControl Database Vault
-
Log into the KeyControl Database Vault webGUI.
-
In the header menu, select CLOUDKEYS, then select the key set that you created.

-
Select the Database Connectors tab.
-
Select Actions > Create Connector.

-
Set the database connector properties, then select Create,
-
VM Name: Select the Maria DB server you registered earlier (mariadb-redhat-8 (vmset1)).
-
Connector Name: The name of the connector (mariadb-connector1).
-
-
Select Actions > Generate Access Token.

-
In the Generate Access Token dialog, select Generate Token.
-
Copy and save the Identity and Secret data that you will need later in the integration process.
You won’t be able to retrieve this data later. Identity: mariadb-connector Secret: ...
Create a Maria DB config file with the information about the connector
-
Sign in to the MariaDB server.
-
Change to the
/opt/hcs/etcdirectory:% cd /opt/hcs/etc -
Create a
mdb.conffile:% sudo vi mdb.conf -
Place the database connector access token information created earlier into the file.
{
	"identity" : "mariadb-connector",
	"secret" : "..."
}
Link the KeyControl library in the MariaDB plugins directory
-
Go to the
plugindirectory.For example:
% cd /usr/lib64/mysql/pluginThis path might vary depending on your Linux distribution and version. -
Create the link to the library:
% sudo ln -s /opt/hcs/lib/entrust_key_management.soThis is the default path. If you installed the policy agent in a different location, replace /opt/with the installation directory. -
Check the link:
% ls -al entrust_key_management.so lrwxrwxrwx. 1 root root 38 Mar 28 11:29 entrust_key_management.so -> /opt/hcs/lib/entrust_key_management.so -
Restart the MariaDB server:
% sudo systemctl restart mariadb -
Run the query to install the plugin:
Invoke MariaDB as a user with
rootprivileges.Run the INSTALL SONAME query to install the plugin.
% mariadb -u root -p Welcome to the MariaDB monitor. Commands end with ; or \g. Your MariaDB connection id is 14 Server version: 11.3.2-MariaDB MariaDB Server Copyright (c) 2000, 2018, Oracle, MariaDB Corporation Ab and others. Type 'help;' or '\h' for help. Type '\c' to clear the current input statement. MariaDB [(none)]> INSTALL SONAME 'entrust_key_management'; Query OK, 0 rows affected (0.646 sec) -
Check that the plugin is installed and active:
MariaDB [(none)]> show plugins;

+-------------------------------+----------+--------------------+---------------------------+---------+
| Name                          | Status   | Type               | Library                   | License |
+-------------------------------+----------+--------------------+---------------------------+---------+
| entrust_key_management        | ACTIVE   | ENCRYPTION         | entrust_key_management.so | GPL     |
+-------------------------------+----------+--------------------+---------------------------+---------+
Test encryption using the KeyControl database vault
This section shows examples how to create tables with encryption that uses the KeyControl database vault that you created.
The examples use the test database available in MariaDB:
MariaDB [(none)]> show databases;
+--------------------+
| Database           |
+--------------------+
| information_schema |
| test               |
+--------------------+
2 rows in set (0.001 sec)
If you get the following error, run mariadb as root.
ERROR 1227 (42000): Access denied; you need (at least one of) the PROCESS privilege(s) for this operationExample 1: Create a table without specifying a key
MariaDB [test]> create table table1 (i int) ENGINE=InnoDB ENCRYPTED=YES;
Query OK, 0 rows affected (0.148 sec)
No key was specified, so MariaDB will try to use the first key it finds in the key set with key ID = 1.
When the VM set and key set was created, the flag to allow creation of keys was set.
This means that if the first key does not exist, it will be automatically created.
If this flag was not set when the VM set and key set was created, you first have to create the key in the KeyControl database vault before running the create table command.
-
Go to the KeyControl database server and look for the key in the key set.
Select CLOUDKEYS in the header menu, then select CloudKeys.
For Key Set: Select the key set you created earlier (keyset1)
-
You should see the first key that was automatically created (mariadb_key_1) and its key ID is set to 1.
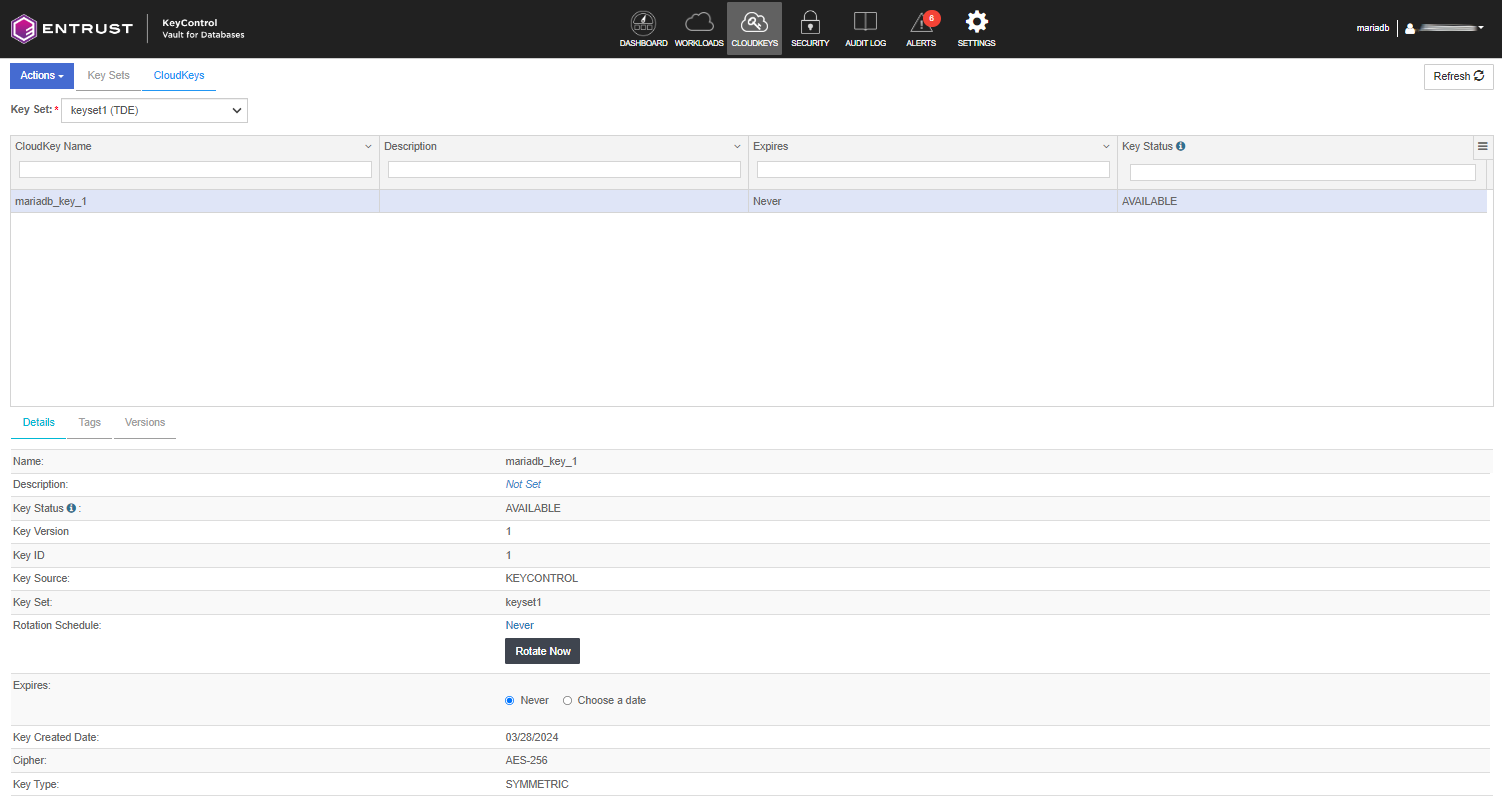
You can also see similar information by running the following command:
MariaDB [(none)]> select * from information_schema.innodb_tablespaces_encryption G;
+-------------+-----------------+---------------------+----------------+
| NAME        | MIN_KEY_VERSION | CURRENT_KEY_VERSION | CURRENT_KEY_ID |
+-------------+-----------------+---------------------+----------------+
| test/table1 |               1 |                   1 |        ==>   1 |
+-------------+-----------------+---------------------+----------------+
1 row in set (0.069 sec)
The CURRENT_KEY_ID field is set to 1, which is the first key in the key set.
Example 2: Create a table specifying a key created by the user in the KeyControl database vault
-
Create a key in the KeyControl database vault so it can be used with the
create tablecommand.In the KeyControl database vault, select CLOUDKEYS in the header menu, then select CloudKeys.
-
Selec Actions > Create CloudKey.

-
Set the properties of the new cloudkey, then select Continue.
-
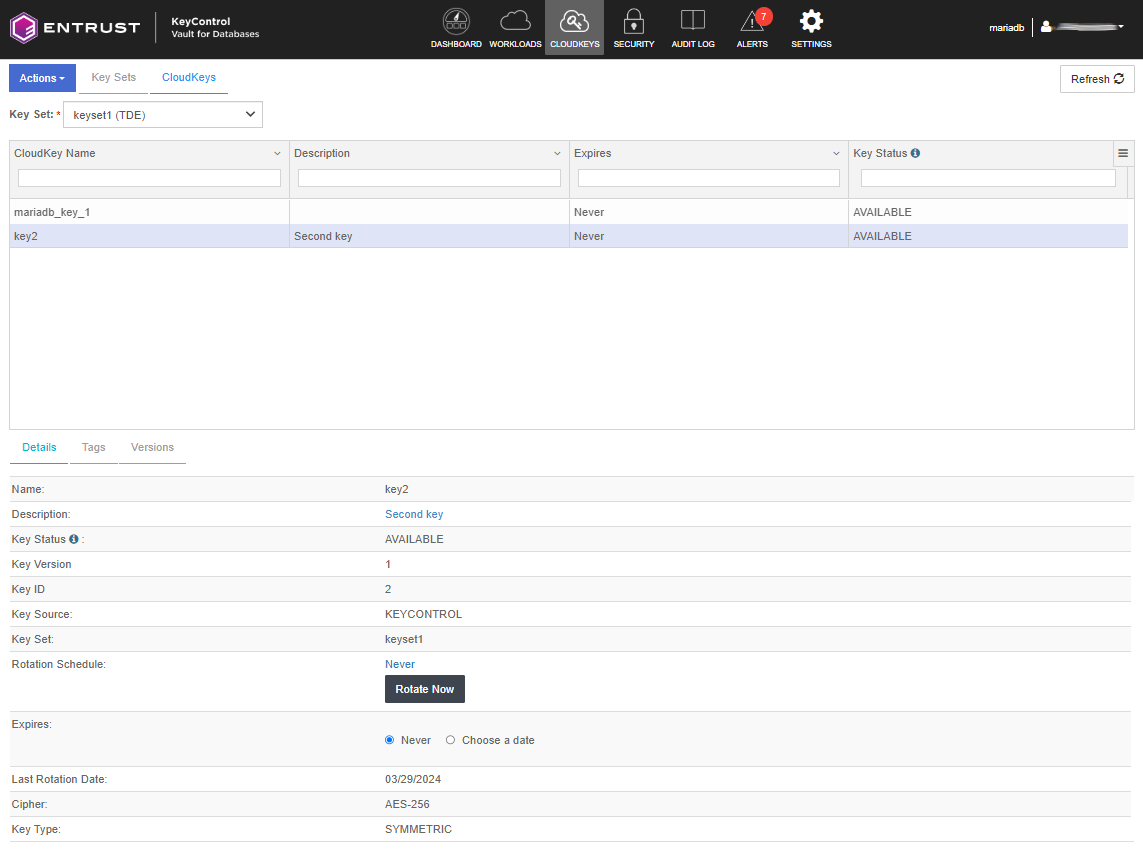
Name: Name of the key (key2)
-
Cipher: Select AES-256
-
-
Select Schedule > Apply to create the key.
-
Back in the MariaDB server, create a table using the new encryption key.
MariaDB [test]> create table table2 (i int) ENGINE=InnoDB ENCRYPTED=YES ENCRYPTION_KEY_ID=2;
Query OK, 0 rows affected (0.158 sec)
We specify the key ID and not the key name in the command. If you look at the key ID for key2, you will see that it is 2.
-
Run the command to show what key ID is used by each table.
MariaDB [(none)]> select * from information_schema.innodb_tablespaces_encryption G;
+-------------+-----------------+---------------------+----------------+
| NAME        | MIN_KEY_VERSION | CURRENT_KEY_VERSION | CURRENT_KEY_ID |
+-------------+-----------------+---------------------+----------------+
| test/table1 |               1 |                   1 |              1 |
| test/table2 |               1 |                   1 |         ==>  2 |
+-------+-----------------------+---------------------+----------------+
2 rows in set (0.147 sec)
The CURRENT_KEY_ID for table2 is 2.
Example 3: Create a table specifying a key that does not exist in the KeyControl database vault
In this example we are going to create the table with a key ID that does not exist yet. The command is similar to Example 1 but in this example we are going to create the new key with a specific ID. The same applies here, the key will be created because the VM set allows the creation of the key.
-
Create a new key:
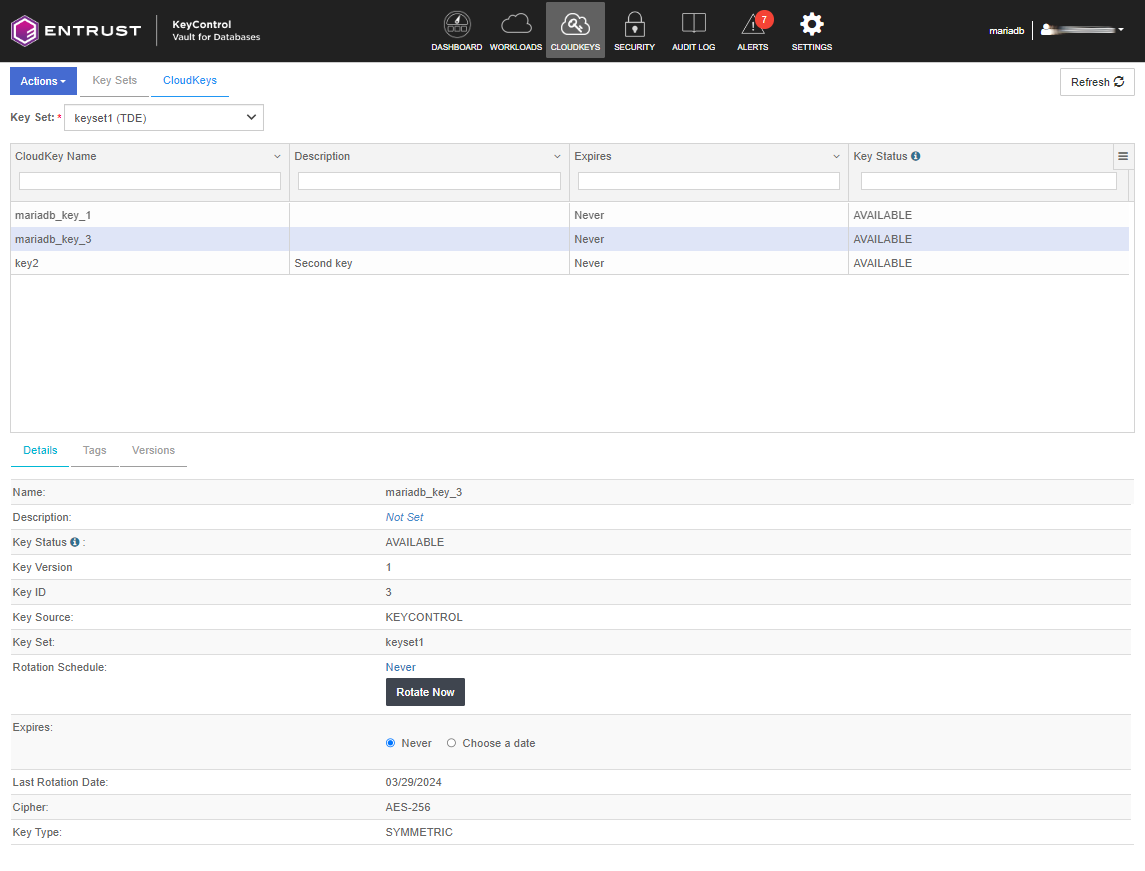
MariaDB [test]> create table table3 (i int) ENGINE=InnoDB ENCRYPTED=YES ENCRYPTION_KEY_ID=3; Query OK, 0 rows affected (0.515 sec) -
Check the new key (mariadb_key3*) with key ID = 3 in the KeyControl database vault:
-
Look up the information in
mariadb.table3uses the new key.MariaDB [(none)]> select * from information_schema.innodb_tablespaces_encryption G; +-------------+------------------+---------------------+----------------+ | NAME | MIN_KEY_VERSION | CURRENT_KEY_VERSION | CURRENT_KEY_ID | +-------------+------------------+---------------------+----------------+ | test/table1 | 1 | 1 | 1 | | test/table2 | 1 | 1 | 2 | | test/table3 | 1 | 1 | ==> 3 | +-------------+------------------+---------------------+----------------+ 3 rows in set (0.172 sec)
Example 4: Key rotation
The rotation of keys is performed in the KeyControl database vault.
-
Select first key with key ID = 1 for rotation.
-
Select Details > Rotate Now.
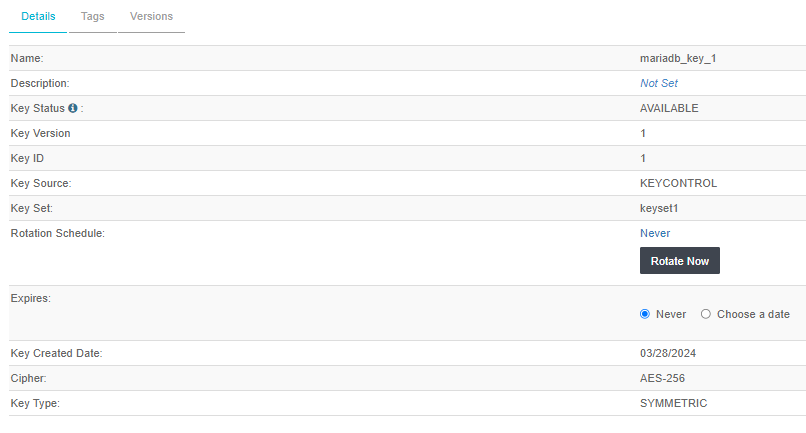
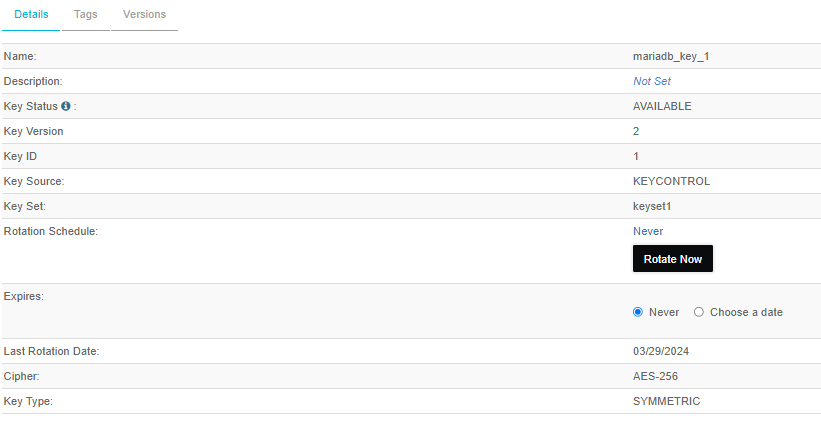
After the rotation, the Key Version will get incremented by 1. In this example, the incremented value will be 2.
-
Look up the information in
mariadb.table1is now using version 2 of the first key.MariaDB [(none)]> select * from information_schema.innodb_tablespaces_encryption G; +-------------+-----------------+---------------------+----------------+ | NAME | MIN_KEY_VERSION | CURRENT_KEY_VERSION | CURRENT_KEY_ID | +-------------+-----------------+---------------------+----------------+ | test/table1 | 1 | ==> 2 | ==> 1 | | test/table2 | 1 | 1 | 2 | | test/table3 | 1 | 1 | 3 | +-------------+-----------------+---------------------+----------------+ -
If you create another encrypted table without specifying the encryption key ID, version 2 of the first key will be used for that table.
MariaDB [test]> create table table4 (i int) ENGINE=InnoDB ENCRYPTED=YES; Query OK, 0 rows affected (0.145 sec) -
Look up the information in
mariadb.table4is using version 2 of the first key.MariaDB [test]> select * from information_schema.innodb_tablespaces_encryption G; +-------------+------------------+---------------------+----------------+ | NAME | MIN_KEY_VERSION | CURRENT_KEY_VERSION | CURRENT_KEY_ID | +-------------+------------------+---------------------+----------------+ | test/table1 | 1 | 2 | 1 | | test/table2 | 1 | 1 | 2 | | test/table3 | 1 | 1 | 3 | | test/table4 | 2 | ==> 2 | ==> 1 | +-------------+------------------+---------------------+----------------+ 4 rows in set (0.249 sec)
Example 5: Encrypt an existing table
-
Create the table without encryption:
MariaDB [test]> create table table5 (i int); Query OK, 0 rows affected (0.013 sec) -
Encrypt the table. Use key ID 2 for the encryption.
MariaDB [test]> alter table table5 ENCRYPTED=YES ENCRYPTION_KEY_ID=2; Query OK, 0 rows affected (0.144 sec) Records: 0 Duplicates: 0 Warnings: 0 -
Look up the information in
mariadb.table2andtable5are using version 1 of the second key:MariaDB [test]> select * from information_schema.innodb_tablespaces_encryption G; +-------------+------------------+---------------------+----------------+ | NAME | MIN_KEY_VERSION | CURRENT_KEY_VERSION | CURRENT_KEY_ID | +-------------+------------------+---------------------+----------------+ | test/table1 | 1 | 2 | 1 | | test/table2 | 1 | ==> 1 | ==> 2 | | test/table3 | 1 | 1 | 3 | | test/table4 | 2 | 2 | 1 | | test/table5 | 1 | ==> 1 | ==> 2 | +-------------+------------------+---------------------+----------------+ 5 rows in set (0.335 sec)