Procedures
Install the IBM DB2 server
Installing the IBM DB2 depends on the operating system on which you are installing it. See the IBM DB2 online documentation for details on how to install IBM DB2 in your environment.
To provide some background on the installation process performed for this guide, here is an example of a IBM DB2 installation on a Red Hat 9 Linux server.
Install Docker Engine on the IBM DB2 server
-
Uninstall Old Versions
% sudo dnf remove docker \ docker-client \ docker-client-latest \ docker-common \ docker-latest \ docker-latest-logrotate \ docker-logrotate \ docker-engine \ podman \ runc -
Set up the repository
% sudo dnf -y install dnf-plugins-core % sudo dnf config-manager --add-repo https://download.docker.com/linux/rhel/docker-ce.repo -
Install docker packages
% sudo dnf install docker-ce docker-ce-cli containerd.io docker-buildx-plugin docker-compose-plugin -
Start docker engine
% sudo systemctl enable --now docker -
Verify that the installation is successful by running the hello-world image:
% sudo docker run hello-world
Install IBM DB2 on the server
-
Create a directory for the Docker image:
% mkdir Docker -
Go to this Directory
% cd Docker -
Pull the Docker image:
% sudo docker pull icr.io/db2_community/db2 -
Create an
.env_listfile with the following content:LICENSE=accept DB2INSTANCE=db2inst1 DB2INST1_PASSWORD=password DBNAME=testdb BLU=false ENABLE_ORACLE_COMPATIBILITY=false UPDATEAVAIL=NO TO_CREATE_SAMPLEDB=false REPODB=false IS_OSXFS=false PERSISTENT_HOME=true HADR_ENABLED=false ETCD_ENDPOINT= ETCD_USERNAME= ETCD_PASSWORD= -
Run
db2server:% sudo docker run -h db2server --name db2server --restart=always --detach --privileged=true -p 50000:50000 --env-file .env_list -v /Docker:/database icr.io/db2_community/db2 a0157dd6b59127fde9c4a287436934161dd8da6fdb35b6800bfb3aa471d2925fWait for five minutes to give time for the database to set up properly. If you need to troubleshoot, remove the
--detachflag so you can see what is going on when the command executes. -
Run the following command to access the DB2 instance that is running in your Docker container:
% sudo docker exec -ti db2server bash -c "su - db2inst1" Last login: Fri Dec 13 15:44:12 UTC 2024 [db2inst1@db2server ~]$ -
Create a sample database:
% db2sampl -force -sql Creating database "SAMPLE"... Connecting to database "SAMPLE"... Creating tables and data in schema "DB2INST1"... 'db2sampl' processing complete. -
Connect to the sample database:
% db2 connect to sample Database Connection Information Database server = DB2/LINUXX8664 12.1.0.0 SQL authorization ID = DB2INST1 Local database alias = SAMPLE % db2 "select * from department" DEPTNO DEPTNAME MGRNO ADMRDEPT LOCATION ------ ------------------------------------ ------ -------- ---------------- A00 SPIFFY COMPUTER SERVICE DIV. 000010 A00 - B01 PLANNING 000020 A00 - C01 INFORMATION CENTER 000030 A00 - D01 DEVELOPMENT CENTER - A00 - D11 MANUFACTURING SYSTEMS 000060 D01 - D21 ADMINISTRATION SYSTEMS 000070 D01 - E01 SUPPORT SERVICES 000050 A00 - E11 OPERATIONS 000090 E01 - E21 SOFTWARE SUPPORT 000100 E01 - F22 BRANCH OFFICE F2 - E01 - G22 BRANCH OFFICE G2 - E01 - H22 BRANCH OFFICE H2 - E01 - I22 BRANCH OFFICE I2 - E01 - J22 BRANCH OFFICE J2 - E01 - 14 record(s) selected. -
Drop the database that was created:
% db2 force applications all

DB20000I  The FORCE APPLICATION command completed successfully.
DB21024I  This command is asynchronous and may not be effective immediately.

% db2 drop db sample
DB20000I  The DROP DATABASE command completed successfully.
Install and configure KeyControl
Follow the installation and setup instructions in the KeyControl nShield HSM Integration Guide. You can access it from the Entrust Document Library and from the nShield Product Documentation website.
Make sure the KeyControl KMIP Vault gets created and certificates are generated for IBM DB2. These certificates are used in the configuration of the KMS described below.
The following sections describe how to create the KeyControl KMIP Vault and certificates.
Create a KMIP Vault in the KeyControl Vault Server
The KeyControl Vault appliance supports different type of vaults that can be used by all type of applications. This section describes how to create a KMIP vault in the KeyControl Vault Server.
For more information, see Creating a Vault in the KeyControl documentation.
-
Sign in to the KeyControl Vault Server webGUI. Use your browser to access the IP address of the server and sign in using the secroot credentials.
-
If you are not in Vault Management, select SWITCH TO: Manage Vaults in the Menu Header.
-
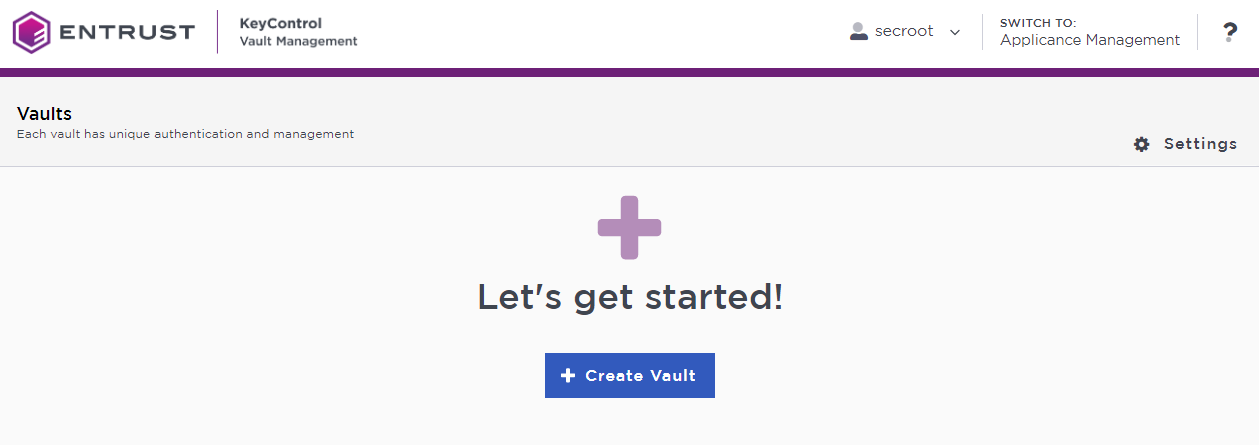
In KeyControl Vault Management, select Create Vault.
-
In the Create Vault page, create a KMIP vault.
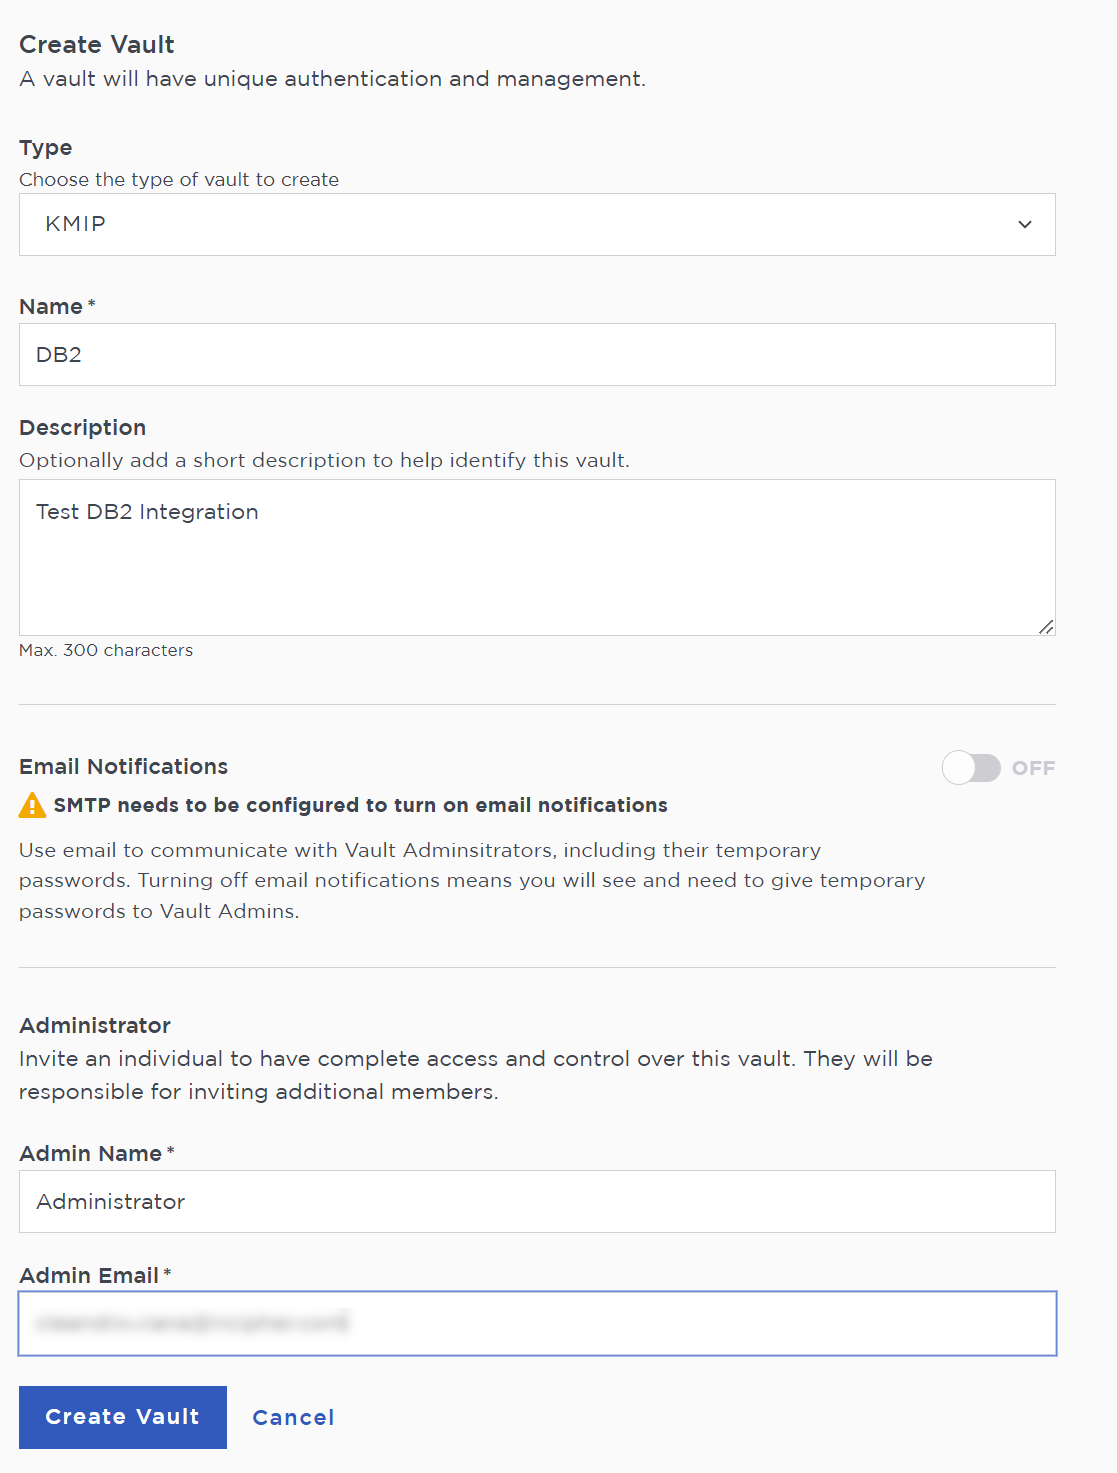
A temporary password will be emailed to the administrator’s email address. This is the password that will be used to sign in for the first time to the KMIP vault’s space in KeyControl. In a closed-gap environment where email is not available, the password for the user is displayed when you first create the vault. That can be copied and sent to the user.
-
Select Create Vault.
-
When the vault creation completed, select Close.
-
The new vault is added to the Vault dashboard and the KMIP server settings on the appliance are enabled.
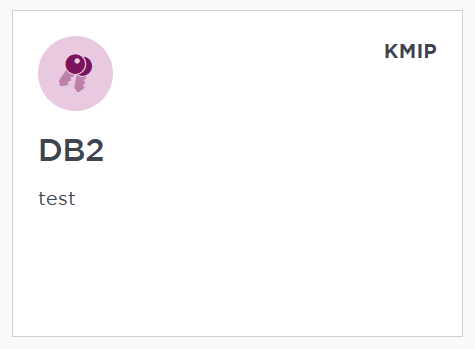
KMIP server settings
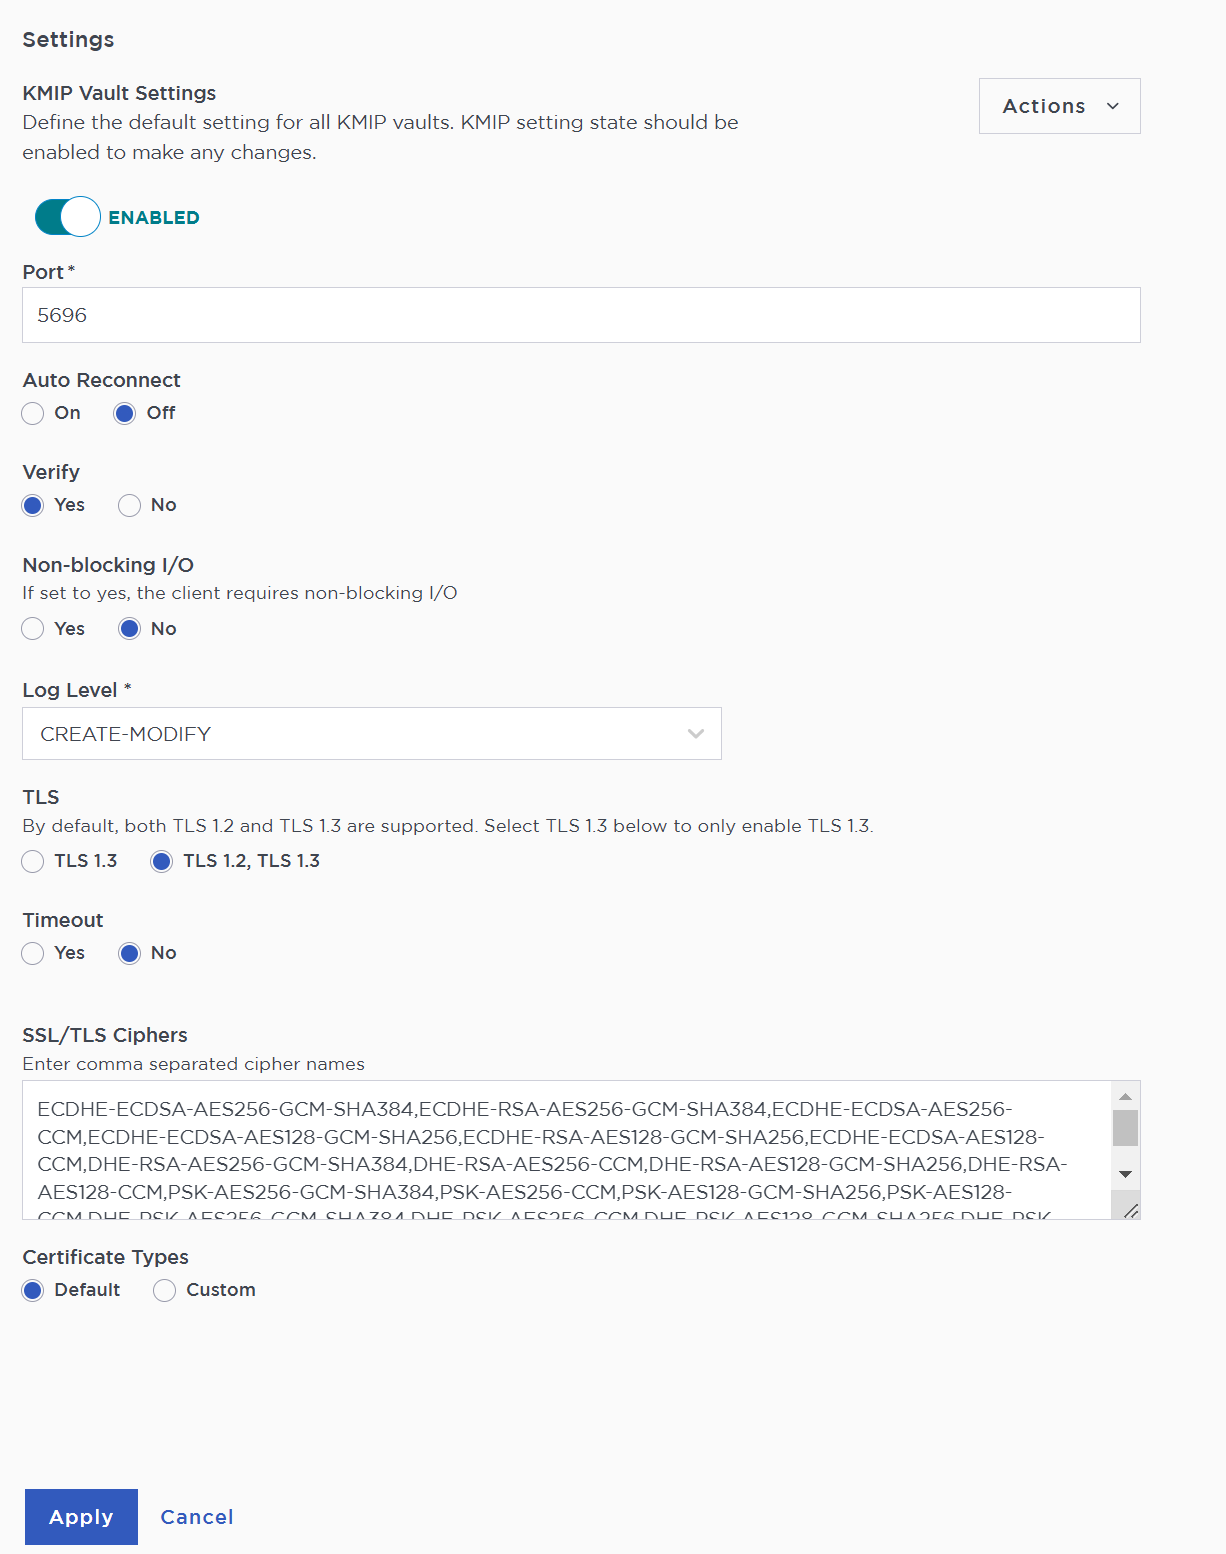
The KMIP server settings are set at the KeyControl appliance level and apply to all the KMIP vaults in the appliance. After a KMIP vault is created, it is automatically set to ENABLED.
To use external key management and configure the KeyControl Vault KMIP settings, refer to the KeyControl Vault for KMIP section of the admin guide.
When you are using external key management, as is the case in this solution, the KeyControl server is the KMIP server and the IBM DB2 server is the KMIP client.
-
Select the Settings icon on the top right to view/change the KMIP settings.
The defaults settings are appropriate for most applications but you can change settings to suit your environment.
-
Select Apply.
Establish trust between the KeyControl Server and IBM DB2
Certificates are required to facilitate the KMIP communications from the KeyControl KMIP vault and the IBM DB2 application and conversely. The built-in capabilities in the KeyControl KMIP Vault are used to create and publish the certificates.
For more information on how to create a certificate bundle, refer to Establishing a Trusted Connection with a KeyControl Vault-Generated CSR.
Certificates are required to facilitate all KMIP communications between the KeyControl Server and IBM DB2.
-
Sign in to the KeyControl webGUI using the VAULT URL.
Use the Administrator credentials that you created during the vault creation.
The VAULT URL was displayed at the end of the Create a KMIP Vault in the KeyControl Vault Server procedure. It is different from the URL of the standard KeyControl webGUI. -
Select Security, then select Client Certificates.
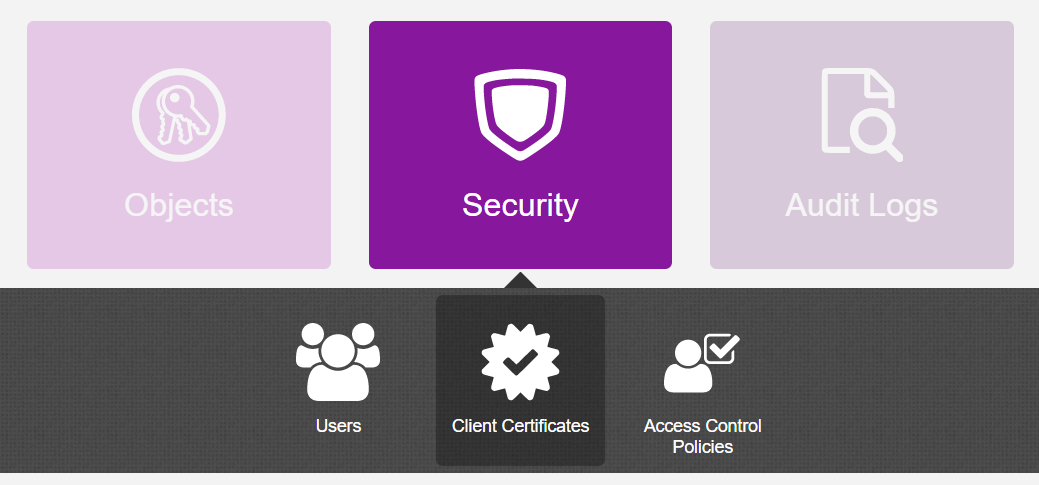
The Manage Client Certificate tab appears.
-
Select the + icon on the right to create a new certificate.
-
In the Create Client Certificate dialog:
-
For Certificate Name, enter a name.
-
For Certificate Expiration, set the date on which you want the certificate to expire.
-
Accept the defaults for remaining properties. For example:
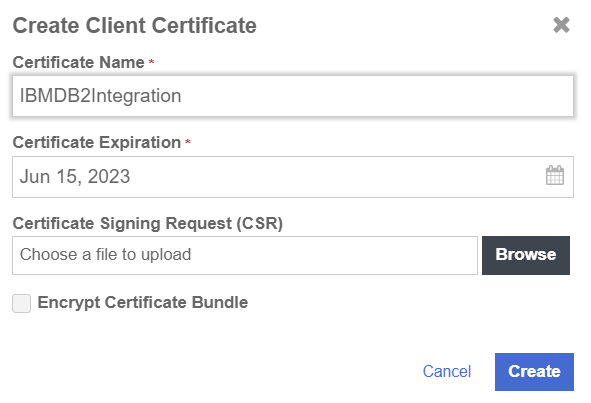
-
Select Create.
-
-
Select the new certificate once it is created and then select Download.
A .zip file downloads, which contains:
-
A
<cert_name>.pemfile that includes both the client certificate and private key.The client certificate section of the
<cert_name>.pemfile includes the lines“-----BEGIN CERTIFICATE-----"and“-----END CERTIFICATE-----"and all text between them.The private key section of the
<cert_name>.pemfile includes the lines“-----BEGIN PRIVATE KEY-----"and“-----END PRIVATE KEY-----"and all text in between them. -
A
cacert.pemfile, which is the root certificate for the KMS cluster. It is always namedcacert.pem.
These files will be used to establish trust between KeyControl and IBM DB2. In this example, the
<cert_name>.pemfile is calledDB2.pemand thecacert.pemfile is calledcacert.pem. -
For more information on how to create a certificate bundle, see Establishing a Trusted Connection with a KeyControl-Generated CSR.
Set up a centralized KMIP keystore
To set up a centralized keystore, with a key manager that is configured for the Key Management Interoperability Protocol (KMIP), for use with DB2 native encryption, you need to create a KMIP keystore configuration file.
After you have created the configuration file, you can enter parameter values to configure DB2 communication between the DB2 instance and the key manager. For more information, see Setting up a centralized KMIP keystore in the IBM documentation site.
Copy the Certificate Zip file you downloaded earlier to the DB2 Server.
-
Copy the KeyControl certificate zip file to the DB2 server:
% scp DB2_XXXX.zip xxxxx@10.XXX.XXX.XXX:/home/xxxxx/. -
In the DB2 server, go to the folder that is mounted and used by the db2 Docker container so you can unzip the Certificate zip file there:
% cd /Docker/config/db2inst1 -
Unzip the certificates:
% sudo unzip ~/DB2*.zip Archive: /home/xxxxx/DB2_XXXXX.zip inflating: DB2.pem inflating: cacert.pem -
Set the permissions so the files can be read inside the container:
% sudo chmod 777 DB2.pem
% sudo chmod 777 cacert.pem
Create the keycontrol-kmip.p12 and .sth files
-
Connect to the docker container running the DB2 server:
% sudo docker exec -ti db2server bash -c "su - db2inst1" Last login: Fri Dec 13 15:44:12 UTC 2024 [db2inst1@db2server ~]$ -
Export the libraries for GSKit from the IBM DB2 installation directory:
% export LD_LIBRARY_PATH=/opt/ibm/db2/V12.1/lib64/gskit:$LIBPATH % export PATH=/opt/ibm/db2/V12.1/gskit/bin:$PATH -
Run the utility to create the
.p12and.sthfiles.:% mkdir temp % cd temp % gsk8capicmd_64 -keydb -create -db "keycontrol-kmip.p12" -pw "mypassword" -type pkcs12 -stash % ls -al -rw-------. 1 db2inst1 db2iadm1 1432 Dec 12 18:41 keycontrol-kmip.p12 -rw-------. 1 db2inst1 db2iadm1 193 Dec 12 18:41 keycontrol-kmip.sth -
Add the client certificate and key to the SSL keystore.
-
Copy the
DB2.pemfile to thetempdirectory.This is one of the certificate files that came in the certificate bundle that you downloaded from KeyControl. It was unzipped earlier into the db2inst1 user’s home directory.
% cp ~/DB2.pem . -
Add the client cert and key to the SSL keystore by running the following command:
% gsk8capicmd_64 -cert -add -db "keycontrol-kmip.p12" -stashed -label "keycontrol_app_cert" -file "DB2.pem" -format ascii -
Copy the
cacert.pemfile to the temp directory.The file is typically located in the user’s home directory. It was unzipped earlier into the db2inst1 user’s home directory.
% cp ~/cacert.pem . -
Import CA Certificate into the SSL keystore by running the following command:
% gsk8capicmd_64 -cert -add -db "keycontrol-kmip.p12" -stashed -label "trustedCA" -file cacert.pem -format ascii -trust enable
-
-
List the certificates in the keystore.
% gsk8capicmd_64 -cert -list -db keycontrol-kmip.p12 -stashed Certificates found * default, - personal, ! trusted, # secret key ! trustedCA - keycontrol_app_cert -
Copy the
keycontrol-kmip.p12andkeycontrol-kmip.sthfiles to the location where they will be used by IBM DB2.% sudo mkdir -p ~/security % sudo cp keycontrol-kmip.p12 ~/security/. % sudo cp keycontrol-kmip.sth ~/secuiryt/. % sudo chmod 644 ~/security/* % ls -al ~/security -rw-r--r--. 1 db2inst1 db2iadm1 6066 Dec 16 15:21 keycontrol-kmip.p12 -rw-r--r--. 1 db2inst1 db2iadm1 193 Dec 16 15:21 keycontrol-kmip.sth
Create the KMIP keystore configuration file
To use DB2 native encryption to store your master key or keys in a centralized keystore using KMIP, you need to create a configuration file that lists details about the keystore.
-
On the DB2 server, create the KMIP keystore configuration file in a text editor. For example:
VERSION=1
PRODUCT_NAME=OTHER
ALLOW_NONCRITICAL_BASIC_CONSTRAINT=TRUE
ALLOW_KEY_INSERT_WITHOUT_KEYSTORE_BACKUP=TRUE
SSL_KEYDB=/database/config/db2inst1/security/keycontrol-kmip.p12
SSL_KEYDB_STASH=/database/config/db2inst1/security/keycontrol-kmip.sth
SSL_KMIP_CLIENT_CERTIFICATE_LABEL=keycontrol_app_cert
PRIMARY_SERVER_HOST=XXX.XXX.XXX.126
PRIMARY_SERVER_KMIP_PORT=5696
CLONE_SERVER_HOST=XXX.XXX.XXX.127
CLONE_SERVER_KMIP_PORT=5696
Attention should be given to the following keywords:
- ALLOW_NONCRITICAL_BASIC_CONSTRAINT
-
Set it to TRUE, this allows DB2 to use local Certificate Authority within KMIP server that does not have a "critical" keyword set and avoids "414" error that is returned by GSKit.
- SSL_KEYDB
-
This is the absolute path and name of the local keystore file that holds the TLS certificates for communication between the DB2 server and the KMIP key manager. (Required)
- SSL_KEYDB_STASH
-
Absolute path and name of the stash file for the local keystore that holds the TLS certificates for communication between the DB2 server and the KMIP key manager. Default value: None. (Optional)
- SSL_KMIP_CLIENT_CERTIFICATE_LABEL
-
The label of the TLS certificate for authenticating the client during communication with the KMIP key manager. This is the label you used when you created the keystore. (Required)
- PRIMARY_SERVER_HOST*
-
Host name or IP address of the KMIP key manager. (Required)
- PRIMARY_SERVER_KMIP_PORT
-
The KMIP TLS port of the KMIP key manager. (Required)
- CLONE_SERVER_HOST
-
Host name or IP address of secondary KMIP keystore. Default value: None. You can specify up to five clone servers by repeating the
CLONE_SERVER_HOSTandCLONE_SERVER_KMIP_PORTparameter pairs in the configuration file, each host with a different value. Clone servers are considered read-only and are only used for retrieving existing master keys from the KMIP keystore. Clone servers are not used when inserting a new key, which occurs when an existing master key label has not been specified for theCREATE DATABASE ENCRYPTorADMIN_ROTATE_MASTER_KEYcommands, or for thedb2p12tokmipexecutable. (Optional) - CLONE_SERVER_KMIP_PORT
-
The KMIP TLS port of the secondary KMIP keystore. Default value: None. (Optional)
For a list of the keywords that can be used in this configuration file, see the IBM documentation at https://www.ibm.com/docs/en/db2/12.1?topic=keystore-kmip-configuration-file
-
Name this file
kmipdb2config.txtand copy it to where the.p12and.sthfiles are.% sudo cp kmipdb2config.txt ~/security/.
Configure the DB2 instance to use the keystore
After the keystore is configured, it is ready to be used by DB2. First, add the location of the configuration files and enable the configuration. To configure a DB2 instance to use a keystore for native encryption, you need to set two database manager configuration parameters:
-
KEYSTORE_TYPE -
KEYSTORE_LOCATION
For a centralized keystore, where the key manager product uses the Key Management Interoperability Protocol (KMIP), set KEYSTORE_TYPE to KMIP, and set KEYSTORE_LOCATION to the absolute path and file name of the centralized keystore configuration file.
-
Connect to the docker container running the DB2 server if not connected yet.
% sudo docker exec -ti db2server bash -c "su - db2inst1" Last login: Fri Dec 13 15:44:12 UTC 2024 [db2inst1@db2server ~]$ -
Update the database parameters:
% db2 update dbm cfg using keystore_location /database/config/db2inst1/security/kmipdb2config.txt keystore_type kmip DB20000I The UPDATE DATABASE MANAGER CONFIGURATION command completed successfully. SQL1362W One or more of the parameters submitted for immediate modification were not changed dynamically. Client changes will not be effective until the next time the application is started or the TERMINATE command has been issued. Server changes will not be effective until the next DB2START command. -
Restart DB2 again so that the keystore changes take effect:
% db2stop 12/16/2024 15:28:05 0 0 SQL1064N DB2STOP processing was successful. SQL1064N DB2STOP processing was successful. % db2start 12/16/2024 15:28:32 0 0 SQL1063N DB2START processing was successful. SQL1063N DB2START processing was successful. -
Verify that
dbm cfgis set correctly by running the following command.% db2 get dbm cfg | grep Keystore Keystore type (KEYSTORE_TYPE) = KMIP Keystore location (KEYSTORE_LOCATION) = /database/config/db2inst1/security/kmipdb2config.txtLook at value of
KEYSTORE_TYPEandKEYSTORE_LOCATION.
Verify that the encryption is working and that IBM DB2 is using KeyControl to manage the keys
Now that IBM DB2 is configured to use KeyControl, check that encryption is working and KeyControl is used.
Before starting, connect to the docker container running the DB2 server if not connected yet.
% sudo docker exec -ti db2server bash -c "su - db2inst1"

Last login: Fri Dec 13 15:44:12 UTC 2024
[db2inst1@db2server ~]$
Reset connections
Reset all connections in the database first.
% db2 QUIESCE DATABASE IMMEDIATE FORCE CONNECTIONS;

SQL1224N  The database manager is not able to accept new requests, has
terminated all requests in progress, or has terminated the specified request
because of an error or a forced interrupt.  SQLSTATE=00000

% db2 CONNECT RESET

DB20000I  The SQL command completed successfully.
Create an encrypted database
Try to create an encrypted database:
% db2 create db mydb1 encrypt

DB20000I  The CREATE DATABASE command completed successfully.
To confirm that the master key was successfully created, sign in to KeyControl using the Tenant URL (KMIP credentials) and look at KMIP Objects as shown below.

Additionally, you can use the db2diag program on the DB2 server to see the operational status.
You can find the Activity logs about the key creation on the Audit Logs page in KeyControl. For example:
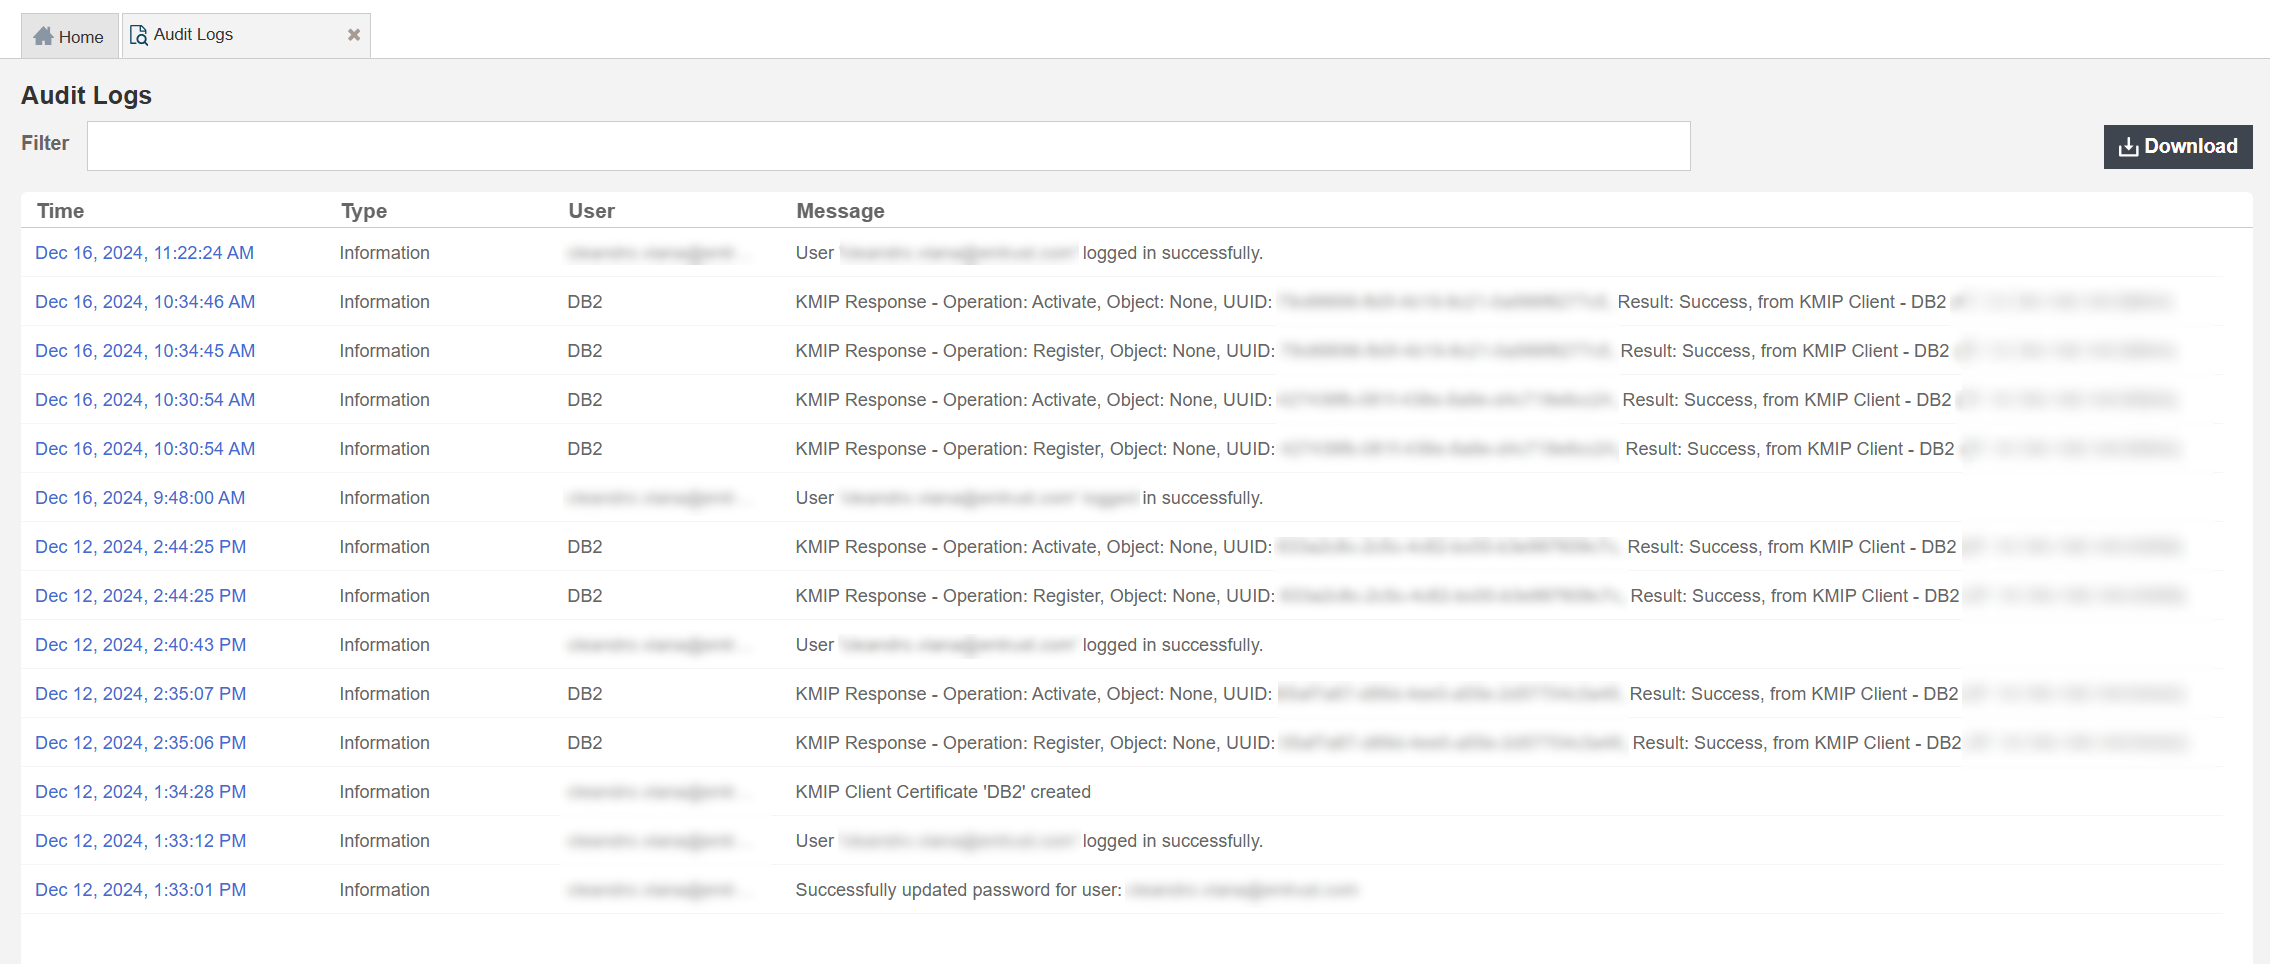
With KeyControl you will see a complete audit trail every time the key is retrieved. You will also have complete control on these keys and you can revoke access to a key or disable it, in case you want to lock down your data at rest.
The Objects tab in the KeyControl UI as described in the Managing KMIP Objects section of the Entrust KeyControl admin guide.
If you try to create the encrypted database and it fails with return code 414, the certificate is not valid:
SQL1782N  The command or operation failed because an error was encountered
accessing the centralized key manager. Reason code "5:414".
Either the local certificate or the peer certificate is not valid.
Use the following command to validate the certificates. Do this as the user who created the SSL Store and in the same directory where the SSL store files are located:
% cd ~/security
% gsk8capicmd_64 -cert -validate -db keycontrol-kmip.p12 -stashed

trustedCA : OK
keycontrol_app_cert : CTGSK2052W An invalid basic constraint extension was found.
Additional untranslated info: GSKKM_VALIDATIONFAIL_SUBJECT: GSKNativeValidator:: [IssuerName=]CN=HyTrust KeyControl Certificate Authority,O=HyTrust Inc.,C=US[Serial#=]60da35b2[SubjectName=]CN=HyTrust KeyControl Certificate Authority,O=HyTrust Inc.,C=US[Class=]GSKVALMethod::PKIX[Issuer=]CN=HyTrust KeyControl Certificate Authority,O=HyTrust Inc.,C=US[#=]60da35b2[Subject=]CN=HyTrust KeyControl Certificate Authority,O=HyTrust Inc.,C=US
CTGSK2052W An invalid basic constraint extension was found.
To address this issue, add the following option to the KMIP keystore configuration file:
ALLOW_NONCRITICAL_BASIC_CONSTRAINT=TRUEThe encrypted database can then be created.
Rotate the Master Key in KeyControl with IBM DB2
-
List your DB directory:
% db2 list db directory System Database Directory Number of entries in the directory = 2 Database 1 entry: Database alias = TESTDB Database name = TESTDB Local database directory = /database/data Database release level = 16.00 Comment = Directory entry type = Indirect Catalog database partition number = 0 Alternate server hostname = Alternate server port number = Database 2 entry: Database alias = MYDB1 Database name = MYDB1 Local database directory = /database/data Database release level = 16.00 Comment = Directory entry type = Indirect Catalog database partition number = 0 Alternate server hostname = Alternate server port number = -
Connect the DB to the same database:
% db2 connect to MYDB1 Database Connection Information Database server = DB2/LINUXX8664 12.1.0.0 SQL authorization ID = DB2INST1 Local database alias = MYDB1 -
Check the encryption information:
% db2 "select * from table(sysproc.admin_get_encryption_info())" OBJECT_NAME OBJECT_TYPE ALGORITHM ALGORITHM_MODE KEY_LENGTH MASTER_KEY_LABEL KEYSTORE_NAME KEYSTORE_TYPE KEYSTORE_HOST KEYSTORE_PORT KEYSTORE_IP KEYSTORE_IP_TYPE PREVIOUS_MASTER_KEY_LABEL AUTH_ID APPL_ID ROTATION_TIME -------------------------------------------------------------------------------------------------------------------------------- -------------------- ---------------- ---------------- ---------- --------------------------------------------------------------------------------------------------------------------------------------------------------------------------------------------------------------------------------------------------------------- --------------------------------------------------------------------------------------------------------------------------------------------------------------------------------------------------------------------------------------------------------------- -------------------- --------------------------------------------------------------------------------------------------------------------------------------------------------------------------------------------------------------------------------------------------------------- ------------- ---------------------------------------- ---------------- --------------------------------------------------------------------------------------------------------------------------------------------------------------------------------------------------------------------------------------------------------------- -------------------------------------------------------------------------------------------------------------------------------- -------------------------------------------------------------------------------------------------------------------------------- -------------------------- MYDB1 DATABASE AES CBC 256 DB2_SYSGEN_db2inst1_MYDB1_2024-12-16-15.30.54_A4E769D6 /database/config/db2inst1/security/kmipdb2config.txt KMIP 10.194.148.126 5696 Unknown IP Type DB2_SYSGEN_db2inst1_MYDB1_2024-12-16-15.30.54_A4E769D6 DB2INST1 *LOCAL.db2inst1.241216153054 2024-12-16-15.30.54.000000 1 record(s) selected. -
Rotate the master key from DB2.
% db2 "CALL SYSPROC.ADMIN_ROTATE_MASTER_KEY (NULL)" Value of output parameters -------------------------- Parameter Name : LABEL Parameter Value : DB2_SYSGEN_db2inst1_MYDB1_2024-12-16-15.34.45_7E908063 Return Status = 0 -
When the key is rotated, check on KeyControl if the Master Key is rotated.
You will find a new key created in KeyControl.
-
For the new key to take effect, stop and start db2.
% db2stop
% db2start
Test access only when KeyControl is available
-
Stop the network services on the IBM DB2 server and try to connect to the database:
% db2 connect to MYDB1If KeyControl is not available, the database fails to connect.
-
Restart Network services on the IBM DB2 server and try to connect to the database:
% db2 connect to MYDB1

   Database Connection Information

 Database server        = DB2/LINUXX8664 12.1.0.0
 SQL authorization ID   = DB2INST1
 Local database alias   = MYDB1
All databases that are encrypted using KeyControl are only accessible when KeyControl is available and Master Key is found.
Validate access when a KeyControl node in the cluster is not available
-
Bring down one of the KeyControl nodes and validate you can access the encrypted database.
-
Attempt to connect to the database when one of the KeyControl nodes in the cluster is down:
% db2 connect to MYDB1

   Database Connection Information

 Database server        = DB2/LINUXX8664 12.1.0.0
 SQL authorization ID   = DB2INST1
 Local database alias   = MYDB1
When one of its nodes is down, the KeyControl cluster goes out of Healthy status.
New keys can only be created when the cluster is in Healthy status.
Therefore, rotating keys should not be attempted when one of the nodes in the cluster is down.