Procedures
Prerequisites
Before you perform the integration, complete the following tasks:
-
Deploy and configure Entrust Key Management Vault.
-
Ensure that you have access to Oracle Cloud Infrastructure (OCI).
-
If the OCI user is not in the administrators group, create a policy that allows the user to manage keys and vaults.
-
Ensure that the OCI user was created in the default identity domain for the tenancy, because users in non-default identity domains are not supported.
-
Ensure that the endpoints whitelisted for OCI BYOK work:
If your organisation restricts outbound access to the public internet, the following endpoints will need to be whitelisted for OCI BYOK to work:
-
https://kms.<region>.oraclecloud.comThis endpoint must be individually whitelisted for each region you want to use.
-
https://identity.<region>.oci.oraclecloud.comThis endpoint must be individually whitelisted for each region you want to use).
-
https://<vaultid>-management.kms.<region>.oraclecloud.comThis endpoint must be individually whitelisted for each vault you want to use. The URL can be found on the vault information tile in the OCI console.
Create a CloudKey Vault in the Key Management Vault server
-
Log in to the Key Management Vault server in your web browser using the secroot credentials.
-
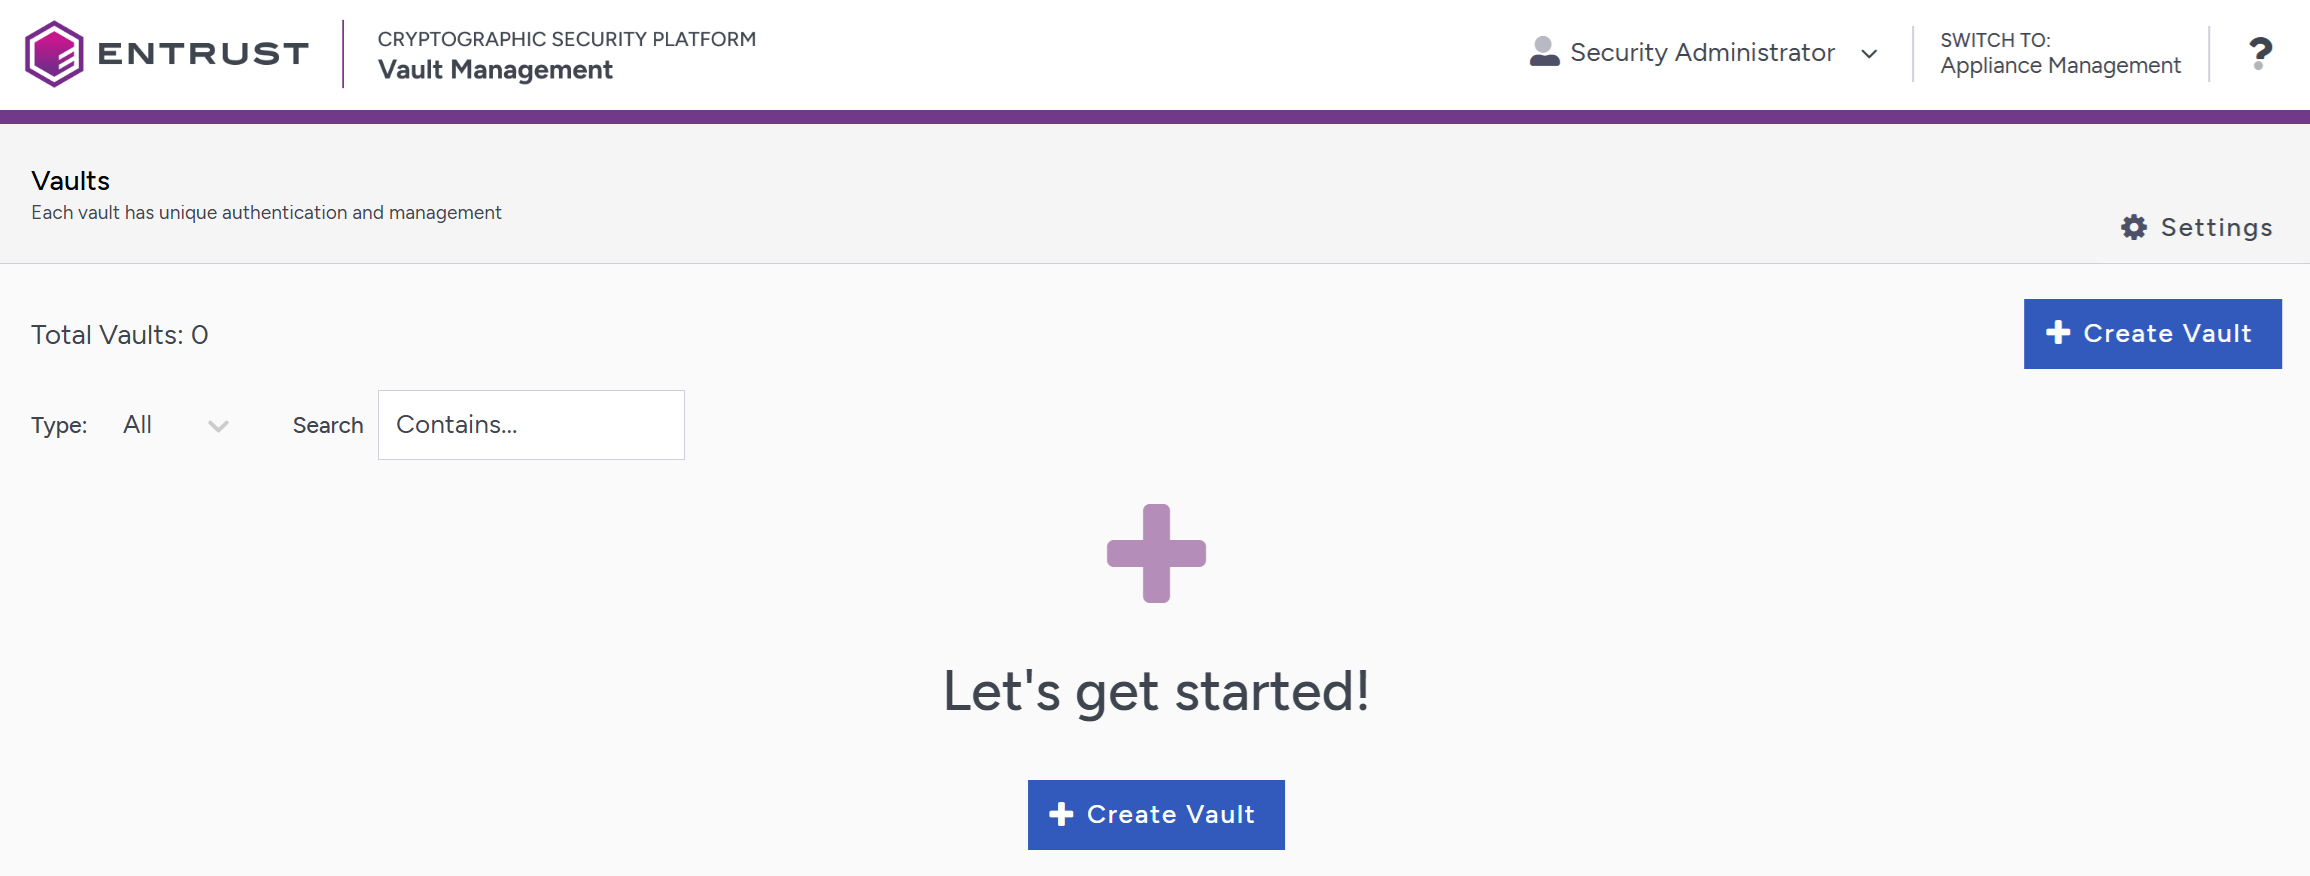
If you are not in the Vault Management interface, select SWITCH TO: Manage Vaults in the menu header
-
Select Create Vault.
-
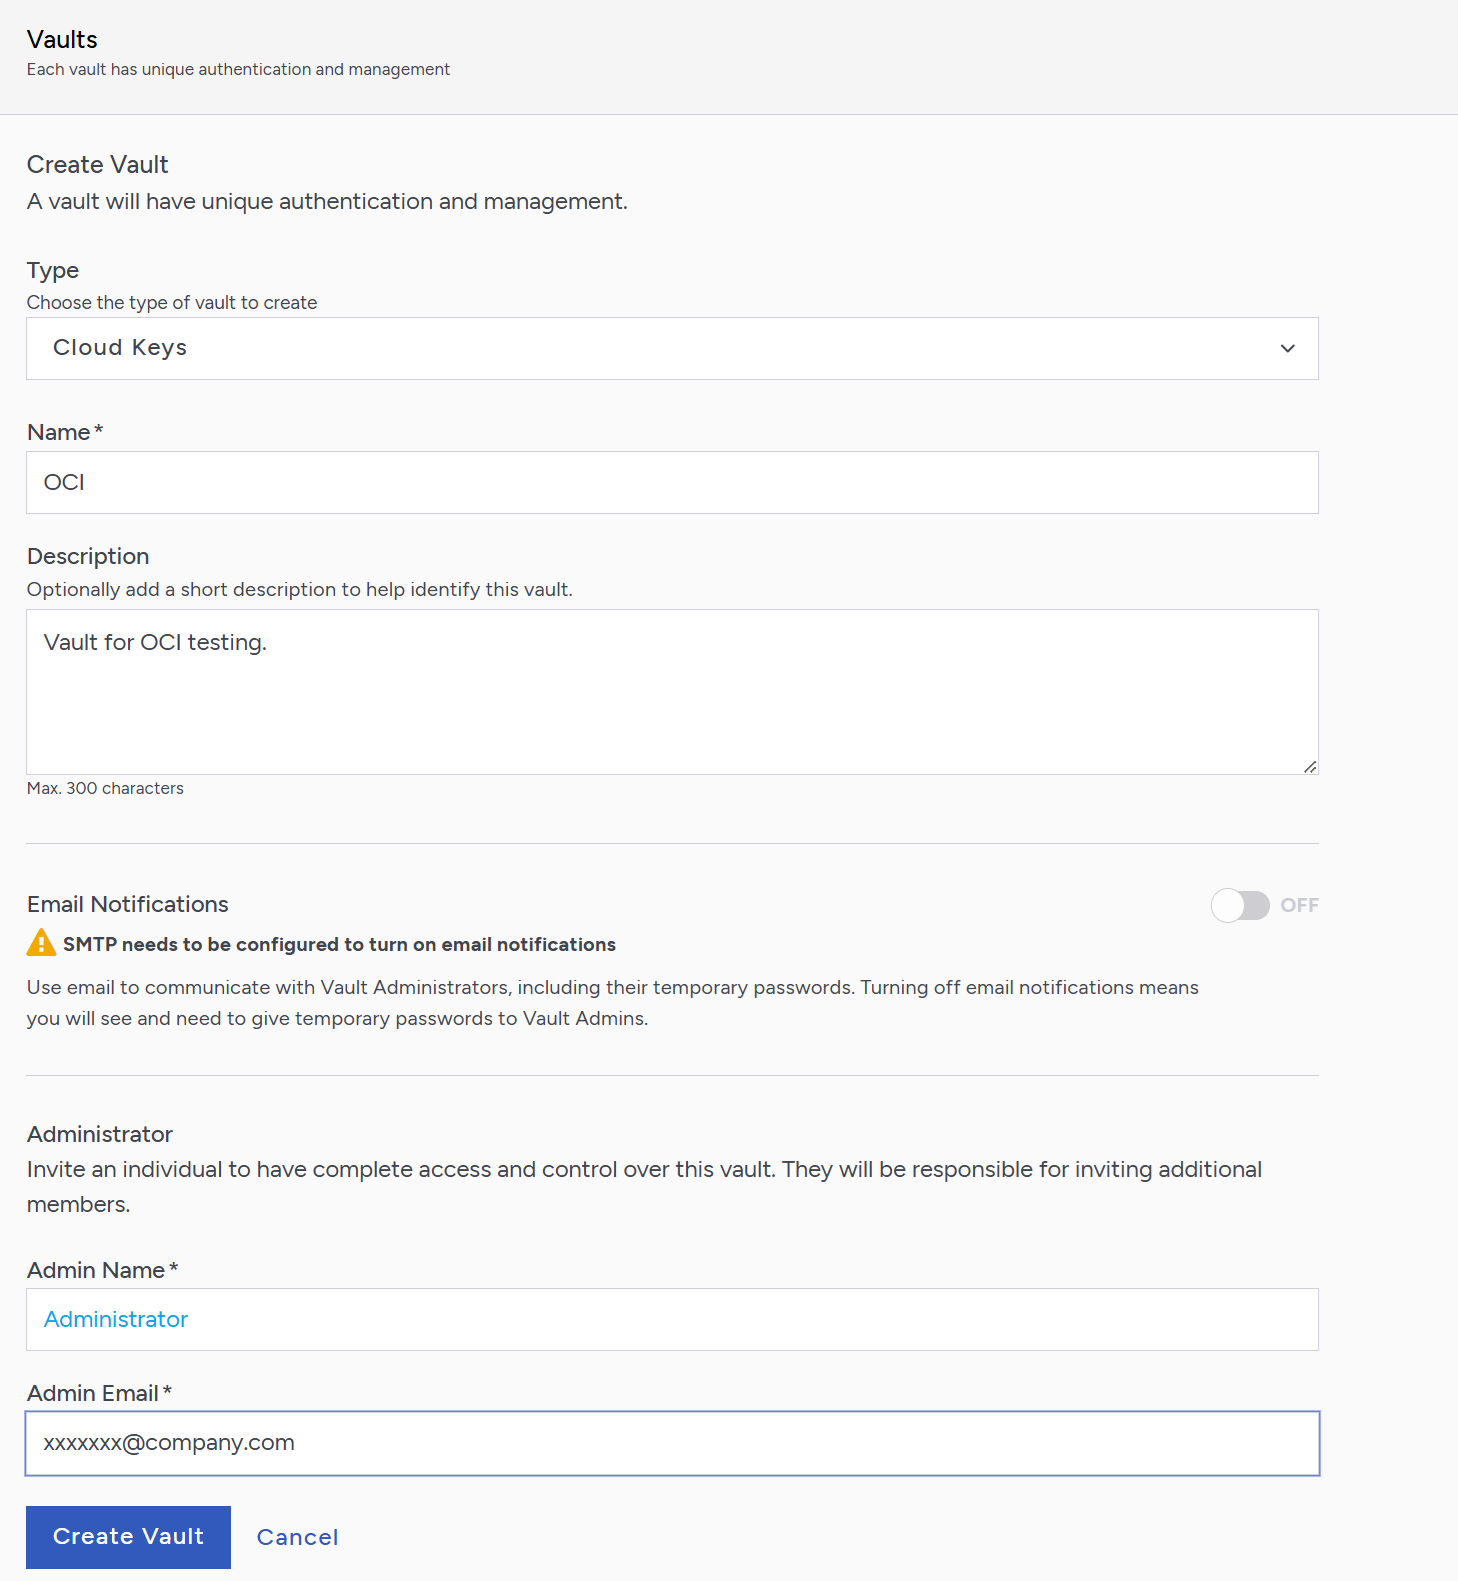
Create a CloudKey Vault:
-
For Type, select Cloud Keys.
-
For Name, enter a vault name.
-
For Description, enter a description for the vault.
-
For Admin Name, enter the name of the vault administrator.
-
For Admin Email, enter a valid email for the administrator.
A temporary password will be emailed to the administrator’s email address when the vault is created. Use this password the first time that you sign in to the CloudKey Vaults space in Key Management Vault. In a closed gap environment where email is not available, the password for the user is displayed when you first create the vault. Copy this password and send it to the user.
-
-
Select Create Vault.
-
Select Close when the vault creation completes.
-
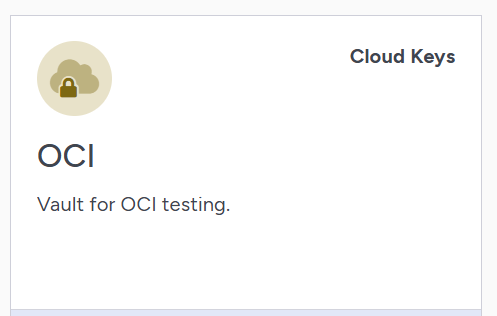
The newly created vault is added to the vault dashboard.
-
Go to the displayed URL and sign in with the credentials given.
When you sign in for the first time, the system will prompt you to change the password.
OCI Setup
Setting up OCI from scratch is a multi-step process that involves creating an account, configuring networks, provisioning resources, and deploying your applications or services. Use the following steps as a general guide to get started:
Create an Oracle Cloud Account
Visit the Oracle Cloud website and create an account: https://cloud.oracle.com/
Log In to Oracle Cloud Console
Use your credentials to log in to the Oracle Cloud Console. This is your central location for configuring and managing OCI resources.
Add an API Key for the OCI User
The API key provides a configuration file snippet that contains the connection information that allows you to connect to the Entrust Cryptographic Security Platform Key Management Vault.
It might take up to 5 minutes for a new API key to become active on OCI.
If you attempt to create your Cloud Service Provider account before the API key is active, it will fail with the following error: Failed to validate Access Credentials OCI returned error: Client is unauthorized. null
Wait for a few minutes before you attempt to recreate your Cloud Service Provider account.
For more information, see Adding a Cloud Service Provider Account for OCI.
|
-
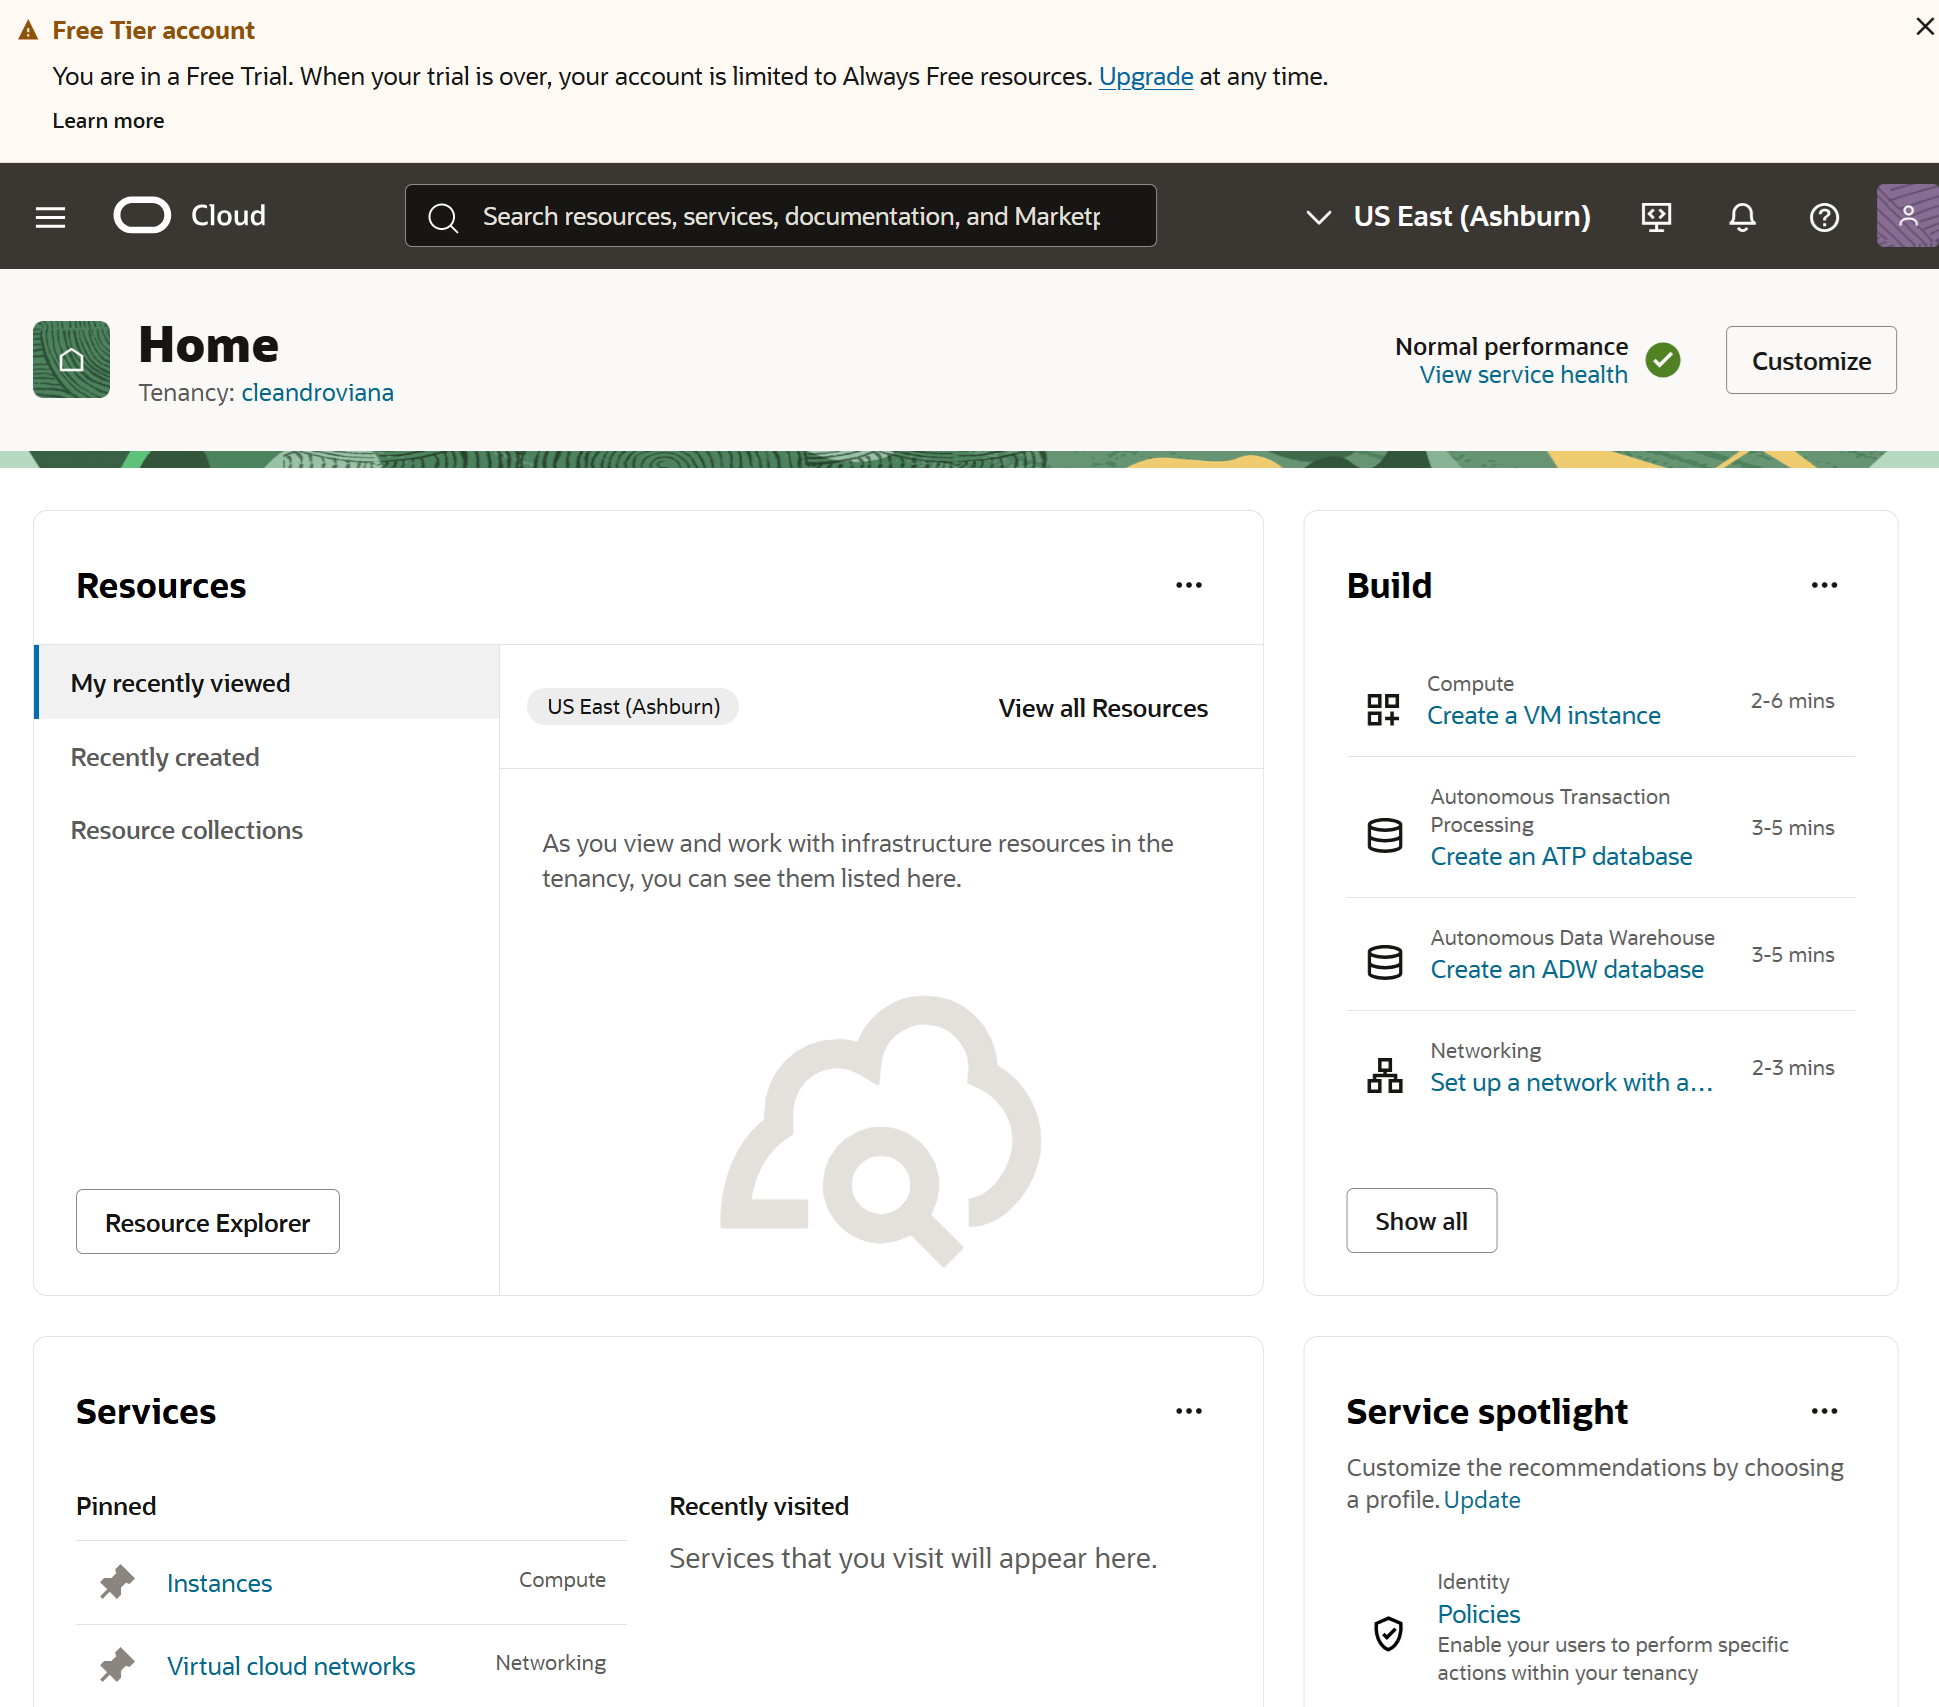
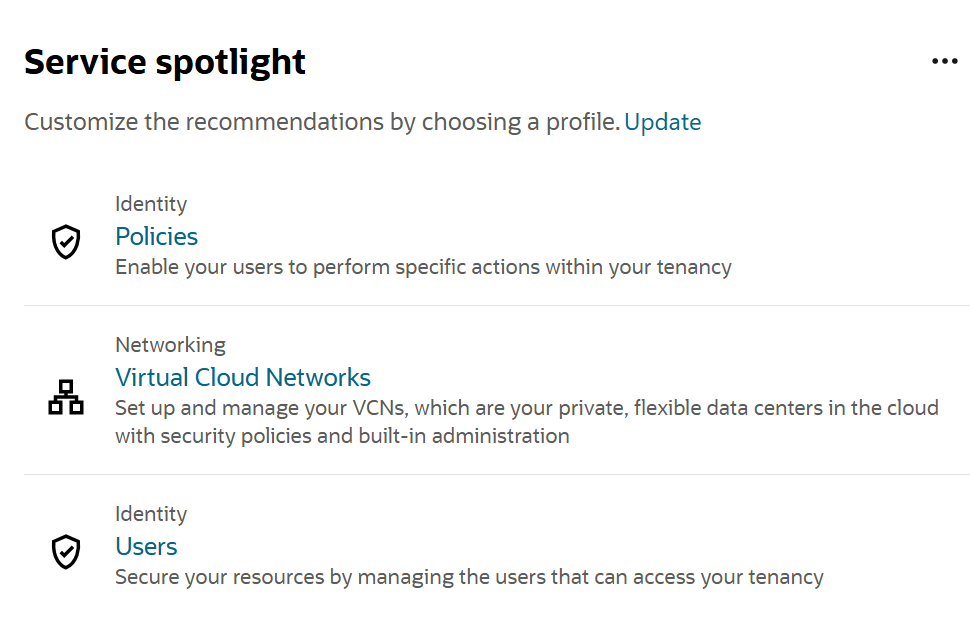
In OCI, navigate to the user that got created for you when you signed up for OCI.
You can find the Users link under the Services spotlight section in the console.
-
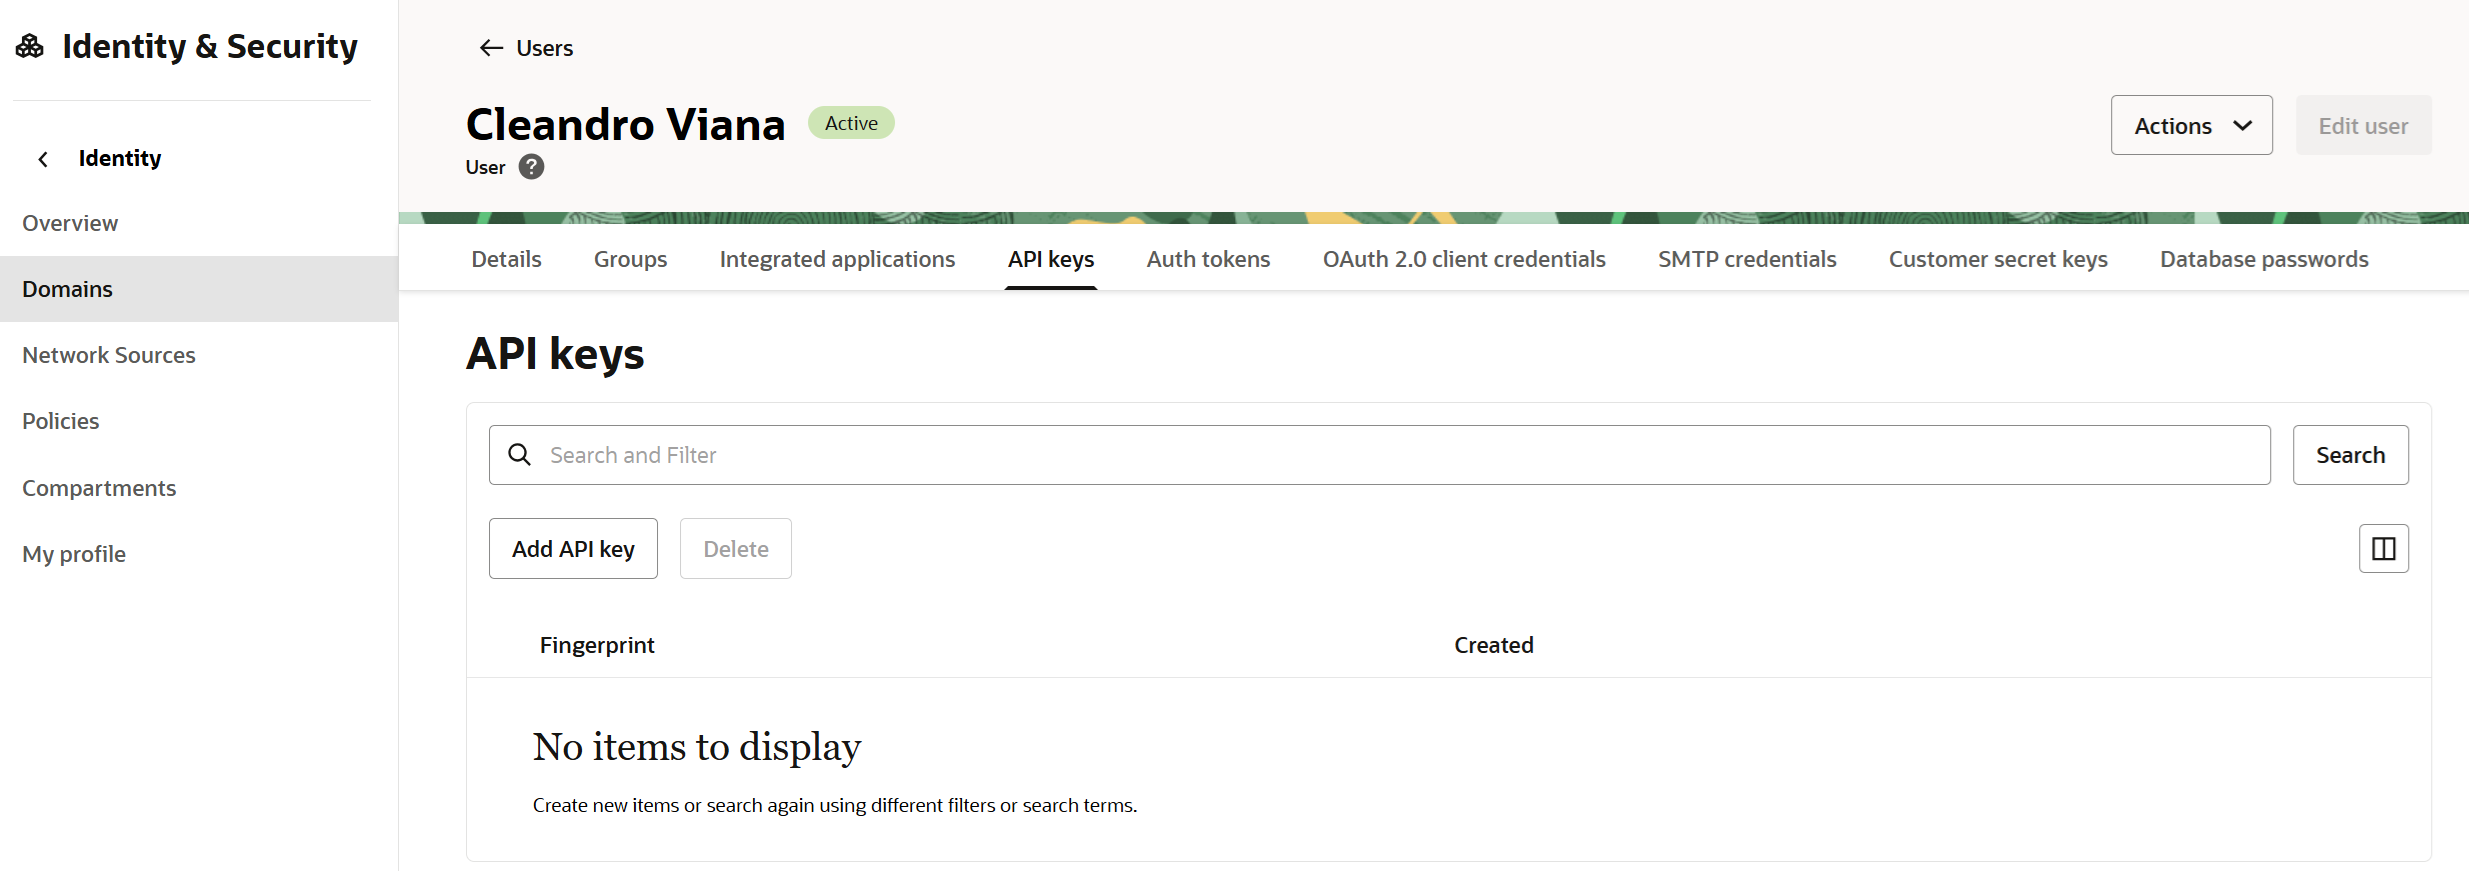
Select Users and then the user that got created for you.
-
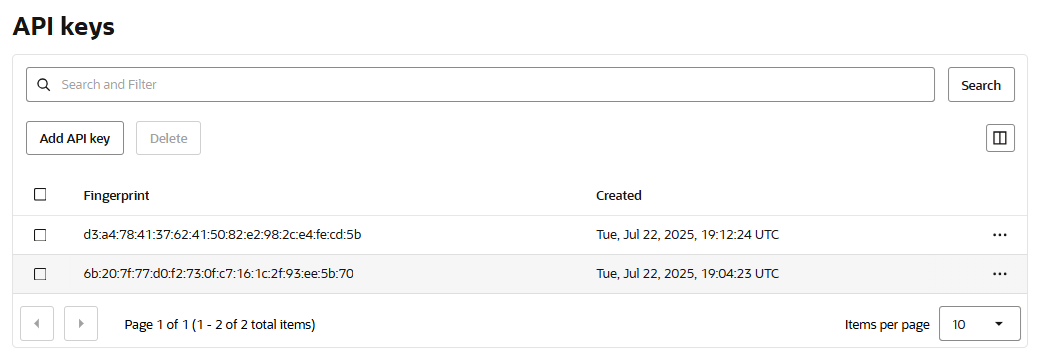
On the user page, select the API Keys tab.
-
Under API Keys, select Add API Key.
-
Add the key using your preferred method. For this guide, Generate API key pair was used.
The API key is an RSA key pair in PEM format. You can either generate the key pair here and download the private key, or, if you already have a key pair, you can choose to upload or paste your public key file instead.
Download the private and public keys because these files will be used later in the integration. -
Click Add.
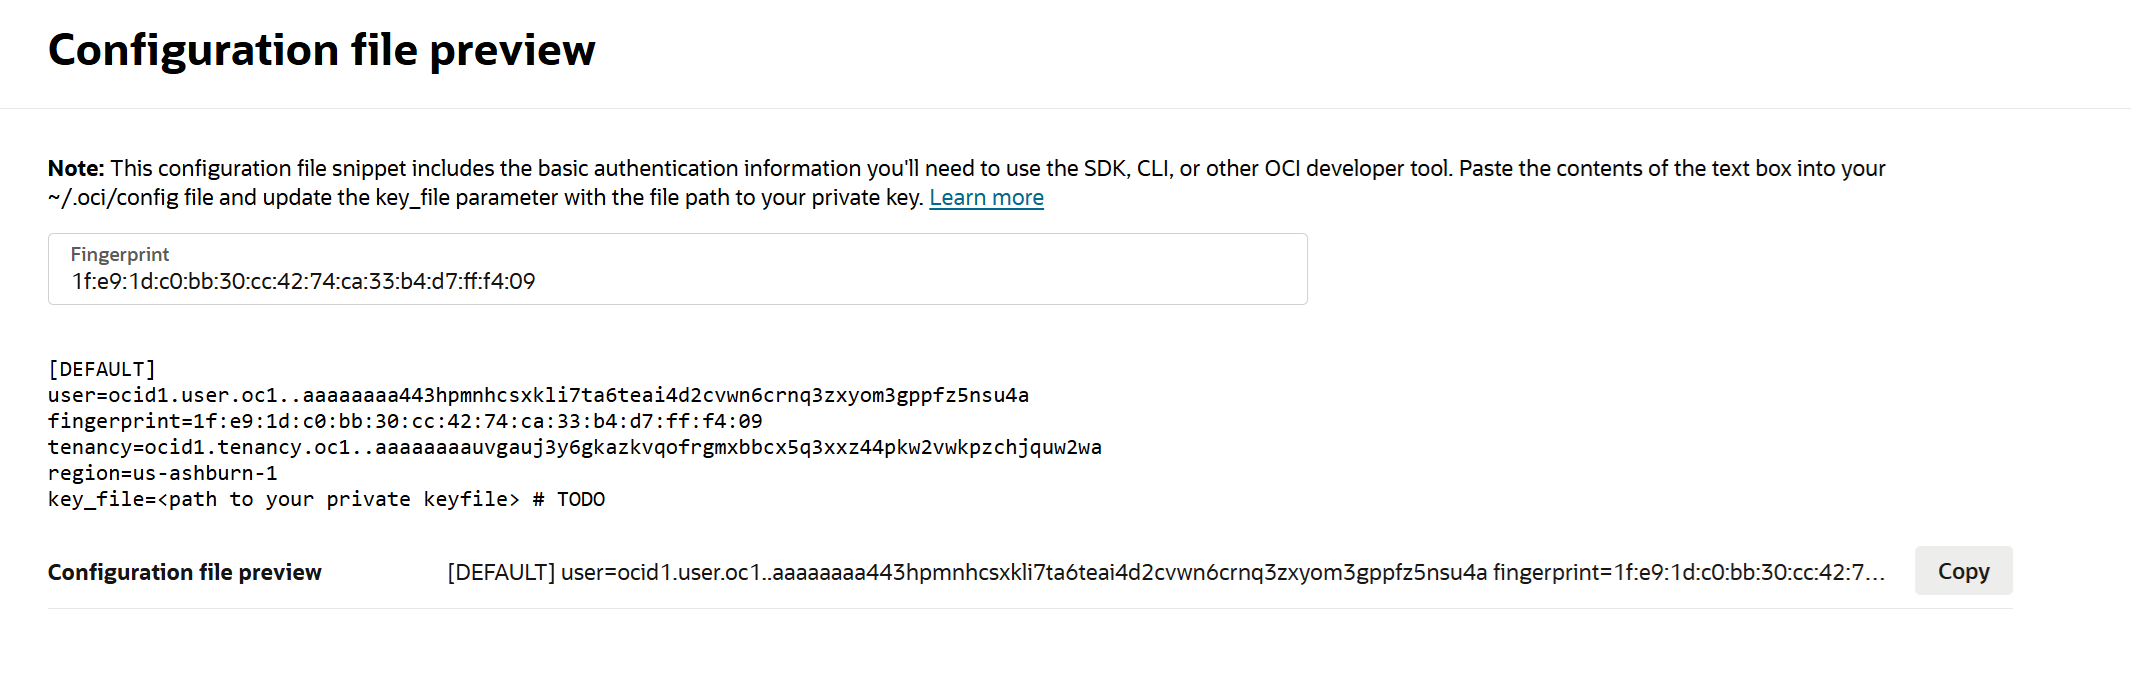
The Configuration file preview window displays the information that you need to connect to Entrust Cryptographic Security Platform Key Management Vault.
-
Click Copy to copy the file, and paste it somewhere you can access later on.
[DEFAULT]
user=ocid1.user.oc1..aaaaaaaa443hpmnhcsxkli7ta6teai4d2cvwn6crnq3zxyom3gppfz5nsu4a
fingerprint=1f:e9:1d:c0:bb:30:cc:42:74:ca:33:b4:d7:ff:f4:09
tenancy=ocid1.tenancy.oc1..aaaaaaaauvgauj3y6gkazkvqofrgmxbbcx5q3xxz44pkw2vwkpzchjquw2wa
region=us-ashburn-1
key_file=<path to your private keyfile> # TODO
Add a Cloud Service Provider Account for OCI
It may take up to 5 minutes for a new API key to become active on OCI.
If you attempt to create your Cloud Service Provider account before the API key is active,
it will fail with the following error: Failed to validate Access Credentials OCI returned error: Client is unauthorized. null
Wait for a few minutes before you attempt to recreate your Cloud Service Provider account.
For more information, see Adding a Cloud Service Provider Account for OCI.
|
-
Log in to the Entrust Cryptographic Security Platform Key Management Vault: Cloud Keys Vault webGUI using an account with Cloud Admin privileges.
-
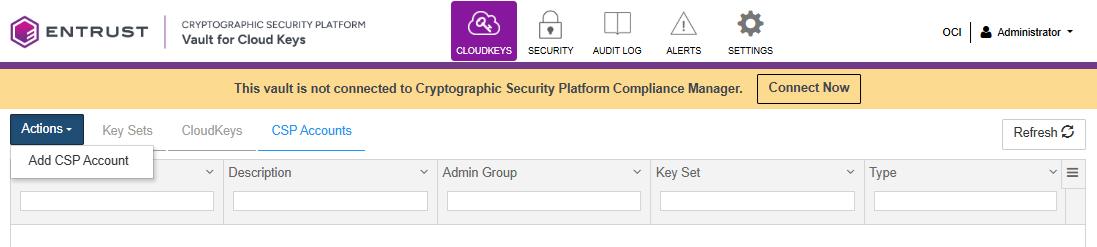
In the top menu bar, select CloudKeys.
-
Select the CSP Accounts tab.
-
Select Actions > Add Cloud Service Provider Account.
-
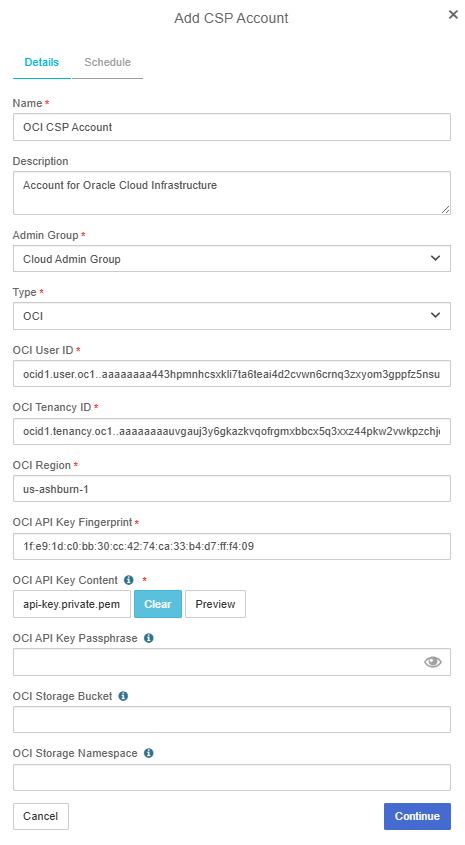
On the Details tab of the Add CSP Account dialog box, enter the account details as follows:
-
For Name, enter the name you want to use for the Cloud Service Provider Account.
-
For Description, enter an optional description of the Cloud Service Provider Account.
-
For Admin Group, select the Admin Group that you want to use for the account, for example Cloud Admin Group.
-
For Type, select OCI.
-
For OCI User ID, copy the user information (everything after
user=) from the configuration file preview. -
For OCI Tenancy ID, copy the tenancy information (everything after
tenancy=) from the configuration file preview. -
For OCI Region, copy the region information (everything after
region=) from the configuration file preview. -
For OCI API Key Fingerprint, copy the fingerprint information (everything after
fingerprint=) from the configuration file preview. -
For OCI API Key Content, click Load File to upload the private keyfile that you generated.
-
For OCI API Key Passphrase, if you generated an RSA Key Pair with a passphrase, enter the passphrase here.
-
For OCI Storage Bucket, if you are using a virtual private vault, enter the bucket name. This is where backups of HSM-protected keys in a virtual private vault will be stored. If you have a virtual private vault, imported keys will not be stored in the Cryptographic Security Platform Vault for Cloud Keys.
-
For OCI Storage Namespace, if you are using a virtual private vault, enter the namespace of the storage bucket.
-
-
Click Continue.
-
On the Schedule tab, determine the rotation schedule. This can be one of the following:
-
Never: The api keys will never be rotated.
-
Every x days: The API keys will be rotated after x days, where x is a value from 1 to 540.
-
Every x weeks: The api keys will be rotated after x weeks, where x is a value from 1 to 72.
-
Every x months: The api keys will be rotated after x months, where x is a value from 1 to 18.
-
Every x years: The api keys will be rotated every year, where x must be "1".
-
-
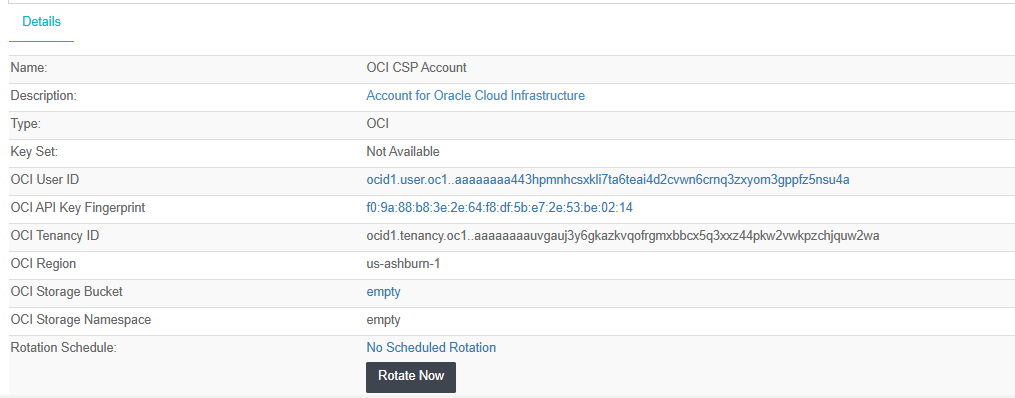
Click Add.
You should be able to see the newly created CSP Account. Select it to view the details:
Testing the Integration
This section demonstrates one possible usage of Entrust Cryptographic Security Platform Key Management Vault in the integration. The following steps set up an OCI storage bucket where the contents are encrypted with an encryption key generated by Entrust Cryptographic Security Platform Key Management Vault and uploaded to an OCI vault.
Rotate the Access Credentials from Entrust Cryptographic Security Platform Key Management Vault
-
Log in to the Entrust Key Management Vault Cloud Keys Vault webGUI using an account with Cloud Admin privileges.
-
In the top menu bar, click CloudKeys.
-
Select the CSP Accounts tab.
-
Select the CSP Account created earlier.
-
In the Details tab, under the Rotation Schedule, select Rotate Now.
This should rotate the API Keys. To check the rotation, you can check the API Keys tab in the User’s page under OCI. You should see a new fingerprint for the key.
Create a Compartment in OCI that will be used for the testing.
-
In the OCI UI, search for compartments.
-
Under Services, select compartments.
-
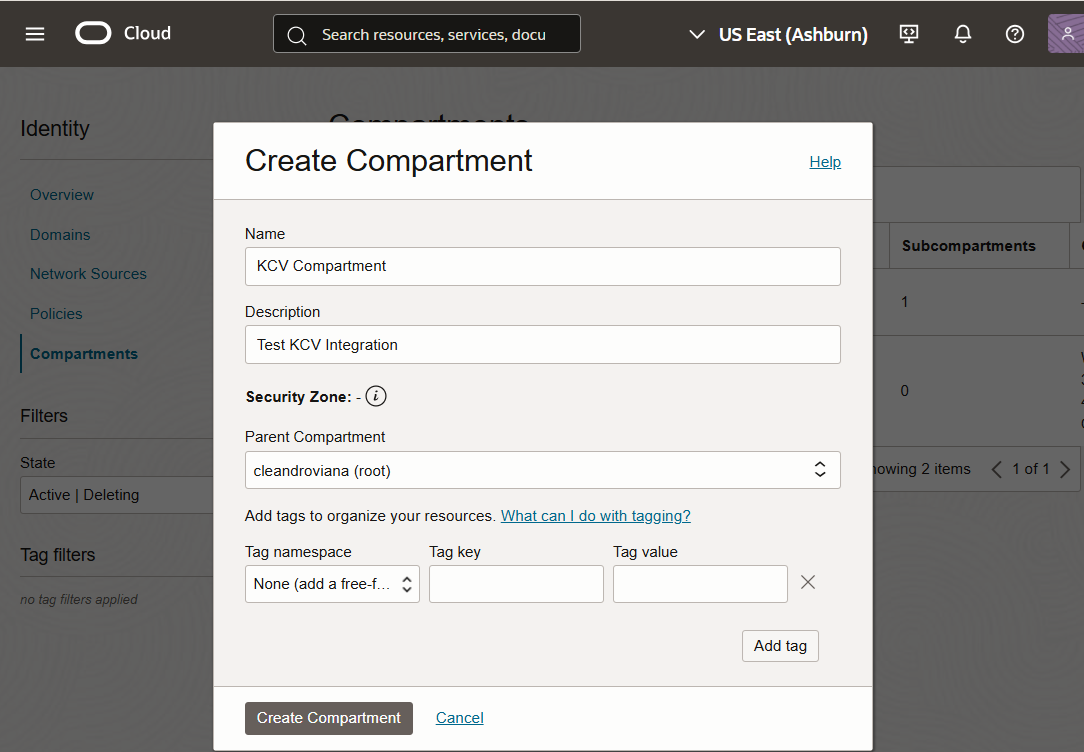
Select Create Compartment.
-
In the Create Compartment dialog, enter the following details:
-
For Name, enter a name for the compartment.
-
For Description, enter a description for the compartment.
-
For Parent Compartment, use the default parent compartment.
-
For the other fields, leave the default values.
-
-
Select Create Compartment.
-
Refresh the page and you should see the compartment listed.

Create a Policy
Create a policy that allows storage buckets to access the master encryption keys present in the test compartment.
-
In the OCI UI, search for policies.
-
Under Services, select policies.
-
Select Create Policy.
-
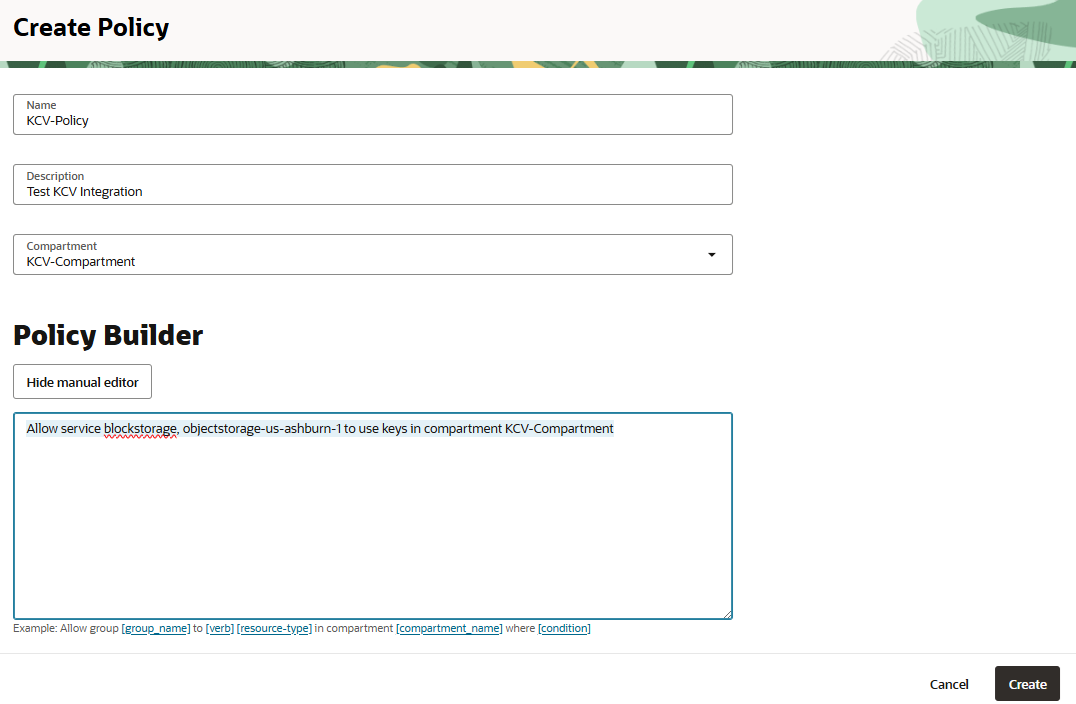
In the Create Policy dialog, enter the following details:
-
For Name, enter the name of the policy.
-
For Description, enter a description for the policy.
-
For Compartment, select the compartment created earlier.
-
Under Policy Builder, select Show Manual Editor and enter the following text:
Allow service blockstorage, objectstorage-us-ashburn-1 to use keys in compartment KCV-Compartmentus-ashburn-1 is the region and KCV-comparment is the compartment created earlier.
-
-
Select Create.
Create a Vault
Now create a vault in the compartment created earlier.
-
In the OCI UI, search for vault.
-
Under Services, select vault.
-
Select Create Vault.
-
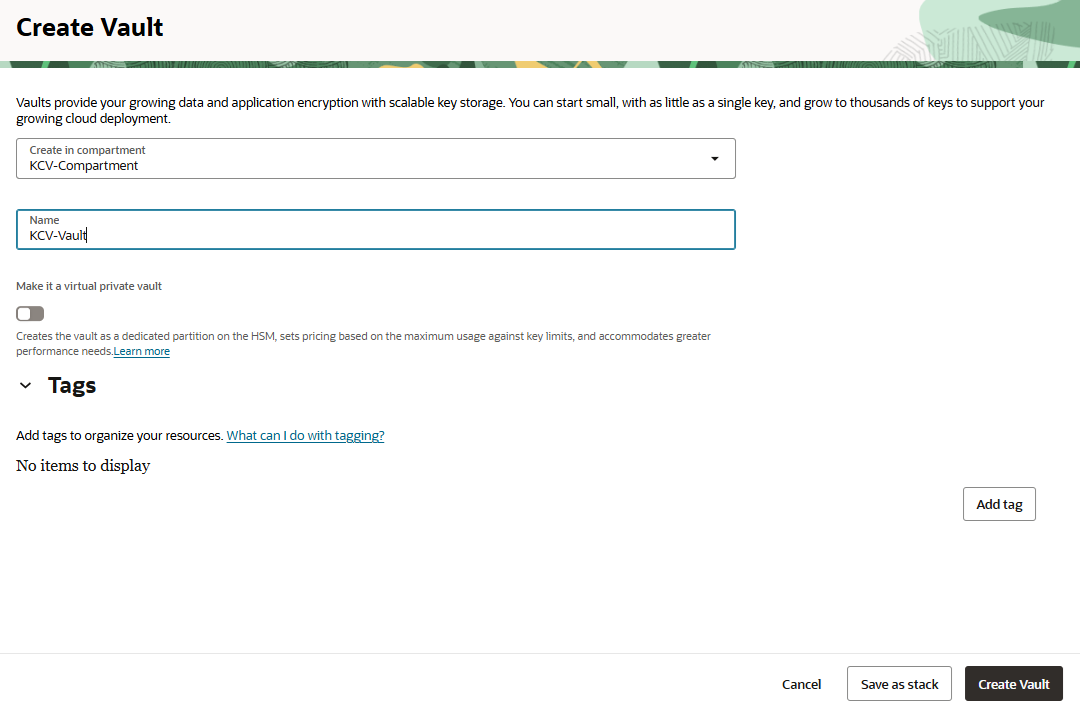
In the Create Vault dialog, enter the following details:
-
For Create in Compartment, select the compartment created earlier.
-
For Name, enter a name.
-
For the other fields, leave the default values.
-
-
Select Create Vault.
-
Select the Master Encryption Keys tab in the vault that you just created.
There are no encryption keys.
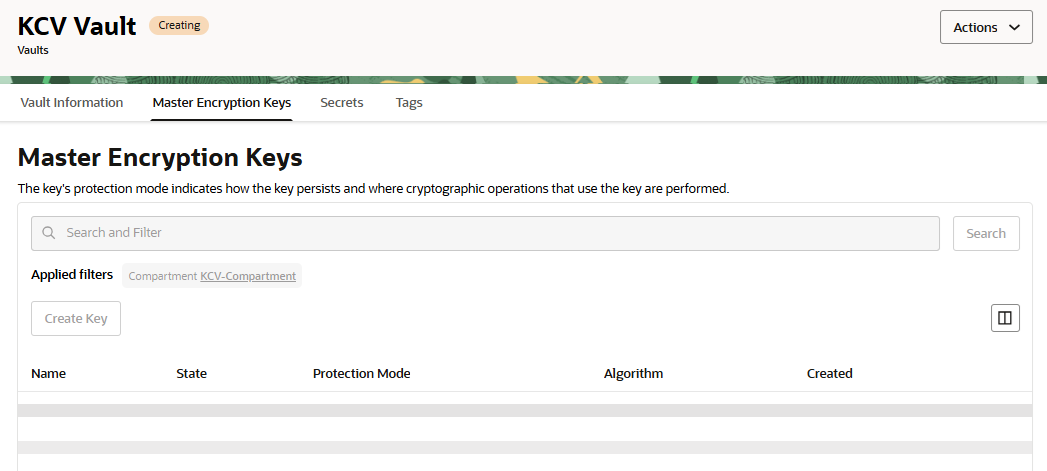
The next step is to use the Entrust Key Management Vault to create the encryption keys for the OCI vault, therefore bringing your own key to the vault.
Create a New KeySet
Back in the Entrust Key Management Vault CloudKey Vault webGUI, create a KeySet.
-
In the top menu bar, select CloudKeys.
-
Select the KeySets tab.
-
Select Create a Key Set Now.
-
In the Choose the Type of Keys in this key set dialog, select OCI Key.
-
In the Create Key Set dialog, in the Details tab, enter the following details:
-
For Name, enter a name for the keyset.
-
For Description, enter a description for the keyset.
-
For Admin Group, select Cloud Admin Group.

-
-
Select Continue.
-
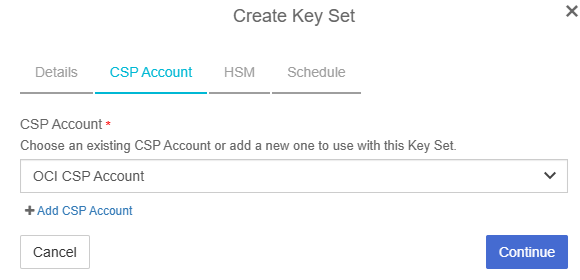
In the Create Key Set dialog, in the CSP Account tab, enter the following details:
-
For CSP Account, select the CSP Account created earlier.
-
-
Select Continue.
-
In the Create Key Set dialog, in the HSM tab:
-
If Key Management Vault has been set with an HSM, select the HSM and then Continue.
-
If not, just select Continue.
-
-
In the Create Key Set dialog, in the Schedule tab, select the rotation schedule.
-
Select Apply.
The KeySet gets created.

-
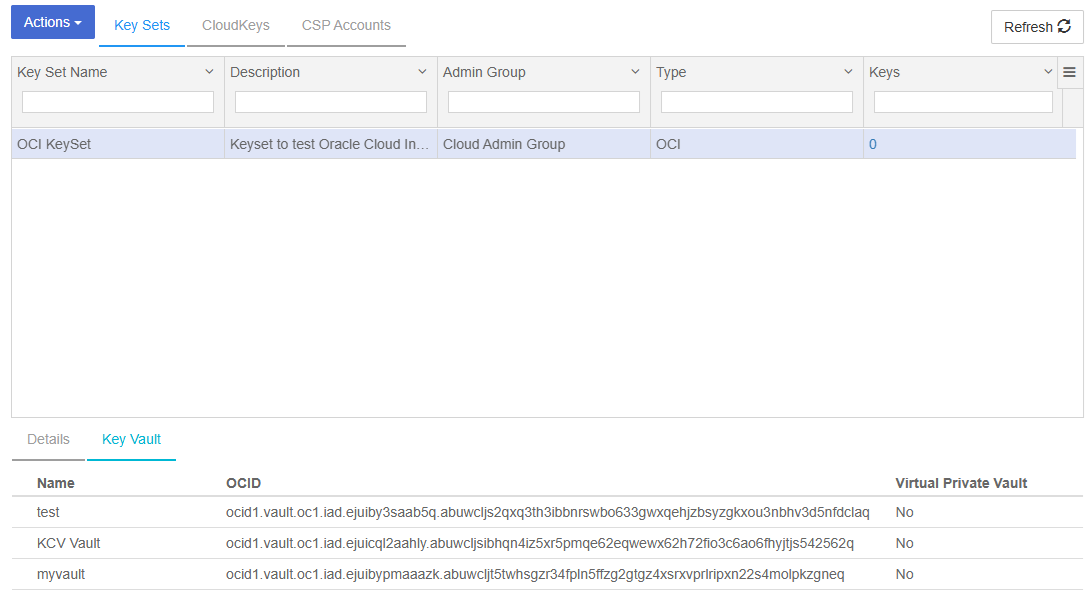
Check whether the KeySet has access to the Vaults in OCI that belong to the CSP Account created earlier.
-
Select the newly created KeySet.
When you select the KeySet, the Details Tab for the KeySet gets displayed.
-
Select the Key Vault Tab to view the vaults.
You should see the OCI Vaults associated with the CSP account in the KeySet. The Vault created earlier should be listed.
Create a master encryption key in the OCI vault
Create a Cloud Key (BYOK) in the OCI vault created earlier. This will be the master encryption key for a storage bucket.
-
Log in to the Entrust Key Management Vault CloudKey Vault webGUI.
-
In the top menu bar, select CloudKeys.
-
Select the CloudKeys tab.
-
For Key Set, select the Key Set created earlier.
-
For Key Vault, select the Vault created earlier in OCI.
-
Under the Actions Menu, select Create CloudKey.
-
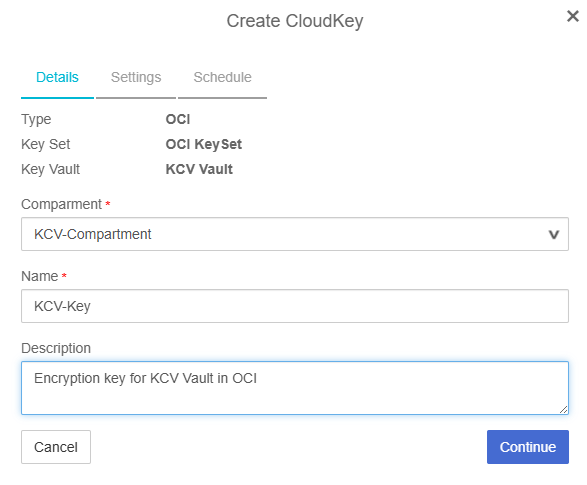
In the Create CloudKey ialog, in the Details tab, enter the following details:
-
The Type, Key Set and Key Vault values should be already set.
-
For Compartment, select the compartment created earlier in OCI.
-
For Name, enter a name for the Key.
-
For Description, enter a description for the key.
-
-
Select Continue.
-
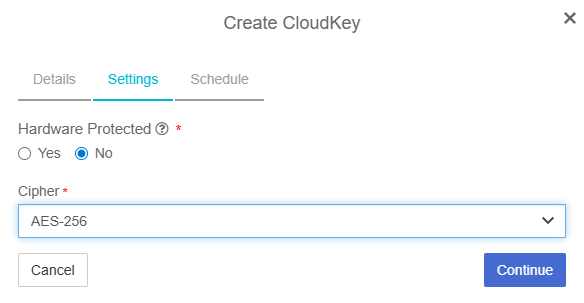
In the Create CloudKey dialog, in the Settings tab:
-
Select a Hardware Protected option.
Hardware Protected controls whether the key is protected by HSM in OCI and not whether the key is protected by the local HSM for the CloudKey vault.
-
Select the Cipher.
-
Select Continue.
-
-
In the Create CloudKey dialog, in the Schedule tab, leave the default values.
-
Select Apply.
The CloudKey gets created.
-
Select the newly created cloudkey to view its details.
If you want to rotate the key, select Rotate.
-
Go back to OCI and check whether the master encryption key has been successfully created in the Vault created earlier.
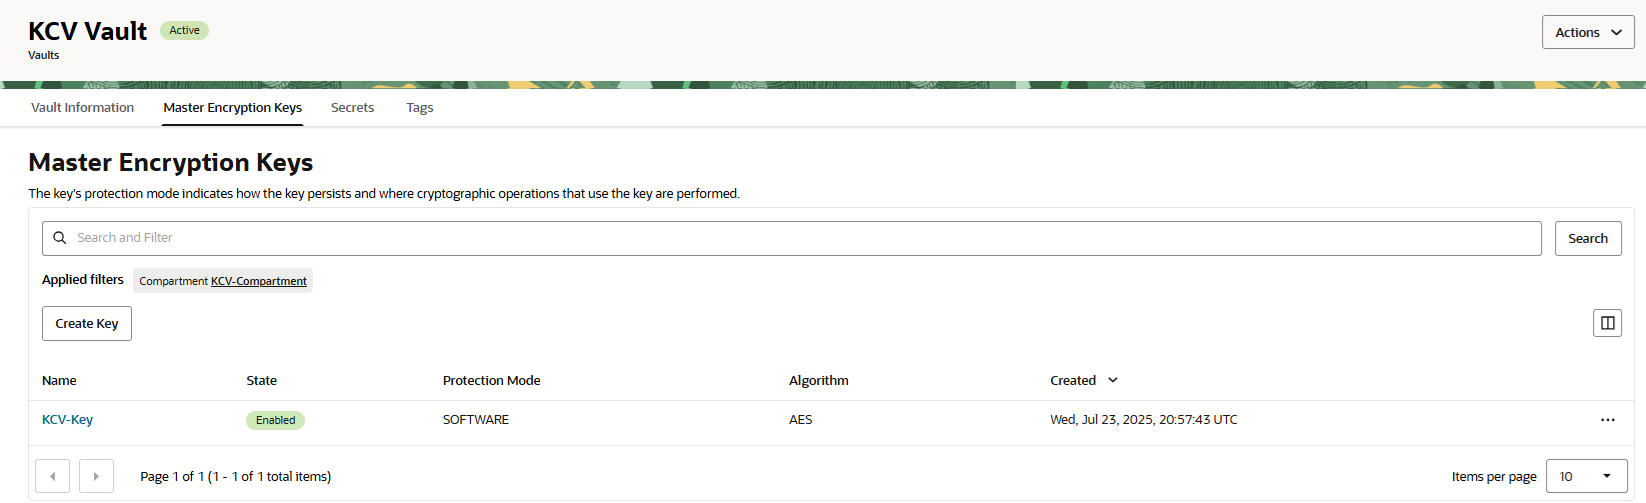
Test the Key Usage
Test the Key usage by creating a bucket in OCI inside the Vault that is protected by the encryption key created earlier. The contents in the bucket will be encrypted by that key. Disable the key in the Entrust Key Management Vault Cloud Key Vault which should prevent access to the bucket contents in OCI.
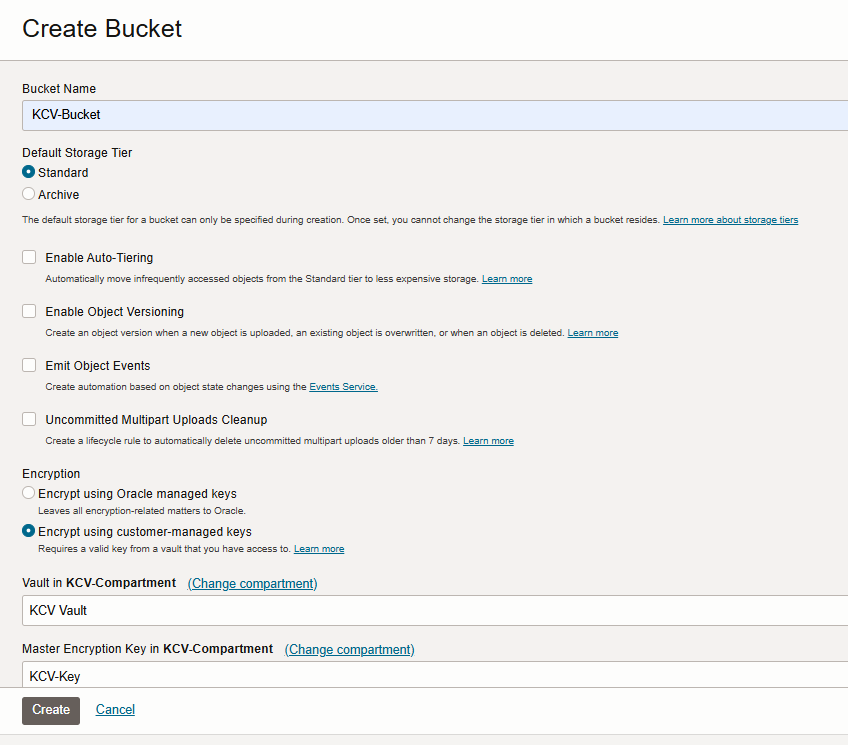
Create the OCI Bucket.
-
In the OCI UI, search for buckets.
-
Under Service, select buckets.
-
Select Create Bucket.
-
In the Create Bucket dialog, enter the following details:
-
For Name, enter a new name or leave the default name.
-
Under Encryption, select Encrypt using customer-managed keys. The dialog prompts for the Vault and Key.
-
Select the Vault and Key created earlier.
-
Leave the rest of the fields with the default values.
-
Select Create.
-
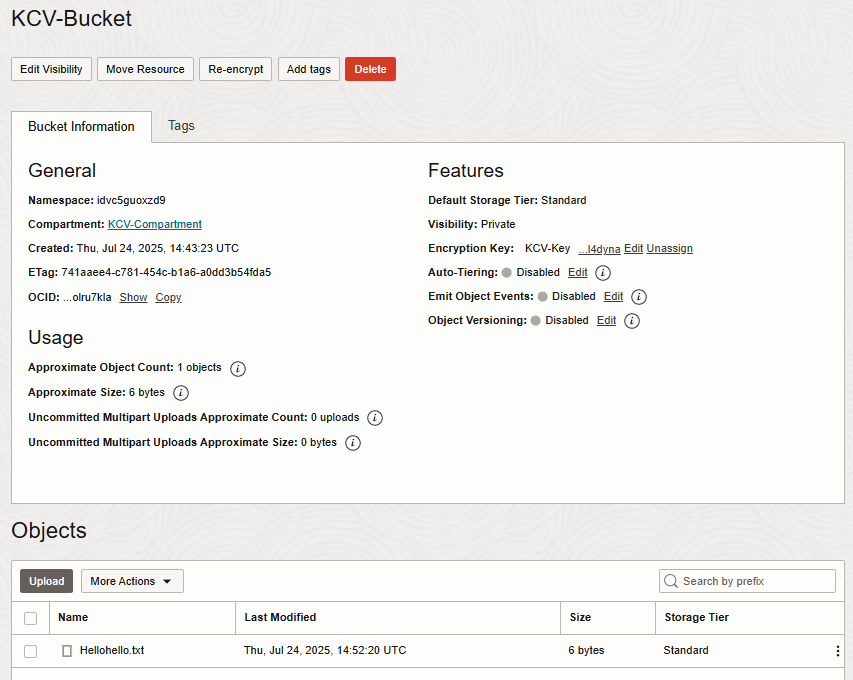
Upload a text file to the newly created bucket.
In the bucket, upload a text file to test the encryption.
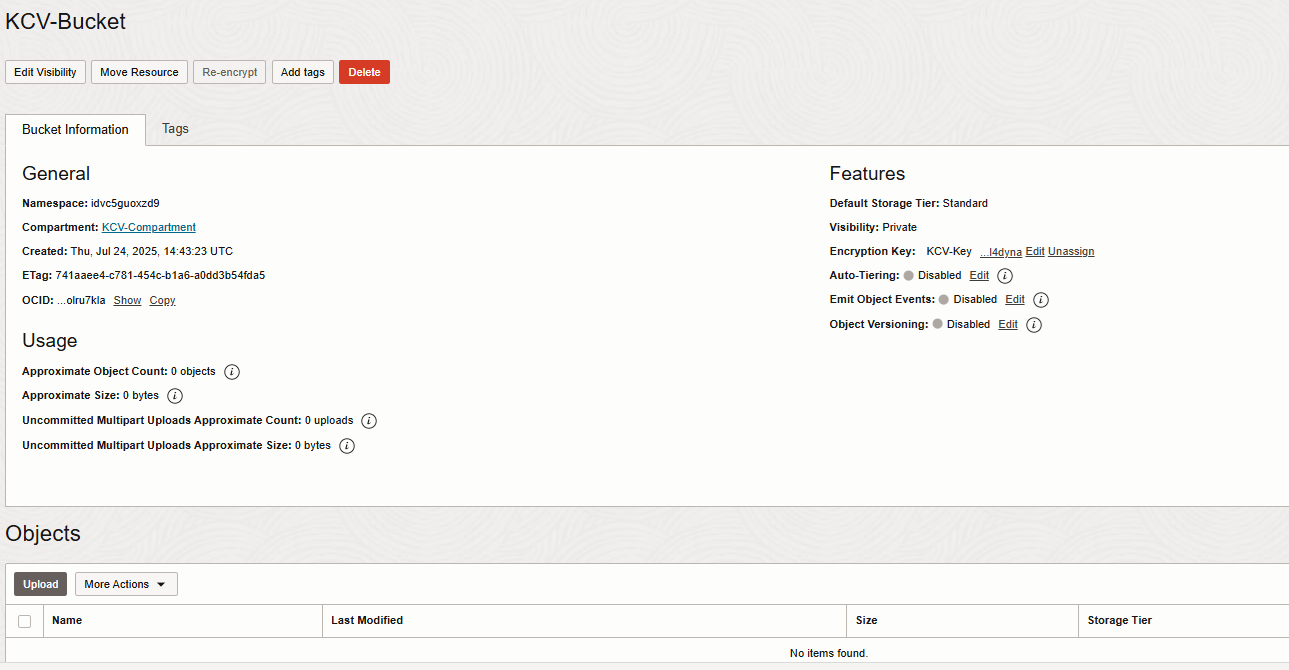
-
Select the newly created bucket.
-
Under Objects in the bucket view, select Upload.
-
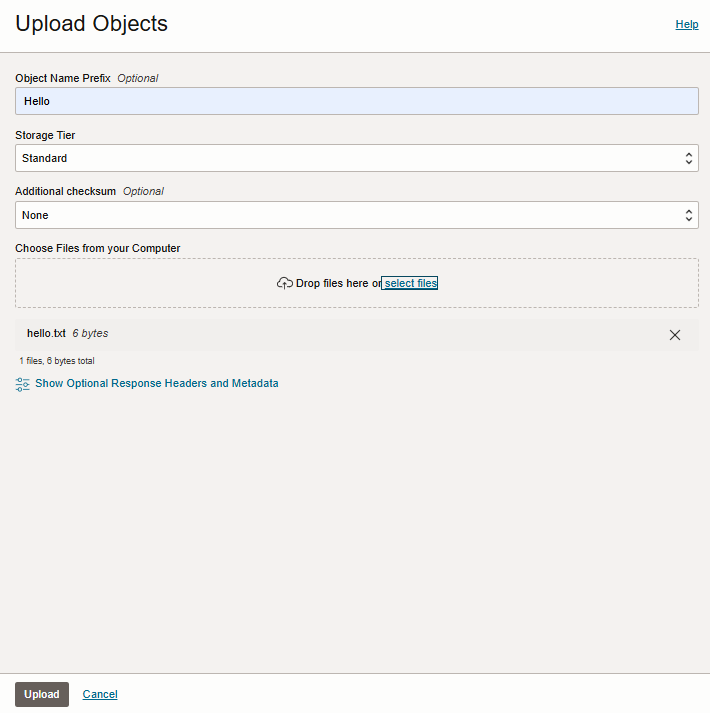
In the Upload Object dialog, upload the text file:
-
Leave the default values for all the fields.
-
In the Choose Files from your computer section, upload a text file.
-
Select Upload.
-
Select Close.
-
You should see the uploaded object in the list.
Disable the Key in the Entrust Key Management Vault
Now if you disable the key in the Entrust Key Management Vault, you can not access the objects in the OCI Vault.
In the Entrust Key Management Vault CloudKey Vault:
-
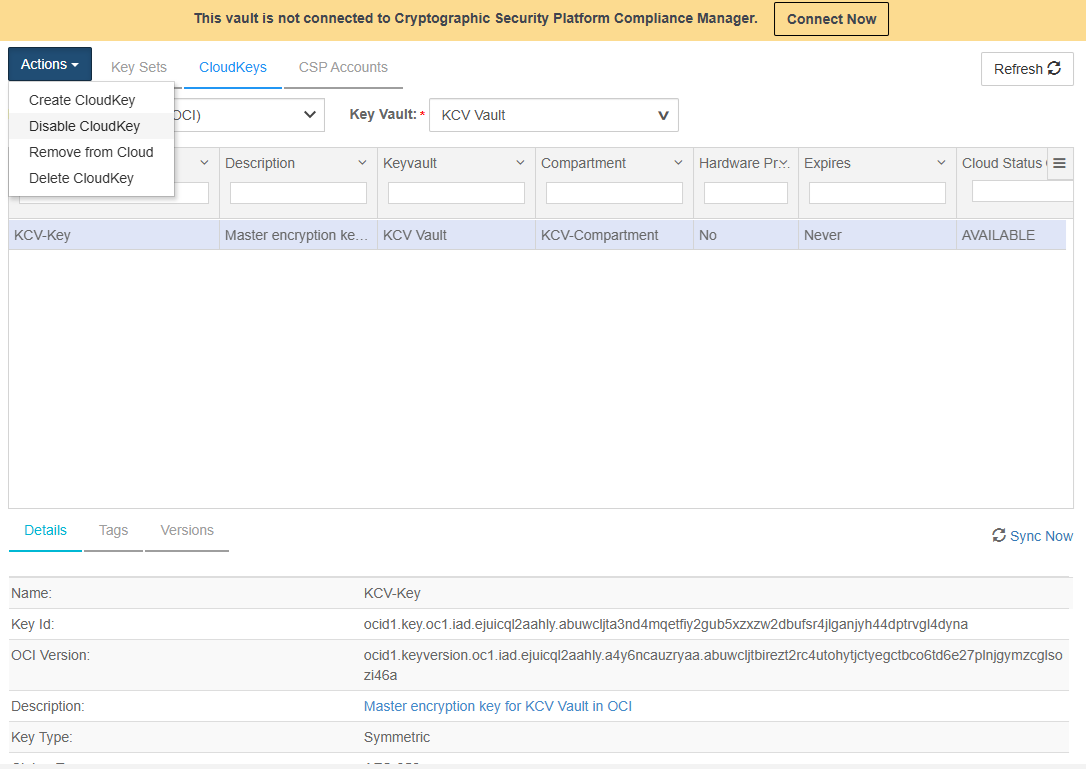
In the top menu bar, click CloudKeys.
-
Select the CloudKeys tab.
-
For Key Set, select the Key Set created earlier.
-
For Key Vault, select the Vault created earlier in OCI.
-
Select the key.
-
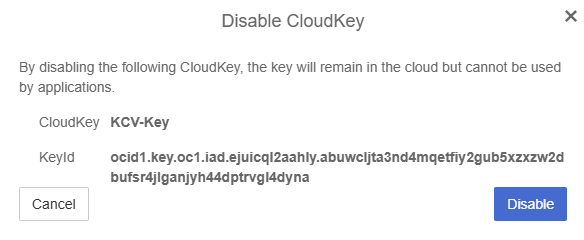
In the Actions menu, select Disable CloudKey.
-
In the Disable CloudKey dialog, select Disable.
-
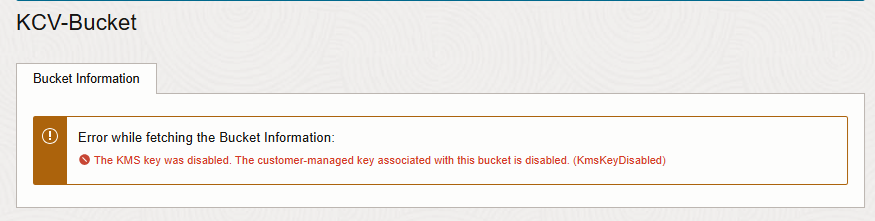
Test whether you can access the bucket. You should be denied access.
-
Enable the CloudKey again in the Key Management Vault CloudKey Vault.
Select Actions > Enable CloudKey.
Once enabled, the bucket can be viewed again in OCI.