Procedures
Prerequisites
Before integrating Entrust KeyControl Vault server and AWS External Key Store (XKS), ensure the following:
-
Entrust KeyControl Vault server is deployed and configured. For details, see KeyControl Installation.
-
Entrust KeyControl Compliance Manager is deployed and configured.
For this integration, the KeyControl Vault servers were deployed using AWS EC2 instances. To learn more about deploying KeyControl Vault in Amazon Web Services, refer to Creating KC Cluster AWS.
However, KeyControl Vault servers can also be deployed outside of AWS EC2, provided they fulfill the requirements outlined in [requirements].
Adding an Elastic Load Balancer
After cluster set-up is complete, you must use AWS elastic load balancing for the KeyControl load balancing.
For more information on AWS ELB, refer to AWS ELB Documentation.
Configure target group
To configure the target group:
-
Sign in the Amazon EC2 console.
-
In the navigation pane, under Load Balancing, select Target Groups.
-
Select Create target group.
-
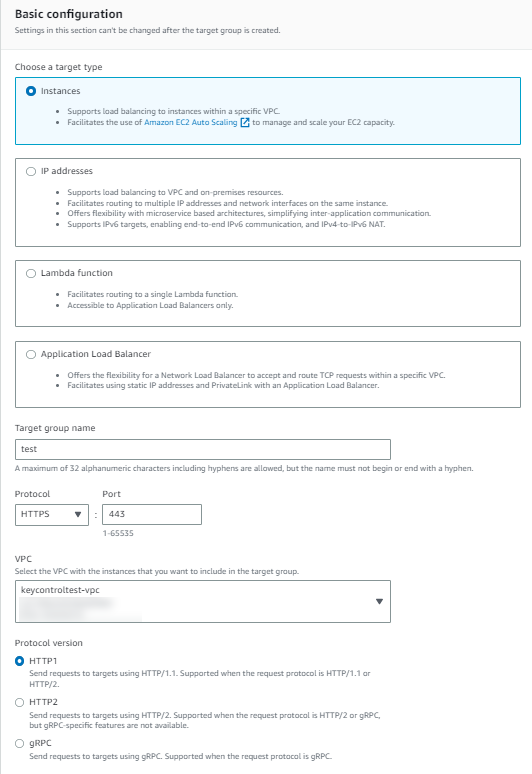
Under Basic configuration:
-
Select Instances as target type.
-
For Target group name, enter a name for the new target group.
-
For Protocol, select HTTPS.
-
For Port, select 443.
-
Select the VPC containing your instances.
-
For Protocol version, retain the default.
-
-
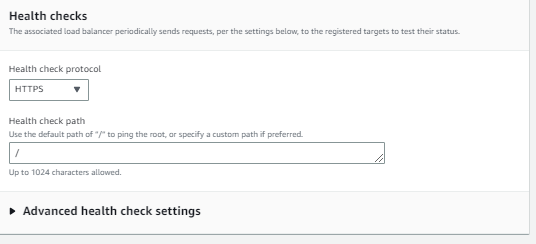
Under Health checks:
-
For Health check protocol, select HTTPS.
-
Retain the default settings for other properties.
-
-
Select Next.
-
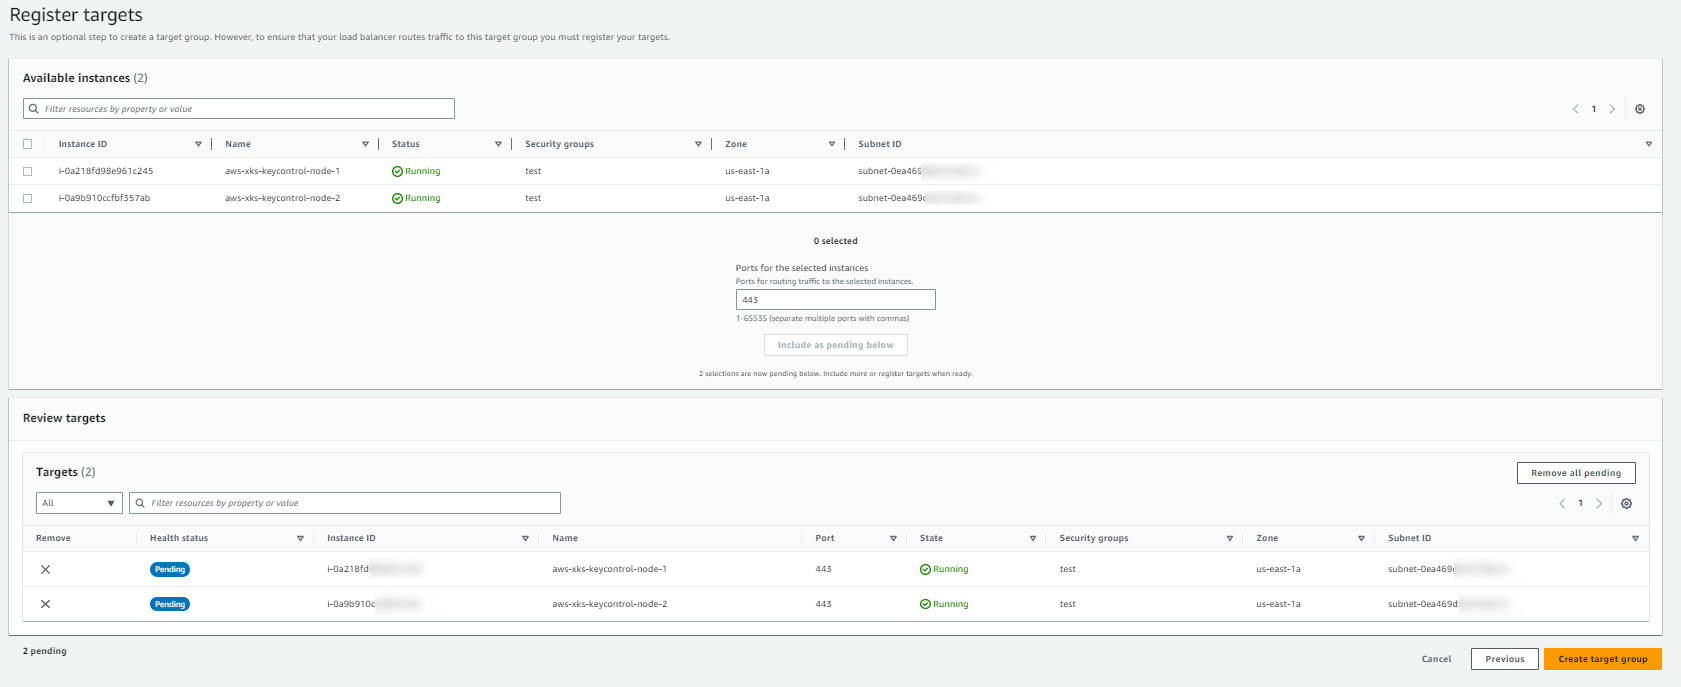
On the Register Targets page, complete the following steps. This is an optional step for creating the load balancer. However, you must register this target if you want to test your load balancer and ensure that it is routing traffic to this target.
-
For Available instances, select the two KeyControl instances.
-
For Port for the selected instances, enter 443, and select Include as pending below.
-
Select Create target group.
-
Create an Elastic Load Balancer
To create an Elastic Load Balancer:
-
Sign in to the Amazon EC2 console.
-
On the navigation bar, select a region for your load balancer. You must select the same region that you used for your EC2 instances.
-
In the navigation pane, under Load Balancing, select Load Balancers.
-
Select Create Load Balancer.
-
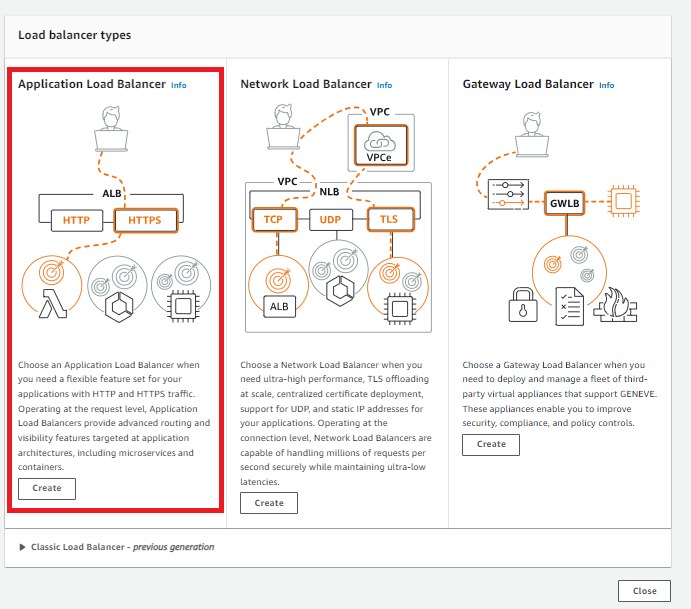
Select Application Load Balancer, select Create.
-
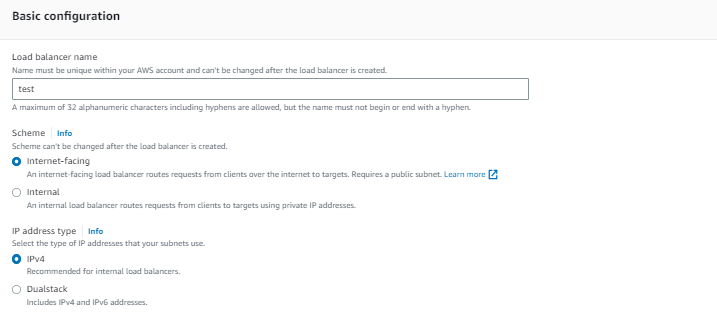
Under Basic configuration:
-
For Load balancer name, enter a name for your load balancer.
-
For Scheme, select Internet-facing.
-
Retain the IP address type default.
-
-
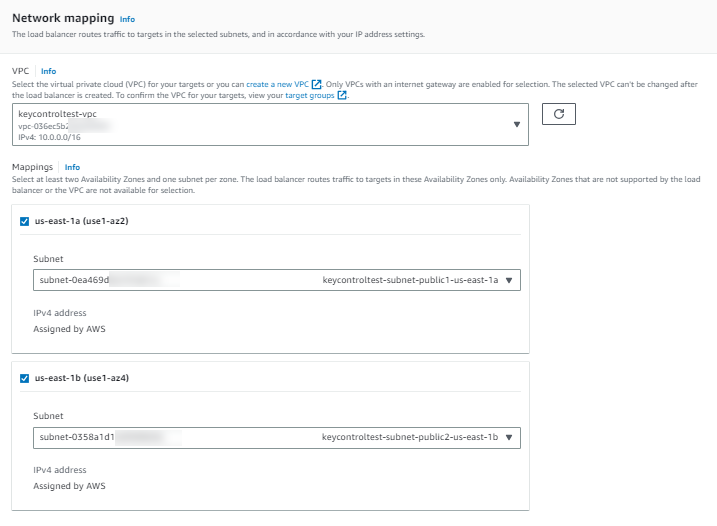
Under Network mapping:
-
For VPC, select the VPC that you used for your EC2 instances.
-
For Mappings, select at least two Availability Zones and one subnet per zone.
-
For each Availability Zone that you used to launch your EC2 instances, select the Availability Zone and then select one public subnet for that Availability Zone.
-
You must select at least one Availability Zone that was used when launching your instances.
-
-
Under Security groups:
-
For Security group, select the default security group for the VPC that you selected in the previous step. Alternatively, you can select a different security group.
-
Ensure that the security group includes rules that allow the load balancer to communicate with registered targets on both the listener port and the health check port.
-
You must include the VPC source in the inbound rule to allow access to all ports or the port you are using as a listener.

-
-
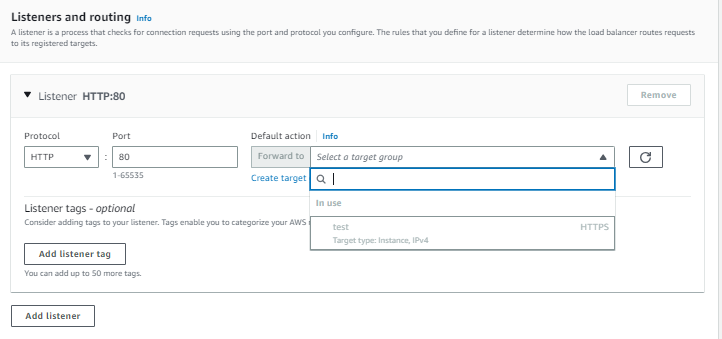
Under Listeners and routing:
-
For Protocol, retain the default setting.
-
For Port, retain the default setting.
-
For Default action, select the Forward to action and select the target group that you created and registered.
-
Keep the Add-on services and Load balancer tags unchecked and left as default.
This configures a listener that accepts HTTP traffic on port 80 and forwards traffic to the selected target group by default.
-
-
Review your configuration and select Create load balancer. A few default attributes are applied to your load balancer during creation. You can view and edit them after creating the load balancer.
-
Select Create load balancer.
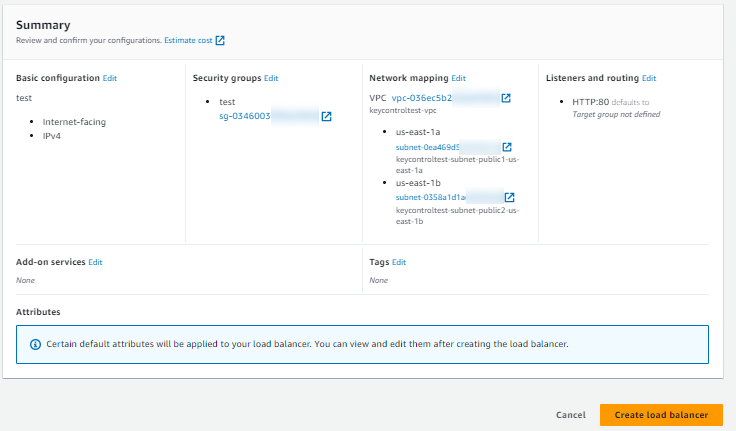
After you receive the notification confirming the successful creation of your load balancer, follow the steps below to verify the status of your instances and test the load balancer.

-
After you are notified that your load balancer was created successfully, select Close.
-
In the navigation pane, under Load Balancing, select Target Groups.
-
Select the newly created target group.
-
Select Targets and verify that your instances are ready.
If the status of an instance is
Initial, the instance is either in the process of being registered or has not passed the minimum number of health checks to be considered healthy. Wait until the status of at least one instance isHealthy. For example:
Configure certificates and DNS
For the successful set-up of AWS External Key Store (XKS), note that the DNS record and TLS certificate relate to the Fully Qualified Domain Name (FQDN) of the load-balanced endpoint utilized for accessing the service. This is distinct from the KeyControl instances.
Ensure the KeyControl Vault server possesses a publicly accessible IP address and that a DNS record is in place for the designated common name within the public DNS server.
| Amazon recommends a round-trip time latency of under 35 milliseconds between the AWS region and the KeyControl. |
You must obtain a TLS certificate issued by a public certificate authority supported for external key stores. For a list, see https://github.com/aws/aws-kms-xksproxy-api-spec/blob/main/TrustedCertificateAuthorities
To ensure seamless access across the cluster nodes, you must install the TLS certificate on all nodes of the cluster, especially if users plan to access the cluster through other nodes. If an Elastic Load Balancer (ELB) is part of the set-up, the certificate handling process will differ. When using an ELB, the TLS certificate must be managed according to ELB requirements.
-
In the KeyControl Appliance Management:
-
Navigate to Cluster > Servers.
-
Select the server to install the certificate.
-
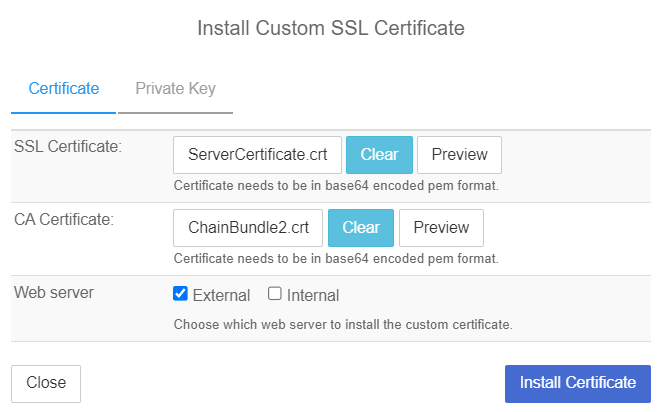
Select Actions > Install Certificate. The Install Custom SSL Certificate dialog appears.
-
Locate and select the SSL Certificate file.
-
Locate and select the CA certificate chain file.
-
Select External for the Web server.
-
Select Install Certificate.
-
-
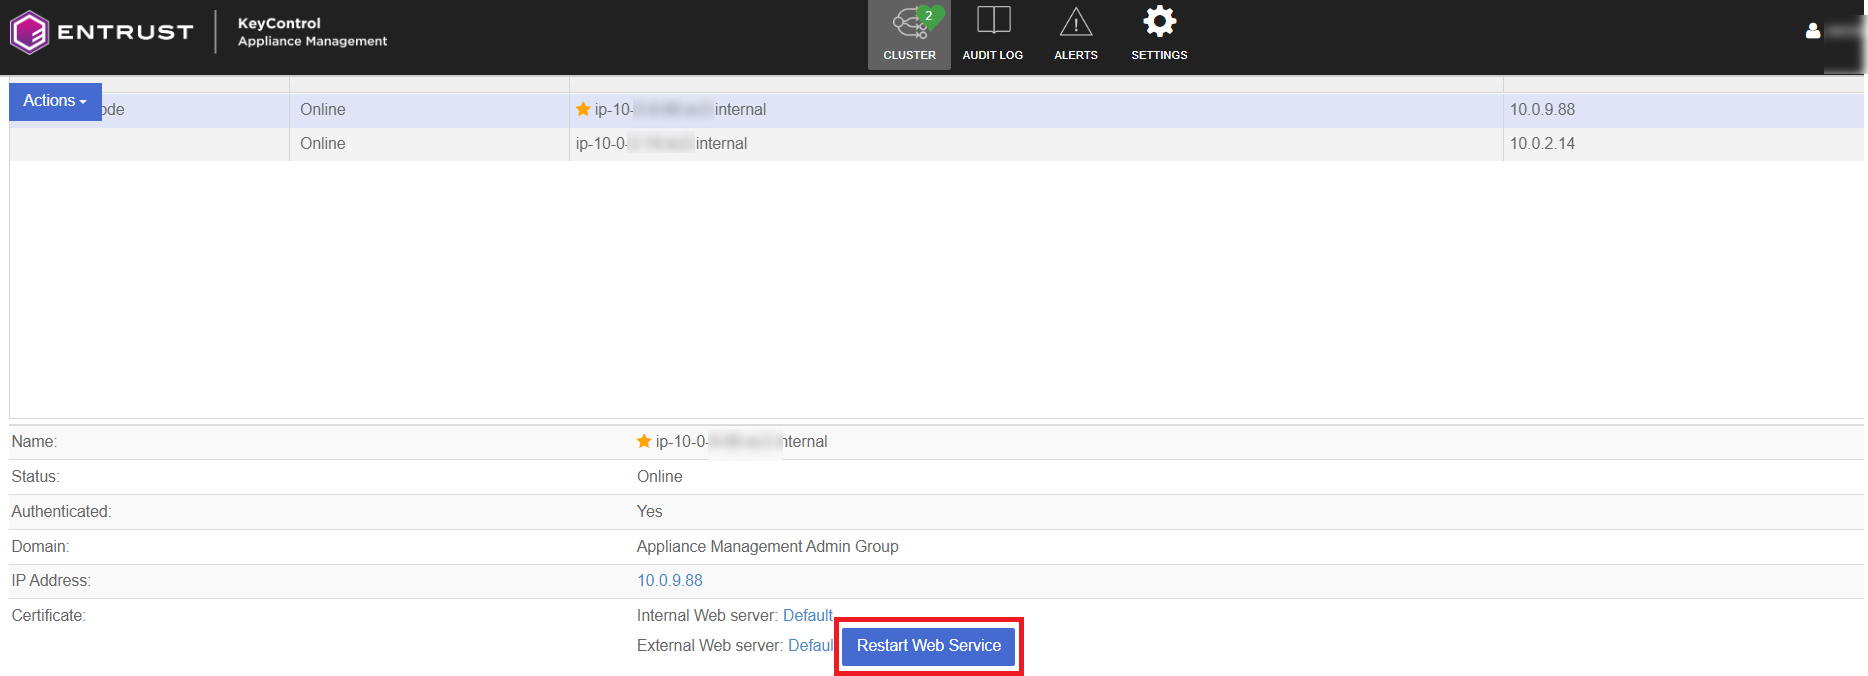
After installation, restart the Web service
-
Confirm the installation. The External Web server will now show as
Customfor the certificate.
-
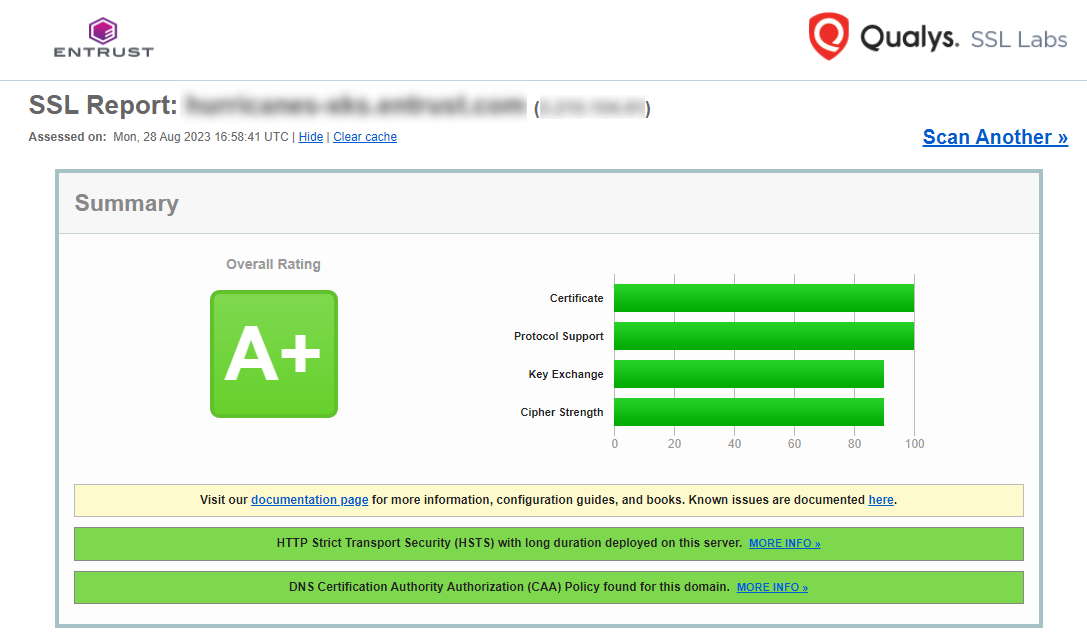
You can validate the certificate using https://entrust.ssllabs.com/ or a similar tool. For example:
If you are not able to verify the server hostname, ensure that any firewalls between AWS KMS and the external key store proxy allow traffic to and from port 443 on the proxy.
Key Administrators - AWS IAM user
To enable the integration, you must designate an IAM user as a Key Administrator. This user is required to generate an access key that will be used in a later step.
This user must have permissions to manage and use the KMS key for cryptographic operations.
-
Sign in to the AWS Management Console.
-
Search for the Identity and Access Management (IAM) service and select it.
-
In the IAM console, select Access Management in the left tab and then select Users.
-
Create a new user or use an existing user to generate an access key. In this example integration, a new user named
xks-useris created as the Key Administrator.
-
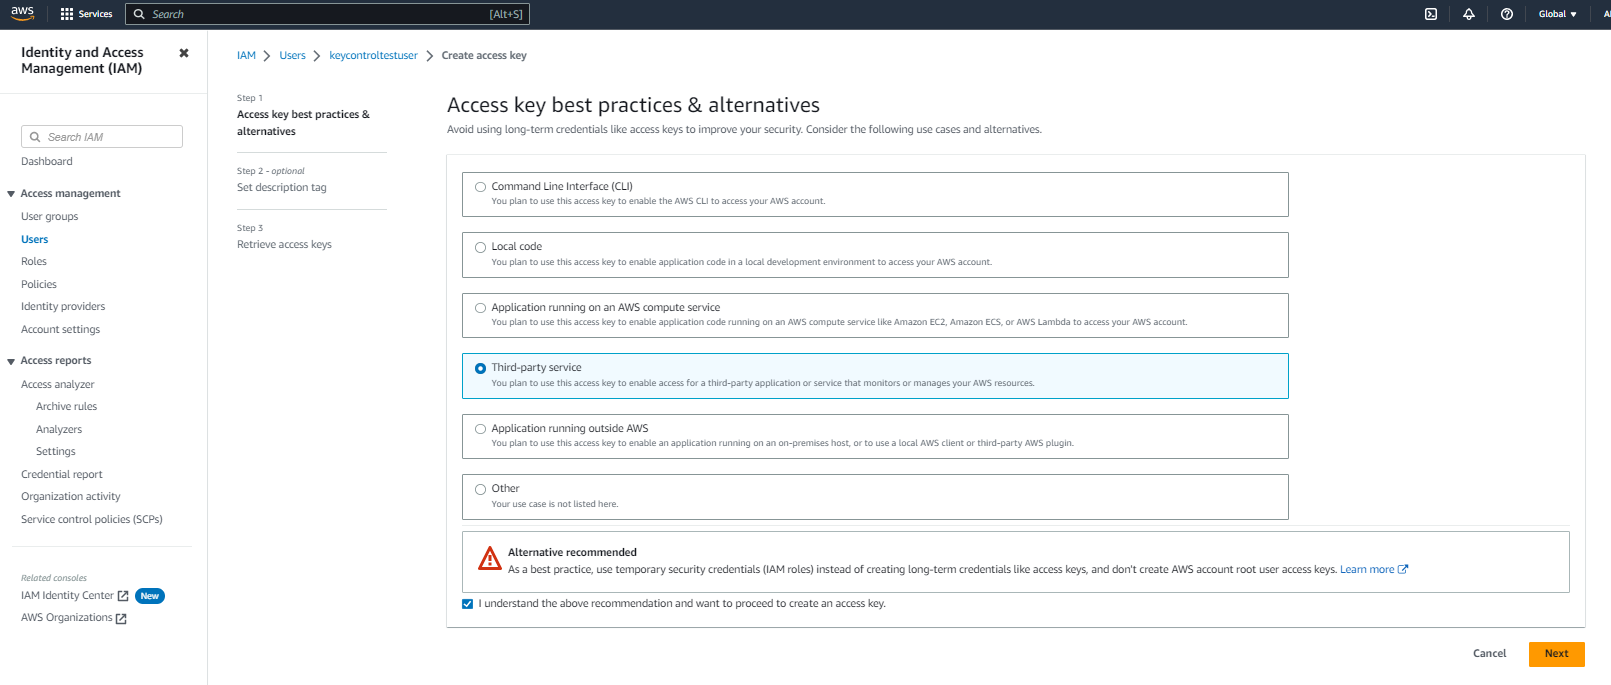
In the user settings, select Create access key and select third-party service.
-
Create the access key.
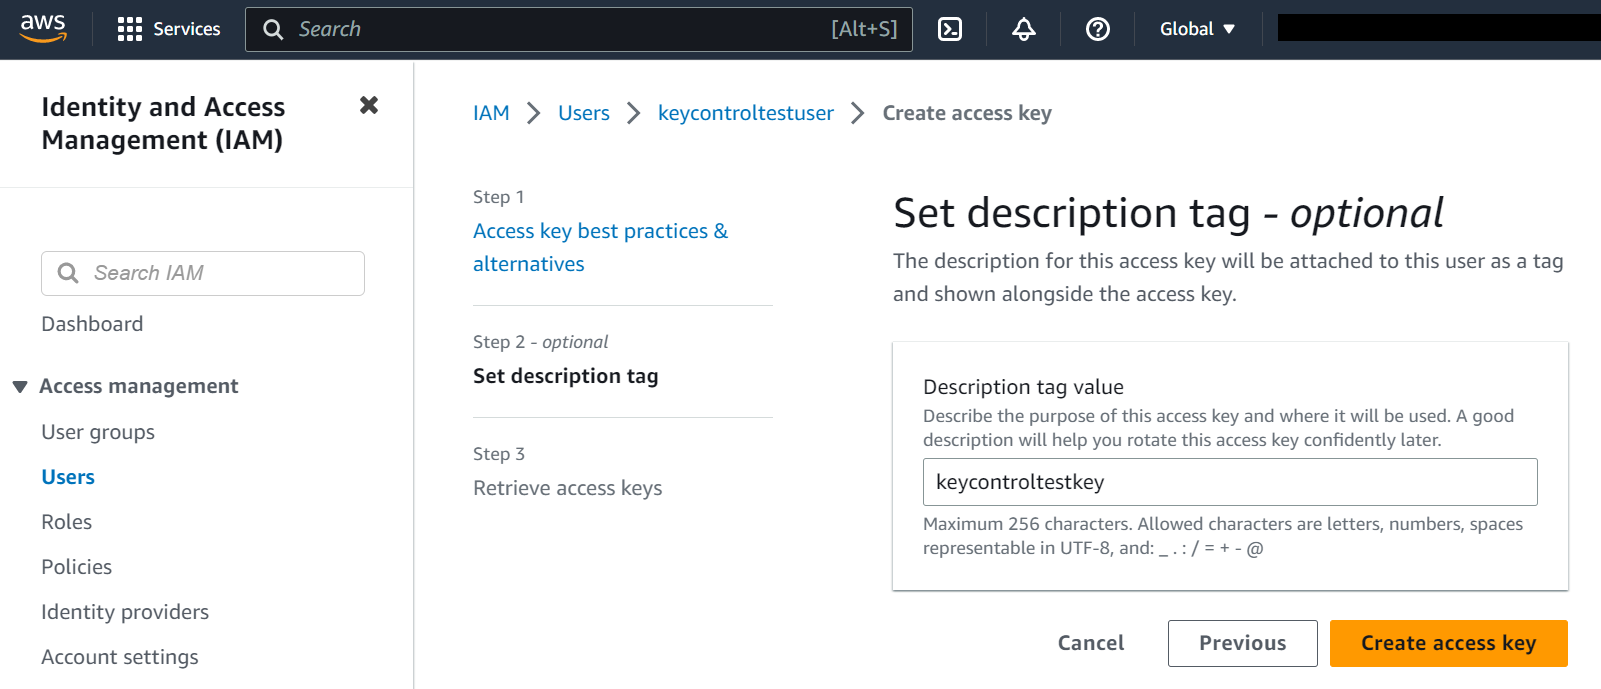
Ensure that you securely store the Access ID and Secret Access Key, as they are required for accessing and managing your AWS resources.
Create a Cloud Key Management Vault
The KeyControl Vault appliance supports the following types of vaults:
-
Cloud Key Management - Vault for cloud keys such as BYOK and HYOK.
-
KMIP Vault - Vault for KMIP Objects.
-
PASM - Vault for objects such as passwords, files, SSH keys, and so on.
-
Database - Vault for database keys.
-
Tokenization - Vault for tokenization policies.
-
VM Encryption - Vault for encrypting VMs.
To create a Cloud Key Management Vault:
-
Sign in to the KeyControl Vault Server Appliance Manager.
-
Open the drop-down menu and select Vault Management.
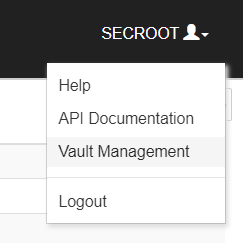
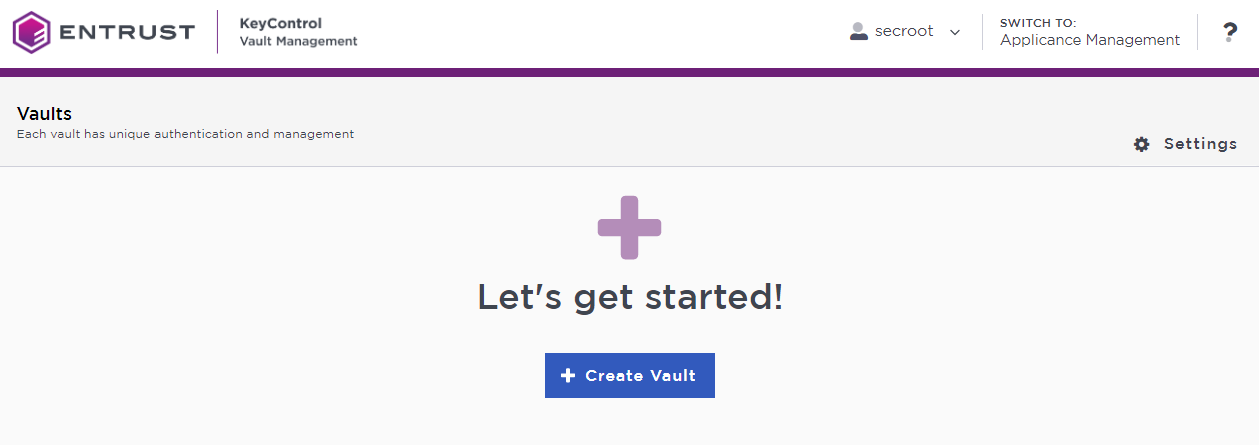
The KeyControl Vault Management interface appears.
-
Select Create Vault.
The Create Vault page appears.
-
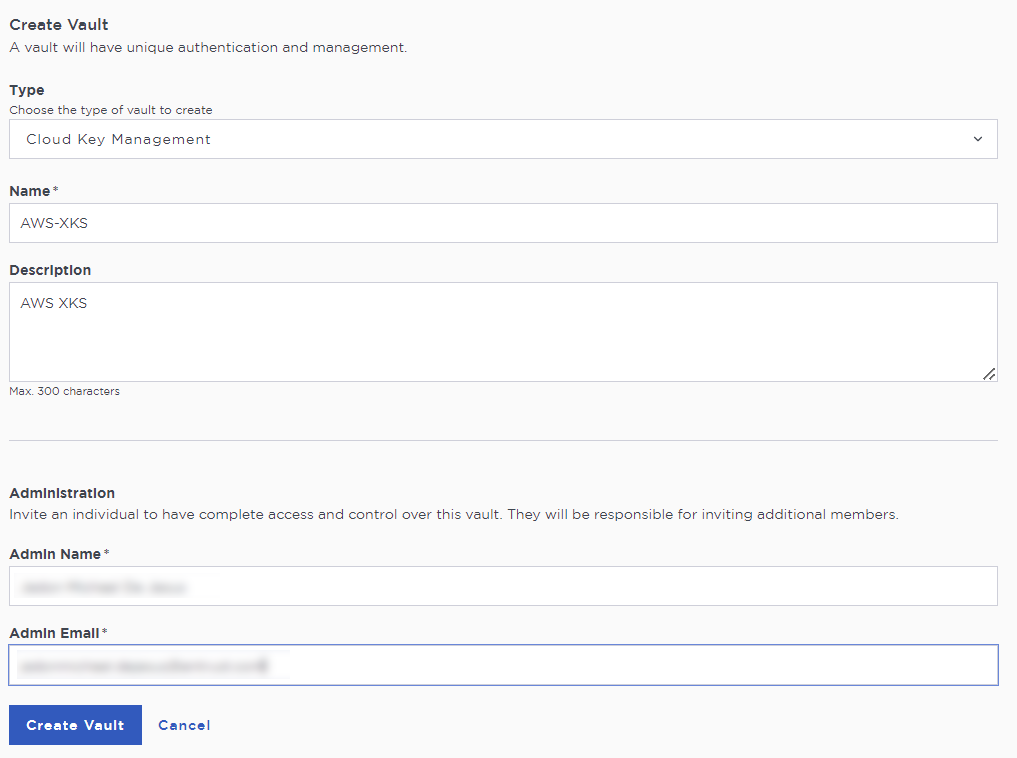
On the Create Vault page:
-
For Type, select Cloud Key Management.
-
Enter a Name for the vault.
-
Provide a Description for the vault.
-
-
Under Administration:
-
Enter the Admin Name who will be responsible for the vault.
-
Enter a valid Admin Email address.
-
-
Select Create Vault.
If you set up an administrator email address when you logged in for the first time, a temporary password is mailed to that address. This is the password you must use when you sign in for the first time to Vaults space in KeyControl.
If you did not set up an email configuration when you logged in for the first time, a password is shown in the Vault Details when you create a Vault for the first time. You must make a note of the password at this time, as it will not be included in the Vault Details afterwards.
-
Select Close.
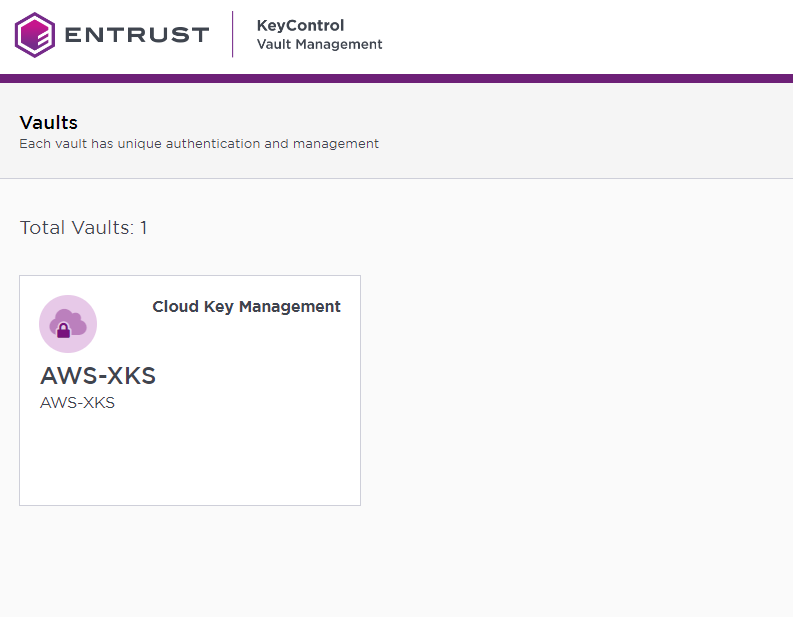
The newly created vault is displayed in the Vaults dashboard.
-
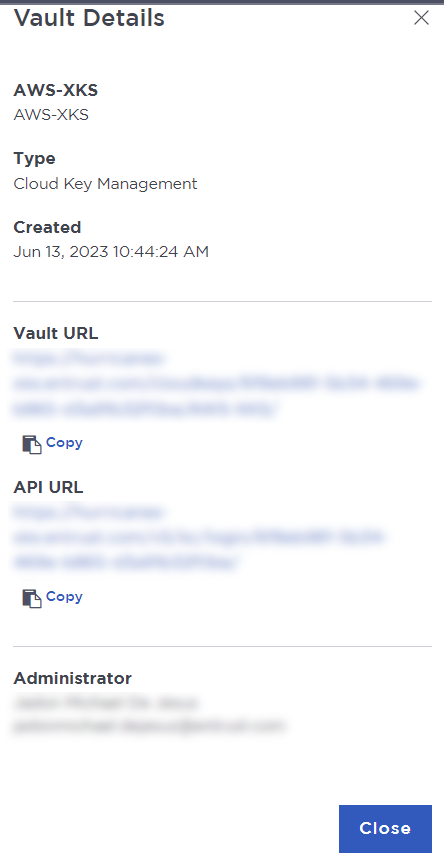
To view the details of a vault, hover over the vault and select View Details.
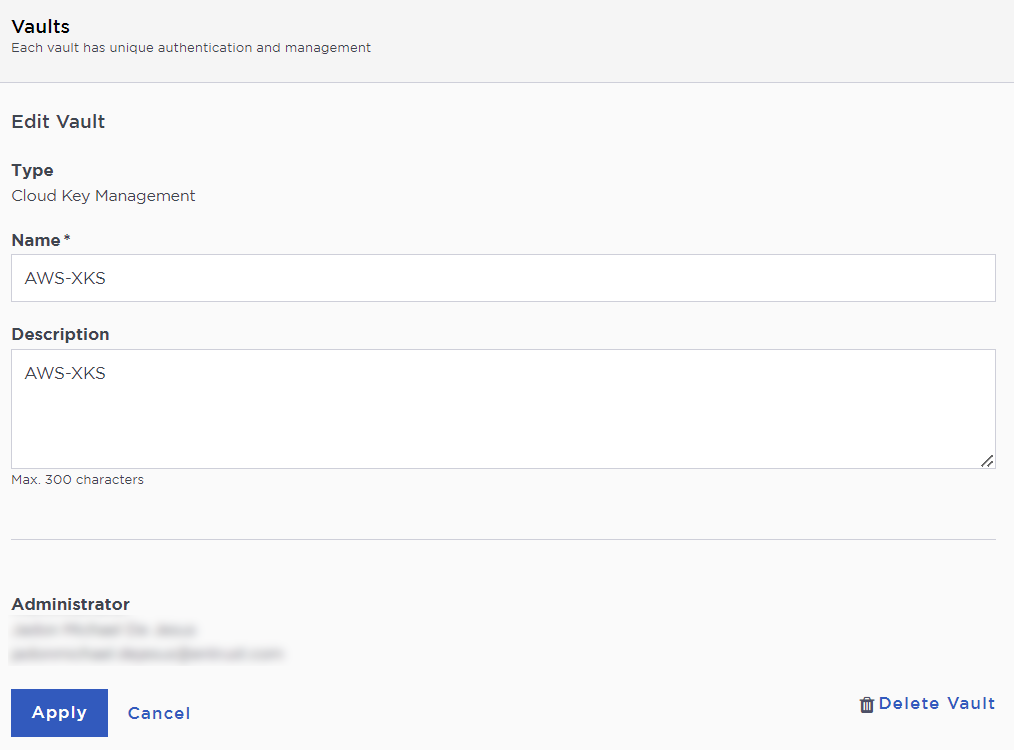
To edit the details of a vault:
-
Hover over the vault and select Edit.
-
Make the required changes and select Apply.
Create a CSP Account in the Cloud Key Management Vault
To create a CSP Account in the Cloud Key Management Vault:
-
Sign into the newly created vault.
-
Select Cloud Keys > CSP Accounts > Actions > Add CSP Account.

The Add CSP Account dialog appears.
-
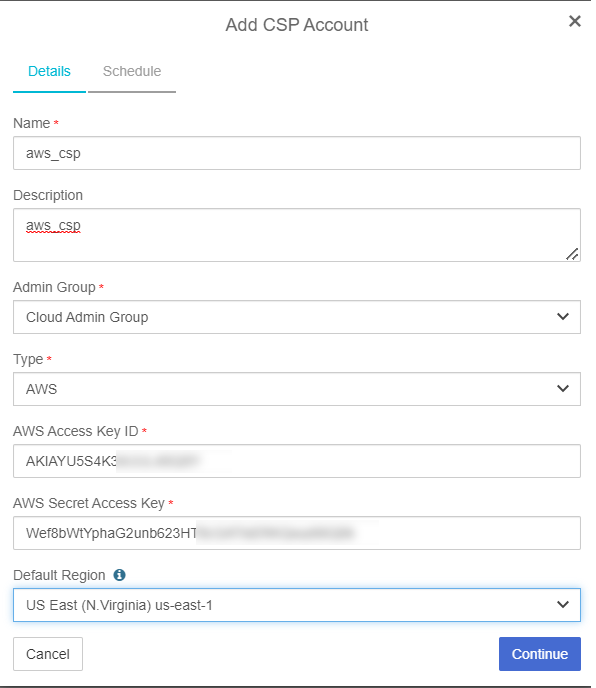
In the Details page:
-
For Name, enter a name for the CSP account.
-
Add a Description.
-
For Admin Group select Cloud Admin Group.
-
For Type select AWS.
-
Enter the AWS Access Key ID and AWS Secret Access Key from earlier.
-
Select the target region as the default region.
-
Select Continue.
-
-
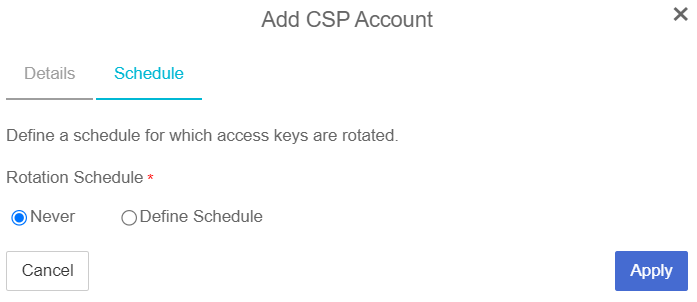
In the Schedule page:
-
Select the required Rotation Schedule.
-
Select Apply.
-
Create the Key Set
To create the Key Set:
-
Under CloudKeys, select Key Sets > Create a Key Set Now.

-
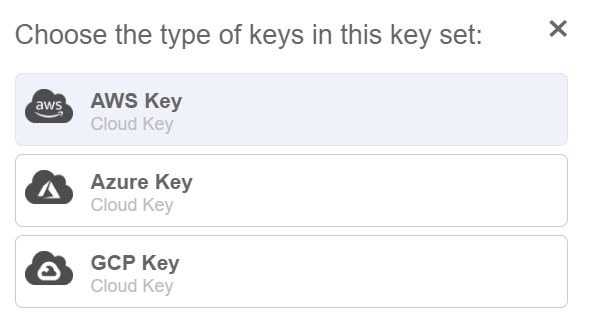
Select AWS Key for the type of keys in key set.
The Create Key Set dialog appears.
-
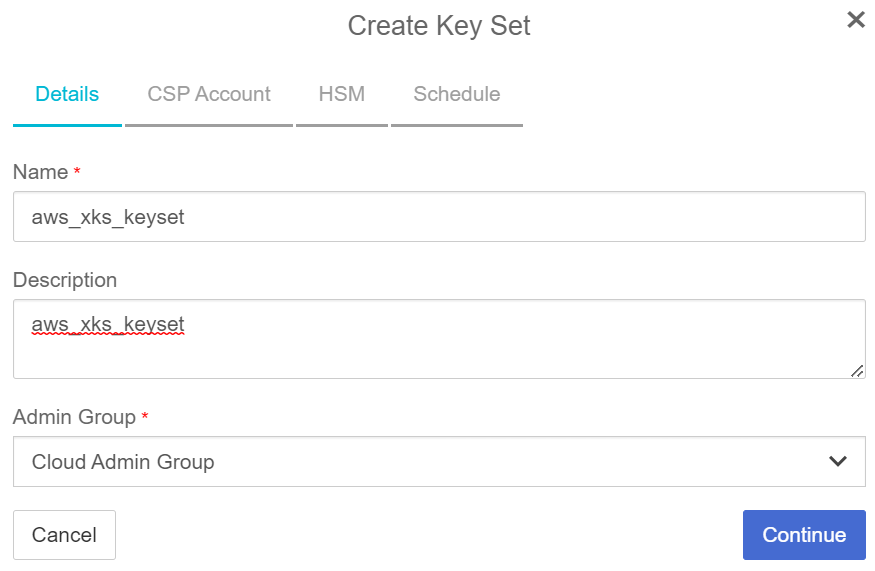
In the Details page:
-
Enter a Name.
-
Enter a Description.
-
For Admin Group, select Cloud Admin Group.
-
Select Continue.
-
-
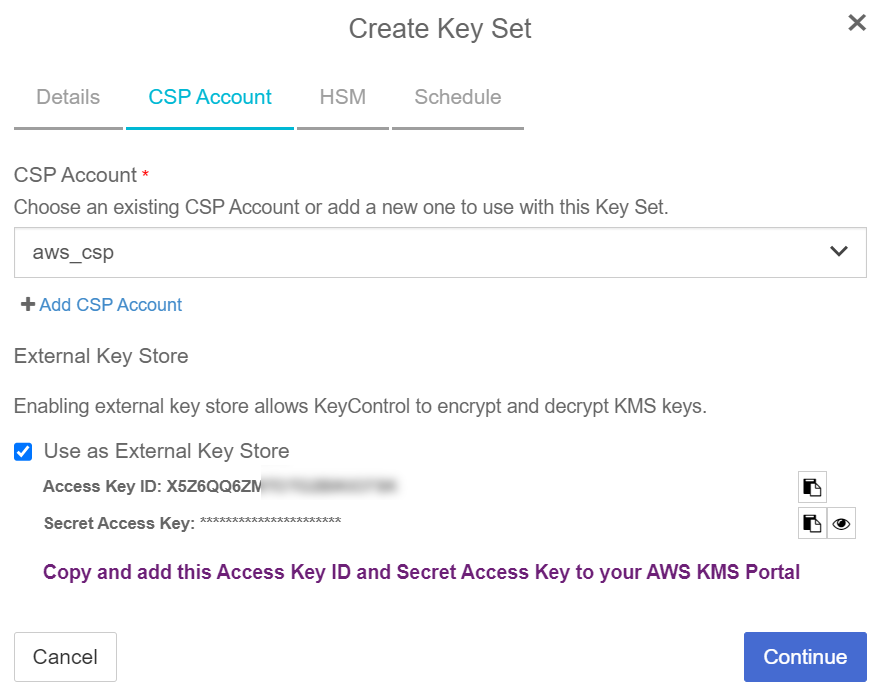
In the CSP Account page:
-
For CSP Account, select the
aws_cspaccount created earlier. -
Select Use as External Key Store.
-
Make a note of the XKS credentials, as these are required later.
-
Select Continue.
-
-
In the HSM page:
-
Optionally select Enable HSM.
-
Select Continue.
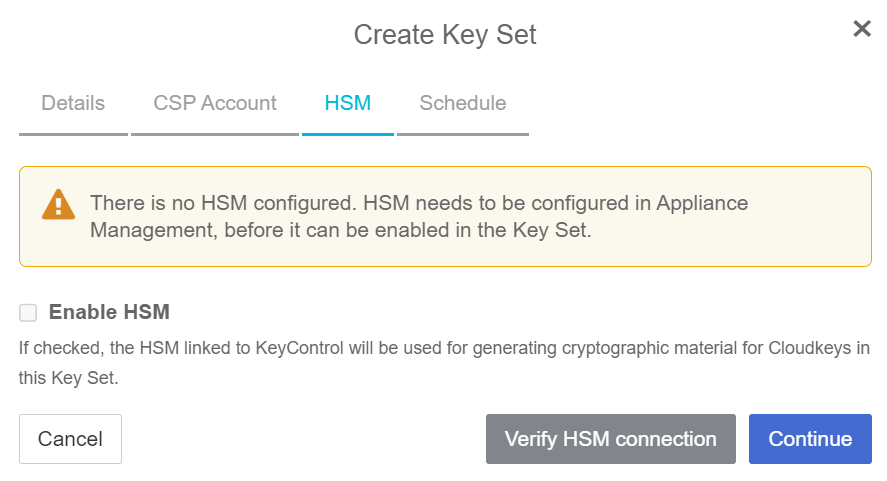
To set up an HSM linked to KeyControl, follow the installation and set-up instructions in the Entrust KeyControl nShield HSM Integration Guide.
-
-
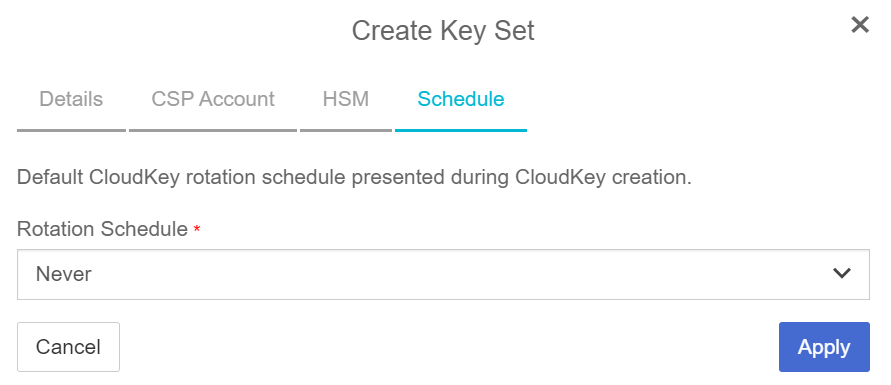
In the Schedule page:
-
For Rotation Schedule, select your required CloudKey rotation.
-
Select Apply.
-
Create an External Key Store in AWS
To create an External Key Store in AWS:
-
Sign in to the AWS console and navigate to Key Management Service (KMS).
-
In the left panel, select Custom key stores > External key stores.
-
For Key store name, enter the required name.
-
Select Create external key store.

The Create external key store page appears.
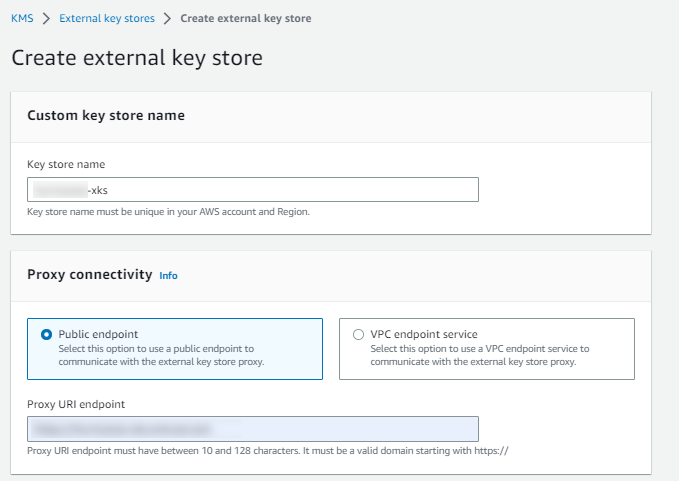
-
Under Custom key store name, provide a descriptive name for the external key store.
-
Under Proxy connectivity:
-
Select Public endpoint.
-
For Proxy URI endpoint, enter the Proxy URI endpoint in the following format:
https://<FQDN of Load Balanced Endpoint>Substitute
<FQDN of Load Balanced Endpoint>with the fully qualified domain name of the load-balanced endpoint utilized for accessing the service, distinct from any of the KeyControl instances.
-
-
Under Proxy configuration:
-
Leave Proxy URI path prefix empty.
-
For Proxy credential: Access key ID, enter the previously-saved proxy access key ID.
-
For Proxy credential: Secret access key, enter the previously-saved proxy secret access key.
-
Select Create external key store.
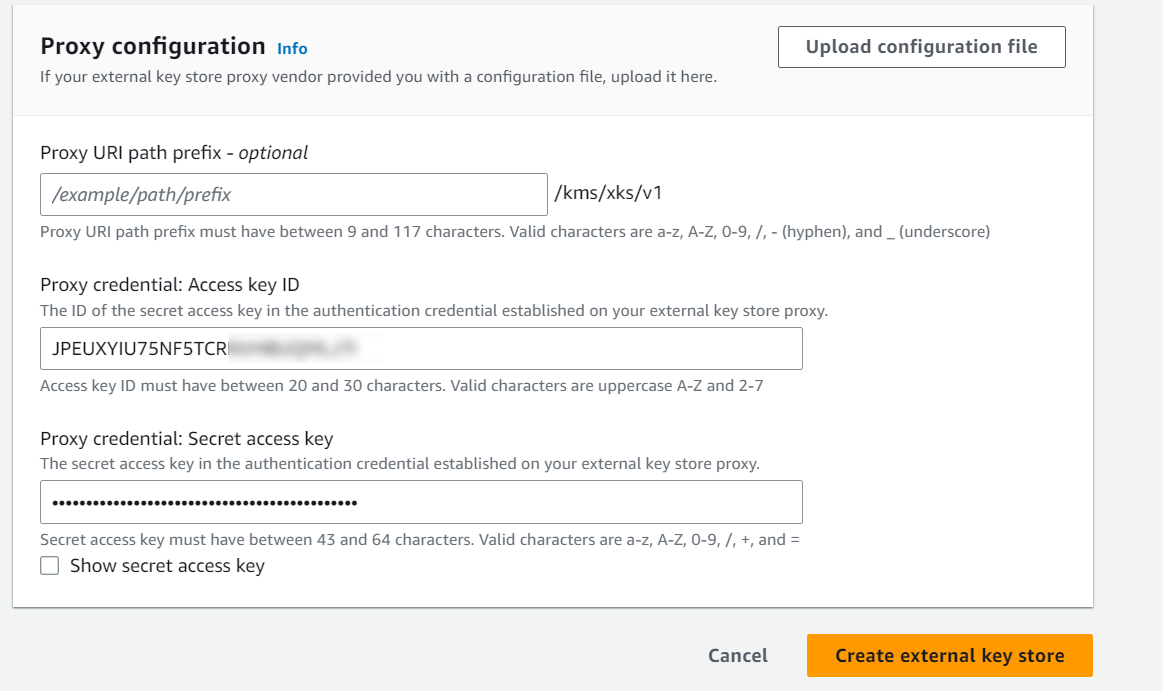
A details page for the new external key store appears.

-
-
Select External key stores to view all external key stores.
-
Select Key store actions > Connect to connect to the external key store.

-
Wait for the Connection state to display as
Connected.
-
Return to KeyControl Cloud Key Management Vault and select CLOUDKEYS > CloudKeys.
-
Select the Key Set created earlier along with the Region.

-
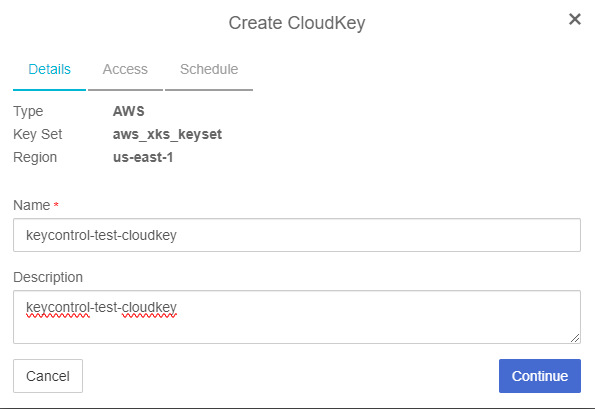
Select Actions > Create CloudKey.
The Create CloudKey dialog appears.
-
In the Details page:
-
For Name, enter a name for the CloudKey.
-
Enter a Description.
-
Select Continue
-
-
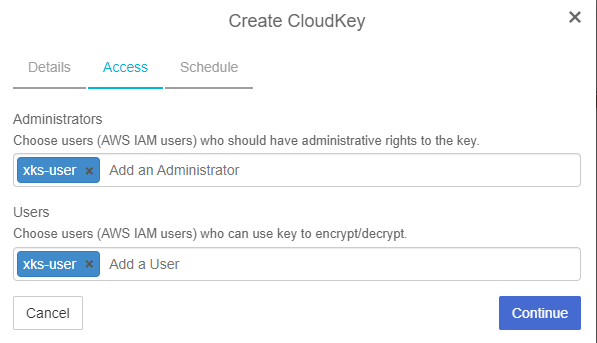
In the Access page:
-
For Administrators, select AWS IAM users who will have administrative rights.
-
For Users, select AWS IAM users who will be able to use the key to encrypt/decrypt.
-
Select Continue.
-
-
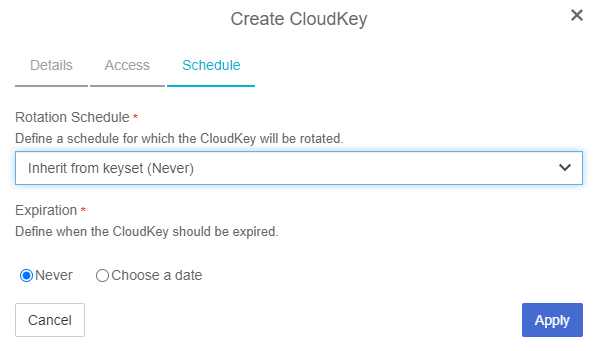
In the Schedule page:
-
For Rotation Schedule, select a rotation schedule for the CloudKey.
-
For Expiration, select the required condition.
-
Select Apply to finish the process.
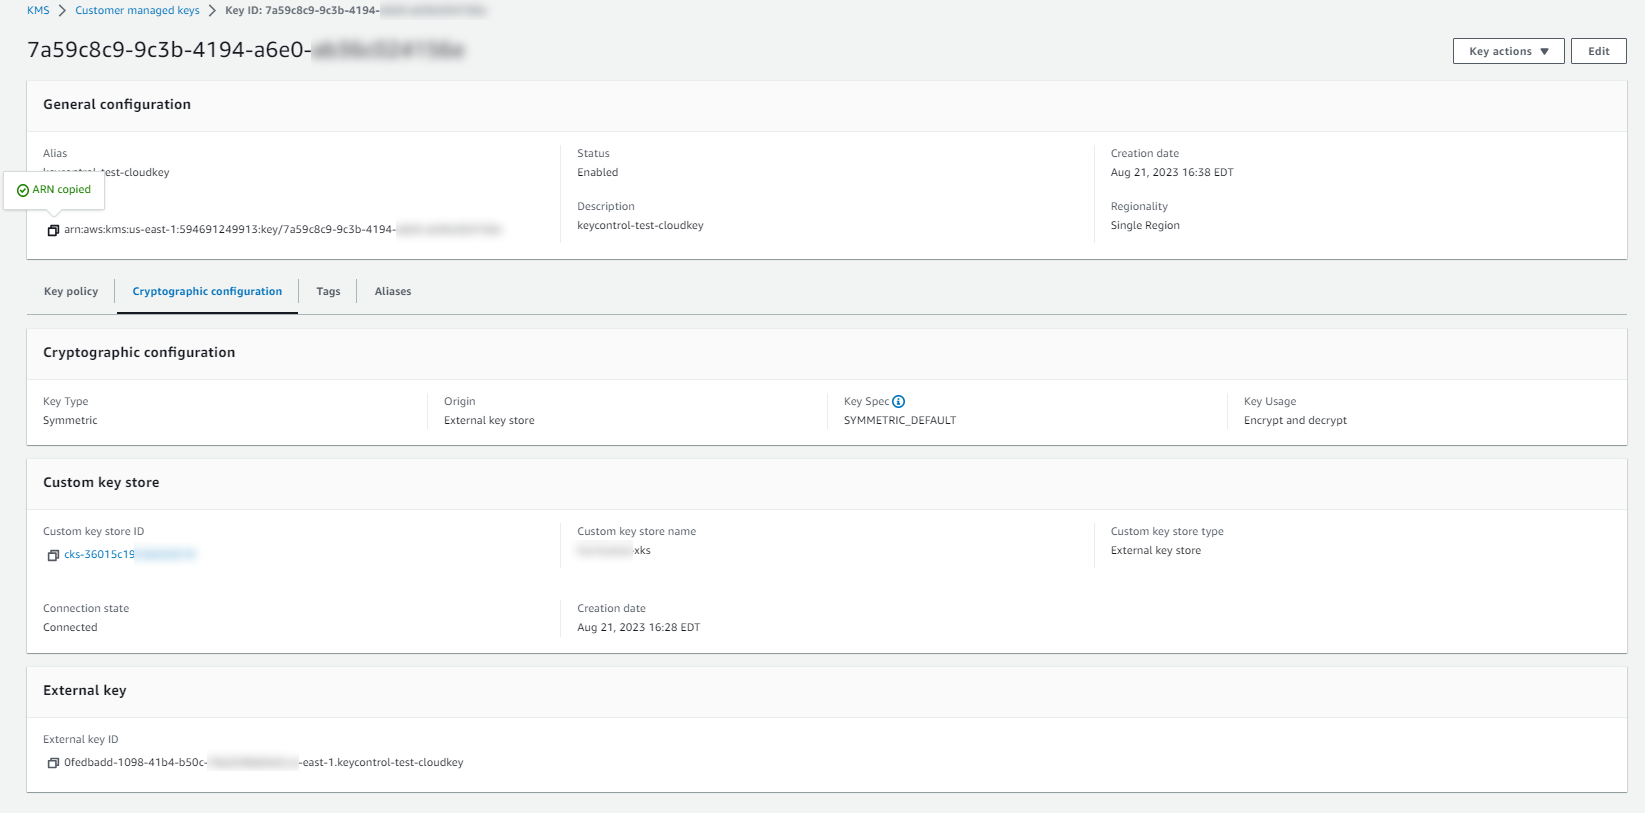
After the XKS CloudKey is created in KeyControl, a KMS key pointer is automatically created in AWS KMS with a key alias that matches the KeyControl CloudKey name. This KMS key pointer can be utilized by AWS services to encrypt or decrypt user objects.
-
-
Return to AWS KMS > Customer managed keys to find the created CloudKey.

-
Select either the Aliases or Key ID hyperlink for the CloudKey.
A details page for the CloudKey appears.
-
Select Cryptographic configuration.
Note that under Custom key store, the Custom key store name appears and the Custom key store type as listed as External.
-
Under General configuration, copy the AWS KMS ARN for a later step.
Test the integration
To test the integration:
-
Sign in to the AWS Console and access S3 services.
-
From the left panel, select Buckets and then select Create bucket.

The Create bucket page appears.
-
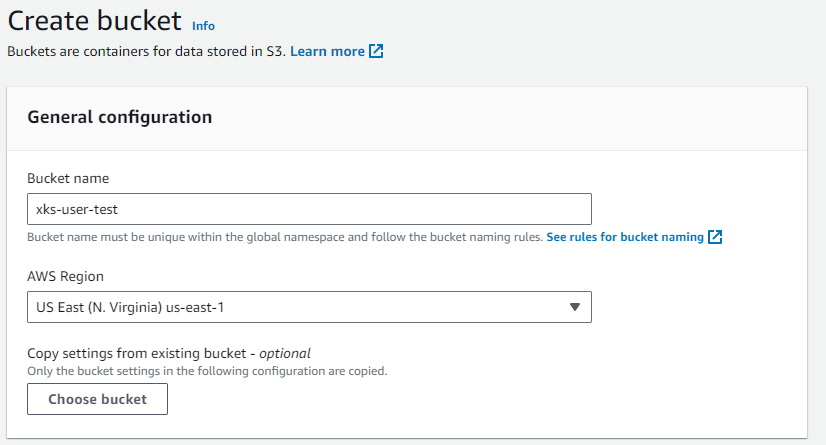
Under General configuration:
-
For Bucket name, enter the required name for the bucket.
-
Select an appropriate AWS Region.
-
-
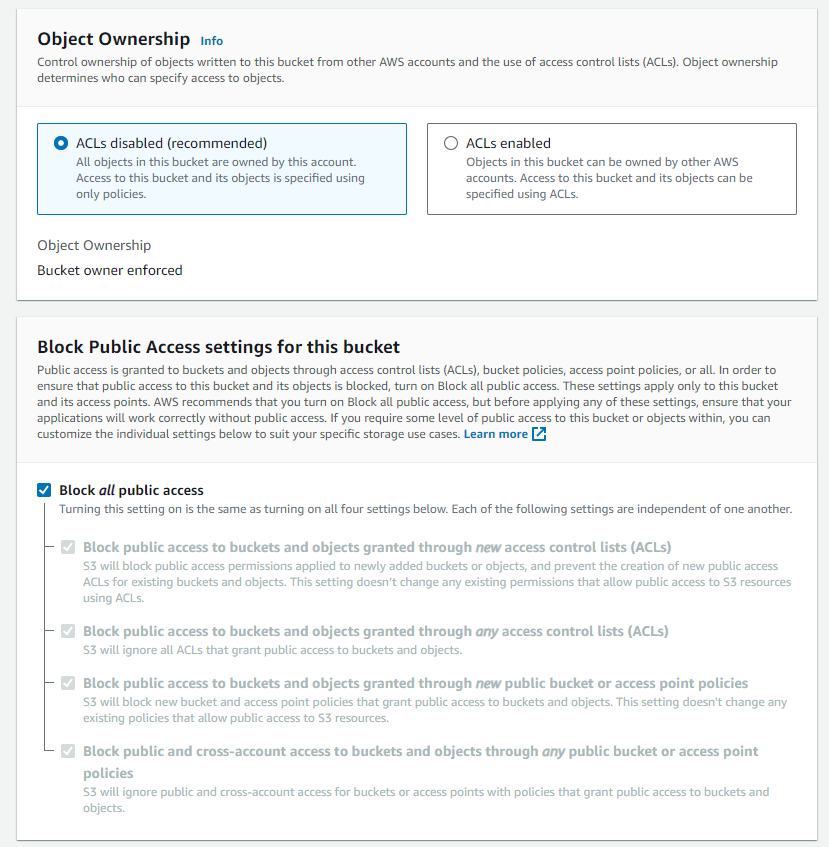
Under Object Ownership, select ACLs disabled.
-
Under Bucket Versioning, set Bucket Versioning to Disable.

-
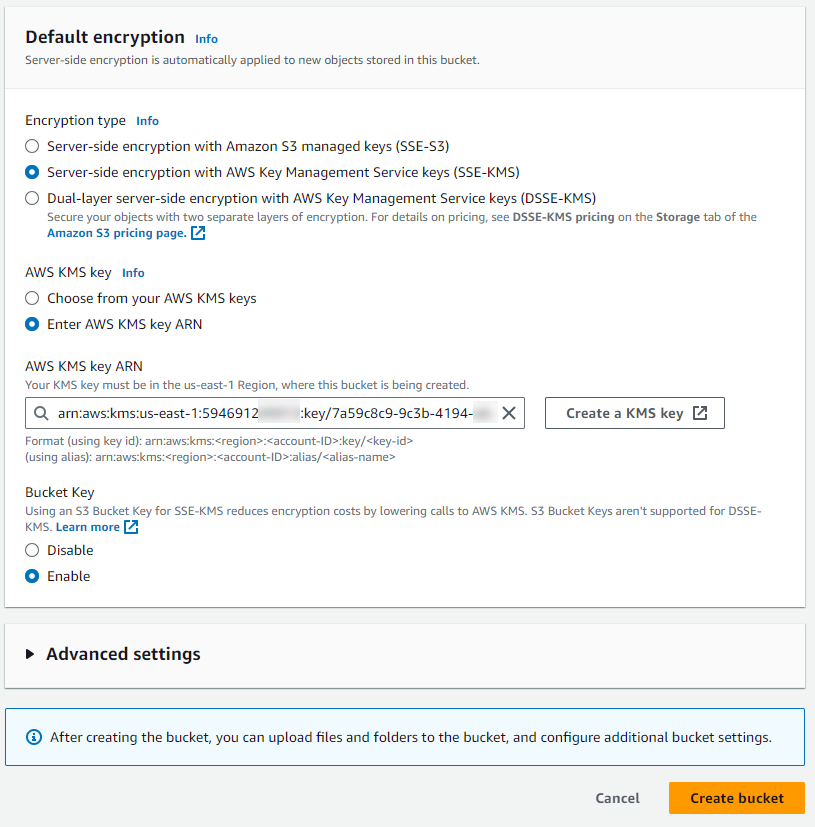
Under Default encryption:
-
For Encryption type, select Server-side encryption with AWS Key Management Service keys (SSE-KMS).
-
For AWS KMS key:
-
Select Enter AWS KMS key ARN.
-
Paste the AWS KMS ARN from the previously created CloudKey.
-
-
For Bucket Key, select Enable.
-
Select Create bucket to complete the process.
The bucket is created.

-
-
Select the hyperlink for the bucket.
A details page for the bucket appears.
-
Select Objects.
-
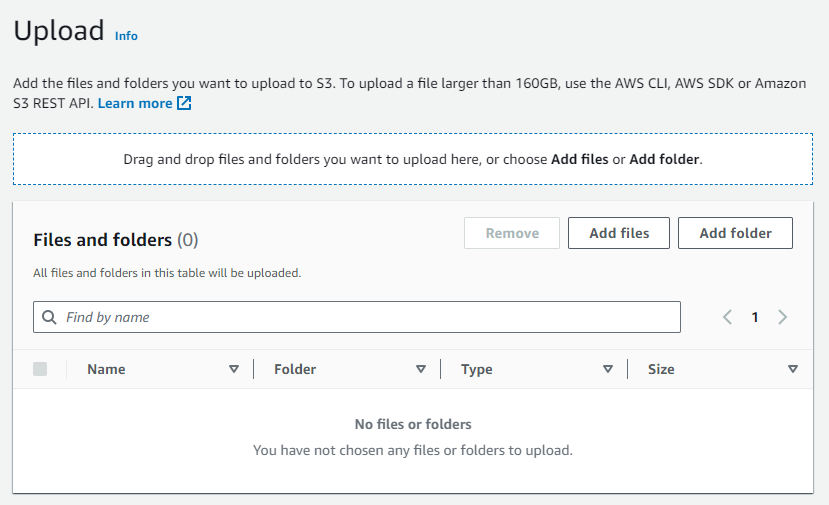
To test the encryption, select Upload.

The Upload dialog appears.
-
Select Add files.
-
Locate and select an image to upload.
The file is added to the list of available images.
-
Select the check box for the image file and select Upload.
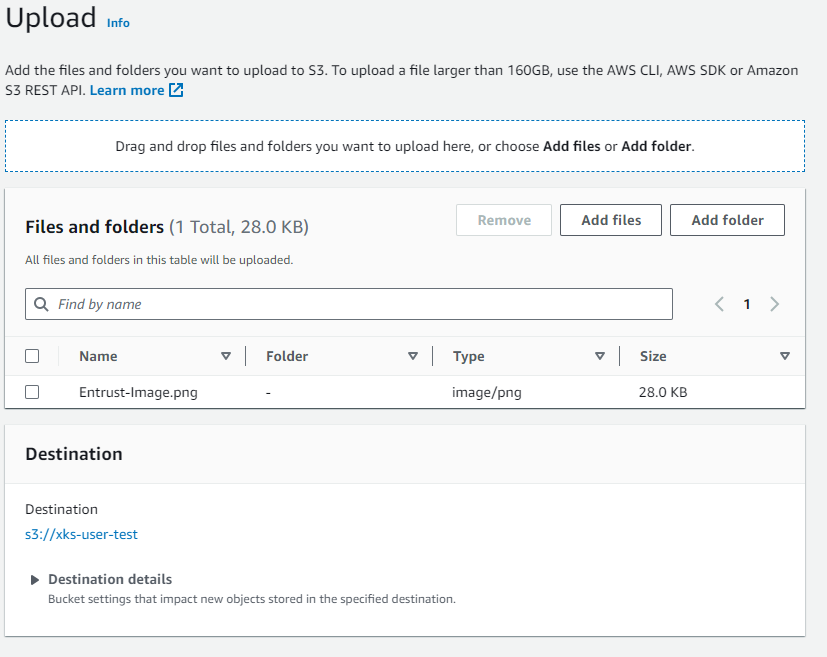
In this example, the
Entrust-Image.pngfile was added and can be selected and uploaded.The newly uploaded image is listed within the bucket.
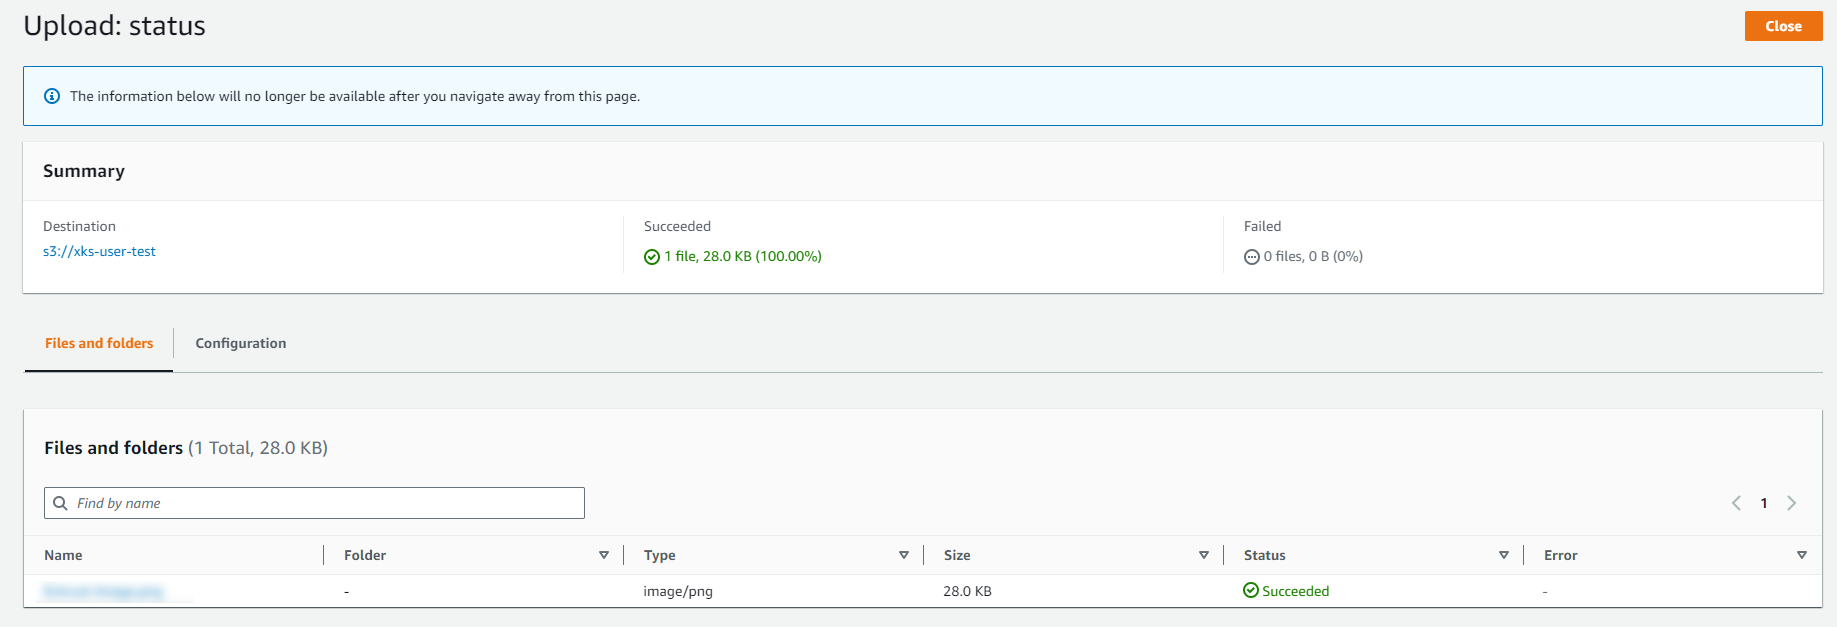
-
Select the new image and select Open to view it.

The image starts in a browser window.
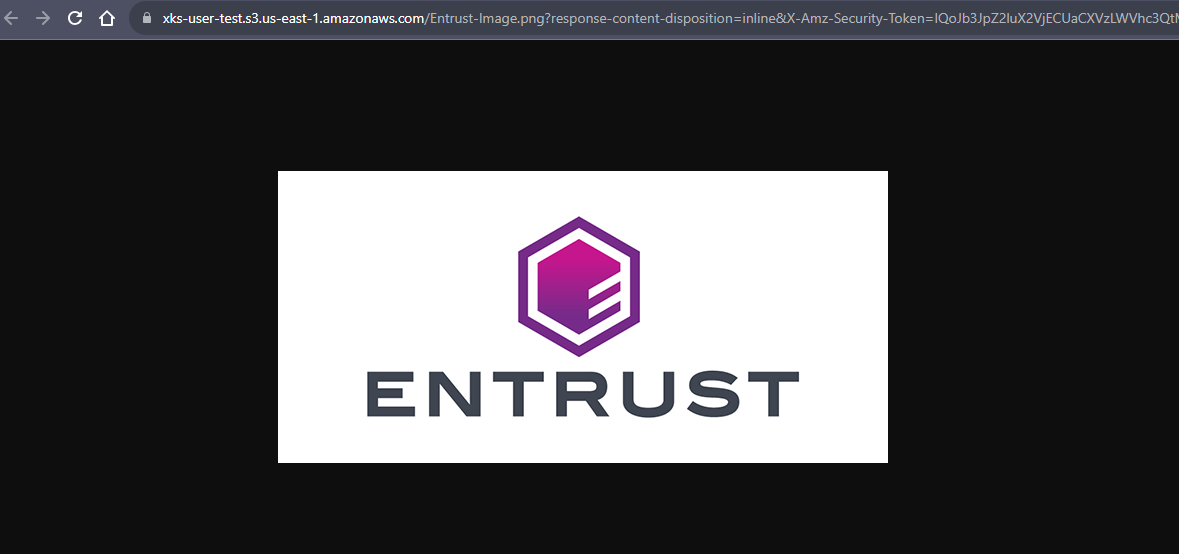
-
Return to KeyControl Cloud Key Management Vault and select CLOUDKEYS > CloudKeys.
-
Select the CloudKey and then select Actions > Disable CloudKey.

The CloudKey is disabled.

-
Return to the AWS S3 bucket and attempt to open the uploaded image.
The image is not viewable as the CloudKey was disabled.

-
Re-enable the CloudKey in the KeyControl CloudKey Management Vault.
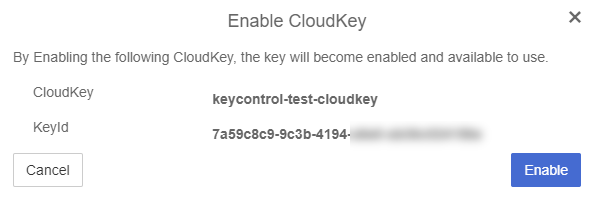
-
Return to the AWS S3 bucket.
-
Open the uploaded image again. It is now viewable.

This concludes the integration process.