Procedures
To configure Adobe Experience Manager Forms with the nShield HSM:
Prerequisites
Before you can use Adobe Experience Manager Forms with the nShield HSM, complete the following steps:
-
Install the Java Development 8 Kit.
-
Set up the HSM client software on the machine where Adobe Experience Manager Forms will be installed.
-
Configure the HSM(s) to have the IP address of your host machine as a client.
-
Create or edit the
cknfastrcfile innfastdirectory add one of the following two config settings:-
Module protection:
CKNFAST_FAKE_ACCELERATOR_LOGIN=1 -
OCS or Softcard protection:
CKNFAST_LOADSHARING=1 CKNFAST_NO_ACCELERATOR_SLOTS=1 -
Optional lines to enable debug:
CKNFAST_DEBUG=5
CKNFAST_DEBUGFILE=C:\pkcs11.log
-
-
Install Adobe Experience Manager Forms. To do this, follow the Adobe online documentation and set up AEM forms on a JEE deployment:
When setting up, ensure that the user account has login permissions to the database server.
For more information on configuring and managing nShield HSMs, Security Worlds, and Remote File Systems, see the User Guide for your HSM(s).
Configure Java
You must configure Java for the nShield HSM before you can use the HSM with Adobe Experience Manager Forms Credentials.
-
Add lines to
C:\ProgramData\nCipher\Key Management Data\config\configabout privileged and non-privileged ports:[server_startup] ... priv_port=9001 nonpriv_port=9000 -
Open a command prompt as Administrator.
-
Set the path variables:
% setx JAVA_HOME "C:\Program Files\Java\jdk1.8.0_321" % setx PATH "%PATH%;%JAVA_HOME%\bin"; -
Copy the
nCipherKM.jarfile to theextensionsfolder of your local Java Virtual Machine installation from the following directory:%NFAST_HOME%\java\classes -
Paste the file in the following directory:
%JAVA_HOME%\jre\lib\ext -
Download the JCE Unlimited Strength Jurisdiction Policy Files from your Java VM vendor’s Web site. The downloaded Java 8 file used in this guide was
jce_policy-8. -
Extract and copy the extracted files
local_policy.jarandUS_export_policy.jarinto the security directory:%JAVA_HOME%\jre\lib\security -
Edit the
java.securityfile in%JAVA_HOME%\jre\lib\security. -
Add the following line to the top of the list of providers and shift the rest of the numbers down to keep them in ascending order:
security.provider.1=com.ncipher.provider.km.nCipherKM -
Open a command prompt as Administrator and run:
% java com.ncipher.provider.InstallationTestThe output includes a list of providers and nShield JCE services. Check for the following phrases within the output:
Unlimited strength jurisdiction files are installed.
The nCipher provider is correctly installed.
Generate a signed certificate on the HSM
An nShield HSM will be used to generate a Certificate Signing Request to then be signed and imported. This certificate will be later used by AEM Forms Credentials.
If you are using FIPS 140 Level 3, PKCS #11 requires HSM OCS cards for FIPS authentication when you are importing the signed certificate.
When you are running the ckcerttool command at a later step, you will have to insert the OCS card(s).
-
Open command prompt as administrator and run the required command:
-
Module protection:
% generatekey pkcs11 protect=module certreq=yes type=rsa size=2048 pubexp=65537 plainname=<key_name> nvram=no -
OCS protection:
% generatekey pkcs11 cardset=<cardset_name> protect=token certreq=yes type=rsa size=2048 pubexp=65537 plainname=<key_name> nvram=no -
Softcard protection:
% generatekey pkcs11 softcard=<cardset_name> protect=softcard certreq=yes type=rsa size=2048 pubexp=65537 plainname=<key_name> nvram=no
-
-
Take note of the path to the key and the CSR.
-
Take the CSR file to a Certificate Authority and have it signed.
-
Take the generated signed certificate file and place it in the same directory where the CSR file was originally generated.
-
Open command prompt as administrator and run one of the following to import the signed certificate:
-
Module protection:
% ckcerttool -n -f <signed_cert_filename> -k <identof the key, the part after pkcs11_> -L <label_for_the_key> -
OCS and Softcard protection:
% ckcerttool -c <cardset name> -f <signed_cert_filename> -k <identof the key, the part after pkcs11_> -L <label_for_the_key>For example (OCS protection):
% ckcerttool -c testOCS -f ocscertificate.cer -k uc6951563523344ac316e14299c7006a8e0aecd377-30f2a9379f7f23b6710e14d4f80ed2b1a45e99ee -L aemocskeyCheck for the following phrases within the output:
Certificate found, processing...
Certificate successfully imported.
Run cklist to view your certificate object.
OK
-
Configure the HSM credential alias
| If you generated the HSM certificate while the Application Server was running, AEM Forms may not immediately recognize the certificate. To resolve this, restart the Application Server before you configure the HSM credential alias. |
-
Open the administrative console of AEM Forms in a web browser at
http://localhost:8080/adminui. -
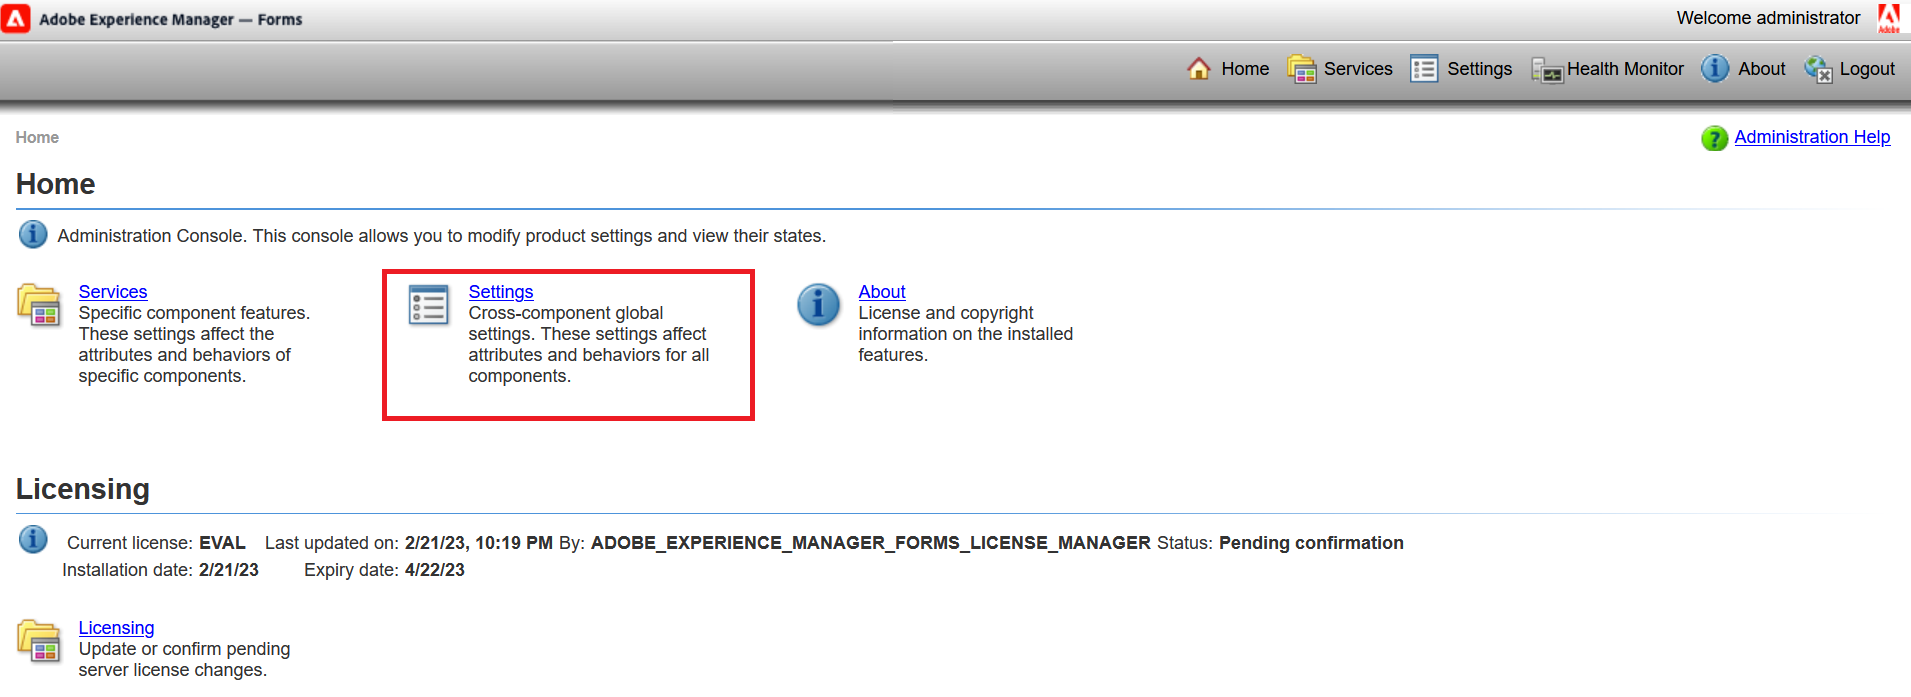
Select Settings.
-
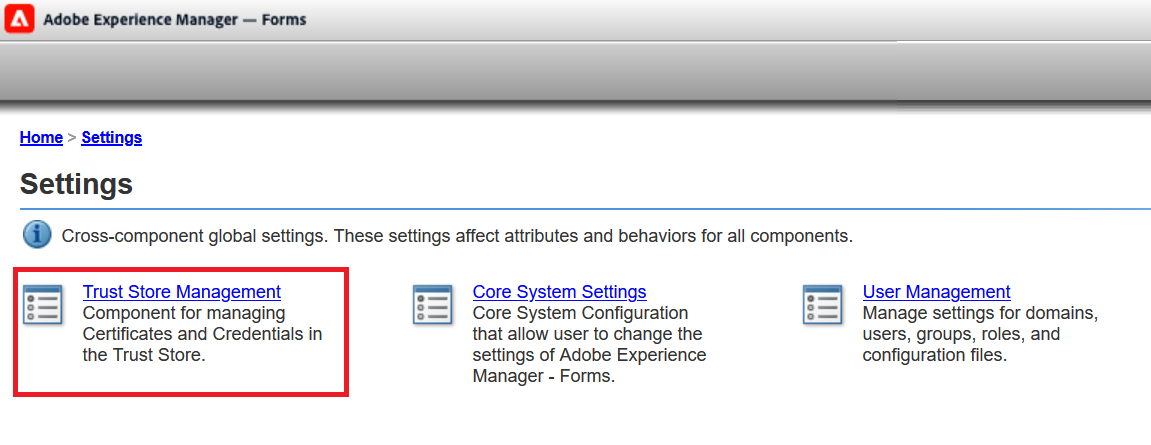
Select Trust Store Management.
-
Select HSM Credentials.
-
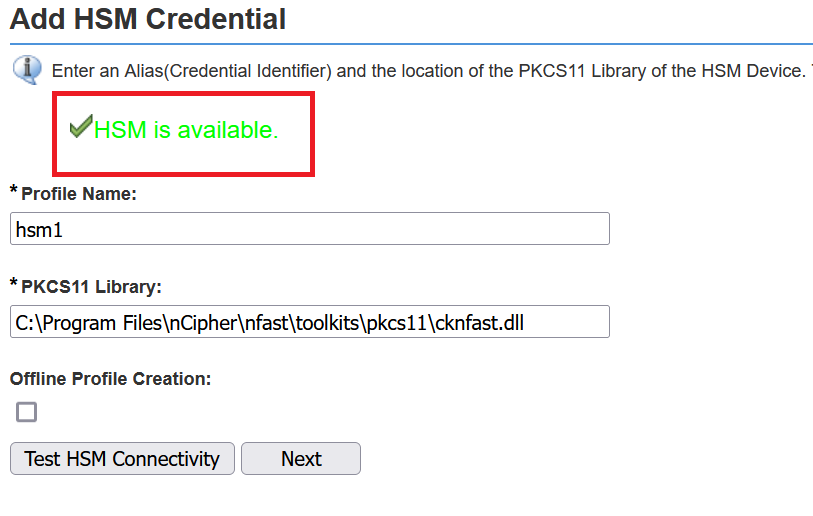
Enter a Profile Name for the HSM.
-
Enter the path of the
pkcs11library:C:\Program Files\nCipher\nfast\toolkits\pkcs11\cknfast.dll -
Select Test HSM Connectivity.
A success message HSM is available appears. For example:
-
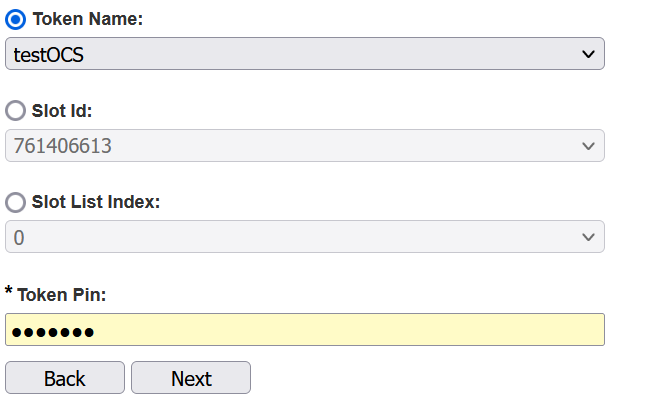
For the Token Name, select the accelerator for module protection or the card set name for OCS/Softcard protection.
-
The corresponding Slot ID and Slot List Index values will be selected automatically.
-
For the Token Pin, enter the administrator card passphrase if you are using module protection. If you are using OCS cards or Softcard protection, enter their passphrase. For example:
-
Select Next.
-
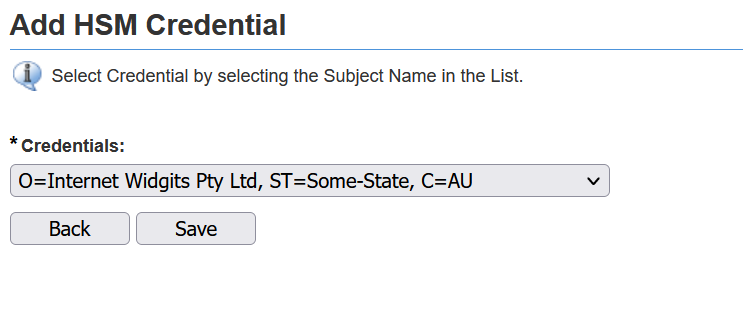
Select the HSM’s Credentials. This will be the same as the certificate that was made in Generate a signed certificate on the HSM. For example:
-
Select Save.
-
Test this credential by selecting the check box next to it and selecting Check Status.
A green check mark appears. For example:
