Configuration Logged in as Administrator
Overview
After setting up nShield Monitor, Administrators can modify the system setup via the Configuration tab.
| To see the options available to a Group Manager, see Configuration Logged in as Group Manager. |
The Administrator is able to set date and time, events, create groups, update licenses, configure the network, reboot the system, set up security, perform upgrades, and set up users.
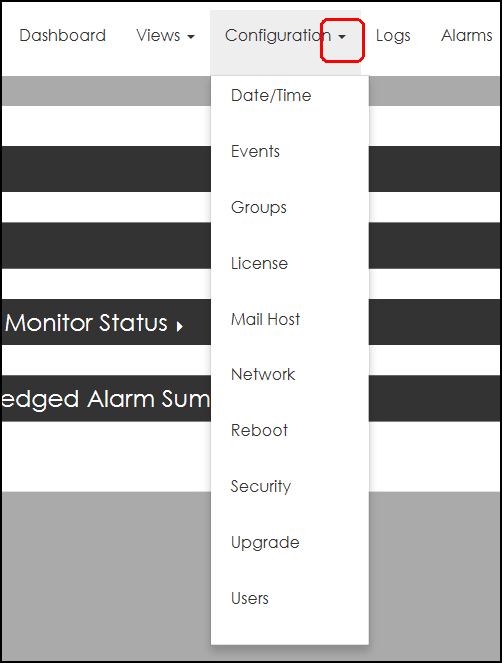
Logged on as an Administrator, the Configuration tab displays the following:
First Time Setup
In order to begin using nShield Monitor, several steps must be taken. These include:
-
HSM configuration - verifying that the HSMs to be monitored are enabled for SNMP
-
Installing the appropriate nShield Monitor License
-
Creating groups and users in the nShield Monitor Virtual Appliance
-
Enrolling devices to appropriate groups
Please note that a device can be assigned to one group or to many separate groups. -
Open firewall port settings
Configuring the nShield/Client Host
In order to properly manage your HSM estate with nShield Monitor, you must perform the following on each device:
-
Enable SNMP and add SNMPv3 users
-
Enable the collection of utilization data
-
Set the period over which utilization statistics are to be collected to 60 seconds
-
Enable the collection of health check counts
These tasks can be performed via the appropriate commands as follows:
-
UTILCFG to set the period over which utilization statistics are to be collected.
Must be set for 60 seconds. -
UTILENABLE to enable the collection of utilization data
-
HEALTHENABLE to enable collection of health check counts
-
SNMP to enable provision of utilization and health check data via SNMP
-
SNMPADD to add an SNMP community or user
Configuring the nShield HSM
Refer to the SNMP V3 Agent for nShield Installation Guide and to the SNMPv3 Agent for nShield User GuideV3 User Guide for the steps to follow in order to properly configure the nShield HSM.
Step 1: Create Groups
In order to begin monitoring, the first required item is to create groups that will contain the monitored devices.
| You must be logged in as an Administrator. |
-
Navigate to Configuration > Groups.
-
Select Add New Group.
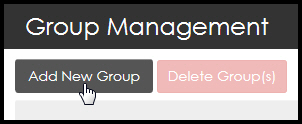
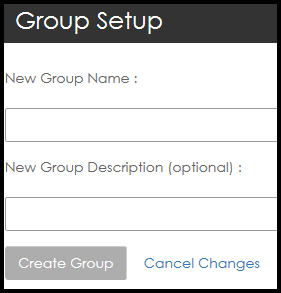
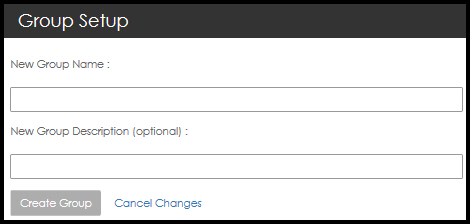
The Group Setup page opens.
-
Enter the New Group Name along with an optional description.
-
Select Create Group.
| It is a best practice to never create more groups than the number required to manage the number of devices that you have. |
| nShield Monitor can support up to 32 groups. |
Step 2: Configure the Group Manager Role
Once you have created your groups, you will need to configure one or more users with the Group Manager role.
| This procedure also includes how to associate a Group Manager with a group. |
-
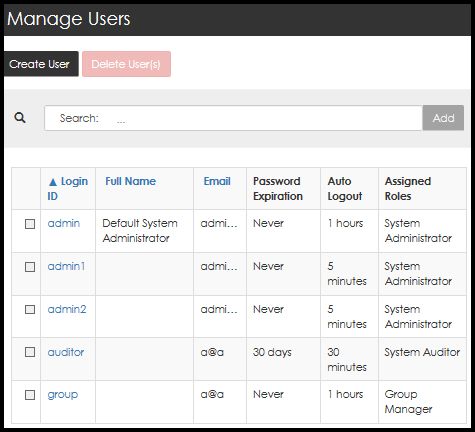
Navigate to: Configuration > Users.
-
The Manage Users page opens.
-
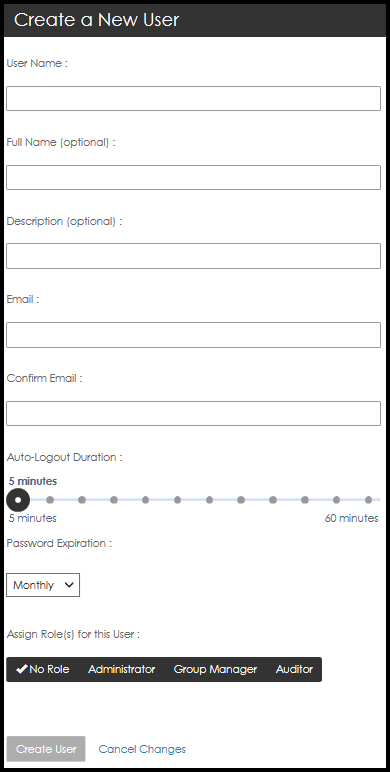
Select Create User.
-
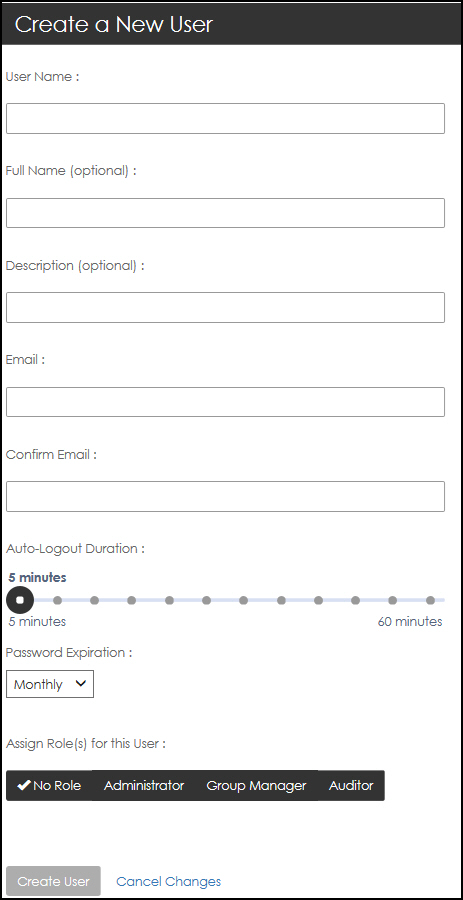
The Create a New User page opens.
-
Enter the new user data.
You select the Auto-Logout Duration by sliding the circle to the right to increase the length of time. 
-
Complete the open fields appropriately and under Assign Role(s) for this User, select Group Manager.
-
The Assign User to Groups window opens.
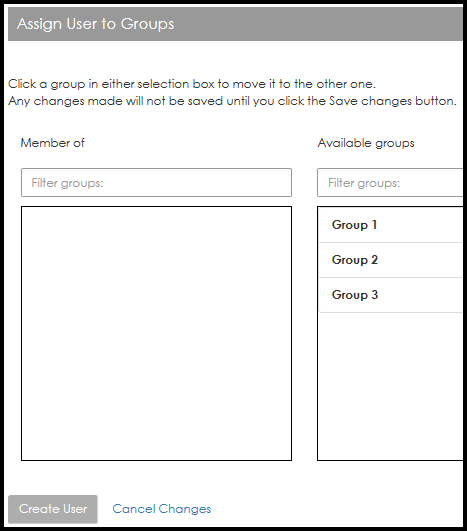
-
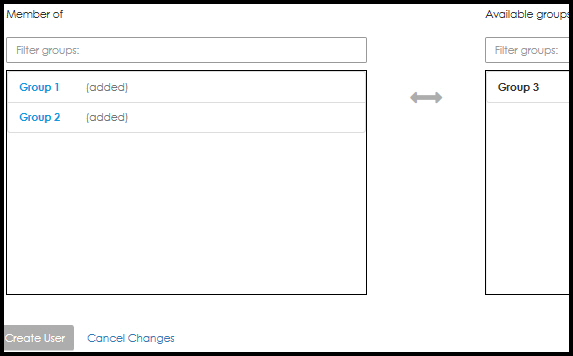
Associate the user to groups by selecting the group name (e.g., Group 1).
-
When clicking on a Group name in the Available groups list, the group name moves to the Member of list.
-
Select Create User.
The User is created.
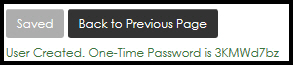
The one-time password is displayed on the screen and is emailed to the user.
Step 3: Group Manager Enroll Managed Entities to Groups
The Group Manager can add devices (i.e., enroll entities) to be monitored into the groups.
A Group Manager can be configured to access one group, a subset of all the groups or all of the groups in nShield Monitor.
Based on your current environment, the persons responsible for the day to day operations of the monitored devices are usually the appropriate persons to assign to this role.
| It is possible to assign a user to both Administrator and Group Manager roles. In doing so, operations and functions of both user roles can be performed. You should refer to your organization’s policy on whether a user with multiple roles is allowed to exist within your security management system. |
Edit Profile page
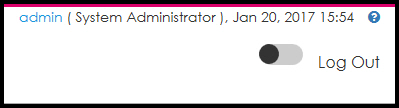
The Edit Profile page is accessed by selecting (i.e., clicking on) your User ID located in the top right corner of the page.

From this page, you can perform the following actions:
-
Add a description
-
Update the email address
-
Change the password
-
Set the Auto-Log duration
-
Select a custom date format
When you select a custom date format, the chosen format is associated with your user ID giving each user the option of selecting their preferred format. Once the format has been selected, it is consistently displayed in accordance with your selection.
The only date format that will not change is the date in the User ID line, as shown below:

| You can select the check box for Use Browser Timezone for Exporting Events, based on your preference. |
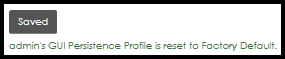
| nShield Monitor keeps track of things like table column sort order, which sections of a page are collapsed/expanded, chart settings, etc., as part of your GUI Persistence Profile. |
You are able to restore Custom Date/Time Format settings to the factory default through the admin’s GUI Persistence Profile tab, Reset to GUI Default option.
Changing your Password and Email and set the Auto-Logout Duration
-
Click on the <user name> on the upper right hand corner of main screen, (e.g., click on admin).
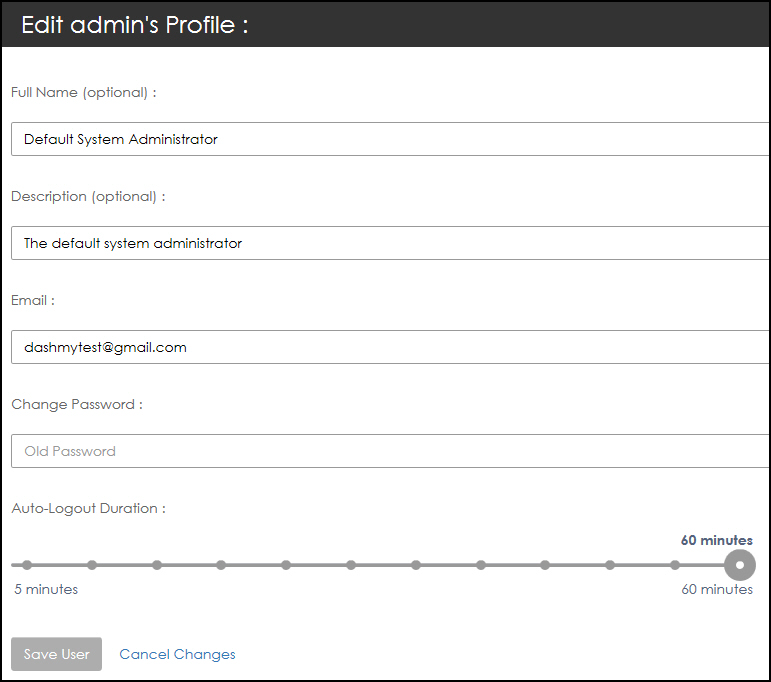
The Edit Profile window displays:
-
To change the password:
Enter the old password in the Change Password field. As you type, the system will prompt.
As prompted, enter the new password once, and then again, to confirm.
-
To change your email:
Enter the new email in the Email field.
-
The Auto-Logout Duration is set to 60 seconds by default.
Use the slide to adjust this setting.
-
Select Save User.
Formatting the Admin Date and Time
-
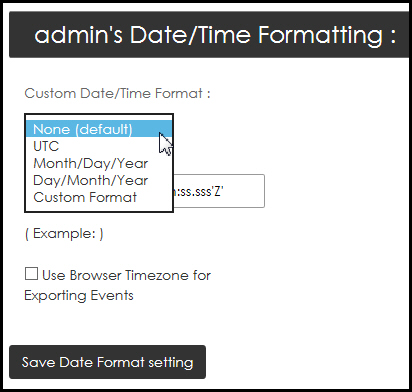
Select the Custom Date/Time Format drop down arrow.
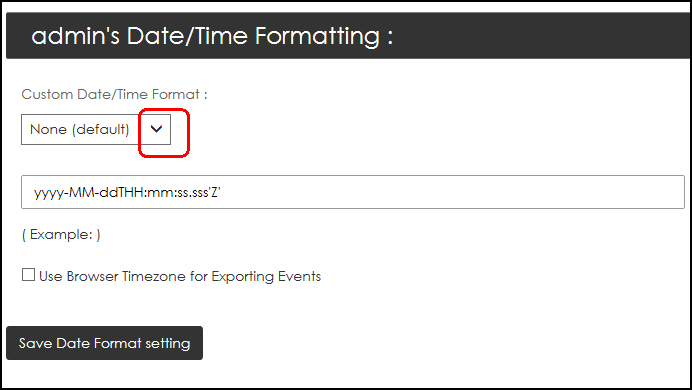
The drop down menu opens.
-
Select your preferred format.
-
Select the Use Browser Timezone for Exporting Events check box to export logs/alarms using the same Date/Time format as that displayed on the web page.
Date/Time on all web pages display in the format configured in the User Profile.
By default, exported logs/alarms show Date/Time in GMT format.
-
Select Save Date Format setting.
Resetting the Admin GUI Persistence Profile
nShield Monitor keeps track of things like table column sort order, which sections of a page are collapsed/expanded, and chart settings, etc.
nShield Monitor also provides you with the means to reset Custom Date/Time Format settings for your profile.
| Selecting the Reset to Factory Default option does not affect nShield Monitor Configuration settings, but it does reset Custom Date/Time Format settings in your profile. |
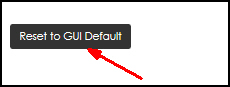
To return to the default for the Date/Time format:
-
Select Reset to GUI Default.
A confirmation message displays:
For more information, see Managed entities.
Configuration Tab tasks
The nShield Monitor main menu page contains a Configuration tab. This tab provides quick links to individual pages. The following sections provide a brief discussion of actions available via the quick links.
| For display purposes, the parameters displayed in this section are those found on the Configuration tab for the Administrator user type. |
Active Directory authentication
Active Directory authentication is set up by mapping Active Directory groups to nShield Monitor roles.
Features of the integration between Active Directory and nShield Monitor:
-
Auto-logout is set to five minutes for Active Directory users. This setting cannot be modified.
-
Active Directory users under the
nSMUsershierarchy are tagged tonSMGroups. By default, three roles exist innSMGroups. These roles map directly to the nShield Monitor user roles:Active Directory nShield Monitor nSMAdministratorAdministrator
nSMGroupGroup Manager
nSMAuditorAuditor
-
The content of the
mailfield of Active Directory user profiles must be populated. nShield Monitor does not use the field. However, if it is empty when the user is imported from Active Directory to nShield Monitor, the user will not be able to log into nShield Monitor with their AD credentials. -
If a new user is created in the
nSMUsershierarchy in Active Directory, the user must log in to the Active Directory domain first, before being able to use the Active Directory credentials in nShield Monitor. -
When Active Directory authentication is enabled in nShield Monitor, user management is fully switched over to Active Directory:
-
nShield Monitor generated credentials, that is, non Active Directory credentials, cannot be used.
-
User creation and user editing is disabled in nShield Monitor.
-
Passwords cannot be updated from nShield Monitor. Passwords must be updated in Active Directory and the Forget password link is disabled in the nShield Monitor UI.
-
Configure Active Directory authentication
-
Save Active Directory server settings in nShield Monitor:
-
Navigate to: Configuration > Active Directory > Credentials Settings.
-
Enter the host name, the port number, the username and password for the Active Directory server.
For an LDAP connection, set the port to 636, and import the certificate file and the private key on this tab.
-
Select Save.
-
-
Map Active Directory groups to nShield Monitor groups:
-
Navigate to: Configuration > Active Directory > Map AD Groups.
The list of Active Directory group is populated from the Active Directory server.
-
From the list, select a group, assign the relevant nShield Monitor roles to this group, then select Save.
-
Repeat the mapping step for each Active Directory group in the list.
Mappings that have been made between Active Directory groups and nShield Monitor roles are shown in a table at the bottom of the dialog.
-
-
Start the user import from the Active Directory with the group the users who will have the Group Manager role in nShield Monitor:
-
Navigate to: Configuration > Active Directory > Import Group Managers.
-
Select the Active Directory group that is to be mapped to the nShield Monitor Group Manager role, and select Import.
-
Assign nShield Monitor groups to each of these users. See Editing users.
You must do all nShield Monitor user management activities at this point because user management will be fully switched over to Active Directory when Active Directory authentication is enabled. nShield Monitor’s own user creation and user editing will disabled.
-
-
After Active Directory users have been imported into nShield Monitor, finish the mapping of Active Directory users to nShield groups and users:
-
Assign groups to the Group Manager role.
-
Assign the Group Manager role to designated users.
-
Enable Active Directory authentication
-
Navigate to: Configuration > Active Directory > Enable AD Authentication.
-
Select Use AD for Authentication, then select Save.
-
Confirm the change.
The nShield Monitor UI restarts and Active Directory credentials can now be used for authentication.
Disable Active Directory authentication
To switch back to nShield Monitor’s own authentication scheme:
-
Navigate to: Configuration > Active Directory > Enable AD Authentication.
-
Clear Use AD for Authentication, then select Save.
-
Confirm the change.
The nShield Monitor UI restarts and Active Directory credentials cannot be used for authentication. The nShield Monitor user management scheme is restored, including the ability to create, update, or delete users in nShield Monitor.
Date/Time
Navigate to: Configuration > Date/Time.
The Date/Time Settings window opens.
Date/Time - NTP Disabled
Most operating systems, including Windows, OS X, Linux, have an option to automatically synchronize the system clock periodically using a network time protocol (NTP) server. With nShield Monitor, you can toggle this option between disabled (off) and enabled (on).
This allows either manual configuration or setting up an NTP server to adjust time as needed.
-
Select NTP Disabled.
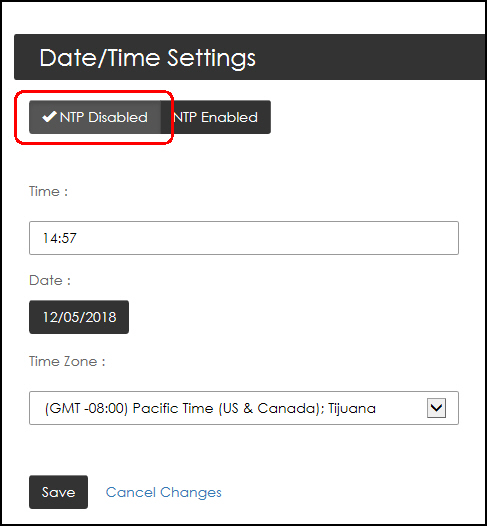
-
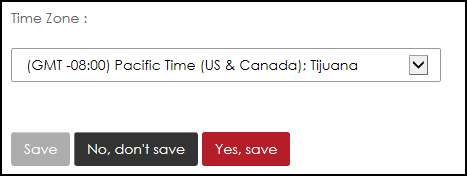
Enter data appropriately and select your Time Zone from the drop down menu.
The default Time Zone on nShield Monitor is GMT. Change it appropriately to match your organization’s Time Zone. -
Select Save.
Date/Time - NTP Enabled
| Changing date, time, or NTP options will reboot nShield Monitor. |
If NTP is enabled, you must indicate the NTP server that you want to use in the NTP Server Address field.
You can enter multiple servers, as long as you separate them using commas.
-
Select NTP Enabled.
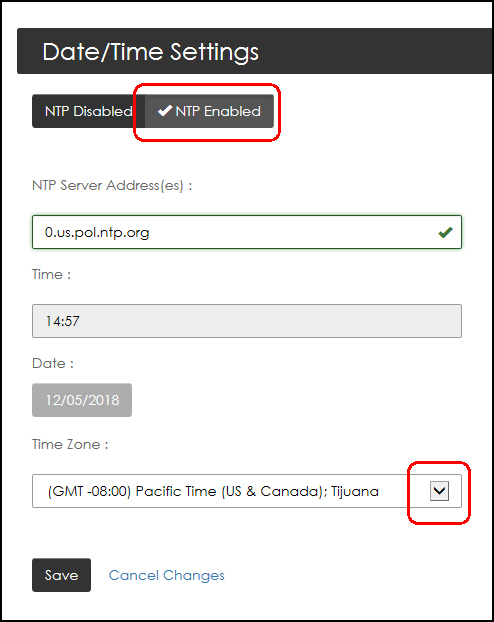
-
Enter the NTP Server Addresses (separated by commas).
-
Select the Time Zone drop down arrow to open your selections.
When NTP is enabled, the time and date field are already populated. You are not able to change them. The default setting is: GMT Greenwich Mean Time.
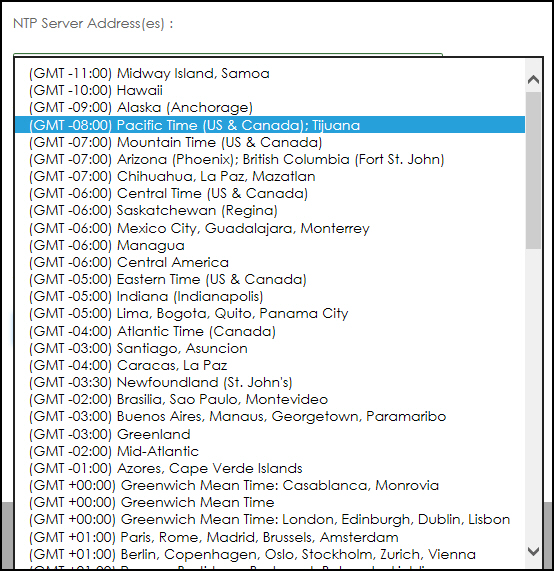
-
Select your time zone.
The system prompts for confirmation:
Changing date, time or NTP options will reboot nShield Monitor. -
Select Save.
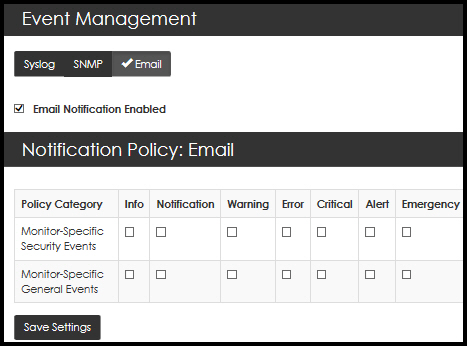
Events
nShield Monitor provides the capability for event notification via:
-
Syslog
-
SNMP and SNMP trap receiver
-
Email
| nShield Monitor can support up to 5 Syslog/SNMP servers at a time. |
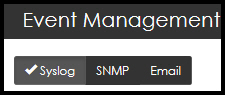
Navigate to: Configuration > Events.
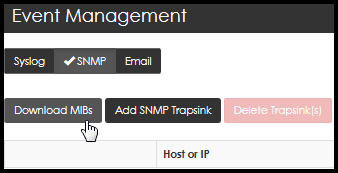
The Event Management page opens.
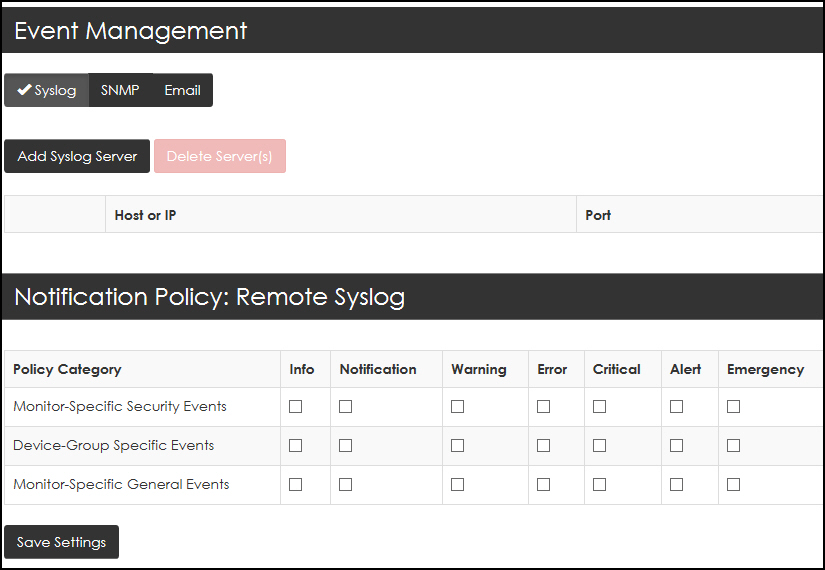
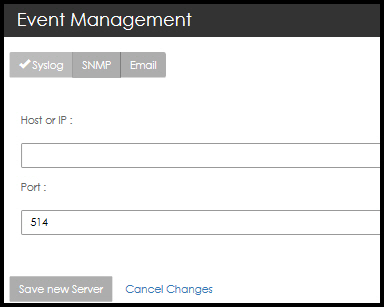
Adding a Syslog Server
-
Navigate to: Configuration > Events > Syslog.
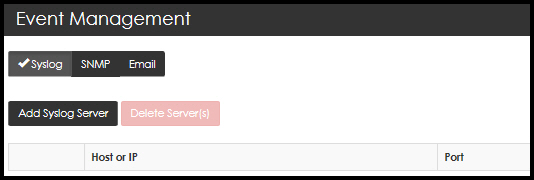
-
Click Add Syslog Server.
-
Enter the Host or IP of the syslog server.
-
Enter the Port number.
-
Click Save new Server.
-
Once the Syslog Server is configured, select the policy category and severity combination that you would like reported to the Syslog Server.
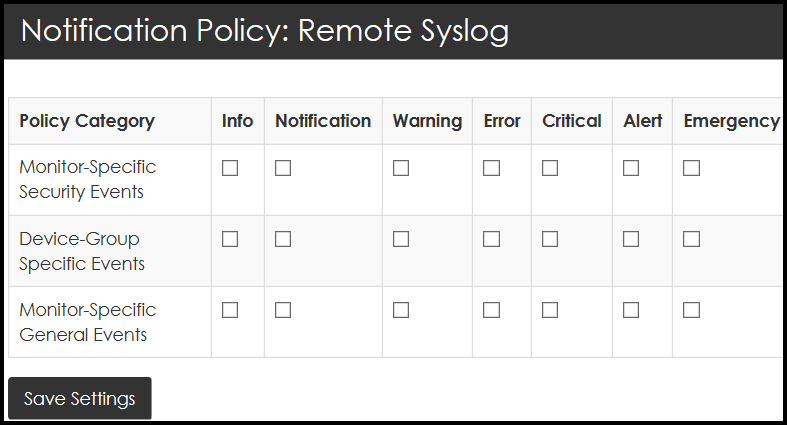
-
Select Save Settings.
Deleting a Syslog Server
-
Select the check box associated with the HP or IP address of the Syslog server to be deleted.
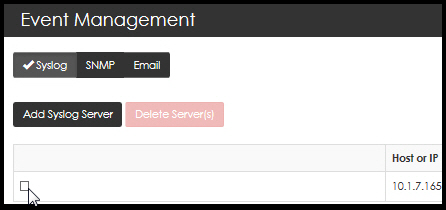
The Delete Server(s) tab activates.
-
Select Delete Server(s).
A confirmation page opens:
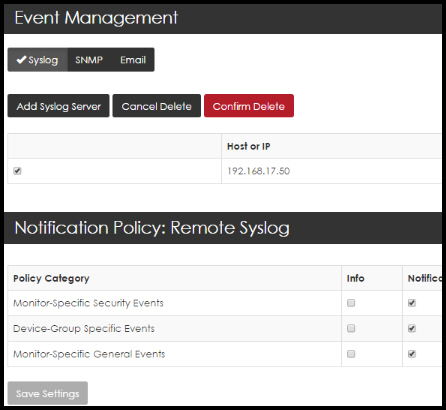
-
Select Confirm Delete.
Download MIBs
-
Navigate to: Configuration > Events > SNMP.
-
Select Download MIBs. The system prompts with the option to Open, Save, or Cancel.
-
Select your preference.
Support for nCSNMP traps
The nShield Monitor user interface provides event notifications for supported nCipher SNMP (nCSNMP) traps on the Dashboard, Logs and Alarms pages.
-
Policies can be set about the notification level, for example warning or emergency, for SNMP traps in general. These policies are managed by Administrators, Assign Notification Policies for SNMP.
-
Group Managers can associate these notification policies with device groups and trap groups:
The following SNMP traps are supported:
| Trap ID | Name | Severity | Trigger Event |
|---|---|---|---|
hardserverAlert |
Hard Server Failure |
ERROR |
The nShield host-side module control software failed |
hardserverUnAlert |
Hard Server Restart |
NOTIFICATION |
The nShield host-side module control software restarted after a previous failure event. |
moduleAlert |
Module Failure |
ERROR |
The nShield hardware failed. |
moduleUnAlert |
Module Restart |
NOTIFICATION |
The nShield hardware restarted after a previous failure event. |
psuAlert |
PSU Failure |
ERROR |
The power supply to an nShield Connect failed. |
psuUnAlert |
PSU Restart |
NOTIFICATION |
The power supply to an nShield Connect is now operational, after a previous failure event. |
fanfailureAlert |
Fan Failure |
ERROR |
The speed of an individual fan on the nShield Connect is zero. |
fanfailureUnAlert |
Fan Restart |
NOTIFICATION |
Fan speed is now non-zero, after a previous failure event. |
memoryUsageHighAlert |
Memory Usage High |
ERROR |
The HSM memory usage high threshold has been reached. |
memoryUsageOkAlert |
Memory Usage Normal |
NOTIFICATION |
The memory usage is below the HSM memory usage ok threshold. |
Assign Notification Policies for SNMP
-
Sign in as Administrator.
-
Navigate to: Configuration > Events > SNMP.
-
Select your preferences for the Policy Categories.
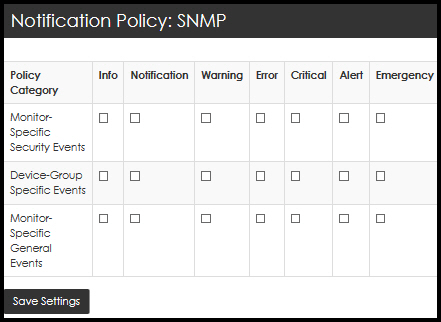
-
Select Save Settings.
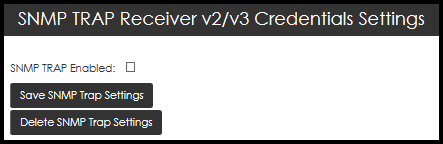
Assign SNMP Trap Settings
| The settings need to match the SNMP trap settings on the devices. |
-
Log in as Administrator.
-
Navigate to: Configuration > Events > SNMP.
-
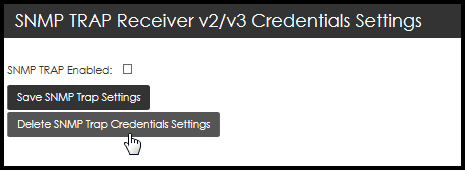
Select the SNMP TRAP Enabled box. The SNMP Trap Setting page opens.
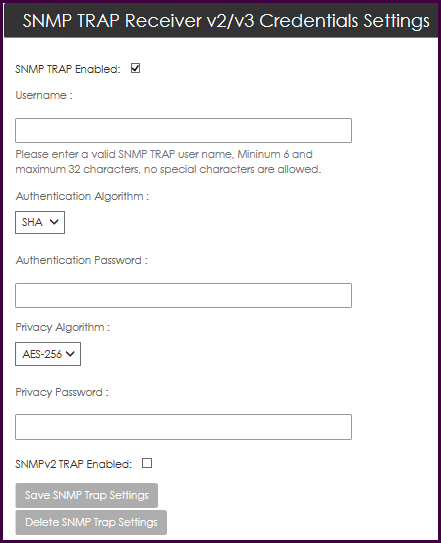
-
Populate the following data fields: Username, Authentication Password, and Privacy Password.
-
Select your Authentication Algorithm from the list.
-
Select your Privacy Algorithm from the list.
Client Hosts only support AES. -
By default, SNMP traps are supported only for SNMP v3. Therefore, option SNMPv2 Enabled is not enabled by default.
-
Select Save SNMP Trap Settings.
Configure SNMPv3 Traps on the SNMP Daemon
trapsess [SNMPCMD_ARGS] HOST defines the configuration for a trap.
This is the only way to define SNMPv3traps.
SNMPCMD_ARGS are arguments that would be used for an equivalent snmptrap command.
So, for example to send a SNMPv3trap as USM user user1 with authentication and encryption, use -v3 -u user1 -1 priv.
For example:
trapsess -v3 -u user1 -l authpriv IP-address:portTo configure SNMPv3 traps on the SNMP daemon:
-
Navigate to the
snmpfolder:-
Linux:
/opt/nfast/etc/snmp -
Windows:
c:\program files\nCipher\nfast\etc\snmp
-
-
Stop the SNMP daemon:
-
Linux: run
/etc/init.d/nc_ncsnmpd stop -
Windows: via Services, the name of the service is
nCipher SNMP Agent
-
-
Add the trapsess to the
snmpd.conf file. Replace <userRW>, <userRO>, <trapreceiverIP>, and port with your values.trapsess -v3 -u <userRW> -l authpriv <trapreceiverIP>:<port> trapsess -v3 -u <userRO> -l authNopriv <trapreceiverIP>:<port> -
Restart the SNMP server:
-
Linux:
/etc/init.d/nc_ncsnmpd start -
Windows: via Services, the name of the service is
nCipher SNMP Agent
-
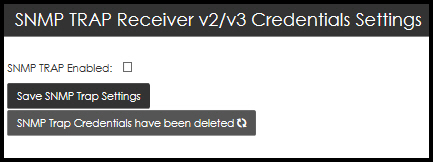
Delete SNMP Trap Settings
-
Navigate to: Configuration > Events > SNMP > SNMP Trap Receiver v2/v3 Credentials Settings.
-
Select Delete SNMP Trap Credentials Settings. The system response confirms the deletion.
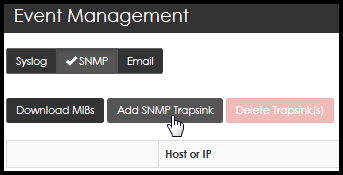
Add SNMP Trapsink
-
Navigate to: Configuration > Events > SNMP > Add SNMP Trapsink.
-
Two options are displayed, one for SNMP V2, and one for SNMP V3. By default, SNMP V2 is selected, and the SNMP V2 settings are shown. To load the SNMP V3 settings, select SNMP V3.
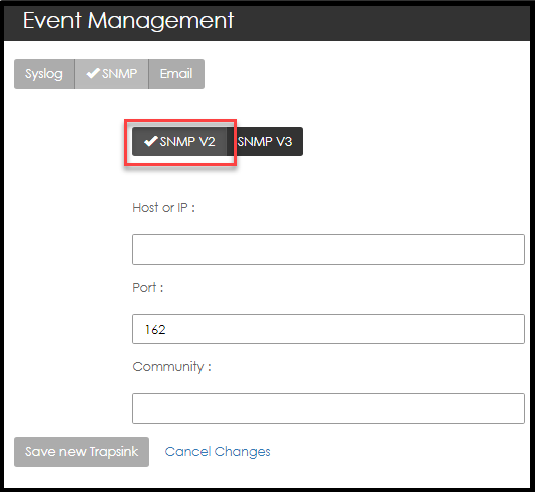
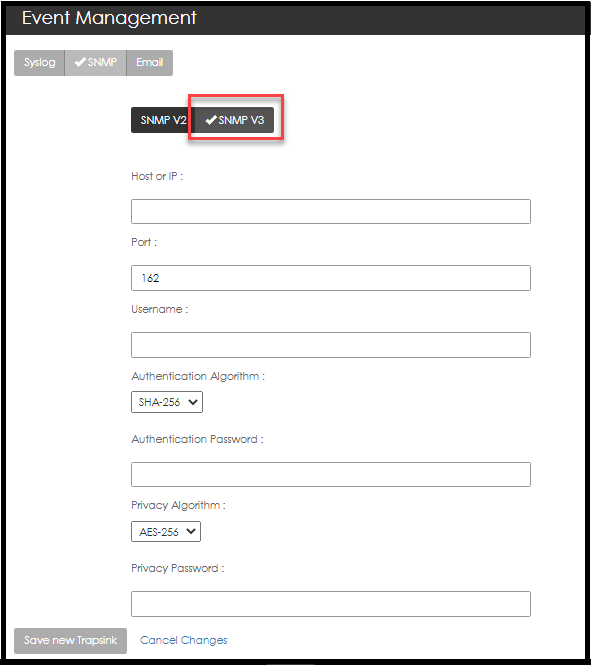
Configure the Trapsink:
For SNMP V2: Enter the Host or IP address of the SNMP device, the port number (default: 162), and the community.
For SNMP V3: Enter the Host or IP address of the SNMP device, the port number, the username, the authentication algorithm, the authentication password, the privacy algorithm, and the privacy password.
-
Select Save new Trapsink.
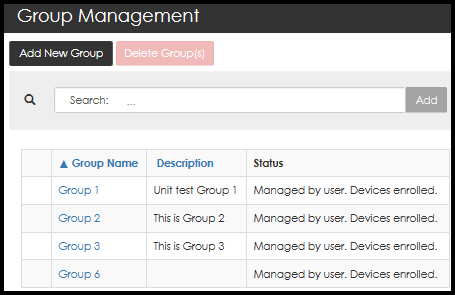
Groups
Groups can be added, deleted and sorted.
-
Navigate to: Configuration > Groups.
The Group Management page opens.
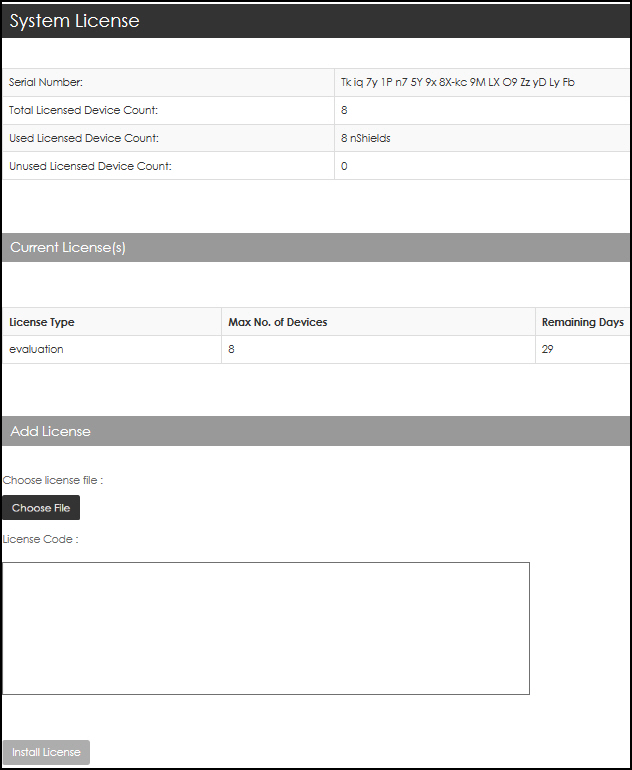
License
From the License tab, users can:
-
View general license data including license count
-
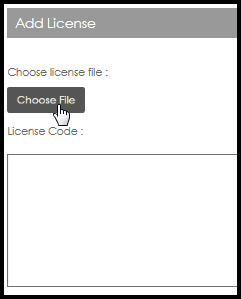
Add licenses
-
Install licenses
-
Navigate to: Configuration > License.
The System License page opens.
-
Mail Host
From here you can configure your nShield Monitor’s out going email address, i.e., your "from" address,and you can send a test email.
| A mail host may be required in order to enable email. |
-
Navigate to: Configuration > Mail Host.
The Email and Messaging page opens:

-
Enter your mail host.
-
Enter your Email sender address.
-
Select Save.
-
Enter your Email ID for Sending Test Email.
-
Select Send Test e-mail.
-
Locate the test email in your email In-box.
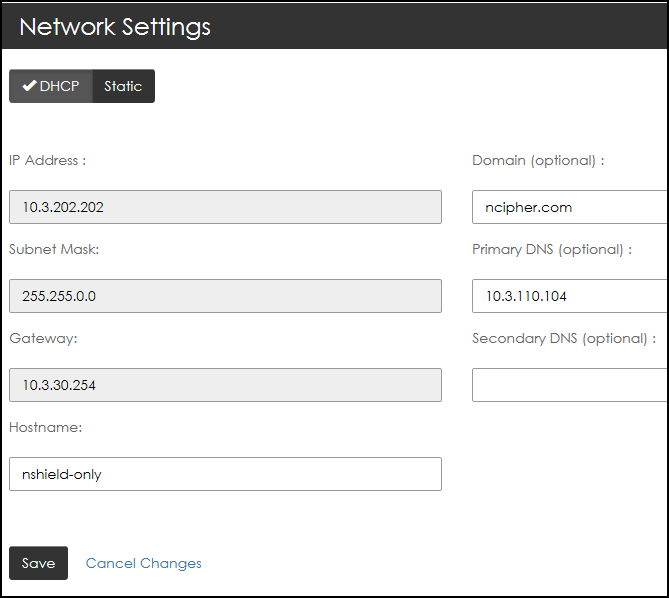
Network
The base network configuration including IP address, subnet mask and default gateway can all be changed via the Network Settings page.
| Changing any one of these settings requires that you close your browser and reconnect approximately 15 seconds after you save the new settings. If you change the IP address, you will have to redirect your web browser to the new IP address or host name. |
-
Navigate to: Configuration > Network.
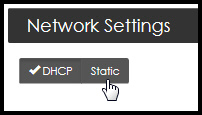
The Network Settings page opens.
-
Select your preference:
-
Dynamic Host Configuration Protocol (DHCP) IP addressing or
-
Static IP addressing
-
-
Select Save.
Reboot
Users with System Administrator privileges are able to reboot the nShield Monitor virtual appliance.
-
Navigate to: Configuration > Reboot.
The System Reboot page opens.
-
Select Reboot Now.
The system prompts for confirmation prior to initiating the reboot.
-
Select Yes, reboot now to continue the process.
Security
-
Navigate to: Configuration > Security.
The Security page opens.

| For users whose credentials were imported from Active Directory, Configuration > Security shows their own credentials in and for nShield Monitor. Changes made to passwords in nShield Monitor are not ported back automatically to the Active Directory server. |
| Users who are Active Directory administrators have no access or visibility to the credentials of other Active Directory users through this dialog. |
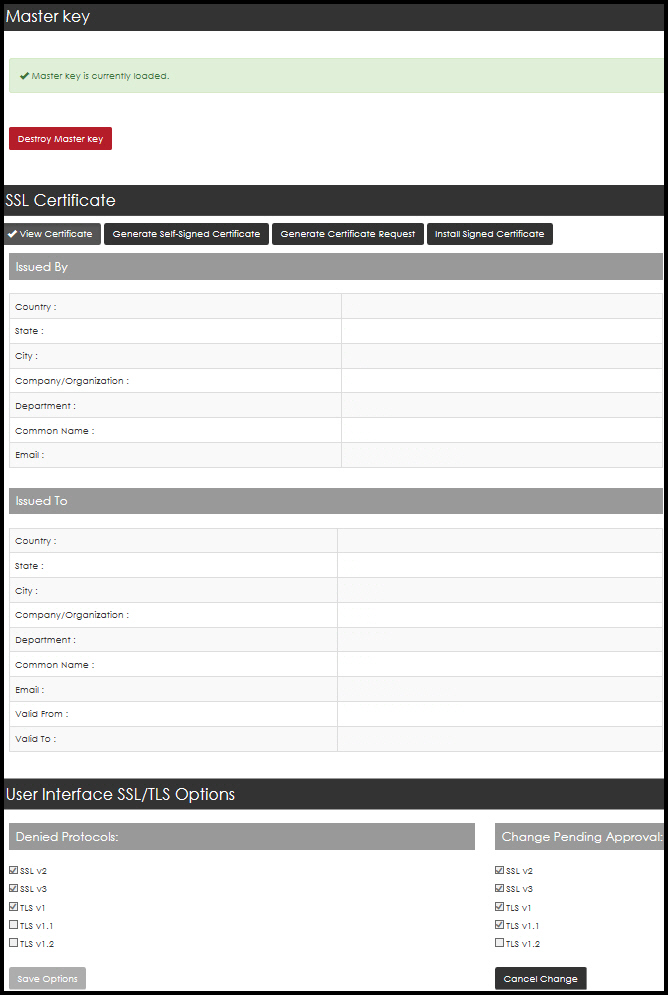
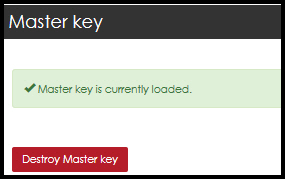
Master Key
The master key consists of an AES256 wrapping key and an HMAC-SHA-512 hash key that is used as the root of protection.
The master key is derived by using the two passphrases using PBKDF2, that are input during the wizard configuration after the first boot and after every reboot.
The master key is never stored in persistent storage.
Two passphrases are required for generation of the key. Enter be entering each passphrase twice.
| Please note to record each passphrase in a secure location as they are required to be reentered when nShield Monitor is rebooted. |
To destroy a Master Key:
| The Master Key can only be destroyed if all of the enrolled devices have been deleted. |
-
Select Destroy Master Key.
-
Select Yes, destroy it.
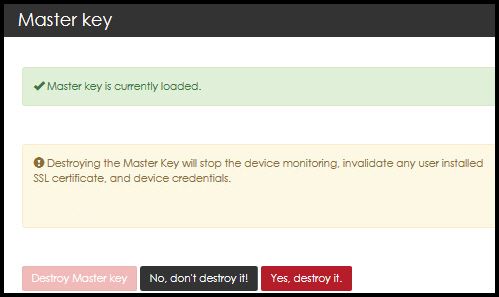
Please note that destroying the master key stops all device monitoring and renders all device credentials invalid. The system must be reset after this operation.
To generate a new master key, enter the two passphrases as before.
View the SSL Certificate
By viewing the current SSL certificate, the administrator can determine what type of certificate is currently installed in the system.
By default, the system installs a self-signed SSL certificate with fixed values for common name, country state, city, etc.
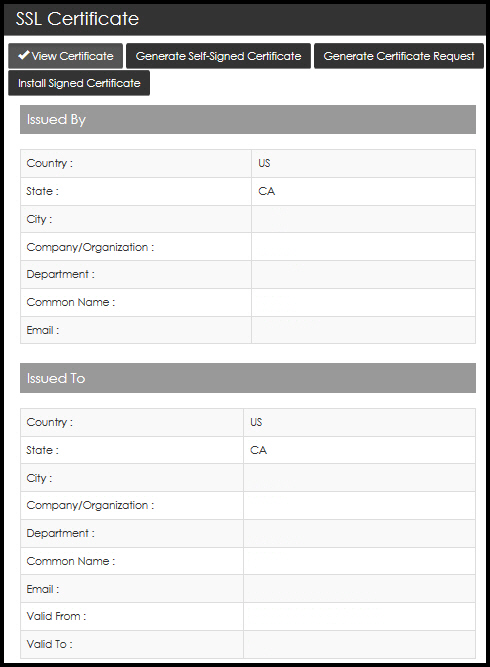
| As a best practice, it is recommended that at least a new self-signed certificate be generated using the appropriate values. The default SSL certificate is valid for 30 days. |
Generate a Self-Signed Certificate
With a self-signed certificate, you can customize certificate information by entering information that applies to your nShield Monitor deployment.
-
Select Generate Self-Signed Certificate.

-
Enter the requested data to complete each field.
The default value for the field Certificate Validity in Days is 730 (i.e., 2 years). 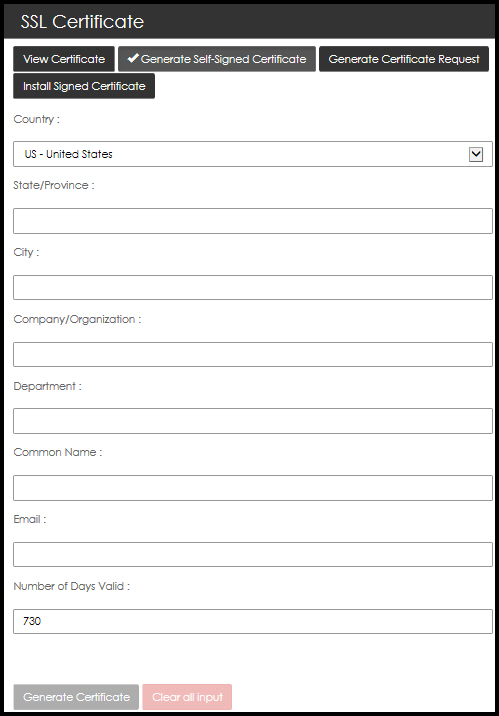
-
Select Generate Certificate.
This action requires restarting the web services so the new certificate can take effect.
You will need re-login into the WebUI.
The following message displays:
Self-Signed Certificate successfully created. System is restarting the web service, please log in again.
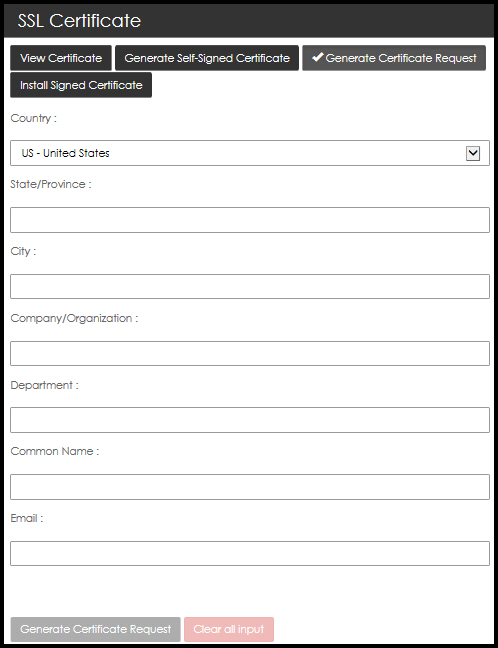
Generate SSL Certificate Request
When a certificate must be signed by an organization’s own Certificate Authority (CA) or a third party trusted CA, you must generate a ertificate signing request.
| The only difference between the fields in a self-signed certificate and a certificate signing request are the number of days of validity which will be determined by the signing CA. |
-
Select Generate Certificate Request.

-
Enter the requested data to complete each field.
-
Select Generate Certificate Request.
The system prompts you to save a file that you will provide to your PKI team or third party CA provider to sign and return.
Private keys are not exported as part of the signing request.
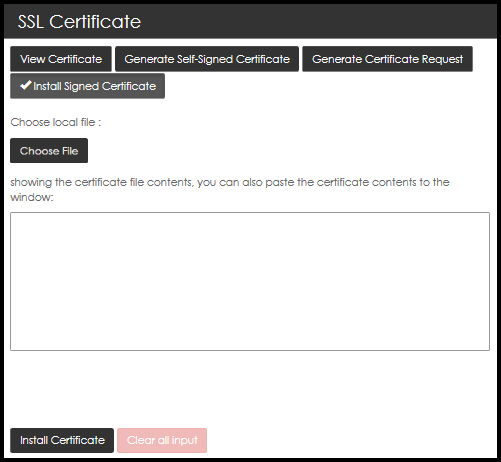
Install Signed SSL Certificate
Once your PKI team or third party CA provider returns your signed certificate, you will need to install it in one of two fashions.
| It is recommended that you ensure that the returned signed certificate includes the full chain of signers (e.g., nShield Monitor certificate, signing CA, root CA). |
The chain should consist of at least two certificates nShield Monitor certificate and signing CA) and as many as seven (includes nShield Monitor certificate, signing intermediate CA and ntermediate CAs between signing CA and the root CA).
| If you receive the file via email be sure to save it to a location where you can find it. |
-
Select Install Signed Certificate.
-
Select Choose file and browse to locate the file that contains the signed certificate and the associated signing chain.
-
Open the file and include the contents in the window.
-
Select Install Certificate. The signed certificate is installed.
-
Close your browser session (logout and close the tab) in order to connect using the new certificate properly.
You will be prompted to login again when you do so.
User Interface SSL/TLS Options
On this page, you can configure which protocols and cipher mechanisms nShield Monitor accepts.
| This feature requires a quorum approval from a second administrator before changes made by the first administrator can be applied. |
-
By default, SSL v2 & v3, and TLS v1 protocols are disabled.
-
By default, the AES256-SHA cipher suite is disabled.
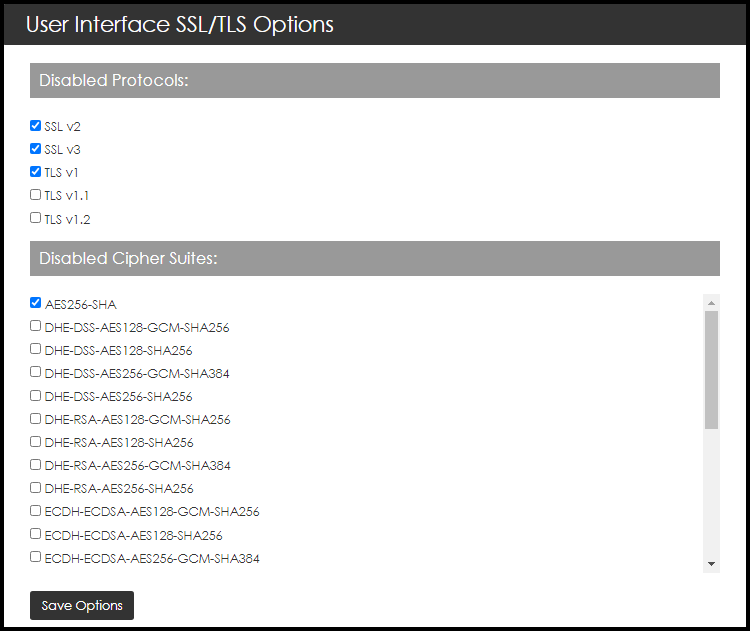
To change which protocols and cipher mechanisms are allowed:
-
Navigate to: Configuration > Security.
-
Select the protocols that the GUI server should deny.
-
Select Save Options.
This generates a warning that lists the protocol option changes that require approval.
There are protections that make sure at least one option is left unchecked (which means unblocked). -
When a quorum approval is pending, one of three actions can happen next:
-
The first administrator can cancel the quorum request by selecting Cancel Change and the system remains unchanged.
-
The second administrator can deny the change by selecting Reject Change. This generates a log message indicating that a change was denied.
-
The second administrator can approve the change by electing Approve Change. This generates a log message indicating that a change was approved, and the GUI server is restarted.
-
-
A restart is required for the new settings to take effect.
This is not a reboot, only a restart of the GUI server. However, any users that are logged on are sent back to the login page. They will need to log back in to the system.
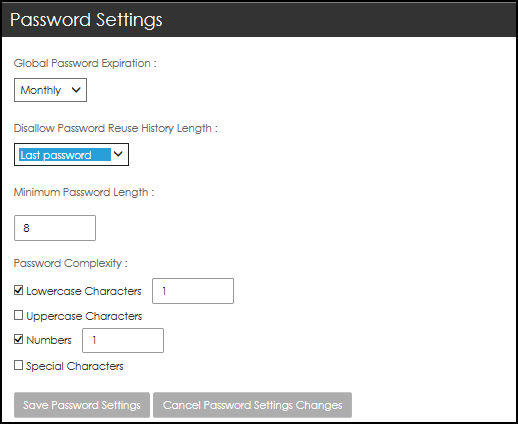
Password Settings
-
Navigate to: Configuration > Security.
You may need to scroll down.
-
Set the parameters based on your organization’s security policy.
-
Global Password Expiration
-
Disable
-
Never
-
Monthly
-
Quarterly
-
Yearly
-
-
Disallow Password Reuse History Length
-
Last password
-
Last 2 passwords
-
Last <n> passwords (up to last 15 passwords)
-
-
Minimum Password Length
-
Password Complexity
-
-
Select Save Password Settings.
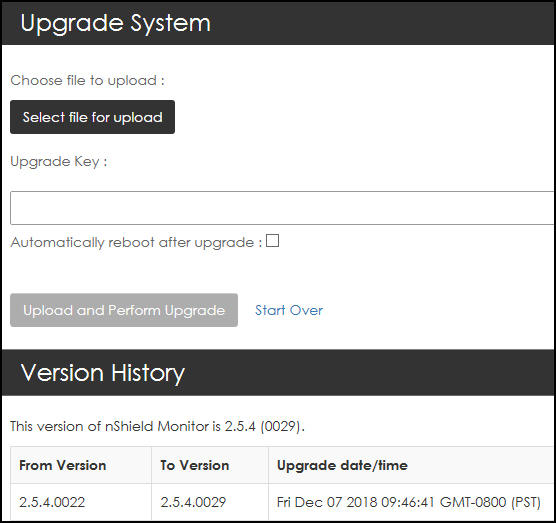
Upgrade
nShield Monitor has the capability to be upgraded via a file provided by Entrust.
Upgrade from 1.1.X
| The same firmware upgrade file works for all your nShield Monitor appliances. Additionally, the upgrade requires a password, or upgrade key. |
The process to obtain an upgrade file for your virtual appliance follows.
-
Send an email to Entrust nShield Support, https://nshieldsupport.entrust.com, and request an upgrade.
Support forwards a firmware upgrade file (with a .cmf file extension) along with the upgrade key password.
-
Save the .cmf file to a convenient location. You are now ready to apply the upgrade.
-
Navigate to:
Configuration > Upgrade
The Upgrade System page opens:
-
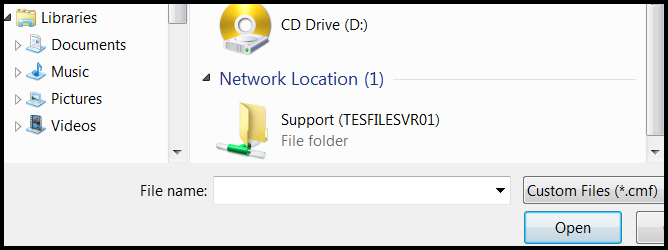
Click Select file for upload.
-
Navigate to the upgrade file.
-
Select, and open the upgrade file that you just saved.
-
Enter the password, provided by Support, under Upgrade Key.
At this point, you can choose to have the system automatically reboot when the upgrade is complete by selecting Automatically reboot after upgrade. Otherwise, you will need to manually trigger a reboot once the upgrade process has completed. Either way, the system must be rebooted to complete the upgrade process. -
Select Automatically reboot after upgrade.

If Automatically reboot after upgrade is not selected, you will need to manually trigger a reboot once the upgrade process has completed. -
Select Upload and Perform Upgrade.

The system displays progress meters to indicate the status.
Please do not navigate away from the Upload page during the upload process. Should you navigate away, the upgrade automatically cancels.
If the system does not automatically reboot, select Reboot Now button and then confirm the action with a second click.
When the process completes, the system will either reboot automatically or you will need to select Reboot Now button and then confirm the action with a second click.
| After the system reboots, the new software version is displayed on the Dashboard page, in the nShield Monitor Status window. |
Creating Users
| nShield Monitor can support up to 64 users. |
| A user with no role is not allowed to login. |
| After three failed login attempts, the account is locked |
To unlock an account, select Forgot your Password on the login page. You will be emailed a onetime password (OTP). The first time you log in with the OTP, the account is unlocked and you are prompted to create a new password.
-
Navigate to: Configuration > Users.
The Manage Users page opens.
-
Select Create User.
-
Complete the open fields appropriately.
When creating a user with the Group Manager role, available groups must be assigned to the user. At least one group must be assigned to all users assigned a Group Manager role. 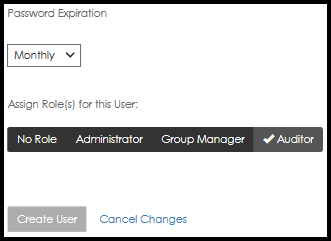
-
After you have made your selections, select Create User.
Editing users
-
Navigate to: Configuration > Users.
The Manage Users page opens.
-
Select the Login ID associated with the user to edit. The Edit this user page opens.
When you are updating a user with the Group Manager role, available groups must be assigned to the user.
At least one group must be assigned to all users assigned a Group Manager role. -
Under Assign Roles for this User, select the role to associate with the user, then select Save User.
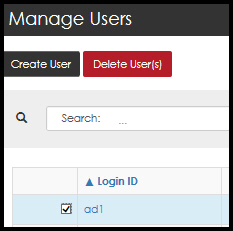
Deleting Users
-
Navigate to: Configuration > Users.
The Manage Users page opens.
Only those users who have no role assigned can be deleted. -
Select the Login ID associated with the user to be deleted. The Edit this user page opens.
-
Under Assign Roles for this User, select No Role.
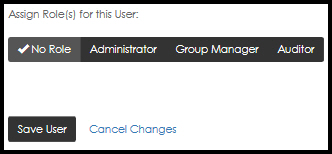
-
Select Save User.
The Manage Users page opens.
-
Select the box associated with the user.
-
Select Delete User(s).
The system prompts requesting a confirmation of the deletion.
-
Confirm the deletion.